はじめに
- 本記事では、UiPath と Word,Excel をもちいた簡易なテキストマイニングのやり方を紹介します。
- 記事の内容は、個人の見解または確認結果であり、UiPath の公式見解ではありません。
- 製品仕様や参考画像は 23.10 バージョンのもので構成しています。
サンプルワークフローの作り方
引数に「分析対象のテキスト(文字型)」と「Wordファイルのパス(文字型)」を作成し、既定値を指定します。

分かち書き用のマクロ(※1)を1件登録した空のWordファイル(拡張子は「.docm」)を用意し、テンプレートフォルダに配置する。
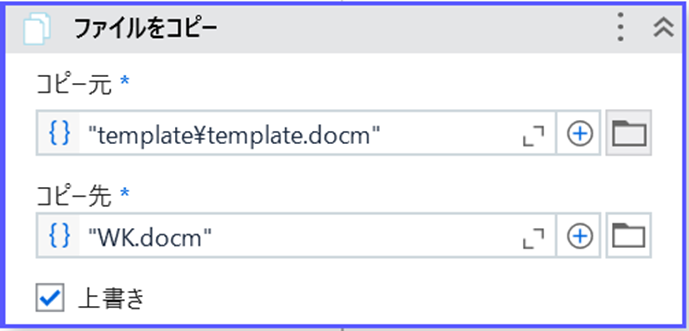
テンプレートフォルダのWordファイルをコピーして、作業用のWordファイル(WK.docm)を作成する。
※1:分かち書き用マクロのソース
Sub 分かち書き()

  Dim outputPath As String
  Dim i As Long
  Dim cnt As Long   '書き込み行のカウンタ
  Dim ExcelApp  As Object: Set ExcelApp = CreateObject("Excel.Application")
  Dim ExcelBook As Object  'Excel Workbook Object
  Dim nFlg As Long   'ノイズフラグ
  With ExcelApp
    .Visible = True
    Set ExcelBook = .Workbooks.Add   '新しいブックを追加
  End With

  'ヘッダー
  ExcelBook.Worksheets(1).Cells(1, 1).Value = "単語"
  ExcelBook.Worksheets(1).Cells(1, 2).Value = "個数"

  cnt = 1
  For i = 1 To ActiveDocument.Words.Count
     nFlg = 0

     If ActiveDocument.Words(i).text = "。" Then
       nFlg = 1
     ElseIf ActiveDocument.Words(i).text = "、" Then
       nFlg = 1
     ElseIf ActiveDocument.Words(i).text = "の" Then
       nFlg = 1
     ElseIf ActiveDocument.Words(i).text = "は" Then
       nFlg = 1
     ElseIf ActiveDocument.Words(i).text = "が" Then
       nFlg = 1
     ElseIf ActiveDocument.Words(i).text = "に" Then
       nFlg = 1
     ElseIf ActiveDocument.Words(i).text = "を" Then
       nFlg = 1
     ElseIf ActiveDocument.Words(i).text = ")" Then
       nFlg = 1
     ElseIf ActiveDocument.Words(i).text = "(" Then
       nFlg = 1
     ElseIf ActiveDocument.Words(i).text = "(" Then
       nFlg = 1
     ElseIf ActiveDocument.Words(i).text = ")" Then
       nFlg = 1
     ElseIf ActiveDocument.Words(i).text = "で" Then
       nFlg = 1
     ElseIf ActiveDocument.Words(i).text = "と" Then
       nFlg = 1
     Else
     End If

     If nFlg = 0 Then
       ExcelBook.Worksheets(1).Cells(cnt + 1, 1).Value = ActiveDocument.Words(i).text
       ExcelBook.Worksheets(1).Cells(cnt + 1, 2).Value = 1 'ピボット用の個数
       cnt = cnt + 1
     Else
     End If
  Next i

  outputPath = CreateObject("Shell.Application").Namespace("shell:Downloads").Self.Path

  ExcelBook.SaveAs outputPath + "\分かち書きの結果.xlsx"   '保存
  ExcelApp.Quit   'Excelの終了

End Sub
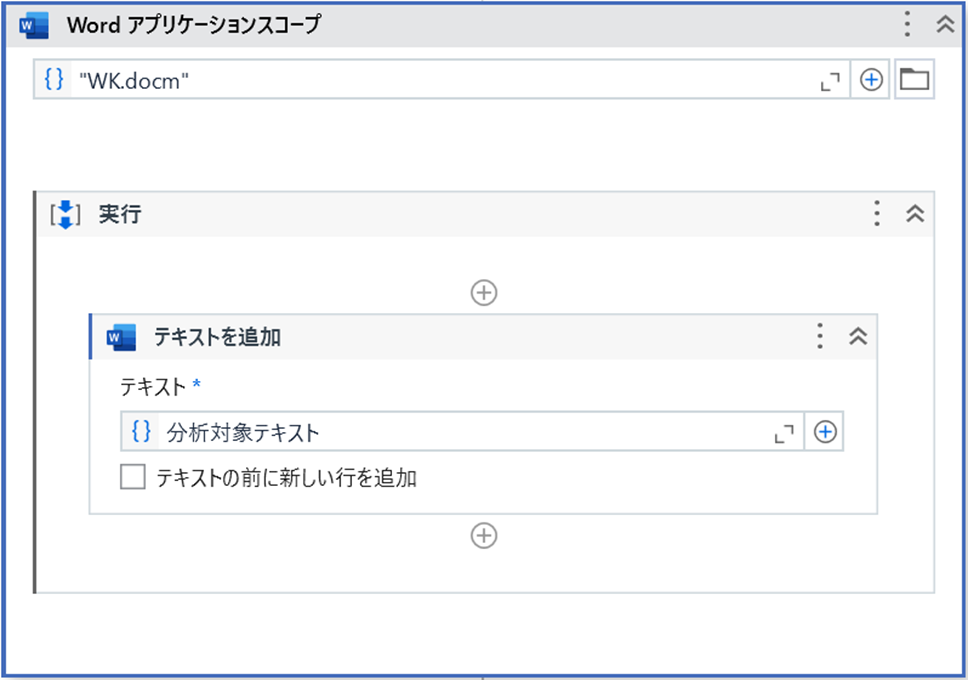
作業用のWordファイル(WK.docm)に分析対象テキストを追加し、保存します。
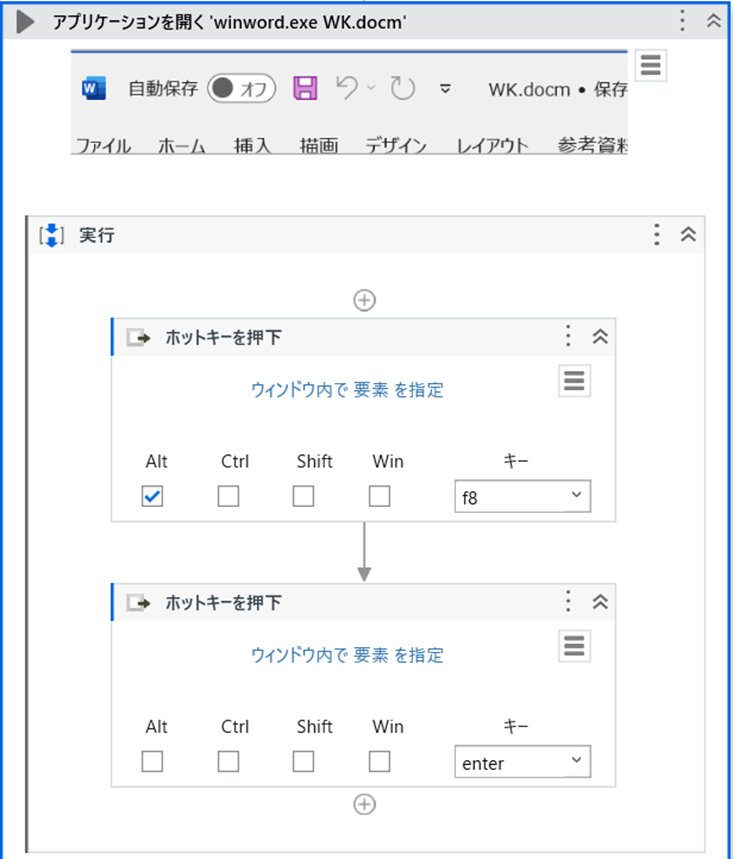
「アプリケーションを開く」アクティビティを配置し、WK.docm を開きます。
「ホットキーを押下」を2つ配置し、「Alt+F8」と「Enter」の操作を記録します。(同操作でマクロが利用可能なWordファイルであれば、マクロの選択・実行ダイアログの起動とマクロ実行が可能です。)
補足:モダンデザインの「アプリケーション/ブラウザを使用」では、実装・設定はできるが、UI要素取得ができない。Word特有の仕様が影響している可能性あり。
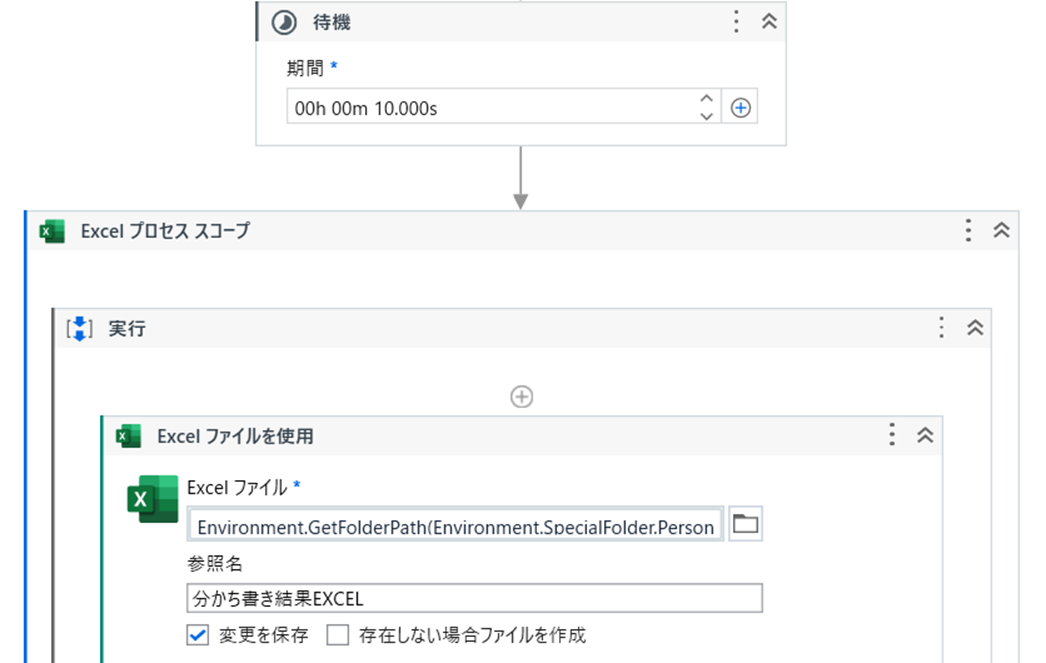
マクロの実行完了を待つための「待機」を挿入する。
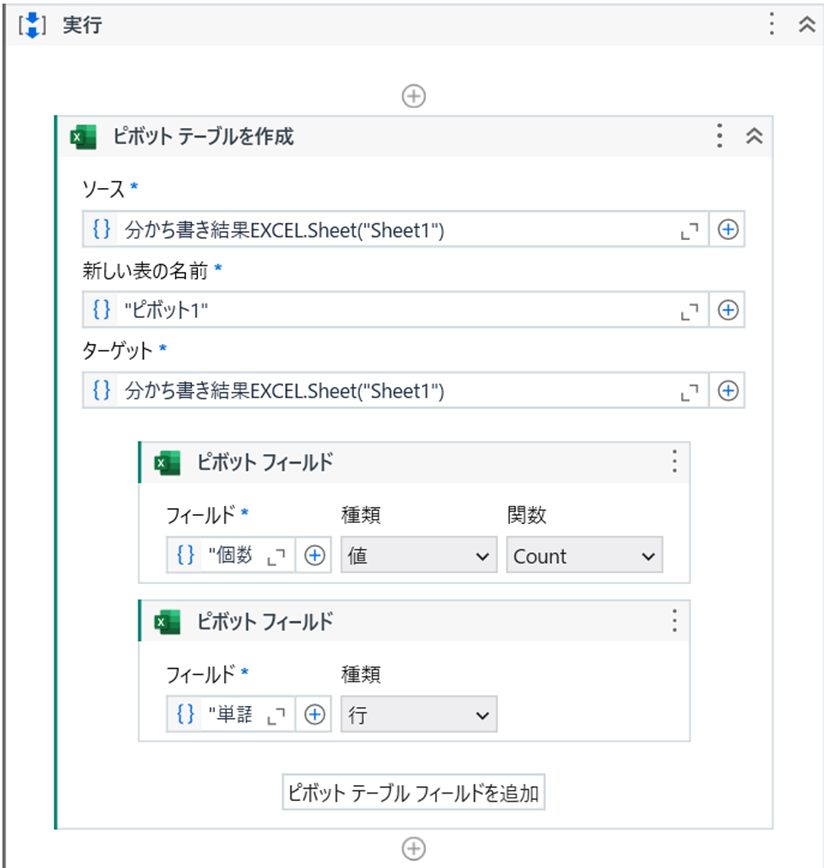
マクロ実行後に作成される「分かち書きの結果.xlsx」を開くため、「Excelプロセススコープ」と「Excelファイルを使用」を配置する。
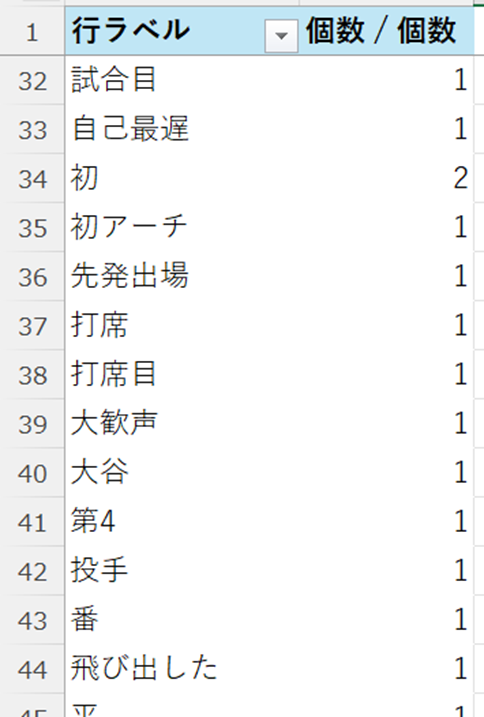
「ピボットテーブルを作成」アクティビティを配置し、単語の個数をカウントする。
さいごに
いかがでしたでしょうか。
最初の分かち書きの部分など、PythonやMeCabでおこなうケースが多いかとおもいますが、Wordがあればこんなに簡単に実現できます。
アウトプットの部分はピボットの例だけ載せましたが、データソースの加工はUiPathがあれば自由自在!
試したら面白そうなアウトプットがみつかったら今度挑戦してみようとおもいます。
以上 最後までお読みいただきありがとうございます(・ω・)ノ