はじめに
- 本記事では、公式技術ガイドの著者である津田氏がリリースした Orchestrator を管理する PowerShell モジュール(UiPathOrch)を紹介します。
- 同モジュールは開発中と聞いているため、本番運用環境でお使いになる場合、テスト環境で動作確認してください。
- 記事の内容は、個人の見解または確認結果であり、UiPath の公式見解ではありません。
- 製品仕様や参考画像は Automation Cloud × PowerShell 7.3.9 のもので構成しています。
UiPathOrch とは
- UiPath の公式技術ガイドの著者である津田氏が Orchestrator を管理する PowerShell モジュールをリリースしました!
- pwsh.exe のコンソール内で、cd コマンドなどをもちいて Orchestrator のフォルダーを移動できます。
- フォルダの他、多くのエンティティをワイルドカードでまとめて指定して操作できます。 Studio/Robot(Assistant) がインストールされていない環境でも動作します。
(参考:フォルダ移動)

(参考:アセット取得)
インストール
作業1) バージョン 7.2 以降のPowerShellのインストール(手元のPowerShellを起動して次のコマンドを実行してください)
winget install --id Microsoft.Powershell --source winget
参考ガイド:

↓↓↓インストールが完了すると PowerShell 7 が利用可能になります。

作業2) 実行ポリシーの変更(次のコマンドを実行してください)
Set-ExecutionPolicy bypass -Scope CurrentUser
作業3) PowerShell 7 (pwsh.exe) を起動し、次のコマンドを実行してください。
Install-Module UiPathOrch –Force
- ツールは PowerShell Gallery に登録されており、インターネット接続が可能な Windows 端末があれば、その他・特別な準備等はありません。
-
https://www.powershellgallery.com/packages/UiPathOrch/0.8.0.9

初期設定
- 初期設定:次のコマンドを実行し、Config ファイルに Orchestrator への接続情報を記入・保存します。
Import-Module UiPathOrch
# Config ファイルはこちらのコマンドでいつでも編集可能です。なお、内容更新した際はpwsh を再起動しないと情報は反映されません。
Edit-OrchConfig
(参考:Config ファイルの内容 - ★印の項目の値を変更してください(接続情報の作成方法は後述を参照))
{
  "PSDrives": [
    {
      "Name": "Orch1",
      "Description": "Non-Conf App settings. In Orchestrator admin page: create an external app, add User Scopes of Orchestrator API Access to the same as or broader than the scopes listed below, and use http://localhost/Temporary_Listen_Addresses as the Redirect URL. In this config: input the Root and the issued App ID.",
      "Root": "https://cloud.uipath.com/★組織名/★テナント名",
      "AppId": "★アプリID",
      "RedirectUrl": "http://localhost:8085/Temporary_Listen_Addresses",
      "Scope": "OR.Assets OR.Audit.Read OR.Execution OR.Folders OR.Jobs OR.Machines OR.Monitoring.Read OR.Queues OR.Robots OR.Settings OR.TestSetExecutions.Read OR.TestSets.Read OR.Users"
    },
    {
      "Name": "Orch2",
      "Description": "Conf App settings. Note that Conf App is relatively unsecure. Use it for unattended script executions and it's recommended to specify only the necessary scopes. In Orchestrator admin page: create an external app and add App Scopes of Orchestrator API Access to the same as or broader than the scopes listed below. No Redirect URL needed. In this config: input the Root, the issued App ID and App Secret.",
      "Root": "https://cloud.uipath.com/★組織名/★テナント名",
      "AppId": "★アプリID",
      "AppSecret": "★シークレット",
      "Scope": "OR.Assets OR.Audit.Read OR.Execution OR.Folders OR.Jobs OR.Machines OR.Monitoring.Read OR.Queues OR.Robots OR.Settings OR.TestSetExecutions.Read OR.TestSets.Read OR.Users"
    }
  ]
}
接続情報を設定したら、一度 PowerShell を再起動しましょう。
- 初期設定(補足):Import-Module UiPathOrch をした後、次のコマンドを実行し Config ファイルで設定した接続先のドライブ名称が表示されるか確認しましょう。
Get-PSDrive

接続情報(外部アプリケーション)の作り方
Automation Cloud を例に説明します。
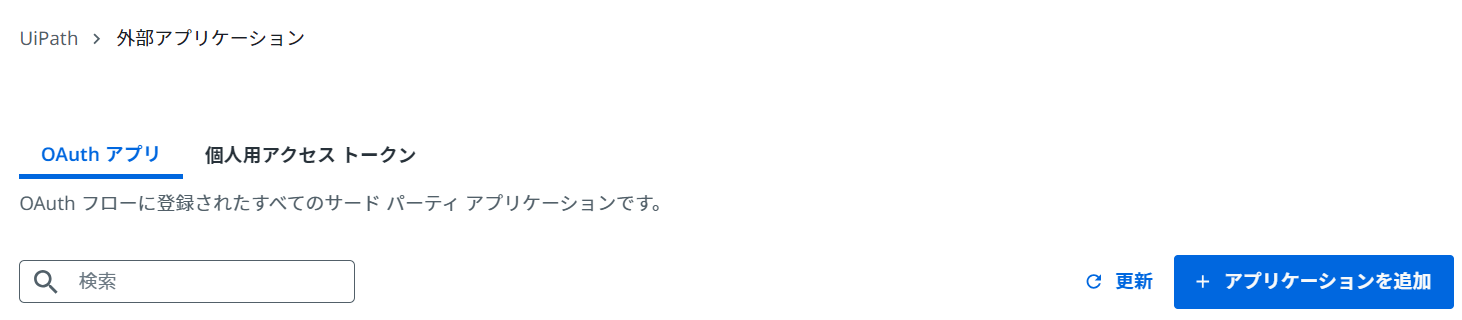
「管理」画面に移動し、「外部アプリケーション」を選択します。

「アプリケーションを追加」ボタンを押下
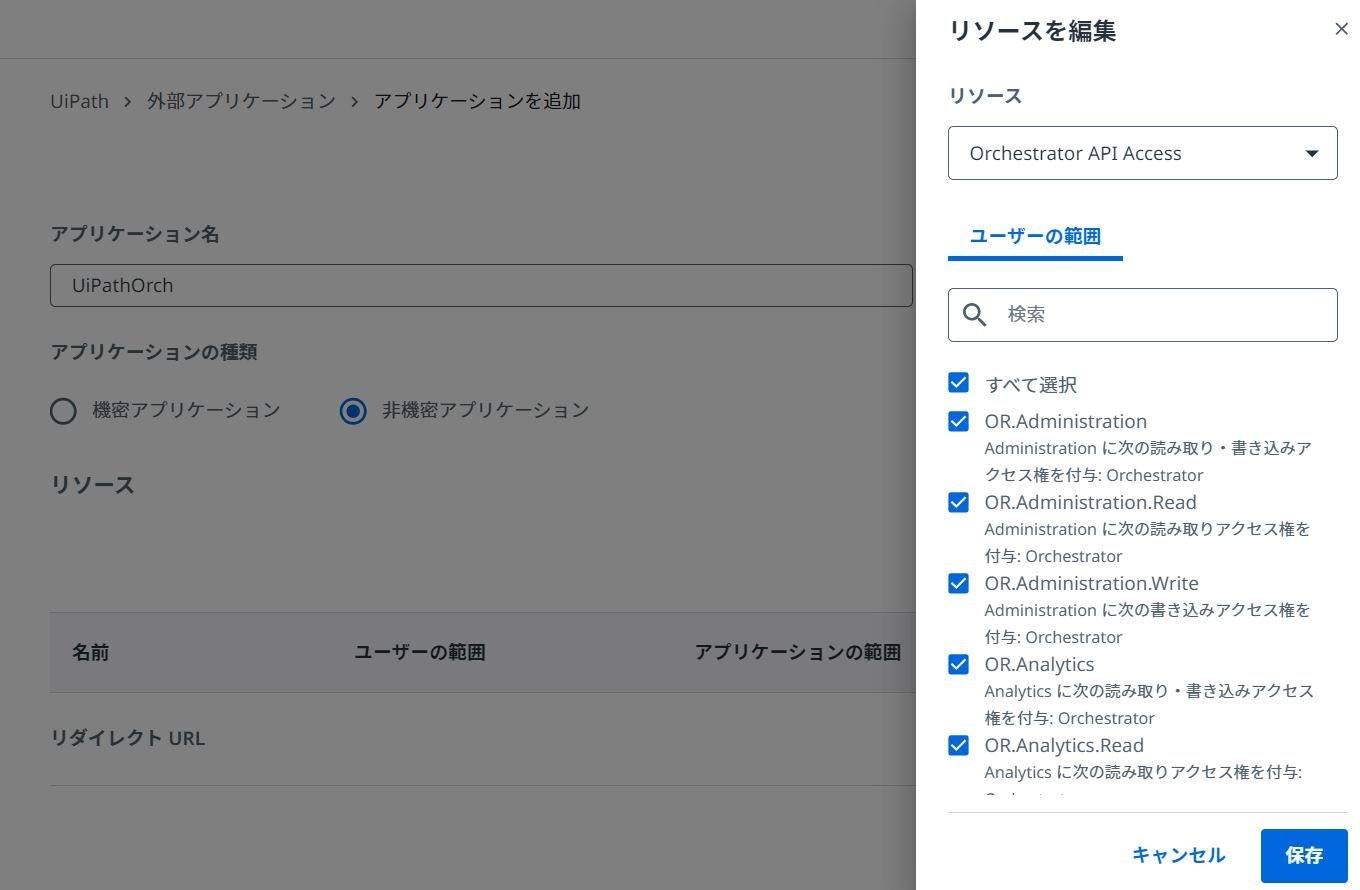
アプリケーション名を入力した後、アプリケーションの種類を選択します。
本手順は「非機密アプリケーション」の例です。

「範囲を追加」ボタンを押下
リソースに「Orchestrator API Access」を指定し、範囲は「すべて選択」とします。
リダイレクトURLには Config ファイルの既定値( "http://localhost:8085/Temporary_Listen_Addresses" )を指定します。
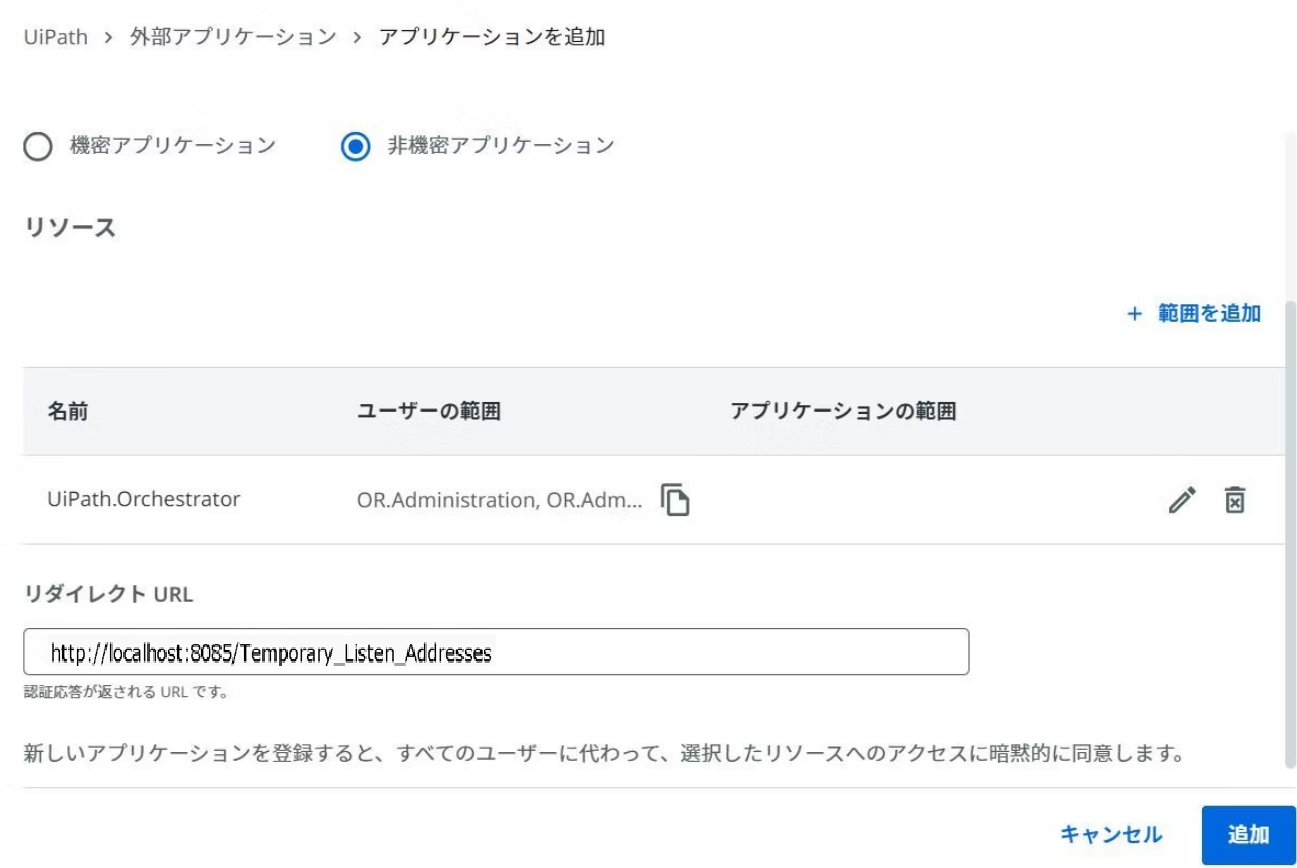
「追加」ボタンを押下し、正常に登録されるとアプリIDが発行されます。
設定ファイルのテンプレートでは、Orch1 が非機密アプリの設定例、Orch2 が機密アプリの設定例です。機密アプリはアプリシークレットを設定ファイルに記載する必要があり、セキュリティ上のリスクがあるためお勧めできません。機密アプリの利用は無人で実行するスクリプト内で UiPathOrch コマンドレットを使うときなどに限定しましょう。
使い方
最初にやること
次の順にコマンドを実行します。
Import-Module UiPathOrch

# この作業により、同ツールで利用可能なコマンドレットを Ctrl+space キーで確認できます。
Import-Module PSReadLine

# コロン(:)の指定は必要です。「Orch2:」の部分は Config ファイルで設定した接続先の名称です。
cd Orch2:
接続後は Ctrl+space 、または Tab キーにてフォルダ移動が可能です。

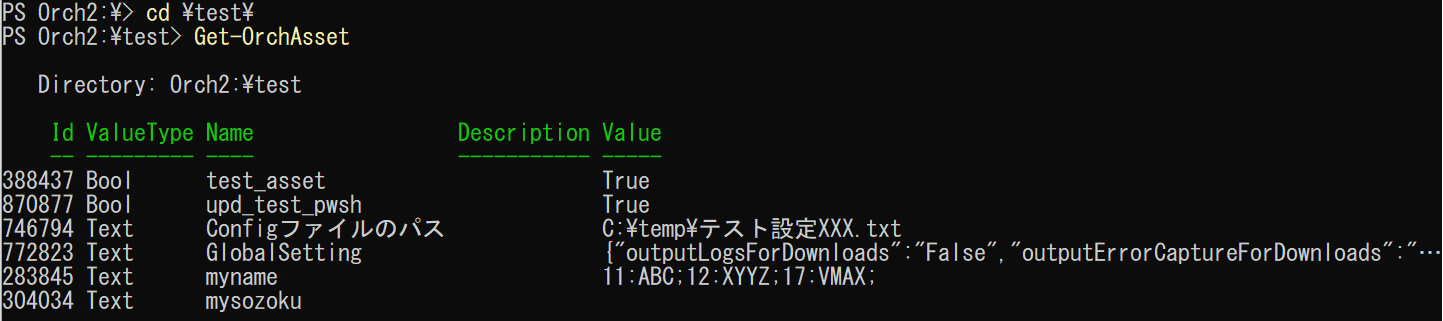
アセットを取得してみる
任意(参考画像は test )フォルダに移動した後、次のコマンドを実行します。
cd Orch2:\test
Get-OrchAsset
(参考:アセット取得)
(補足)接続情報の設定に誤りがある場合、コマンド実行時にエラーとなります。

成功時はこちら↓

オプションで出力フォーマットを変えてみます。
Get-OrchAsset | Format-List

Get-OrchAsset | ConvertTo-Json

Get-OrchAsset | Format-Table

Get-OrchAsset | ConvertTo-Csv

項目を絞ってCSVで出力してみます。
Get-OrchAsset | Select Name,Description,ValueType,Value,Path | Export-Csv c:\tmp\template.csv

アセットを登録してみる
アセットを新規登録してみます。
Add-OrchAsset Bool 'add_test_bool' 'add test' False

Ctrl+spaceキーを押下することで、選択可能な項目値、または記述すべき値のヒントなどが表示されます。

アセットを更新してみる
アセットを編集(更新)してみます。
Update-OrchAsset Bool add_test_bool True

(補足)):Orchestrator のウェブページ上で直接編集した際など、表示内容を更新するには次のコマンドを実行しキャッシュをクリアしてください。
Clear-OrchCache
さいごに
Orchestrator のエンティティをコマンド一つでCSV出力できる破壊力半端ないですね。
Orchestrator Manager との使い分けを考えないといかん日がくるとは夢にもおもわなんだです。
UiPath でも OCを普段触らない方には伝わりづらいとおもいますが、運用に関わる方ならテナントやフォルダの各種エンティティデータをサクッと取得、一括更新などできるのはかなり助かります。
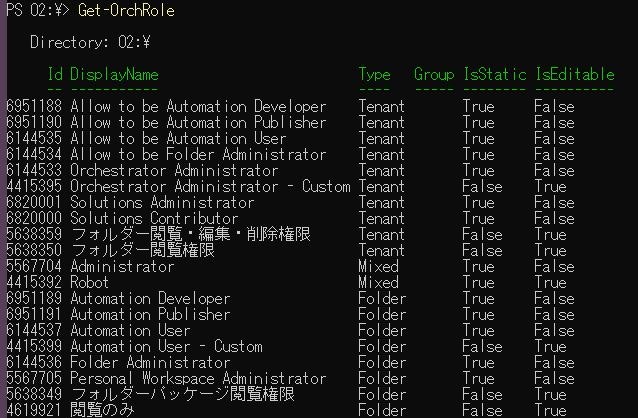
(参考:ロール取得)
Orchestrator を普段使いされてる方は是非一度使ってみてください(∩´∀`)∩
最後までお読みいただきありがとうございますm(_ _)m