はじめに
個人アプリ作成時にカウントダウン機能を実装したので、
備忘録がてらコマンドの共有をさせていただきます。
GitHubにコードを載せていますのでぜひご覧ください。
-> https://github.com/onishi-app/CountDown
環境
・Apple Swift version 5.3
・XCode version 12.3
完成形
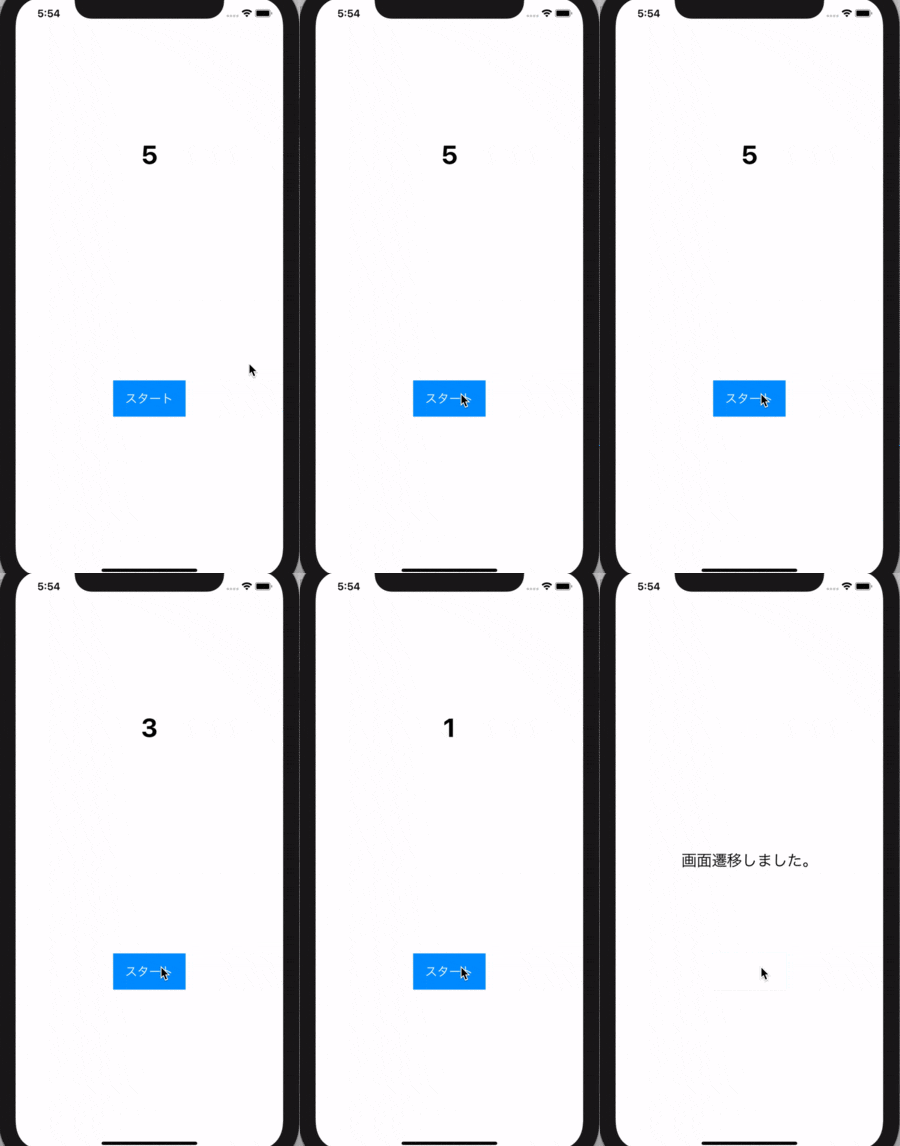
今回の完成形は次のようになります。
ボタンタップ後、1秒ずつカウントダウンしていき0秒になったら画面遷移します。
コード
今回は、カウントダウンを行うViewController.swiftと、
画面遷移先のNextViewController.swiftを定義したのですが、
NextViewController.swiftでの処理は特にないので省略します。
カウントダウンの実装にはTimerクラスを使用したいと思います。
import UIKit

class ViewController: UIViewController {

    @IBOutlet weak var countLabel: UILabel!
    @IBOutlet weak var startButton: UIButton!

    var time = 5
    var timer = Timer()

    override func viewDidLoad() {
        super.viewDidLoad()
        countLabel.text = String(time)
        startButton.layer.cornerRadius = 10
    }

    // ボタンが押された時の処理
    @IBAction func buttonAction(_ sender: Any) {
        timer = Timer.scheduledTimer(withTimeInterval: 1, repeats: true, block: { (timer) in
            self.time -= 1
            self.countLabel.text = String(self.time)

            if self.time == 0 {
                self.performSegue(withIdentifier: "next", sender: nil)
            }
        })
    }

    override func prepare(for segue: UIStoryboardSegue, sender: Any?) {
        timer.invalidate()
    }
}
コード説明
viewDidLoad()内では特に特殊なことはしていません。
Labelのテキスト変数timerの値にし、ボタンの角を丸くしています。
override func viewDidLoad() {
    super.viewDidLoad()
    countLabel.text = String(time)   // text変更
    startButton.layer.cornerRadius = 10   // 丸角
}
スタートボタンが押されたタイミングでカウントダウンを開始したいので、
@IBAction func buttonAction(_ sender: Any) { }内で定義します。
TimerクラスのscheduledTimer()メソッドを使用します。
withTimeIntervalは1秒、repeats(繰り返し)はtrueにします。
メソッド内の処理ですが、timeの値を1減らしLabelの値に再代入しています。
この処理により、ボタンが押されて1秒後にLabelの値も1秒下がることになります。
0秒になったら画面遷移を行うので、
if self.time == 0 { ・・・ }の箇所で画面遷移を行っています。
// ボタンが押された時の処理
@IBAction func buttonAction(_ sender: Any) {
    timer = Timer.scheduledTimer(withTimeInterval: 1, repeats: true, block: { (timer) in
        self.time -= 1
        self.countLabel.text = String(self.time)

        if self.time == 0 {
            self.performSegue(withIdentifier: "next", sender: nil)
        }
    })
}
画面遷移を行う際にタイマーを停止したいので、下記のコマンドを記述しております。
prepare(for segue: UIStoryboardSegue, sender: Any?){ }は、
performSegue()で画面遷移する際に呼ばれるメソッドです。
メソッド内では、timer.invalidate()を実行しタイマーを停止しています。
override func prepare(for segue: UIStoryboardSegue, sender: Any?) {
    timer.invalidate()
}
さいごに
カウントダウン機能はかなり簡単に実装することが出来るのでぜひ使ってみてください。
Timerクラスを使用すれば、iPhoneのストップウォッチの機能も実装することができます。
(Timerクラスのみでは実装することができないと思いますが・・・)
以上、最後までご覧いただきありがとうございました。
