富士通システムズウェブテクノロジー Advent Calendar 2019 4日目の投稿です。
記事の内容は全て個人の見解であり、執筆内容は執筆者自身の責任です。所属する組織は関係ありません。
以前から気になっていたAzureのCustom Vision Serviceを使用してみました。
敷居が高そうな機械学習の入り口に立った気になれる記事です。
動作環境
Azure Custom Vision Service
Monaca ←API叩く用
参考にしたサイト
Custom Vision APIをJavascriptから呼び出す
Azure Custom Vision Serviceとは
Microsoft Azureが提供する機械学習関連のAPI群(Cognitive Service)の中にある
画像分類を得意とするサービス。
流れを3行でまとめると
・学習用データ(画像)をアップロードして
・学習させて
・問題用データを判定させる
という大変に便利なサービスとなっております。
事前準備
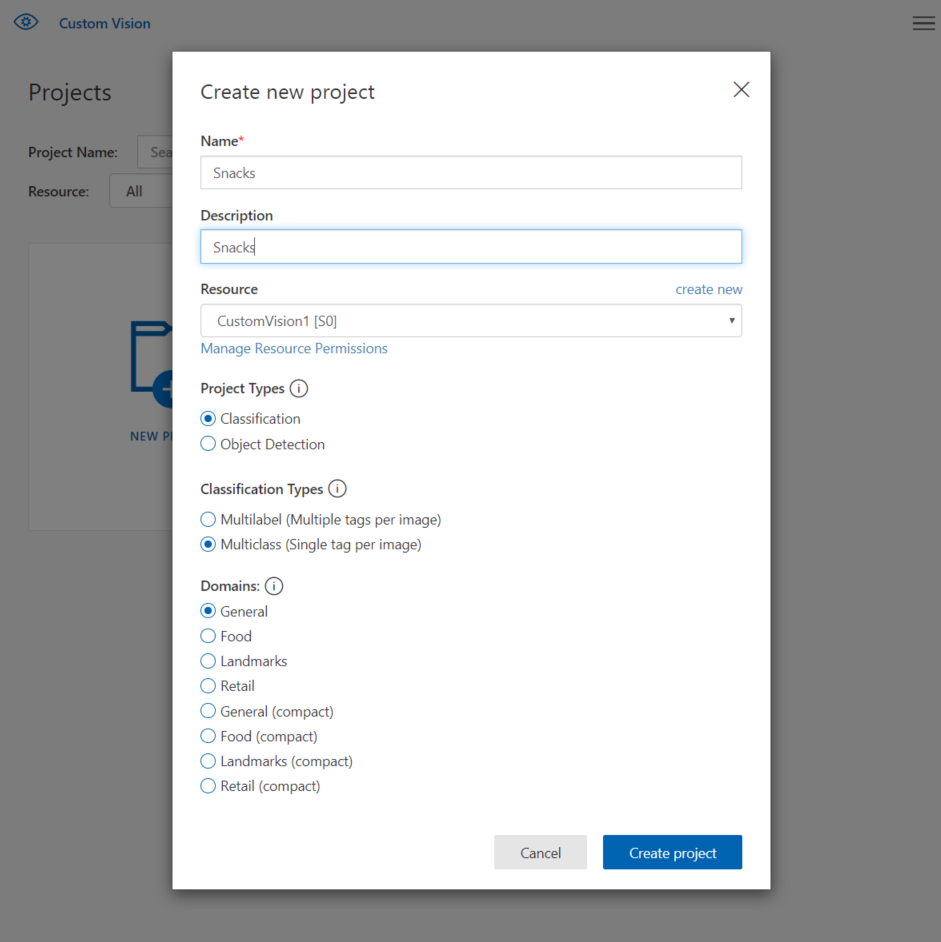
Custom Vision ServiceにアクセスしCreate new projectを行いましょう。
NameとDescriptionを入力しResourceを選択したら「CreateProject」をクリックします。

Custom Vision Serviceの学習方法
- 学習用データの準備
今回はスティックタイプのお菓子で有名な「ポッキー」「プリッツ」「トッポ」の画像を各30枚ずつ準備しました。※背景は白などで統一すると判定精度が上がります。 - 学習用データのアップロード
事前準備で作成したプロジェクトにアクセスし、Add imagesから画像を追加します。
追加が出来たらMy Tagsに自分の付けたいタグ名を入力しUploadを行います。

- すべての画像がアップロード出来たら画面右上の緑色の歯車マークを押して学習を実行しましょう!
学習が完了すると先ほど画像に付けたTag毎の学習度などが表示されます。

APIをつかって判定してみる
学習が完了したのでさっそくAPI用のIDを払い出して簡単なアプリを作っていきます。
必要となるのは以下の4つの情報です。
・APIへのアクセス用URL
・Prediction-Key
・Content-Type
・IterationID

Monacaにアクセスして先ほど集めた情報をもとにサクッとアプリを作りました!

実際にトッポの画像を読み込ませてAPIを叩いてみましょう!
判定結果は**トッポ99.926%**となりました。

まとめ
今回各30枚という少ない画像での判定を行いましたが、特徴的な物であれば十分に判定可能という事が分かりました、Custom Vision Serviceを足掛かりに機械学習に興味を持つきっかけとなればと思っています。
おまけ
Monacaで作成したソースコード↓
<!DOCTYPE html>
<html>
<head>
  <meta charset="utf-8"/>
  <title>CustomVisionSample</title>
  <script src="https://ajax.googleapis.com/ajax/libs/jquery/2.1.4/jquery.min.js"></script>
</head>
<body>
  <div>
    <p>判定したい画像を選択</p>
    <p><input id="inputFile"  name="file" type="file" accept="image/*" ></p>
    <p><button onclick="sendImage()">送信</button></p>
  </div>
    <p id = "answer" > </p>
<script type="text/javascript">
    function sendImage(){
        $('#answer').html(' ');
        var params = {
            "iterationId": "[IterationID]",
        };
        var tagname = [];
        var tagnum = [];
        var file = $('input[type="file"]').prop('files')[0];
        $.ajax({
            url: "[APIへのアクセス用URL]?" + $.param(params),
            beforeSend: function(xhrObj){
                xhrObj.setRequestHeader("Prediction-key","[Prediction-Key]");
                xhrObj.setRequestHeader("Content-Type","[Content-Type]");
            },
            type: "POST",
            data: file,
            processData: false,
            contentType: false
        })
        .done(function(json_data) {
            Object.keys(json_data.predictions).forEach(function(d){
              tagname.push(json_data.predictions[d].tagName)
              tagnum.push(Math.round(json_data.predictions[d].probability * 100000) /100000)
            })
            var len = Object.keys(json_data.predictions).length
            for ( var i = 0; i < len; i++ ) {
              $('#answer').append(tagname[i]+' : '+tagnum[i]*100+'%<br>')
            }
        })
        .fail(function() {
            alert("error");
        });
    }
</script>
</body>
</html>