概要
ローカルのkubernetes環境に、RocketChatというSlackライクなOSSチャットツールを構築します。
RocketChatではmongoDBが使用されており、使用するボリュームについては今回はLocalVolumeを使用します。
mongoDBが起動しているNodeのローカルストレージにデータが保存されるシンプルな形になります。
この状態だとNode障害に対応できなかったり、mongoDBのレプリカセット(レプリケーションと自動フェイルオーバー機能)が使えない、などの問題があるのですが、今回はこの形で進めようと思います。
後ほど、LocalVolumeではなく、NFSを使用した場合の手順についても記事にしようと思います。
構成
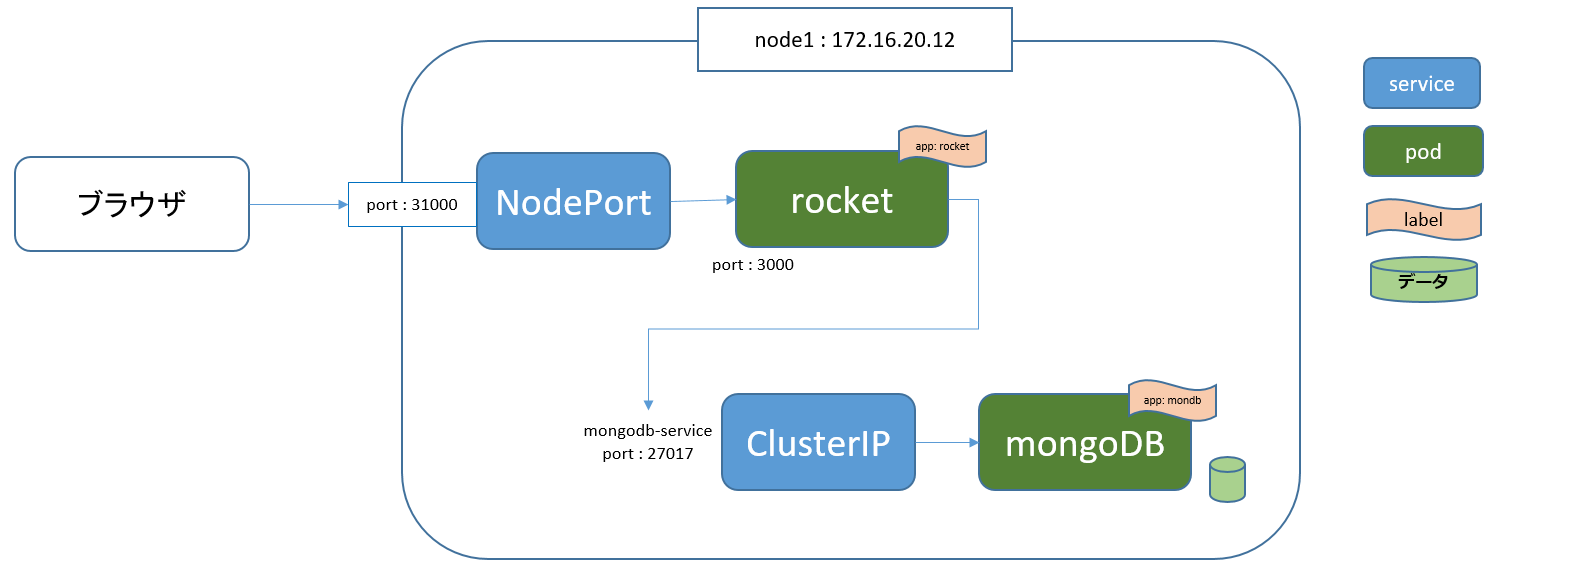
以下のように、workerNode1にRocketChatとmongoDB用のPODを作成します。
NodePortを作成しておき、ブラウザからアクセスする際は、NodeのIPアドレスとNodePortで設定したポートに対してhttpで接続します。
前提
OS : Ubuntu 16.04.6 LTS
vagrant@master:~$ kubectl version
Client Version: version.Info{Major:"1", Minor:"14", GitVersion:"v1.14.1", GitCommit:"b7394102d6ef778017f2ca4046abbaa23b8
8c290", GitTreeState:"clean", BuildDate:"2019-04-08T17:11:31Z", GoVersion:"go1.12.1", Compiler:"gc", Platform:"linux/amd
64"}
Server Version: version.Info{Major:"1", Minor:"14", GitVersion:"v1.14.2", GitCommit:"66049e3b21efe110454d67df4fa62b08ea7
9a19b", GitTreeState:"clean", BuildDate:"2019-05-16T16:14:56Z", GoVersion:"go1.12.5", Compiler:"gc", Platform:"linux/amd
64"}
SC作成
それではまず、LocalVolumeに対応したStorageClassを作成します。
LocalVolumeは動的にVolumeを作成してくれるDynamic Volume Provisioningという機能がサポートされないため使えません。
そのためLocalVolumeを使用する場合、provisionerは「kubernetes.io/no-provisioner」を選択します。
kind: StorageClass
apiVersion: storage.k8s.io/v1
metadata:
  name: local-storage
provisioner: kubernetes.io/no-provisioner
実行結果
vagrant@master:/vagrant/yaml_file$ kubectl create -f sc_chat.yaml
storageclass.storage.k8s.io/local-storage created
vagrant@master:/vagrant/yaml_file$ kubectl get sc
NAME            PROVISIONER                    AGE
local-storage   kubernetes.io/no-provisioner   6s
PV,PVC作成
PersistentVolumeを作成します。
nodeAffinityにて、node1にPVが作成されるように設定します。
アクセスモードはReadWriteOnceで単一ノードで読み書きが可能にします。
apiVersion: v1
kind: PersistentVolume
metadata:
  name: local-pv
spec:
  capacity:
    storage: 2Gi
  accessModes:
  - ReadWriteOnce
  persistentVolumeReclaimPolicy: Retain
  storageClassName: local-storage
  local:
    path: /chat_data
  nodeAffinity:
    required:
      nodeSelectorTerms:
      - matchExpressions:
        - key: kubernetes.io/hostname
          operator: In
          values:
          - node1
実行結果
vagrant@master:/vagrant/yaml_file$ kubectl create -f pv_chat.yaml
persistentvolume/local-pv created
vagrant@master:/vagrant/yaml_file$ kubectl get pv -o wide
NAME       CAPACITY   ACCESS MODES   RECLAIM POLICY   STATUS      CLAIM                STORAGECLASS    REASON   AGE
local-pv   2Gi        RWO            Retain           Available                        local-storage            6s
次はPersistentVolumeClaimを作成します。
storageClassNameで先程作成したSCのmetadata.nameを指定します。
apiVersion: v1
kind: PersistentVolumeClaim
metadata:
  name: local-claim
spec:
  accessModes:
  - ReadWriteOnce
  storageClassName: local-storage
  resources:
    requests:
      storage: 2Gi
実行結果
vagrant@master:/vagrant/yaml_file$ kubectl create -f pvc_chat.yaml
persistentvolumeclaim/local-claim created
vagrant@master:/vagrant/yaml_file$ kubectl get pvc
NAME          STATUS   VOLUME     CAPACITY   ACCESS MODES   STORAGECLASS    AGE
local-claim   Bound    local-pv   2Gi        RWO            local-storage   3s
mongoDBのPOD作成
spec.replicas: 1 で、レプリカセットをシングルノードで作成します。
スタンドアロンモードでの作成も可能ですが、レプリカセットを使うことでトランザクション機能が使用できるようになります。
Starting in version 4.0, MongoDB provides the ability to perform multi-document transactions against replica sets.
https://docs.mongodb.com/manual/release-notes/4.0/
apiVersion: apps/v1
kind: Deployment
metadata:
  name: mongodb-deployment
spec:
  replicas: 1 #シングルノードで作成
  selector:
    matchLabels:
      app: mondb
  template:
    metadata:
      labels:
        app: mondb
    spec:
      containers:
      - name: mongodb
        image: mongo:4.0.18-xenial
        args: ["--smallfiles","--replSet","rs0","--oplogSize","128"]
        env:
        volumeMounts:
        - name: vol
          mountPath: /data/db
      volumes:
      - name: vol
        persistentVolumeClaim:
          claimName: local-claim
spec.template.spec.containers.argsで指定している引数は以下の通りです。
"--smallfiles":少ない容量で作成
"--replSet","rs0":レプリカセットをrs0という名前で作成
"--oplogSize":オペログのサイズ
実行結果
vagrant@master:/vagrant/yaml_file$ kubectl apply -f mongodb.yaml
deployment.apps/mongodb-deployment created
vagrant@master:/vagrant/yaml_file$ kubectl get po -o wide
NAME                                  READY   STATUS    RESTARTS   AGE   IP             NODE    NOMINATED NODE   READINESS GATES
mongodb-deployment-7b75b6447b-hn5xt   1/1     Running   0          6s    10.244.1.248   node1   <none>           <none>
vagrant@master:/vagrant/yaml_file$ kubectl get deployment -o wide
NAME                 READY   UP-TO-DATE   AVAILABLE   AGE   CONTAINERS   IMAGES                SELECTOR
mongodb-deployment   1/1     1            1           13s   mongodb      mongo:4.0.18-xenial   app=mondb
mongoDBのレプリカセットを初期化
レプリカセットの初期化を行います。
作成したmongoDBのメンバーへ接続し、rs.initiate()コマンドで初期化します。
これを忘れてRocketChatのPODを作成しようとすると、エラーが出て正常に作成できません。
・mongoDBに接続
# mongo 10.244.1.248

・初期化前確認
> rs.status()
{
        "operationTime" : Timestamp(0, 0),
        "ok" : 0,
        "errmsg" : "no replset config has been received",
        "code" : 94,
        "codeName" : "NotYetInitialized",
        "$clusterTime" : {
                "clusterTime" : Timestamp(0, 0),
                "signature" : {
                        "hash" : BinData(0,"AAAAAAAAAAAAAAAAAAAAAAAAAAA="),
                        "keyId" : NumberLong(0)
                }
        }
}

・初期化実行
> rs.initiate()
{
        "info2" : "no configuration specified. Using a default configuration for the set",
        "me" : "mongodb-deployment-7b75b6447b-hn5xt:27017",
        "ok" : 1,
        "operationTime" : Timestamp(1588334257, 1),
        "$clusterTime" : {
                "clusterTime" : Timestamp(1588334257, 1),
                "signature" : {
                        "hash" : BinData(0,"AAAAAAAAAAAAAAAAAAAAAAAAAAA="),
                        "keyId" : NumberLong(0)
                }
        }
}

・実行後、Enterを押すとプロンプトが変化します。
旧)>
新)rs0:PRIMARY>

・初期化後確認
rs0:PRIMARY> rs.status()
{
        "set" : "rs0",
        "date" : ISODate("2020-05-01T11:57:52.337Z"),
        "myState" : 1,

***長いので省略***

        "members" : [
                {
                        "_id" : 0,
                        "name" : "mongodb-deployment-7b75b6447b-hn5xt:27017",
                        "health" : 1,
                        "state" : 1,
                        "stateStr" : "PRIMARY",
                        "uptime" : 945,
                        "optime" : {
                                "ts" : Timestamp(1588334257, 7),
                                "t" : NumberLong(1)
                        },
                        "optimeDate" : ISODate("2020-05-01T11:57:37Z"),
                        "syncingTo" : "",
                        "syncSourceHost" : "",
                        "syncSourceId" : -1,
                        "infoMessage" : "",
                        "electionTime" : Timestamp(1588334257, 2),
                        "electionDate" : ISODate("2020-05-01T11:57:37Z"),
                        "configVersion" : 1,
                        "self" : true,
                        "lastHeartbeatMessage" : ""
                }
        ],
        "ok" : 1,
        "operationTime" : Timestamp(1588334257, 7),
        "$clusterTime" : {
                "clusterTime" : Timestamp(1588334257, 7),
                "signature" : {
                        "hash" : BinData(0,"AAAAAAAAAAAAAAAAAAAAAAAAAAA="),
                        "keyId" : NumberLong(0)
                }
        }
}
ClusterIPの作成
spec.selector.appに、mongoDBのspec.selector.matchLabels.appを記載します。
また、spec.ports.portには27017を指定します。
apiVersion: v1
kind: Service
metadata:
  name: mongodb-service
spec:
  type: ClusterIP
  selector:
    app: mondb
  ports:
  - protocol: TCP
    port: 27017
実行結果
vagrant@master:/vagrant/yaml_file$ kubectl apply -f service_chat.yaml
service/mongodb-service created
vagrant@master:/vagrant/yaml_file$ kubectl get svc -o wide
NAME              TYPE        CLUSTER-IP      EXTERNAL-IP   PORT(S)     AGE    SELECTOR
mongodb-service   ClusterIP   10.244.181.86   <none>        27017/TCP   7s     app=mondb
RocketChatの作成
・MONGO_URL:mongoDBに接続するURL
→spec.template.spec.env.valueにmongodb://<ClusterIPのサービス名>:<ClusterIPのポート>/<RocketChat用にmongoDBで使用するDB名>で設定します。
・ROOT_URL:RocketChatのURL
→環境によって変わってきますが、ここではhttp://localhost:3000/で設定しました。
・MONGO_OPLOG_URL:mongoDBのOPLOGを格納する
→spec.template.spec.env.valueにmongodb://<ClusterIPのサービス名>:<ClusterIPのポート>/localで設定する。
apiVersion: apps/v1
kind: Deployment
metadata:
  name: rocket-deployment
spec:
  replicas: 1
  selector:
    matchLabels:
      app: rocket
  template:
    metadata:
      labels:
        app: rocket
    spec:
      containers:
      - name: rocket
        image: rocket.chat:3.0.12
        ports:
        - containerPort: 3000
        env:
        - name: MONGO_URL
          value: mongodb://mongodb-service:27017/rocket
        - name: ROOT_URL
          value: http://localhost:3000/
        - name: MONGO_OPLOG_URL
          value: mongodb://mongodb-service:27017/local
      affinity:
        nodeAffinity:
          requiredDuringSchedulingIgnoredDuringExecution:
            nodeSelectorTerms:
            - matchExpressions:
              - key: kubernetes.io/hostname
                operator: In
                values:
                - node1
実行結果
vagrant@master:/vagrant/yaml_file$ kubectl apply -f rocketchat.yaml
deployment.apps/rocket-deployment created
vagrant@master:/vagrant/yaml_file$
vagrant@master:/vagrant/yaml_file$ kubectl get deployment -o wide
NAME                 READY   UP-TO-DATE   AVAILABLE   AGE   CONTAINERS   IMAGES                SELECTOR
mongodb-deployment   1/1     1            1           18m   mongodb      mongo:4.0.18-xenial   app=mondb
rocket-deployment    1/1     1            1           4s    rocket       rocket.chat:3.0.12    app=rocket
vagrant@master:/vagrant/yaml_file$ kubectl get po -o wide
NAME                                  READY   STATUS    RESTARTS   AGE   IP             NODE    NOMINATED NODE   READINESS GATES
mongodb-deployment-7b75b6447b-hn5xt   1/1     Running   0          18m   10.244.1.248   node1   <none>           <none>
rocket-deployment-77596dcf9f-c9w9z    1/1     Running   0          6s    10.244.1.251   node1   <none>           <none>
結果確認
ログを確認すると、SERVER RUNNINGになっていることが確認できます。
vagrant@master:/vagrant/yaml_file$ kubectl logs rocket-deployment-77596dcf9f-c9w9z
Setting default file store to GridFS
LocalStore: store created at
LocalStore: store created at
LocalStore: store created at
ufs: temp directory created at "/tmp/ufs"
Loaded the Apps Framework and loaded a total of 0 Apps!
Updating process.env.MAIL_URL
Using GridFS for custom sounds storage
Using GridFS for custom emoji storage
Browserslist: caniuse-lite is outdated. Please run next command `npm update`
➔ System ➔ startup
➔ +--------------------------------------------------+
➔ |                  SERVER RUNNING                  |
➔ +--------------------------------------------------+
➔ |                                                  |
➔ |  Rocket.Chat Version: 3.0.12                     |
➔ |       NodeJS Version: 12.14.0 - x64              |
➔ |      MongoDB Version: 4.0.18                     |
➔ |       MongoDB Engine: wiredTiger                 |
➔ |             Platform: linux                      |
➔ |         Process Port: 3000                       |
➔ |             Site URL: http://172.16.20.12:3000/  |
➔ |     ReplicaSet OpLog: Enabled                    |
➔ |          Commit Hash: 15ac7670be                 |
➔ |        Commit Branch: HEAD                       |
➔ |                                                  |
➔ +--------------------------------------------------+
NodePortの作成
spec.portsについては以下の方針で記載していきます。
KubernetesのDiscovery&LBリソース(その1)から引用
spec.ports[x].port            ClusterIPで受け付けるPort番号
spec.ports[x].targetPort      転送先のコンテナのPort番号
spec.ports[x].nodePort        全Kubernetes NodeのIP Adressで受け付けるPort番号
今回は以下のように作成しました。
apiVersion: v1
kind: Service
metadata:
  name: rocket-service
spec:
  type: NodePort
  selector:
    app: rocket
  ports:
  - protocol: TCP
    port: 3000
    targetPort: 3000
    nodePort: 31000
実行結果
vagrant@master:/vagrant/yaml_file$ kubectl apply -f service_nodeport_chat.yaml
service/rocket-service created
vagrant@master:/vagrant/yaml_file$ kubectl get svc -o wide
NAME              TYPE        CLUSTER-IP      EXTERNAL-IP   PORT(S)          AGE    SELECTOR
mongodb-service   ClusterIP   10.244.181.86   <none>        27017/TCP        23m    app=mondb
rocket-service    NodePort    10.244.175.43   <none>        3000:31000/TCP   2s     app=rocket
サービス接続
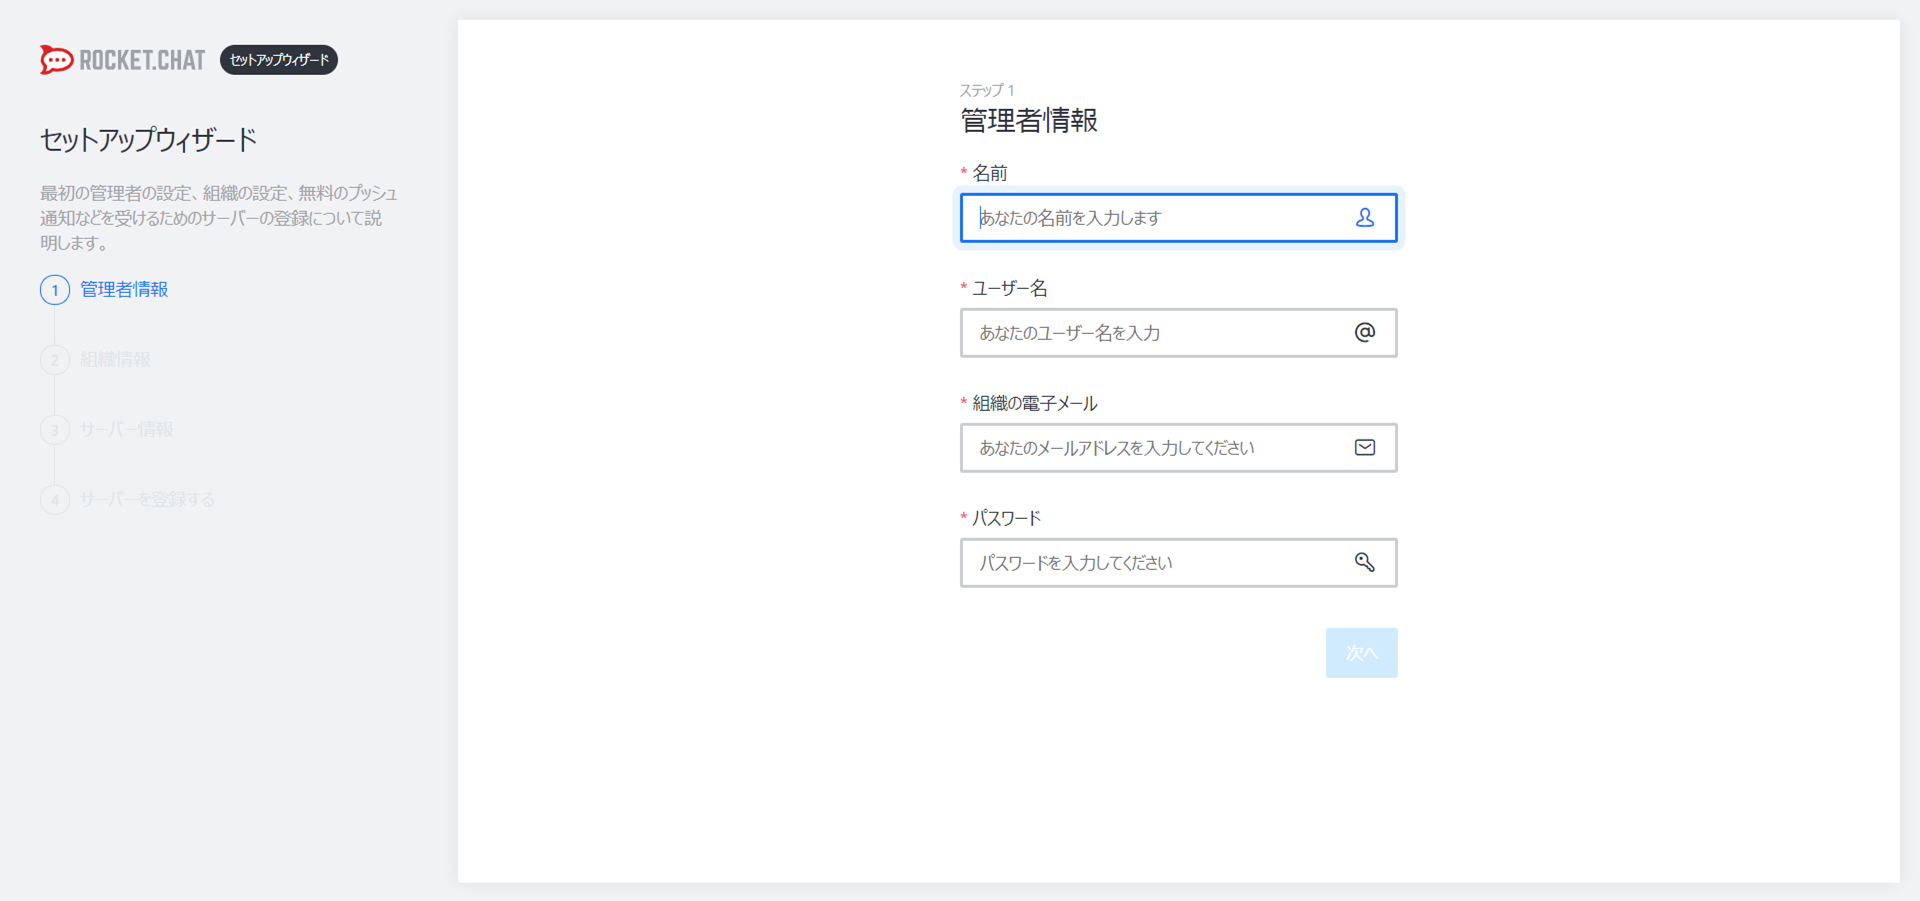
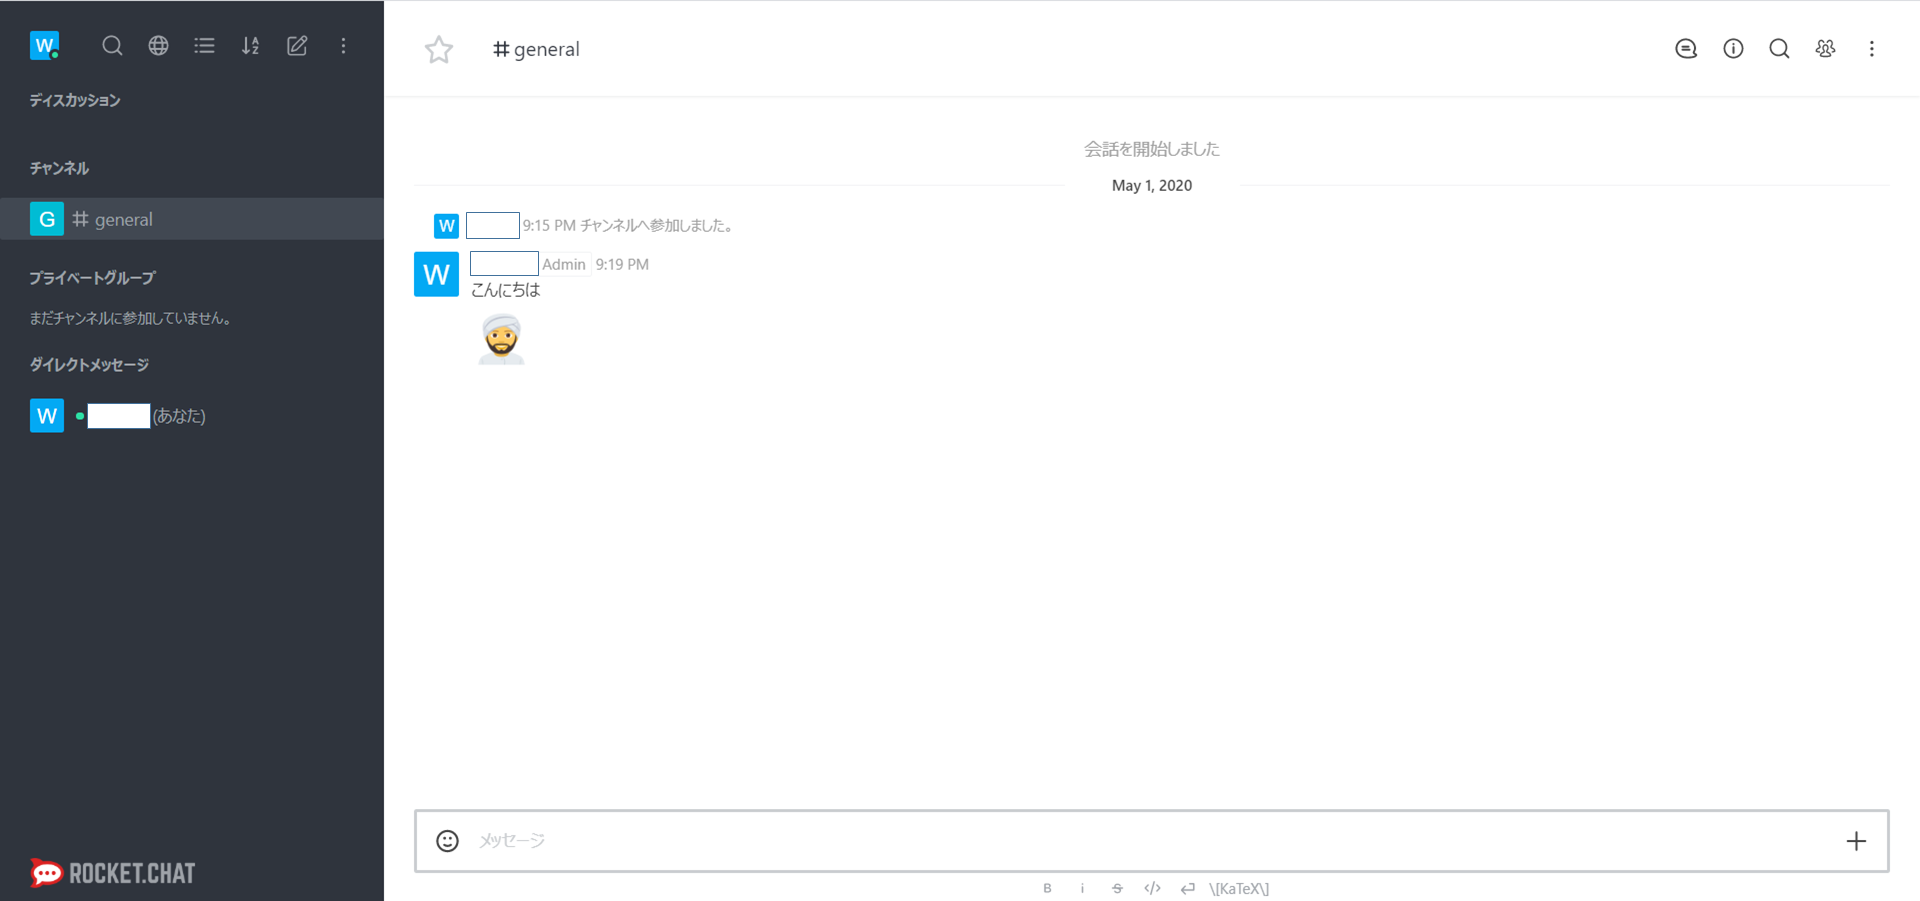
ブラウザからhttp://172.16.20.12:31000/に接続します。
参考
・mongoDB関連
Kubernetes 上に 単独 MongoDB サーバー を構築する方法
俺でもわかるシリーズ: MongoDBのレプリケーション
MongoDBでReplica Setsを試した時のメモ
・RocketChat
公式リファレンス
公式インストールドキュメント


