ImageViewにランダムな画像を表示する
https://qiita.com/ksugawara61/items/7b1bec882a0272cc626b
を参考にさせていただき
複数の画像を配列として扱う方法を試してみました。
①layoutファイル(activity_main.xml)にImageViewを追加
//Imageview blankImageを宣言(このままでは何も表示されない)
②app→res→drawableファイル配下に画像を配置(コピペ)
10枚の猫画像をdrawableにコピペ

③Valuesファイル配下に画像を配列として扱うarrayファイルを作成
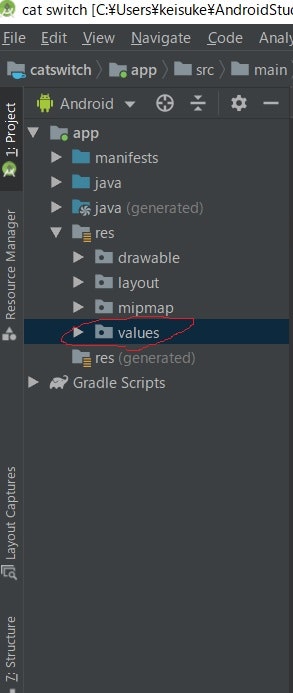
app→res→valuse
valuesファイルを右クリック
→New→Values resource fileをクリック
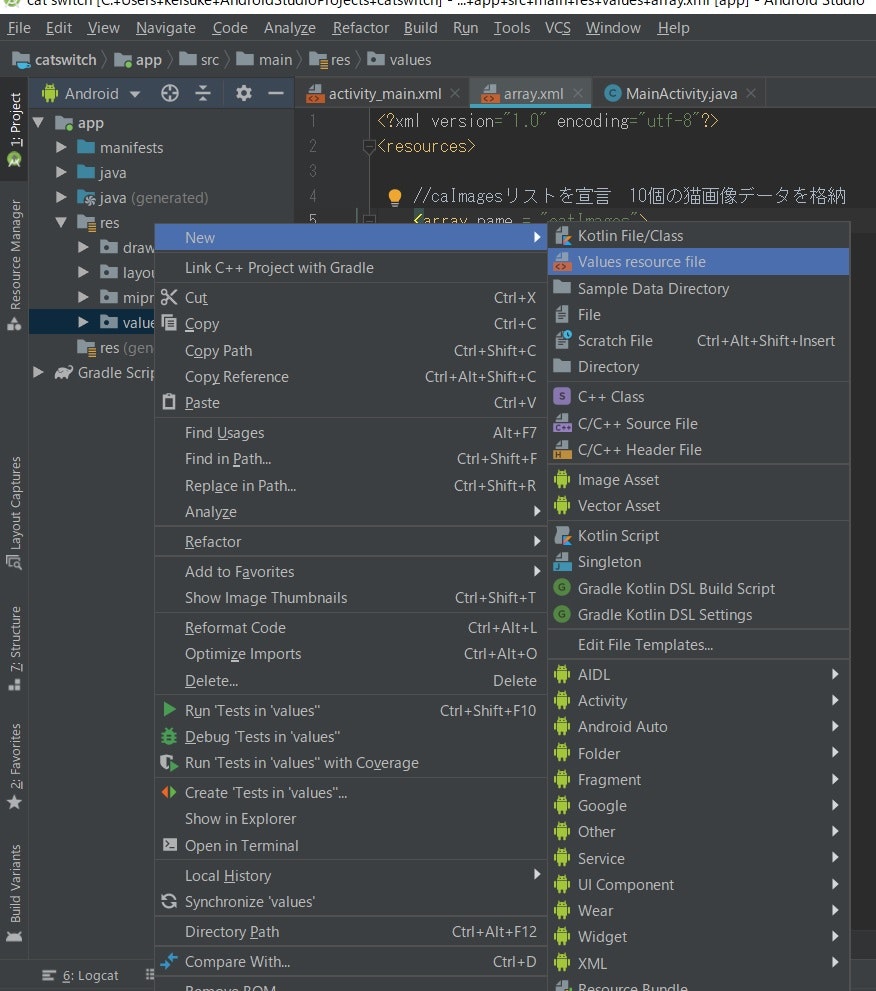
→File nameをarrayにしてOKをクリック

→array.xmlの内容を以下のようにします
//caImagesリストを宣言 10個の猫画像データを格納
<array name = "catImages">

    <item>@drawable/konekokakure</item>

    <item>@drawable/nekonirami</item>

    <item>@drawable/nekoyousumi</item>

    <item>@drawable/konekomouhu</item>

    <item>@drawable/nekobaua</item>

    <item>@drawable/nekonozokimi</item>

    <item>@drawable/nekomehurisou</item>

    <item>@drawable/koenkomoutyo</item>

    <item>@drawable/nekoutouto</item>

    <item>@drawable/nekohukigen</item>

</array>
④Javaコード内(i+1)番目の画像を表示する処理を追加
ImageView blankImage;
TypedArray typedArray;
Drawable drawable;
int i = 0;
//配列は[0,1,2・・・]と1番目が0になるので、i = 0の時 1番目の画像、 i = 1 の時2番目の画像
//猫画像の配列から(i + 1)番目の画像を選択してcatImageにセット(表示)し、numberを表示するメソッド
public void catImageSelectShow() {
    //配列typedArrayから画像を選択 配列の(i + 1)番目
    drawable = typedArray.getDrawable(i);

    //blankImage(何も表示されていない)にdrawable(画像)をセット
    blankImage.setImageDrawable(drawable);

    //i=0の時の画像をNo.1、i=1の時の画像をNo.2と表示するため、(i+1)を入れる
    numberTextView.setText("No." + (i+1));
}
・
・
・
blankImage = findViewById(R.id.blankImage);
//猫画像のリソースの配列(10個の画像の配列)を宣言
typedArray = getResources().obtainTypedArray(R.array.catImages);
⑤Javaのコード全体(*コード修正したものを最下部に追記します)とキャプチャした動画
アプリの動作の様子をキャプチャした動画↓
https://twitter.com/i/status/1231957528071639040
package com.example.catswitch;
import androidx.appcompat.app.AppCompatActivity;
import android.content.res.TypedArray;
import android.graphics.drawable.Drawable;
import android.os.Bundle;
import android.view.View;
import android.widget.Button;
import android.widget.ImageView;
import android.widget.TextView;
public class MainActivity extends AppCompatActivity {
ImageView blankImage;
TextView numberTextView;
TypedArray typedArray;
Drawable drawable;
Button nextButton;
Button prevButton;
int i = 0;


//配列は[0,1,2・・・]と1番目が0になるので、i = 0の時 1番目の画像、 i = 1 の時2番目の画像
//猫画像の配列から(i + 1)番目の画像を選択してcatImageにセット(表示)し、numberを表示するメソッド
public  void catImageSelectShow() {

    //配列typedArrayから画像を選択 配列の(i + 1)番目
    drawable = typedArray.getDrawable(i);

    //blankImage(何も表示されていない)にdrawable(画像)をセット
    blankImage.setImageDrawable(drawable);

    //i=0の時の画像をNo.1、i=1の時の画像をNo.2と表示するため、(i+1)を入れる
    numberTextView.setText("No." + (i+1));
}


@Override
protected void onCreate(Bundle savedInstanceState) {
    super.onCreate(savedInstanceState);
    setContentView(R.layout.activity_main);

    blankImage = findViewById(R.id.blankImage);
    numberTextView = findViewById(R.id.numberTextView);
    nextButton = findViewById(R.id.nextButton);
    prevButton = findViewById(R.id.prevButtton);

    //猫画像のリソースの配列(10個の画像の配列)
    typedArray = getResources().obtainTypedArray(R.array.catImages);

    //i = 0(初期値) (i + 1)番目の猫画像を選択し表示 No.1と表示
    catImageSelectShow();


    //nextButtonを押したときの挙動を設定  ViewクラスのOnClickListenerメソッドを上書き
    nextButton.setOnClickListener(new View.OnClickListener() {
        @Override
        public void onClick(View v) {

            //iには0~9が入る
            if(i == 9) {

                //変数iに0を代入
                i = 0;

                //(0 + 1)番目の猫画像を選択し表示 No.1と表示
                catImageSelectShow();

            } else {

                //変数iを1増加させる
                i++;

                //(i + 1)番目の猫画像を選択し表示 No.(i + 1)と表示
                catImageSelectShow();
            }

        }
    });

    //prevボタンを押したときの挙動を設定
    prevButton.setOnClickListener(new View.OnClickListener() {
        @Override
        public void onClick(View v) {

            //iには0~9が入る
            if(i == 0) {

                //変数iに9を代入
                i = 9;

                //(9 + 1)番目の画像を表示
                catImageSelectShow();

            } else {

                //変数iを1減少させる
                i--;

                //(i + 1)番目の猫画像を選択し表示 No.(i + 1)と表示
                catImageSelectShow();
            }
        }
    });

}
}
activity_main.xmlのコード全体↓
<androidx.constraintlayout.widget.ConstraintLayout xmlns:android="http://schemas.android.com/apk/res/android"
xmlns:app="http://schemas.android.com/apk/res-auto"
xmlns:tools="http://schemas.android.com/tools"
android:layout_width="match_parent"
android:layout_height="match_parent"
tools:context=".MainActivity">
//Imageview blankImageを宣言(このままでは何も表示されない)
<ImageView
    android:id="@+id/blankImage"
    android:layout_width="match_parent"
    android:layout_height="match_parent"
    app:layout_constraintBottom_toBottomOf="parent" />

<TextView
    android:id="@+id/numberTextView"
    android:layout_width="wrap_content"
    android:layout_height="wrap_content"
    android:layout_marginBottom="67dp"
    android:textSize="30sp"
    app:layout_constraintBottom_toBottomOf="parent"
    app:layout_constraintEnd_toEndOf="parent"
    app:layout_constraintHorizontal_bias="0.5"
    app:layout_constraintStart_toStartOf="parent" />

<Button
    android:id="@+id/prevButtton"
    android:layout_width="wrap_content"
    android:layout_height="wrap_content"
    android:layout_marginStart="33dp"
    android:layout_marginBottom="67dp"
    android:text="←"
    android:textSize="30sp"
    app:layout_constraintBottom_toBottomOf="parent"
    app:layout_constraintStart_toStartOf="parent" />

<Button
    android:id="@+id/nextButton"
    android:layout_width="wrap_content"
    android:layout_height="wrap_content"
    android:layout_marginEnd="33dp"
    android:layout_marginBottom="67dp"
    android:text="→"
    android:textSize="30sp"
    app:layout_constraintBottom_toBottomOf="parent"
    app:layout_constraintEnd_toEndOf="parent" />
(追記)Javaのコードを少し修正しました
@Override
public void onClick(View v) {
            //iには0~9が入る
            if(i == 9) {

                //変数iに0を代入
                i = 0;

                //(0 + 1)番目の猫画像を選択し表示 No.1と表示
                catImageSelectShow();

            } else {

                //変数iを1増加させる
                i++;

                //(i + 1)番目の猫画像を選択し表示 No.(i + 1)と表示
                catImageSelectShow();
            }

        }
後から画像を追加してもいいように
i == 9 を i == typedArray.length() - 1) に変更。
また、 catImageSelectShow(); が if とelse 両方に書かれているので
ブロックの外に出しました。
if(i == typedArray.length() - 1) {
                //変数iに0を代入
                i = 0;

            } else {

                //変数iを1増加させる
                i++;
            }

            //(i + 1)番目の猫画像を選択し表示 No.(i + 1)と表示
            catImageSelectShow();
ソースコード全体↓
package com.catsw.catswitch;
import androidx.appcompat.app.AppCompatActivity;
import android.content.res.TypedArray;
import android.graphics.drawable.Drawable;
import android.os.Bundle;
import android.view.View;
import android.widget.Button;
import android.widget.ImageView;
import android.widget.TextView;
public class MainActivity extends AppCompatActivity {
ImageView blankImage;
TextView numberTextView;
TypedArray typedArray;
Drawable drawable;
Button nextButton;
Button prevButton;
int i = 0;


//猫画像の配列から(i + 1)番目の画像を選択してcatImageにセット(表示)し、numberを表示するメソッド
public  void catImageSelectShow() {

    //配列typedArrayから画像を選択 配列の(i + 1)番目
    drawable = typedArray.getDrawable(i);

    //blankImage(何も表示されていない)にdrawable(画像)をセット
    blankImage.setImageDrawable(drawable);

    //i=0の時の画像をNo.1、i=1の時の画像をNo.2と表示するため、(i+1)を入れる
    numberTextView.setText("No." + (i+1));
}


@Override
protected void onCreate(Bundle savedInstanceState) {
    super.onCreate(savedInstanceState);
    setContentView(R.layout.activity_main);

    blankImage = findViewById(R.id.blankImage);
    numberTextView = findViewById(R.id.numberTextView);
    nextButton = findViewById(R.id.nextButton);
    prevButton = findViewById(R.id.prevButtton);

    //猫画像のリソースの配列を宣言
    typedArray = getResources().obtainTypedArray(R.array.catImages);

    //i = 0(初期値) (i + 1)番目の猫画像を選択し表示 No.1と表示
    catImageSelectShow();


    //nextButtonを押したときの挙動を設定  ViewクラスのOnClickListenerメソッドを上書き
    nextButton.setOnClickListener(new View.OnClickListener() {
        @Override
        public void onClick(View v) {

            //iが猫画像の(配列の要素数-1)に等しい時
            if(i == typedArray.length() - 1) {

                //変数iに0を代入
                i = 0;

            } else {

                //変数iを1増加させる
                i++;
            }

            //(i + 1)番目の猫画像を選択し表示 No.(i + 1)と表示
            catImageSelectShow();
        }
    });

    //prevボタンを押したときの挙動を設定
    prevButton.setOnClickListener(new View.OnClickListener() {
        @Override
        public void onClick(View v) {

            if(i == 0) {

                //変数iに(猫画像の配列の要素数-1)を代入
                i = typedArray.length() - 1;

            } else {

                //変数iを1減少させる
                i--;
            }

            //(i + 1)番目の猫画像を選択し表示 No.(i + 1)と表示
            catImageSelectShow();
        }
    });

}
}