初めに
通知機能を実装しようとしていたときに、便利そうなパッケージを見つけて使ってみたので共有します!
Badges とは
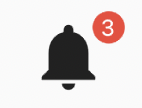
そもそも Badges ( 以下バッジ ) とは以下の画像のように通知の件数や重要な知らせをユーザに伝えるためのアイコンです。

パッケージの準備
まずは Badgesパッケージ を pubspec.yaml に記述し、Pub get します。
dependencies:
  flutter:
    sdk: flutter
  badges: ^2.0.3
次にバッジを使いたい画面でパッケージをインポートします。
import 'package:badges/badges.dart';
これで準備は完了です!
実装
コード
Badge(
  badgeContent: const Text("3"),
  child: const Icon(Icons.notifications, size: 50,),
),
実行結果

アイコンの大きさのみ変更していますが、これが最もシンプルなバッジの実装結果と言えるのではないでしょうか。
badgeContent
badgeContent: const Text("3"),
このプロパティでは名前の通り、バッジに表示させるコンテンツを指定します。通知の数を表示させる場合が多いです。
表示させるテキストなどの色を変更する場合は Textstyle で変更します。
テキストを白に変更してみましょう。
Badge(
  badgeContent: const Text("3",style: TextStyle(color: Colors.white),),
  child: const Icon(Icons.notifications, size: 50,),
),
表示結果
TextStyle の color で色を変更することができます。
child
child: const Icon(Icons.notifications, size: 50,),
child ではバッジをつける要素を指定します。今回は Notifications のアイコンを指定しています。Icon や IconButton、Text が子要素となることが多いです。
badgeColor
バッジの色を変更してみましょう。
badgeColor: Colors.blue,
実行結果
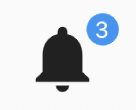
badgeColor ではバッジの背景色を変更することができます。バッジを表示させるアイコンなどの背景色とのコントラスト比を見て、相性が良い色を選びましょう。
position
バッジの位置を変更してみましょう。
position: BadgePosition.bottomEnd(),
実行結果
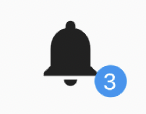
position ではバッジを表示させる位置を変更できます。
位置は以下の通りです。
| コード | 位置 |
|---|---|
| center( ) | 中央 |
| topStart( ) | 左上 |
| topEnd( ) | 右上(デフォルト) |
| bottomStart( ) | 左下 |
| bottomEnd( ) | 右下 |
また、以下のように位置を細かく指定することもできます。
position: BadgePosition.bottomEnd(bottom: -20, end: 10),
shape
バッジの形を変更してみましょう。
shape: BadgeShape.square,
実行結果
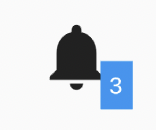
shape ではバッジの形を変更することができます。
種類は circle と square の二種類です。
shape が square の時のみ、 borderRadius プロパティを使うことでバッジの角の丸みを変更できますが、ここでは省略します。
その他の形にしたいときはパッケージを使用せず、Container や Stack を使用して実装する必要があります。
値を変更してみよう
次は Riverpod を使ってバッジの通知件数を変更してみましょう。
まずは Riverpod を pubspec.yaml に記述し、Pub get します。
dependencies:
  flutter:
    sdk: flutter
  badges: ^2.0.3
+ flutter_riverpod: ^1.0.4
次にバッジを使用している画面にインポートして準備完了です。
import 'package:flutter_riverpod/flutter_riverpod.dart';
余談ですが、Riverpod には riverpod, flutter_riverpod, hooks_riverpod の三種類があり、ブラウザで「flutter riverpod」と検索すると flutter に対応していない通常の riverpod のパッケージが表示されることが往々にしてあります。
以前気づかずに通常の riverpod をインポートして時間を無駄にしたことがあったので、flutter_riverpod の使用頻度が高い方はURLをメモしておくか、「flutter_riverpod pubdev」で検索するかした方が良いかもしれません。
次に通知件数を監視する StateProvider を作成します。
最初の通知は0件なので初期値を0にしておきます。
final notificationCountProvider = StateProvider((ref) => 0);
Widget 内で Riverpod を使うために StatelessWidget から ConsumerWidget に変更します。
- class BadgesExample extends StatelessWidget
+ class BadgesExample extends ConsumerWidget
build の引数に ref を追加します。
- Widget build(BuildContext context)
+ Widget build(BuildContext context, WidgetRef ref)
次に作成した StateProvider を読み取るための変数を設けます。
final notificationCountNotifier = ref.watch(notificationCountProvider.notifier);
final notificationCount = ref.watch(notificationCountProvider);
変数 notificationCountNotifier は notifier を読み取っているため、その型は StateController となります。
変数 notificationCount はそのまま provider を読み取っているので、 int 型となります。
これで notificationCountProvider を読み取った値を Widget 内で使用することができるようになりました。
badgeContent に指定していた Text の内容を通知の件数に変更してみましょう。( TextStyle は省略しています。 )
- badgeContent: const Text("3"),
+ badgeContent: Text(notificationCount.toString()),
最後に通知の件数を増やすための ElevatedButton を設けます。
ElevatedButton(
  onPressed: () {
 // notificationCountNotifier.state = notificationCountNotifier.state + 1;
    notificationCountNotifier.state++;
  },
  child: const Text("通知", style: TextStyle(color: Colors.white),),
  style: ElevatedButton.styleFrom(
    primary: Colors.red
  ),
),
ここでは Provider の値を変更するため notificationCountNotifier を使用しています。
これでボタンが押されるたびに Provider の値が変更されてバッジに表示される数値も変更されるようになりました。
ここまでの全コードが以下の通りです。
import 'package:flutter/material.dart';
import 'package:badges/badges.dart';
import 'package:flutter_riverpod/flutter_riverpod.dart';

final notificationCountProvider = StateProvider((ref) => 0);

class BadgesExample extends ConsumerWidget {
  const BadgesExample({Key? key}) : super(key: key);
  @override
  Widget build(BuildContext context, WidgetRef ref) {

    final StateController<int> notificationCountNotifier =
        ref.watch(notificationCountProvider.notifier);
    final int notificationCount = ref.watch(notificationCountProvider);

    return Scaffold(
      appBar: AppBar(
        title: const Text("BadgesSample"),
      ),
      body: Center(
        child: Column(
          mainAxisAlignment: MainAxisAlignment.center,
          children: <Widget>[
            Badge(
              badgeContent: Text(
                notificationCount.toString(),
                style: const TextStyle(color: Colors.white),
              ),
              child: const Icon(
                Icons.notifications,
                size: 50,
              ),
            ),
            const SizedBox(
              height: 50,
            ),
            ElevatedButton(
              style: ElevatedButton.styleFrom(primary: Colors.red),
              onPressed: () {
                notificationCountNotifier.state++;
              },
              child: const Text(
                "通知",
                style: TextStyle(color: Colors.white),
              ),
            ),
          ],
        ),
      ),
    );
  }
}
なお、badgeColor や position などの記述は削除しています。
実行結果
showBadge
最後に通知が 0 件の時はバッジを表示させないように変更してみましょう。
showBadge: (notificationCount == 0) ? false : true,
notificationCount が 0 の時には showBadge を false にして、それ以外は true にします。こうすることで以下のように通知が 0 件の時にバッジが表示されないようになます。
以上です!
あとがき
最後は Riverpod 中心の内容になってしまいましたが、最後まで読んでいただきありがとうございました。
誤っている点があれば指摘していただければ幸いです。
参考にしたサイト