はじめに
様々な方の記事を参考にNightWatch.jsを試してみて、ハンズオンを実施した時のマニュアルのカジュアルverです。
nvmはNode.jsをインストールするために使いましたが、公式からインストーラを取ってきてもいいですよね。そのくらいの感じの記事です。よろしくお願いします。
NightWatch.js
公式サイト:http://nightwatchjs.org/
GitHub:https://github.com/nightwatchjs/nightwatch
NightWatch.jsはE2Eテストを行うためのテストフレームワークです。
E2Eテストとは、ユーザーが行うようなシナリオに沿って画面からアプリを動かすテスト手法です。基本的に、実稼働状態に近づけてブラウザから行うのでサーバからフロント全て含んだ動作のテストになります。また、ブラウザ上に表示されているbuttonやテキストの表示とそれらの挙動もテストします。
ただ、そういったテストをリリースのたびに手動でやるのはしんどいので、チェックポイントを設けて自動化しよう!というものになります。
NightWatch.js以外にも沢山あります。私はNightWatch.js以外ではSelenium+MSTest・TestCafe等を試してみました。(比較してどうだった的なことは本記事では書きませんが)
インストール
nvmインストール
からnvm-setup.zipをダウンロード
展開、「nvm-setup.exe」をダブルクリックしてインストール
PC再起動(もしかして:だるい⇒こちら)
Windows PowerShellを起動、下記コマンドで確認
nvm -v
> nvm -v

Running Version 1.1.7.
<以下略>
みたいなものが出ればOK
node.js npmインストール
nvm list available
> nvm list available

|   CURRENT    |     LTS      |  OLD STABLE  | OLD UNSTABLE |
|--------------|--------------|--------------|--------------|
|    11.6.0    |   10.15.0    |   0.12.18    |   0.11.16    |
|    11.5.0    |   10.14.2    |   0.12.17    |   0.11.15    |
表示された内容から、LTSの最新版をインストール
nvm install 10.15.0
> nvm install 10.15.0
Downloading node.js version 10.15.0 (64-bit)...
Complete
Creating C:\Users\kouki\AppData\Roaming\nvm\temp

Downloading npm version 6.4.1... Complete
Installing npm v6.4.1...

Installation complete. If you want to use this version, type

nvm use 10.15.0
また、使用するnode.jsを指定する
nvm use 10.15.0
> nvm use 10.15.0
Now using node v10.15.0 (64-bit)
windowsの確認ダイアログが出るので、「OK」をクリック(コンピューターへの変更を許可しますか的なやつ、アレなんて言うんですかね?)
npmも同時に入っているので確認
npm --version
> npm --version
6.4.1
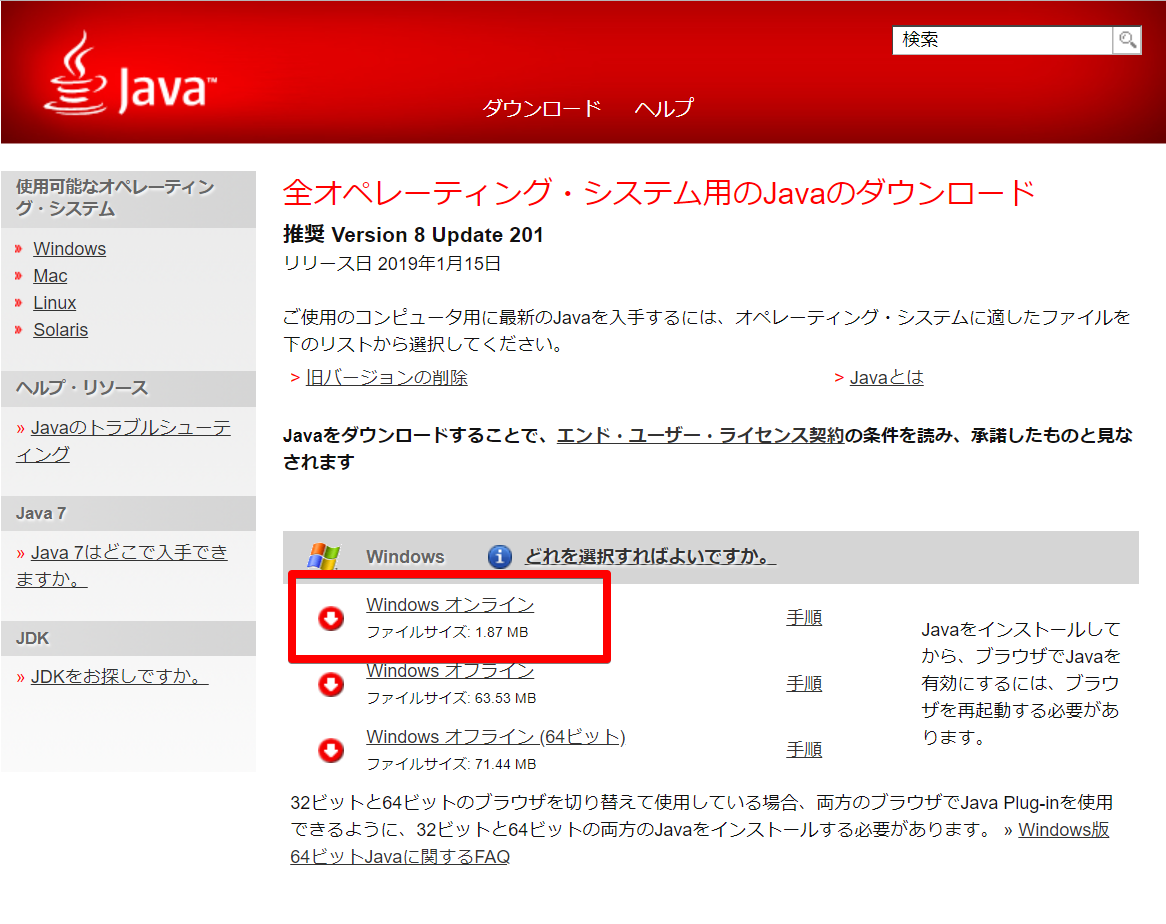
javaインストール
にアクセス
jre-8u201-windows-i586-iftw.exeを実行
インストーラに従いインストール
PowerShellを再起動して、確認
java -version
> java -version
java version "1.8.0_201"
Java(TM) SE Runtime Environment (build 1.8.0_201-b09)
Java HotSpot(TM) Client VM (build 25.201-b09, mixed mode, sharing)
NigjtWatch.jsインストール
C直下など適当な場所にディレクトリ作成
mkdir C:\NightWatch_project
C:\NightWatch_projectに移動
cd C:\NightWatch_project\
NightWatch.jsをインストール(この時はグローバルインストールではやりませんでした)
npm install nightwatch
> npm install nightwatch
npm WARN saveError ENOENT: no such file or directory, open 'C:\NightWatch_project\package.json'
npm notice created a lockfile as package-lock.json. You should commit this file.
npm WARN enoent ENOENT: no such file or directory, open 'C:\NightWatch_project\package.json'
npm WARN NightWatch_project No description
npm WARN NightWatch_project No repository field.
npm WARN NightWatch_project No README data
npm WARN NightWatch_project No license field.

+ nightwatch@1.0.18
added 110 packages from 531 contributors and audited 173 packages in 18.679s
found 0 vulnerabilities
C:\NightWatch_projectの配下に「node_modules」と「Package-lock.json」ができる
各種設定
Selenium Serverを配置
C:\NightWatch_projectにbinディレクトリ作成
mkdir bin
にアクセス
Selenium Standalone Serverをダウンロード(若干見辛いけど頑張って探して!)
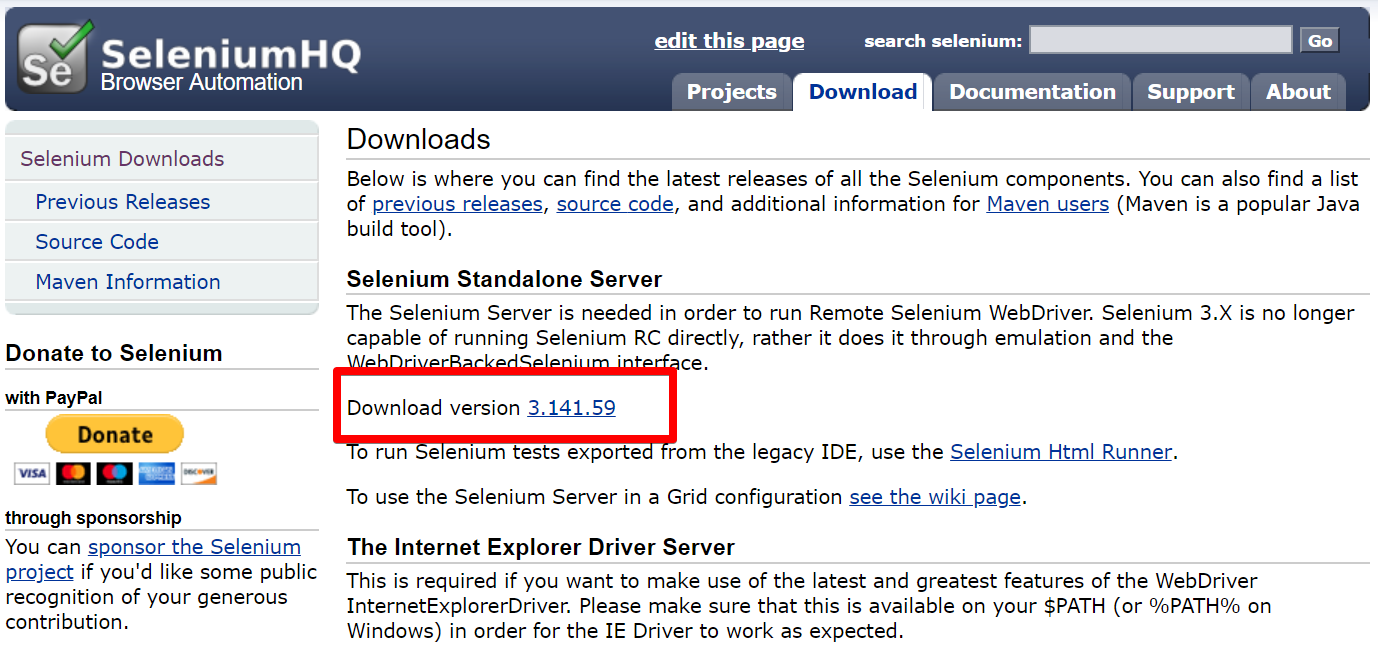
C:\NightWatch_project\binに移動させる
chrome、Firefox、IEのWeb Driverを配置
IE
The Internet Explorer Driver Serverの「32 bit Windows IE」をクリックしてダウンロード(若干見辛いけd)
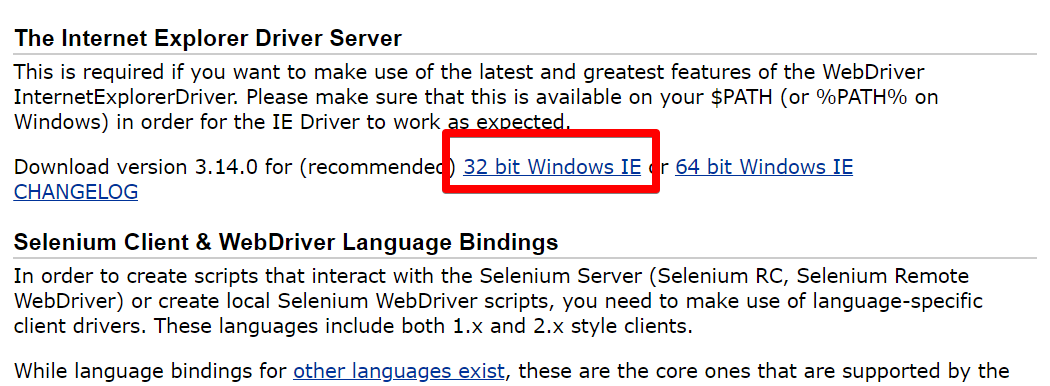
zipを展開し、「IEDriverServer.exe」をC:\NightWatch_project\binに移動させる
Firefox
「Mozilla GeckoDriver」の「latest」をクリック
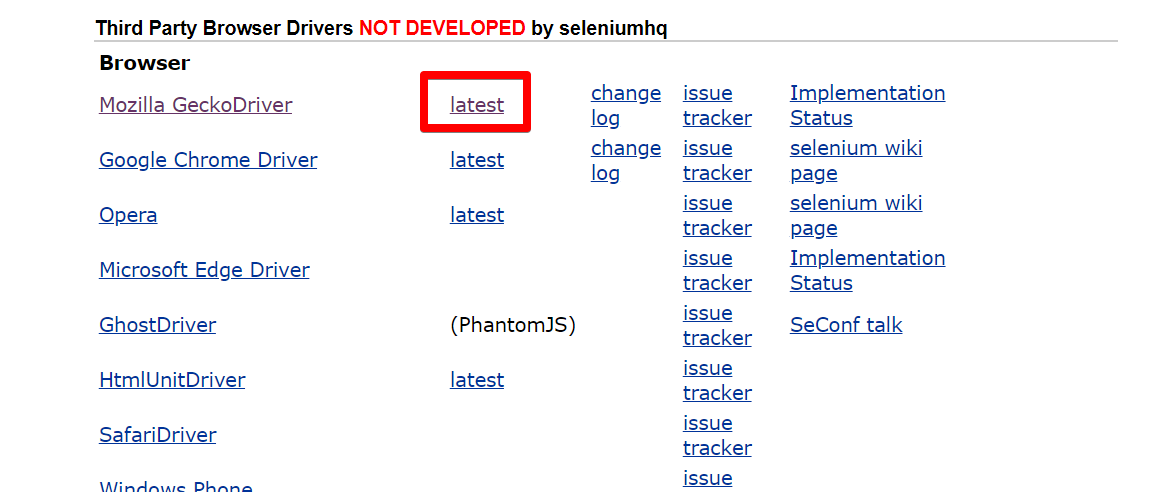
「geckodriver-v0.23.0-win64.zip」をクリックしてダウンロード
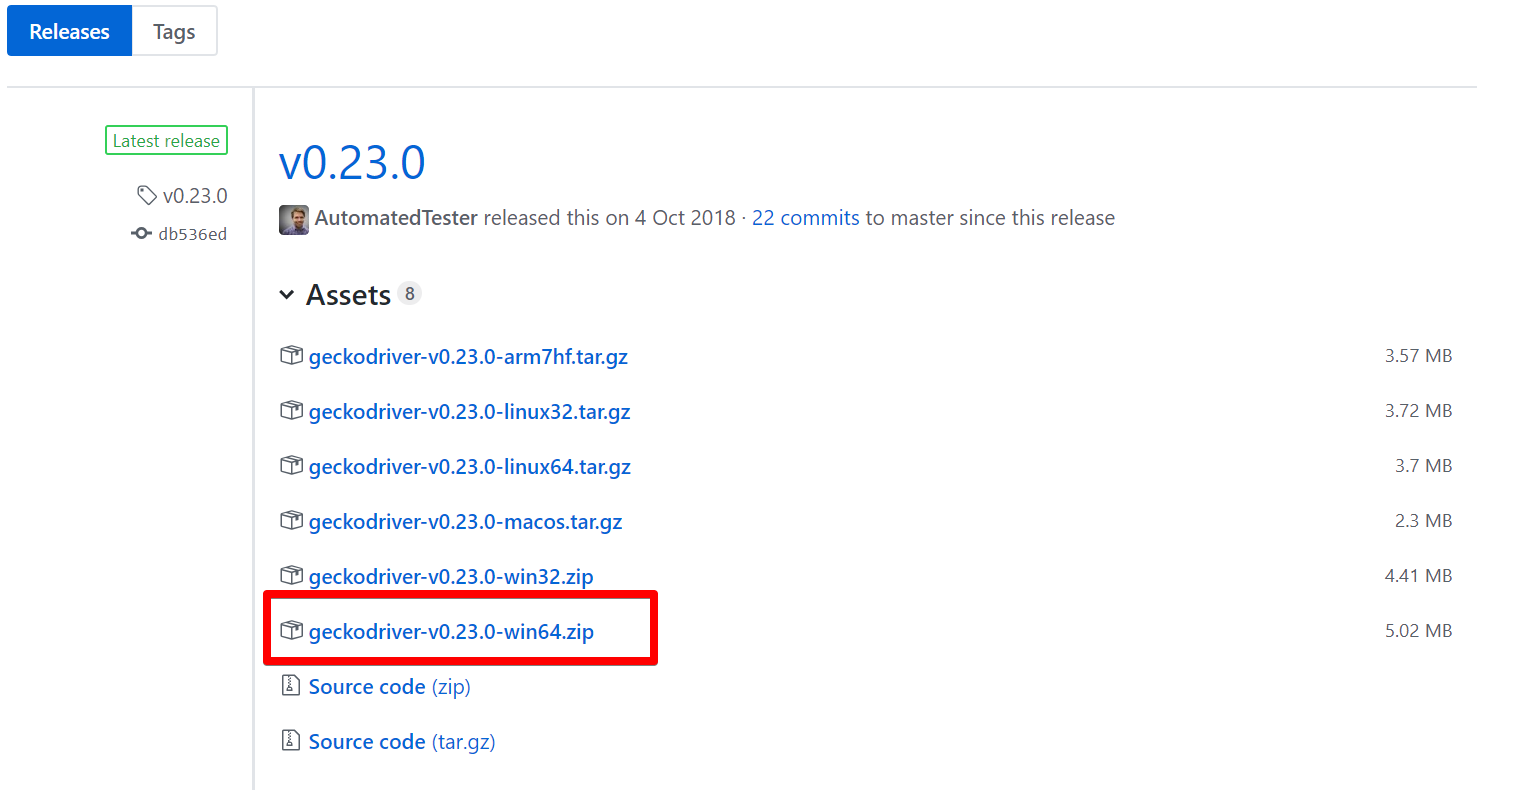
zipを展開し、「geckodriver.exe」をC:\NightWatch_project\binに移動させる
Chrome
「Google Chrome Driver」の「latest」をクリック
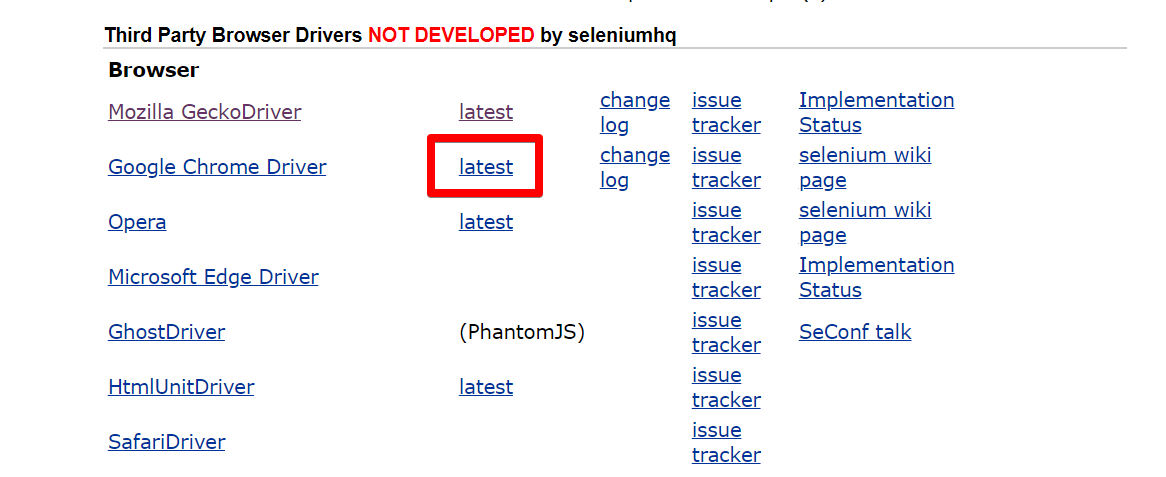
「ChromeDriver 2.45」をクリック
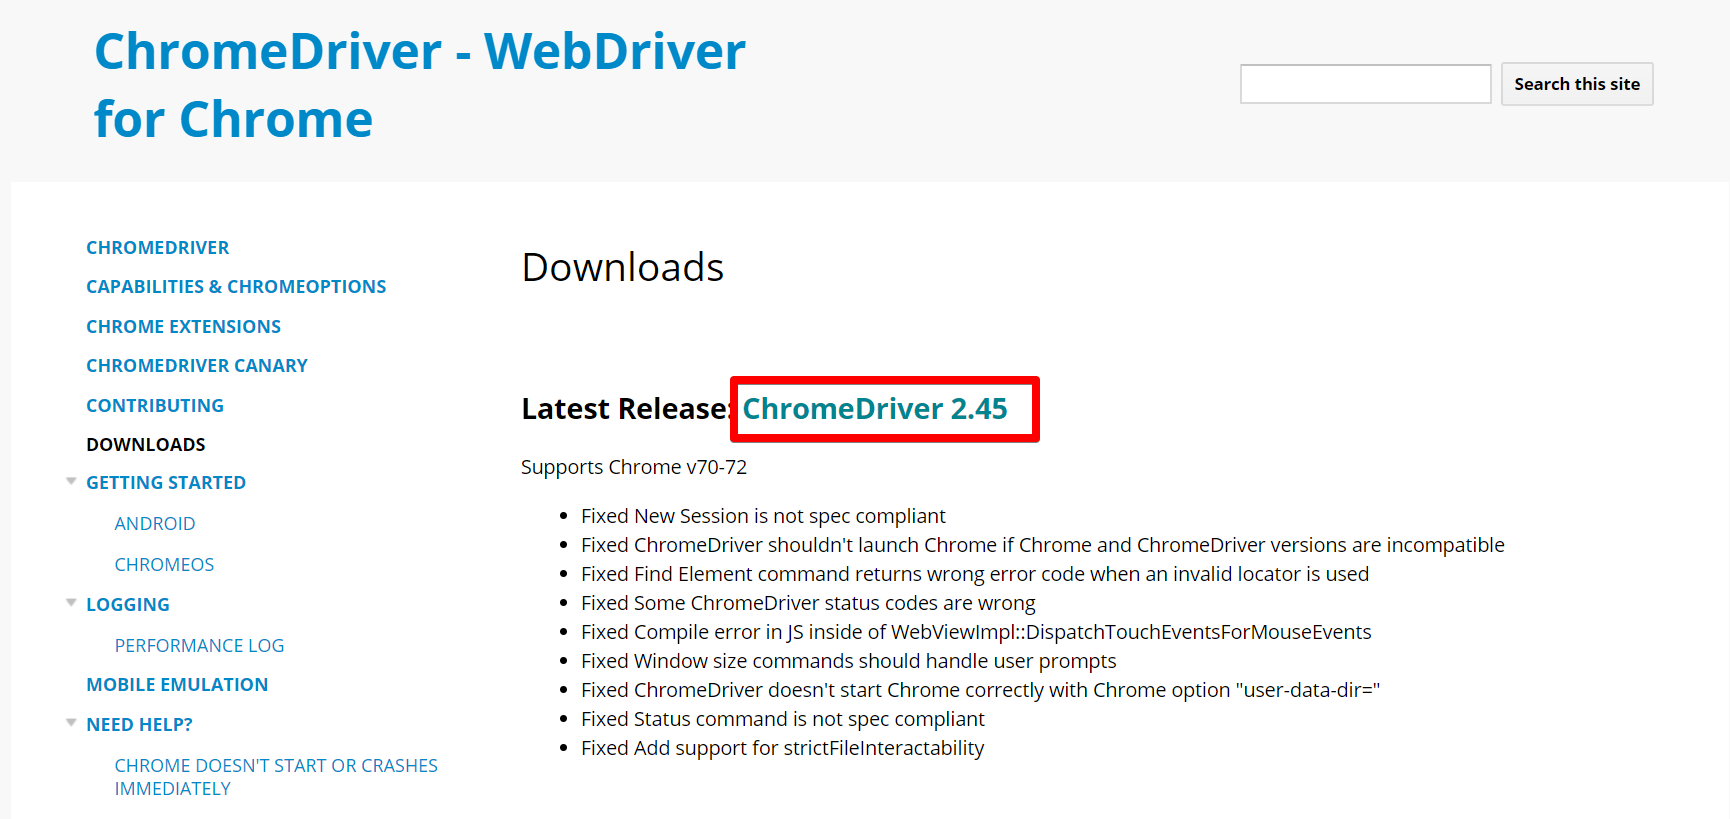
「chromedriver_win32.zip」をクリックしてダウンロード
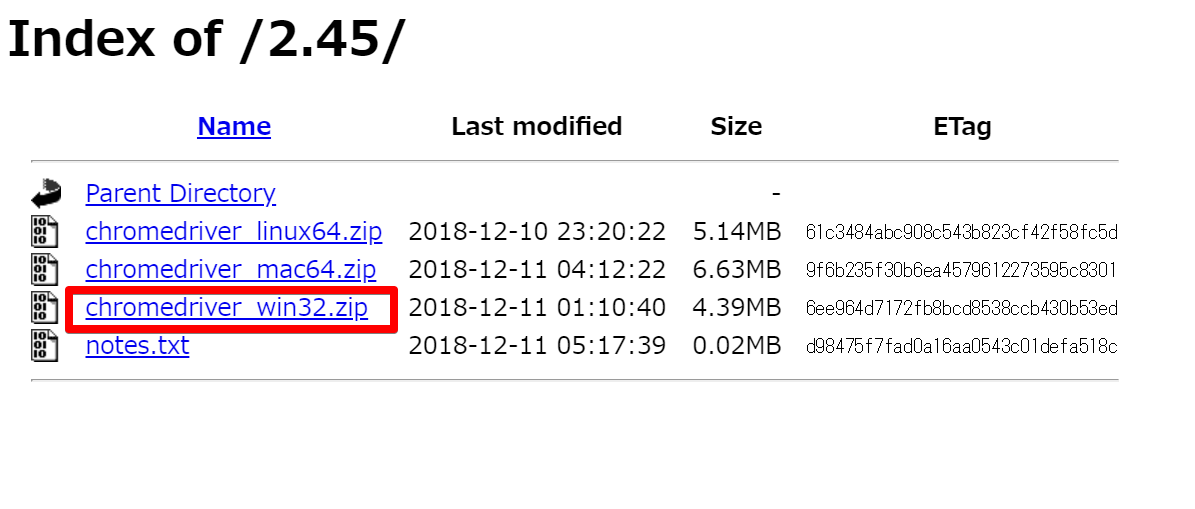
zipを展開し、「chromedriver.exe」をC:\NightWatch_project\binに移動させる
設定ファイル作成
C:\NightWatch_projectにて、「nightwatch.json」を作成
New-Item nightwatch.json -ItemType File
下記をコピー
{
  "src_folders" : ["tests"],
  "output_folder" : "reports",
  "custom_commands_path" : "",
  "custom_assertions_path" : "",
  "page_objects_path" : "",
  "globals_path" : "",

  "selenium" : {
    "start_process" : false,
    "server_path" : "",
    "log_path" : "",
    "port" : 4444,
    "cli_args" : {
      "webdriver.chrome.driver" : "",
      "webdriver.gecko.driver" : "",
      "webdriver.edge.driver" : ""
    }
  },

  "test_settings" : {
    "default" : {
      "launch_url" : "http://localhost",
      "selenium_port"  : 4444,
      "selenium_host"  : "localhost",
      "silent": true,
      "screenshots" : {
        "enabled" : false,
        "path" : ""
      },
      "desiredCapabilities": {
        "browserName": "firefox",
        "marionette": true
      }
    },

    "chrome" : {
      "desiredCapabilities": {
        "browserName": "chrome"
      }
    },

    "edge" : {
      "desiredCapabilities": {
        "browserName": "MicrosoftEdge"
      }
    }
  }
}
seleniumサーバ、Chrome、Firefoxの設定
  "selenium" : {
    "start_process" : true,
    "server_path" : "./bin/selenium-server-standalone-3.141.59.jar",
    "log_path" : "",
    "port" : 4444,
    "cli_args" : {
      "webdriver.chrome.driver" : "./bin/chromedriver.exe",
      "webdriver.gecko.driver" : "./bin/geckodriver.exe",
      "webdriver.edge.driver" : ""
    }
  },
また、IEの設定を追加(お好みで)
    "cli_args" : {
      "webdriver.chrome.driver" : "./bin/chromedriver.exe",
      "webdriver.gecko.driver" : "./bin/geckodriver.exe",
      "webdriver.edge.driver" : "",
      "webdriver.ie.driver" : "./bin/IEDriverServer.exe"
    "edge" : {
      "desiredCapabilities": {
        "browserName": "MicrosoftEdge"
      }
    },

    "ie" : {
      "desiredCapabilities" : {
        "browserName": "internet explorer"
      }
    }
最終的なnightwatch.json
{
  "src_folders" : ["tests"],
  "output_folder" : "reports",
  "custom_commands_path" : "",
  "custom_assertions_path" : "",
  "page_objects_path" : "",
  "globals_path" : "",

  "selenium" : {
    "start_process" : true,
    "server_path" : "./bin/selenium-server-standalone-3.141.59.jar",
    "log_path" : "",
    "port" : 4444,
    "cli_args" : {
      "webdriver.chrome.driver" : "./bin/chromedriver.exe",
      "webdriver.gecko.driver" : "./bin/geckodriver.exe",
      "webdriver.edge.driver" : "",
      "webdriver.ie.driver" : "./bin/IEDriverServer.exe"
    }
  },

  "test_settings" : {
    "default" : {
      "launch_url" : "http://localhost",
      "selenium_port"  : 4444,
      "selenium_host"  : "localhost",
      "silent": true,
      "screenshots" : {
        "enabled" : false,
        "path" : ""
      },
      "desiredCapabilities": {
        "browserName": "firefox",
        "marionette": true
      }
    },

    "chrome" : {
      "desiredCapabilities": {
        "browserName": "chrome"
      }
    },

    "edge" : {
      "desiredCapabilities": {
        "browserName": "MicrosoftEdge"
      }
    },

    "ie" : {
      "desiredCapabilities" : {
        "browserName": "internet explorer"
      }
    }
  }
}
IEでのエラーを回避するための設定
どうしても(どうしても)IEでやらなくちゃいけない方へ、起こりがちなエラーについて書かせていただきます。→こちら
サンプルコードを実行してみる
サンプルコード
C:\NightWatch_projectに、testsディレクトリを作成
C:\NightWatch_project\testsにて、「test.js」を作成
module.exports = {
	tags: ['Google'],
	'Demo': function (client) {
		client
		.url('http://www.google.com')
		.waitForElementVisible('body', 1000)
		.assert.title('Google')
		.assert.visible('input[type=text]')
		.setValue('input[type=text]', 'E2Eテスト')
		.waitForElementVisible('input[name=btnK]', 1000)
		.click('input[name=btnK]')
		.pause(3000)
		.end();
	}
};
↓の'E2Eテスト'で、Googleでググるというテストです。モチベーティブにするために好きなアイドルなどにすると良いでしょう。
.setValue('input[type=text]', 'E2Eテスト')
テスト実行
実行コマンド
※「-e」は、テストを実行するブラウザを指定するオプション
※指定する文字列は設定ファイルのtest_settingsで付けたもの
※指定なしだとdefaultに設定したドライバーで動く(今回だとFirefox)
nightwatch -e chrome
nightwatch -e ie
「nightwatch」コマンドが認識されない場合は以下のコマンド
(その他、環境設定からパスを通す等で対処)
.\node_modules\.bin\nightwatch -e chrome
※実行するテストを指定する場合(指定なしだと、testsディレクトリ内にあるjsファイルを全て実行する)
nightwatch ./tests/test.js -e chrome
> .\node_modules\.bin\nightwatch -e chrome

[Test] Test Suite
=================
Running:  Demo

√ Element <body> was visible after 75 milliseconds.

OK. 1 assertions passed. (1.375s)
※テキストボックスに日本語を入力させる際に、ファイルの文字コードがUTF-8になっておらずエラーになることがある
もうちょっとだけ踏み込む
- 番号を入力するテキストボックスに数字を入力
- フォーカスアウトのイベントを拾い
- 15桁にゼロ埋めする
という(謎)機能についてのテストコード
module.exports = {
    'test ロストフォーカス時のゼロ埋め': function (client) {
        client
          .url('http://hoge.html')
          .waitForElementVisible('body', 1000)
          .assert.visible('a[id=btnHoge]')
          .click('a[id=btnHoge]')
          .waitForElementVisible('body', 1000)
          .assert.visible('input[id=tbxHoge]')
          .setValue('input[id=tbxHoge]', ['123', client.Keys.TAB])
          .getValue("input[id=tbxHoge]", function (result) {
              this.assert.equal(result.value.length, 15);
          })
          .end();
    }
};
waitForElementVisible(‘body’, 1000)
body要素が表示されるのを1000ミリ秒待ちます。1000ミリ秒待っても表示されない場合はテスト失敗となります。
assert.visible(‘a[id=btnHoge]’)
a要素のidがbtnHogeのモノが表示されているか確かめます。表示されてない場合はテスト失敗となります。
click(‘a[id=btnHoge]’)
その名の通り渡された要素のクリックイベントを起こします。
setValue(‘input[id=tbxHoge]’, [‘123’, client.Keys.TAB])
テキストを要素にsetします。キーストロークをsetすることも出来ます。
getValue(“input[id=tbxHoge]”, function (result) { ~ })
要素から値をgetします。その値を用いて第2パラメーターにcallback関数を入れてassertするのが主流のようです。
API
参考
全体について
WebアプリのUIテストを手軽に自動化できるNightwatch.jsの使い方 - WPJ
インストール関連
Nightwatch setup in Windows – Tanmay Sarkar
Nightwatch.jsとPhantomJSを使ってヘッドレステストを行う - まちいろエンジニアブログ
Getting Started | Nightwatch.js
IEのセットアップ
Internet Explorer Setup · nightwatchjs/nightwatch Wiki · GitHub
