以下を参考に進める。
事前準備
GitHubからReleaseの安定版をダウンロードする。(develブランチはたまに動かない、ビルドできない時がある)
$ wget https://github.com/neutrinolabs/xrdp/releases/download/v0.9.10/xrdp-0.9.10.tar.gz
$ unzip xrdp-0.9.10.tar.gz
解凍すると、XQuartz-2.7.9.dmgがあるはずなので、インストーラを起動してXQuartzをインストール。
# Xcode-selectのインストール
$ xcode-select --install
# Brewのインストール
$ /usr/bin/ruby -e "$(curl -fsSL https://raw.githubusercontent.com/Homebrew/install/master/install)"
# opensslのインストール
$ brew install openssl
$ echo 'export PATH="/usr/local/opt/openssl/bin:$PATH"' >> ~/.bash_profile
$ openssl version #結果のバージョンを確認
# OpenSSL 1.0.2s  28 May 2019(こんな結果が帰って来ればOK)

$ brew install automake
$ brew install libtool
$ brew install pkgconfig
$ brew install nasm
make
まずはXRDPをmakeする。
$ cd xrdp-0.9.10
$ ./bootstrap
$ ./configure PKG_CONFIG_PATH=/usr/local/opt/openssl/lib/pkgconfig
$ make
$ sudo make install
正常にmake installできていれば、xrdpのコマンドが以下に配置される。
(PATHは通してくれないので、自分で設定する必要がある。)
$ /usr/local/sbin/xrdp -v
xrdp 0.9.10
  A Remote Desktop Protocol Server.
  Copyright (C) 2004-2018 Jay Sorg, Neutrino Labs, and all contributors.
  See https://github.com/neutrinolabs/xrdp for more information.

  Configure options:
      PKG_CONFIG_PATH=/usr/local/opt/openssl/lib/pkgconfig

  Compiled with OpenSSL 1.0.2s  28 May 2019
次にxorgxrdp-0.2.10をmakeする。
$ wget https://github.com/neutrinolabs/xorgxrdp/releases/download/v0.2.10/xorgxrdp-0.2.10.tar.gz
$ ./bootstrap
$ ./configure PKG_CONFIG_PATH=/opt/X11/lib/pkgconfig
$ make
$ sudo make install
環境設定
ライブラリモジュール
El Capitan以降ではLD_LIBRARY_PATHに相当するものが /usr/local/lib 配下にあるのだが、普通のLinuxで言うところの .so オブジェクトは .dylibとして配置されている。
$ ls -la /usr/local/lib/xrdp | grep dylib
-rwxr-xr-x   1 root     admin  112584  8  7 15:36 libcommon.0.dylib
lrwxr-xr-x   1 root     admin      17  8  7 15:36 libcommon.dylib -> libcommon.0.dylib
-rwxr-xr-x   1 root     admin    9544  8  7 15:36 libmc.0.dylib
lrwxr-xr-x   1 root     admin      13  8  7 15:36 libmc.dylib -> libmc.0.dylib
-rwxr-xr-x   1 root     admin   49628  8  7 15:36 libscp.0.dylib
lrwxr-xr-x   1 root     admin      14  8  7 15:36 libscp.dylib -> libscp.0.dylib
-rwxr-xr-x   1 root     admin   29636  8  7 15:36 libvnc.0.dylib
lrwxr-xr-x   1 root     admin      14  8  7 15:36 libvnc.dylib -> libvnc.0.dylib
-rwxr-xr-x   1 root     admin  163020  8  7 15:36 libxrdp.0.dylib
lrwxr-xr-x   1 root     admin      15  8  7 15:36 libxrdp.dylib -> libxrdp.0.dylib
-rwxr-xr-x   1 root     admin   14588  8  7 15:36 libxrdpapi.0.dylib
lrwxr-xr-x   1 root     admin      18  8  7 15:36 libxrdpapi.dylib -> libxrdpapi.0.dylib
-rwxr-xr-x   1 root     admin   19780  8  7 15:36 libxup.0.dylib
lrwxr-xr-x   1 root     admin      14  8  7 15:36 libxup.dylib -> libxup.0.dylib
そのため、 /etc/xrdp/xrdp.ini内で設定している各種.soファイルの指定は.dylibに修正する必要がある。
(シンボリックリンクでリンク張っても良いかも)
[Xorg]
name=Xorg
lib=libxup.dylib
username=ask
password=ask
ip=127.0.0.1
port=-1
code=20
これをやっておかないと起動時に以下のようなメッセージが出る。
[20190807-17:02:58] [ERROR] xrdp_wm_log_msg: error loading libxrdpneutrinordp.so specified in xrdp.ini, please add a valid entry like lib=libxrdp-vnc.so or similar
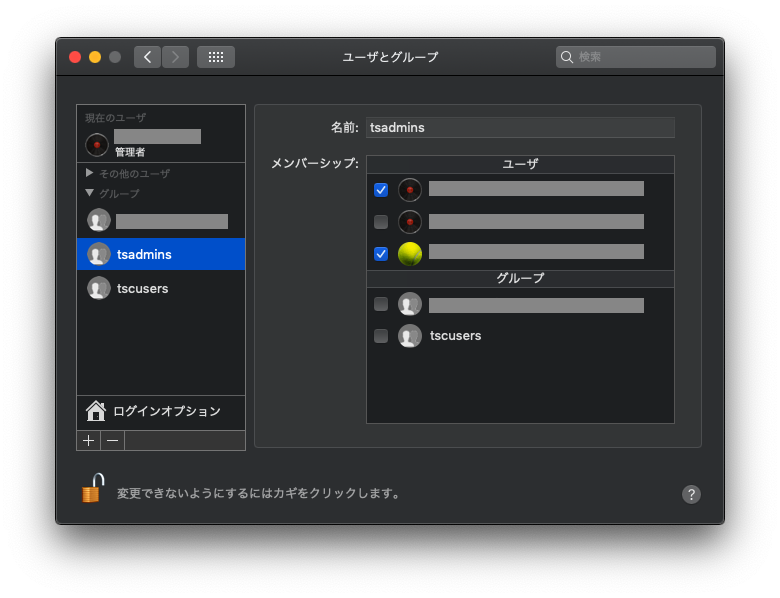
ユーザーグループ
以下のように、ログインできるグループが制限されている。
[Security]
TerminalServerUsers=tsusers
TerminalServerAdmins=tsadmins
OS側にも同様のグループ設定をするため、「システム環境設定」 > 「ユーザとグループ」でグループの追加とユーザへの割り当てを行う。
XRDPプロセス起動
xrdpプロセス(3389)からxrdp-sesman(3350)への接続が行われるため、両方とも起動する必要がある。
$ sudo /usr/local/sbin/xrdp-sesman
logging configuration:
	LogFile:       /var/log/xrdp-sesman.log
	LogLevel:      4
	EnableSyslog:  1
	SyslogLevel:   4

$ sudo /usr/local/sbin/xrdp
logging configuration:
	LogFile:       /var/log/xrdp.log
	LogLevel:      4
	EnableSyslog:  1
	SyslogLevel:   4
[20190807-15:38:12] [DEBUG] Testing if xrdp can listen on 0.0.0.0 port 3389.
[20190807-15:38:12] [DEBUG] Closed socket 6 (AF_INET 0.0.0.0:3389)
daemon process 47889 started ok
が、ここまでやって起動しても、XRDPのログイン画面は出るものの、実際のデスクトップ画面の表示には到達していない。現在調査中。 ![]()