ANACONDA 環境設定
※この記事はanacondaのインストールが終わっている事が前提となります。
anaconda navigatorを立ち上げましょう。
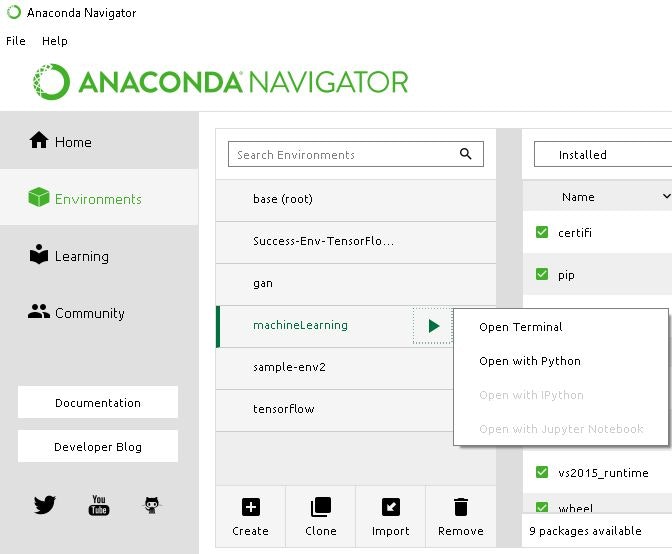
対象の環境(Environments)を選択してOpenTerminalで立ち上げます。
具体的な立上げ方は以下の画像のようにOpenTerminalを出してクリックしてみてくださいね。
環境設定Pathを設定・確認します。
Pathが通っているかをコマンド上で確認してみましょう。
conda info -e
結果
base C:\Users\xxx\Anaconda3
machineLearning * C:\Users\xxx\Anaconda3\envs\machineLearning
tensorflow C:\Users\xxx\Anaconda3\envs\tensorflow
環境設定はPC環境毎に設定が異なります。
ご自身の環境パスが通っているかをよく確認してください。
例えばwin10の場合だと以下のように自分の環境設定編集をチェックする事で
確認・設定する事ができます。既に非常にわかりやすい記事が沢山あるので参考にしてください。
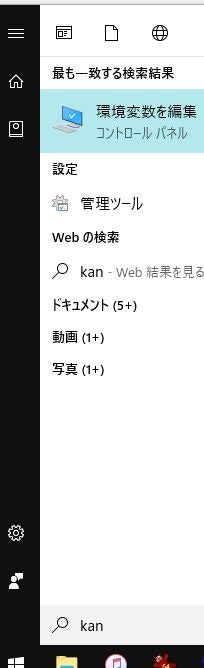
前述の通り環境変数名の編集はご自身のPC環境ごとに異なりますが
以下あくまでご参考までに記載しました。何かのお役に立てれば幸いです。
C:\Users\xxx\Anaconda3

C:\Users\xxx\Anaconda3\Scripts

C:\Users\xxx\Anaconda3\envs\machineLearning
ライブラリのインストールを確認
現在インストールされているライブラリを確認しましょう。
※pip3の3を忘れないようにしてくださいね。
コマンド

pip3 list
上記インストールが終了したらscikit-learn稼働テスト
まず以下3つのライブラリをインストールしましょう。
pip install scikit-learn
pip install matplotlib
pip install pandas
インストールが正常終了したら以下pyファイルを自分のPCローカル環境に保存して
実行してください。※実行コマンドは以下を参考にしてみてくださいね。
python C:\Users\xxx\Desktop\plot_multioutput_face_completion.py
実際のソースは以下になりますのでコピペしてpyファイルに格納してください。
名前はplot_multioutput_face_completion.pyです。
print(__doc__)

import numpy as np
import matplotlib.pyplot as plt

from sklearn.datasets import fetch_olivetti_faces
from sklearn.utils.validation import check_random_state

from sklearn.ensemble import ExtraTreesRegressor
from sklearn.neighbors import KNeighborsRegressor
from sklearn.linear_model import LinearRegression
from sklearn.linear_model import RidgeCV

# Load the faces datasets
data = fetch_olivetti_faces()
targets = data.target

data = data.images.reshape((len(data.images), -1))
train = data[targets < 30]
test = data[targets >= 30]  # Test on independent people

# Test on a subset of people
n_faces = 5
rng = check_random_state(4)
face_ids = rng.randint(test.shape[0], size=(n_faces, ))
test = test[face_ids, :]

n_pixels = data.shape[1]
# Upper half of the faces
X_train = train[:, :(n_pixels + 1) // 2]
# Lower half of the faces
y_train = train[:, n_pixels // 2:]
X_test = test[:, :(n_pixels + 1) // 2]
y_test = test[:, n_pixels // 2:]

# Fit estimators
ESTIMATORS = {
    "Extra trees": ExtraTreesRegressor(n_estimators=10, max_features=32,
                                       random_state=0),
    "K-nn": KNeighborsRegressor(),
    "Linear regression": LinearRegression(),
    "Ridge": RidgeCV(),
}

y_test_predict = dict()
for name, estimator in ESTIMATORS.items():
    estimator.fit(X_train, y_train)
    y_test_predict[name] = estimator.predict(X_test)

# Plot the completed faces
image_shape = (64, 64)

n_cols = 1 + len(ESTIMATORS)
plt.figure(figsize=(2. * n_cols, 2.26 * n_faces))
plt.suptitle("Face completion with multi-output estimators", size=16)

for i in range(n_faces):
    true_face = np.hstack((X_test[i], y_test[i]))

    if i:
        sub = plt.subplot(n_faces, n_cols, i * n_cols + 1)
    else:
        sub = plt.subplot(n_faces, n_cols, i * n_cols + 1,
                          title="true faces")

    sub.axis("off")
    sub.imshow(true_face.reshape(image_shape),
               cmap=plt.cm.gray,
               interpolation="nearest")

    for j, est in enumerate(sorted(ESTIMATORS)):
        completed_face = np.hstack((X_test[i], y_test_predict[est][i]))

        if i:
            sub = plt.subplot(n_faces, n_cols, i * n_cols + 2 + j)

        else:
            sub = plt.subplot(n_faces, n_cols, i * n_cols + 2 + j,
                              title=est)

        sub.axis("off")
        sub.imshow(completed_face.reshape(image_shape),
                   cmap=plt.cm.gray,
                   interpolation="nearest")

plt.show()
数分待って以下のような画面がポップアップで出てきたら正常稼働できています。
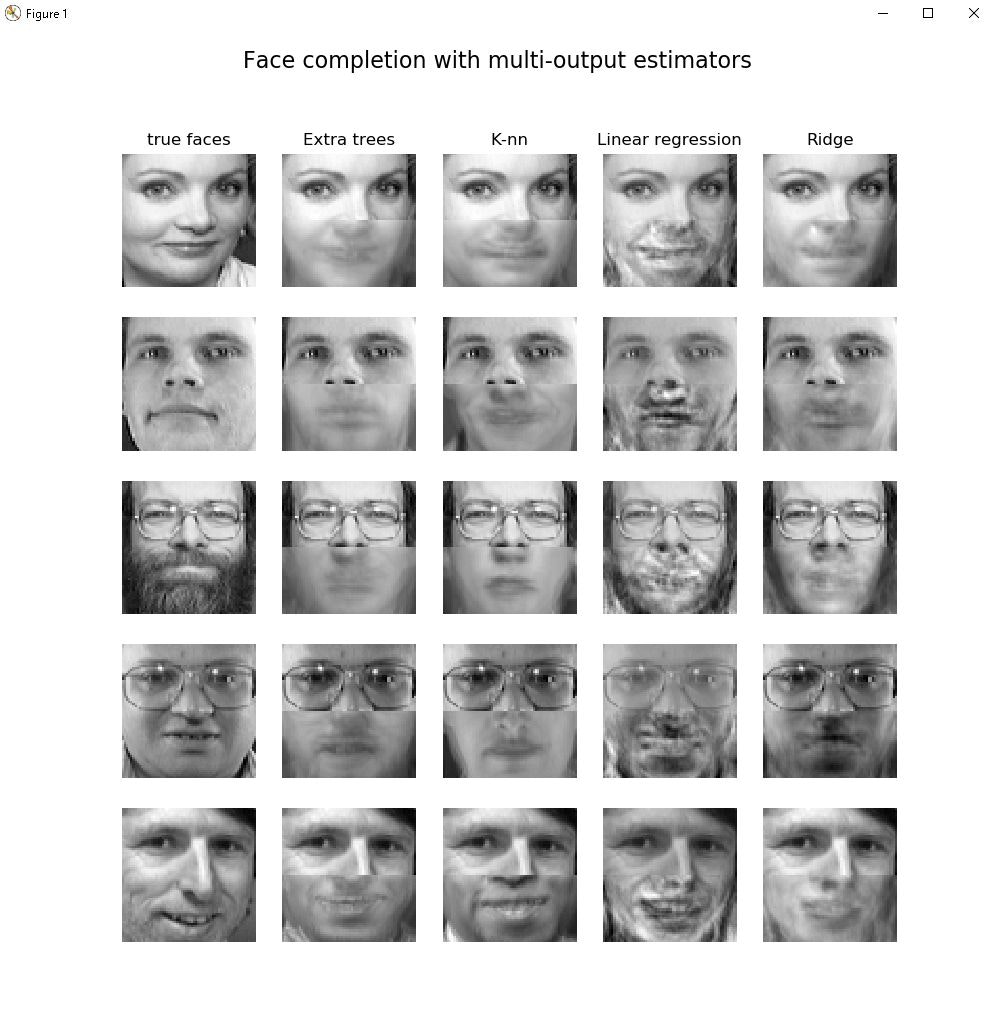
ちなみに上記画像の簡単な説明をしておきましょう。これは複数のアルゴリズムを使用した結果の画像が表示されています。具体的には人間の上半分の顔をターゲットにして顔の下半分を予測しています。画像の一番左側の列の写真は元の現画像の顔(つまり人間の普通の顔)を示しています。左から二番目の顔から右側にそれぞれアルゴリズムが違います。2番目はランダムフォレスト、3番目はk近傍法、4番目は線形回帰、5番目はリッジ回帰です。
つまりあなたのPC上でこれらのアルゴリズムが稼働し顔の下半分を予測した結果が示されています。さて、scikit-learnの起動や結果を無事確認する事ができたら次は今回の対象ファイル(テスト2)についても実行していきましょう。
もうひとつの対象ファイル(テスト2)実行
テスト2で使用するライブラリパッケージバージョンは以下です。
ご自身に合ったバージョン環境を設定してみてください。
推奨
Python 3.6.8
numpy 1.15.4
scikit-learn 0.20.1
Pillow 5.4.1
今回試してみたバージョン
Python 3.6.8
numpy 1.16.2
scikit-learn 0.21.2
Pillow 6.0.0
ちなみにPillowとPILは共存ができません。
PILは2011年開発が停止した画像処理ライブラリなので
pillowをインストールしてください。
コマンド

pip3 install pillow
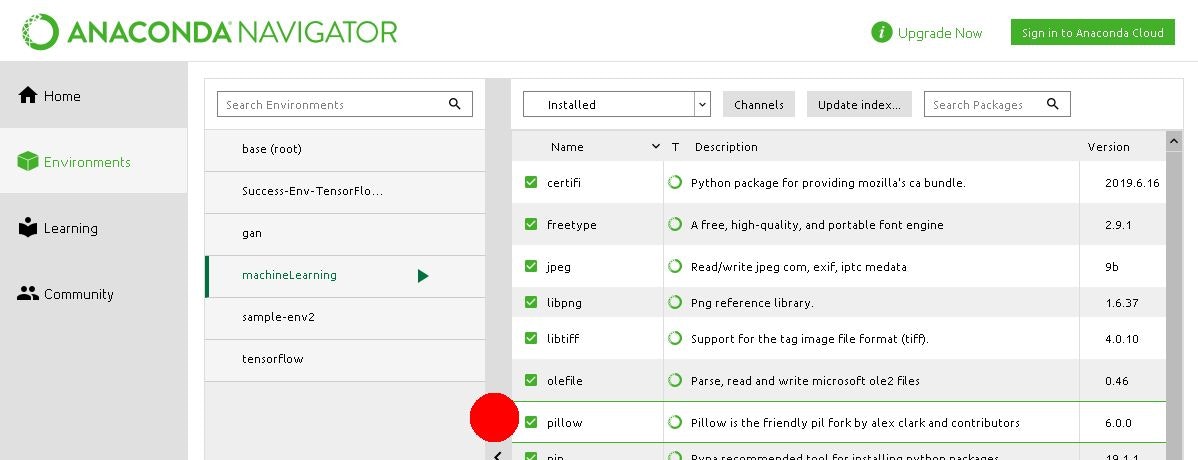
追記
ターミナルから上記インストールしても以下エラーが出ましたので
ModuleNotFoundError: No module named 'PIL'
ナビゲータ上からインストールする事で正常起動を確認しました。
インストールが正常終了したら以下pyファイルを自分のPCローカル環境に保存して
実行してください。※実行コマンドは以下を参考にしてみてください。
今回のプログラム
前述と同じように以下ソースをコピペしてsample.pyとしてローカル環境に保存します。
実行コマンドは以下を参考にしてください。
python C:\Users\xxx\Desktop\sample.py
import tkinter as tk
import tkinter.filedialog as fd
import PIL.Image
import PIL.ImageTk

#機械学習モジュール
import sklearn.datasets
import sklearn.svm
import numpy

#画像ファイルを数値リストに変換する
def imageToData(filename):
    #画像を8x8のグレースケールに変換する
    grayImage = PIL.Image.open(filename).convert("L")
                        # 画像を開く      グレースケール
    grayImage = grayImage.resize((8,8), PIL.Image.ANTIALIAS)
    #その画像を表示
    dispImage = PIL.ImageTk.PhotoImage(grayImage.resize((300, 300)))
    imageLabel.configure(image = dispImage)
    imageLabel.image = dispImage

    #数値リストに変換する
    numImage = numpy.asarray(grayImage, dtype = float)
    numImage = numpy.floor(16 - 16 * (numImage / 256))
    numImage = numImage.flatten()

    return numImage

def predictDigits(data):
    #学習用データを読み込む
    digits = sklearn.datasets.load_digits()
    #機械学習をする
    clf = sklearn.svm.SVC(gamma = 0.001)
    clf.fit(digits.data, digits.target)
    #予測結果を表示する
    n = clf.predict([data])
    textLabel.configure(text = "この画像は" + str(n) + "です")

#ファイルダイアログを開く
def openFile():
    fpath = fd.askopenfilename()
    if fpath:
        #画像を数値リストに変換する
        data = imageToData(fpath)

        #数字を予測する
        predictDigits(data)

#アプリのウインドウを作る
root = tk.Tk()
root.geometry("400x400")

btn = tk.Button(root, text="ファイルを開く", command = openFile)
imageLabel = tk.Label()

btn.pack()
imageLabel.pack()

#予測結果を表示させるラベル
textLabel = tk.Label(text = "数字を当てます")
textLabel.pack()

tk.mainloop()
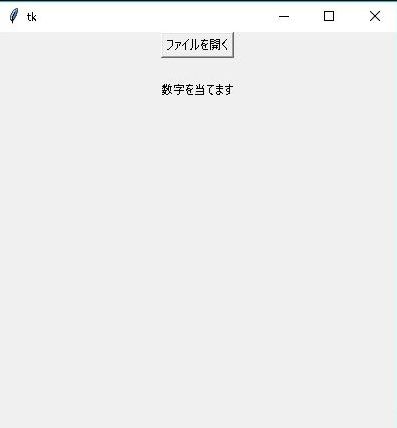
画面が起動し手書き文字が認識・確認できれば以上です。お疲れ様でした。
番外編 よく使うanacondaのコマンドを記載します。ご参考までに
# condaのアップデート
conda update conda

# ライブラリのインストール
conda install ライブラリ

# 仮想環境の作成。
conda create -n 仮想環境の名前 python=バージョン

# 作った仮想環境一覧の表示
conda info -e

# 仮想環境の削除
conda remove -n 仮想環境の名前

# 仮想環境を使う
# mac/linuxの場合
source activate 仮想環境の名前

# 仮想環境を使う
# windowsの場合
activate 仮想環境の名前

# 仮想環境から出る
source deactivate

# 今使っている仮想環境にインストールされているライブラリの一覧を表示
conda list