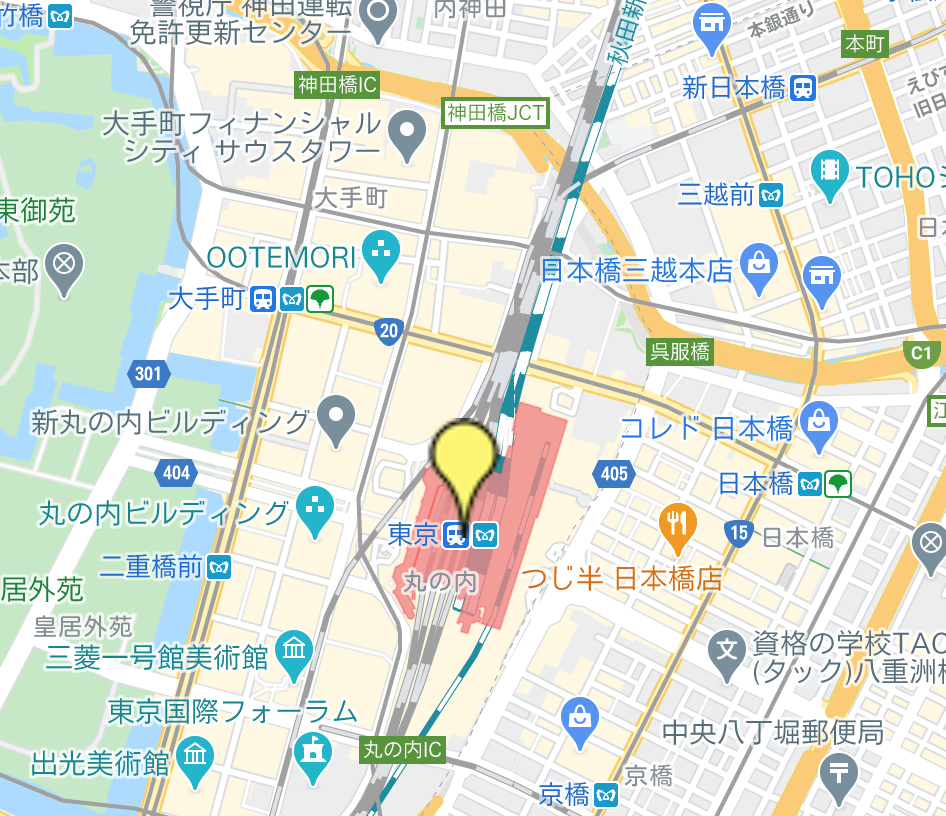
事前準備(APIキー取得)
Google maps APIを利用するには、まずAPIキーを取得しなければいけないです。
取得の方法については以下の通りです。
*Google Maps APIコンソールでAPIキーを作成する為に、Googleアカウントが必要なので、事前に準備の必要があります。
[Googleアカウントの作成]
(https://accounts.google.com/signup/v2/webcreateaccount?hl=ja&flowName=GlifWebSignIn&flowEntry=SignUp)
まず、Googleアカウントでログインします。
プロジェクトの作成
「プロジェクト名」を入力して作成ボタンをクリックします。

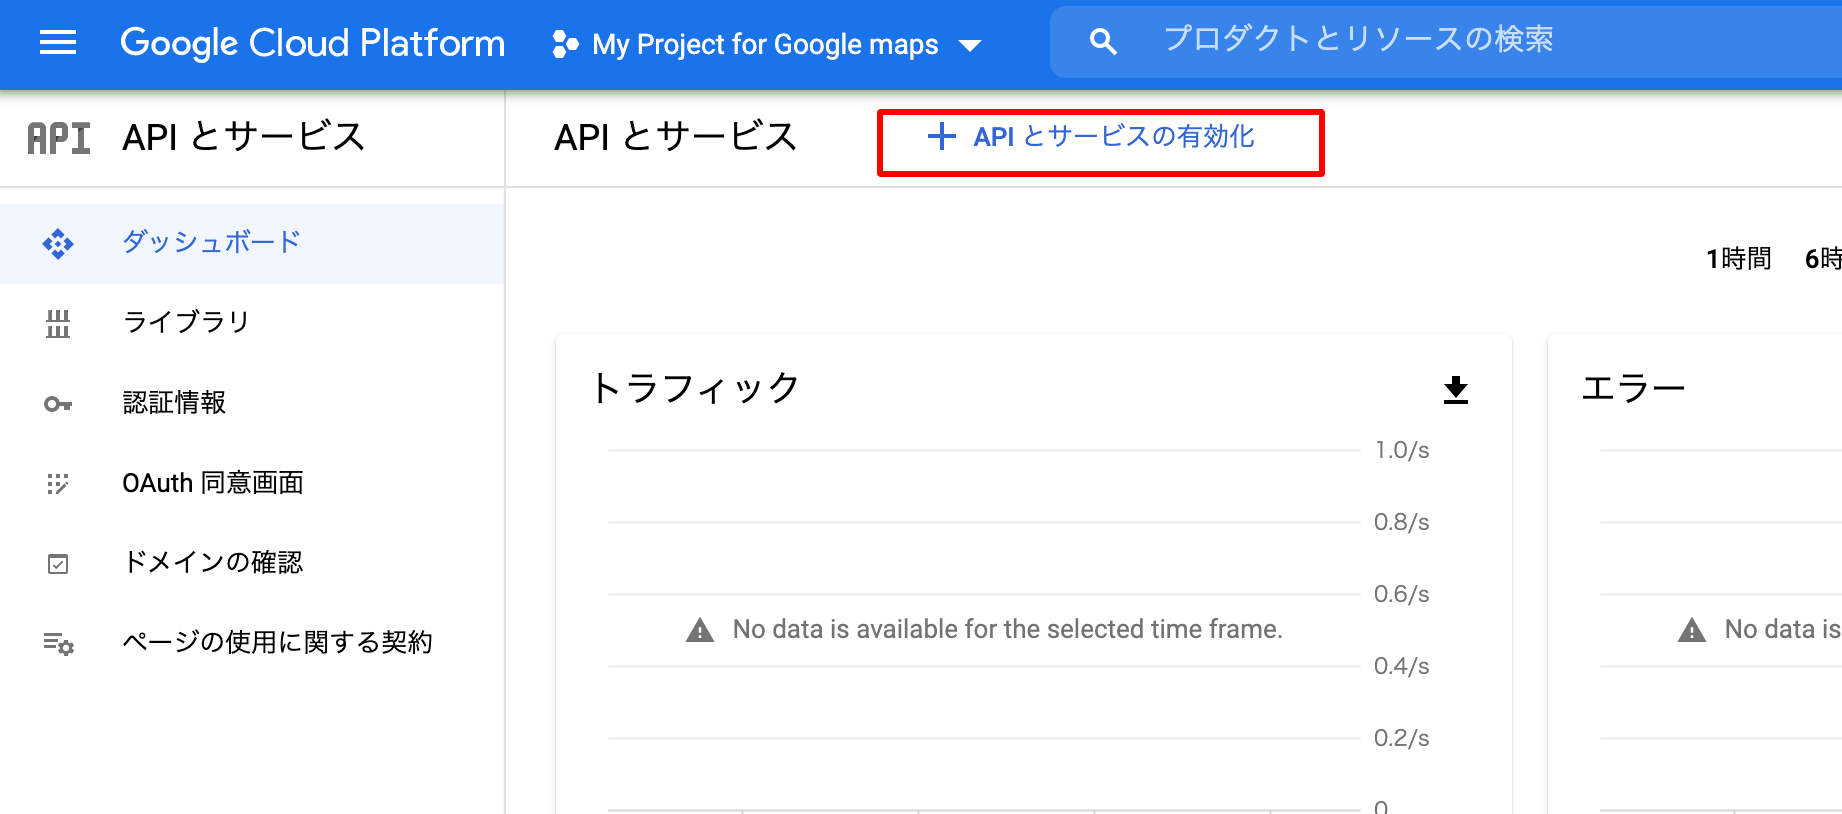
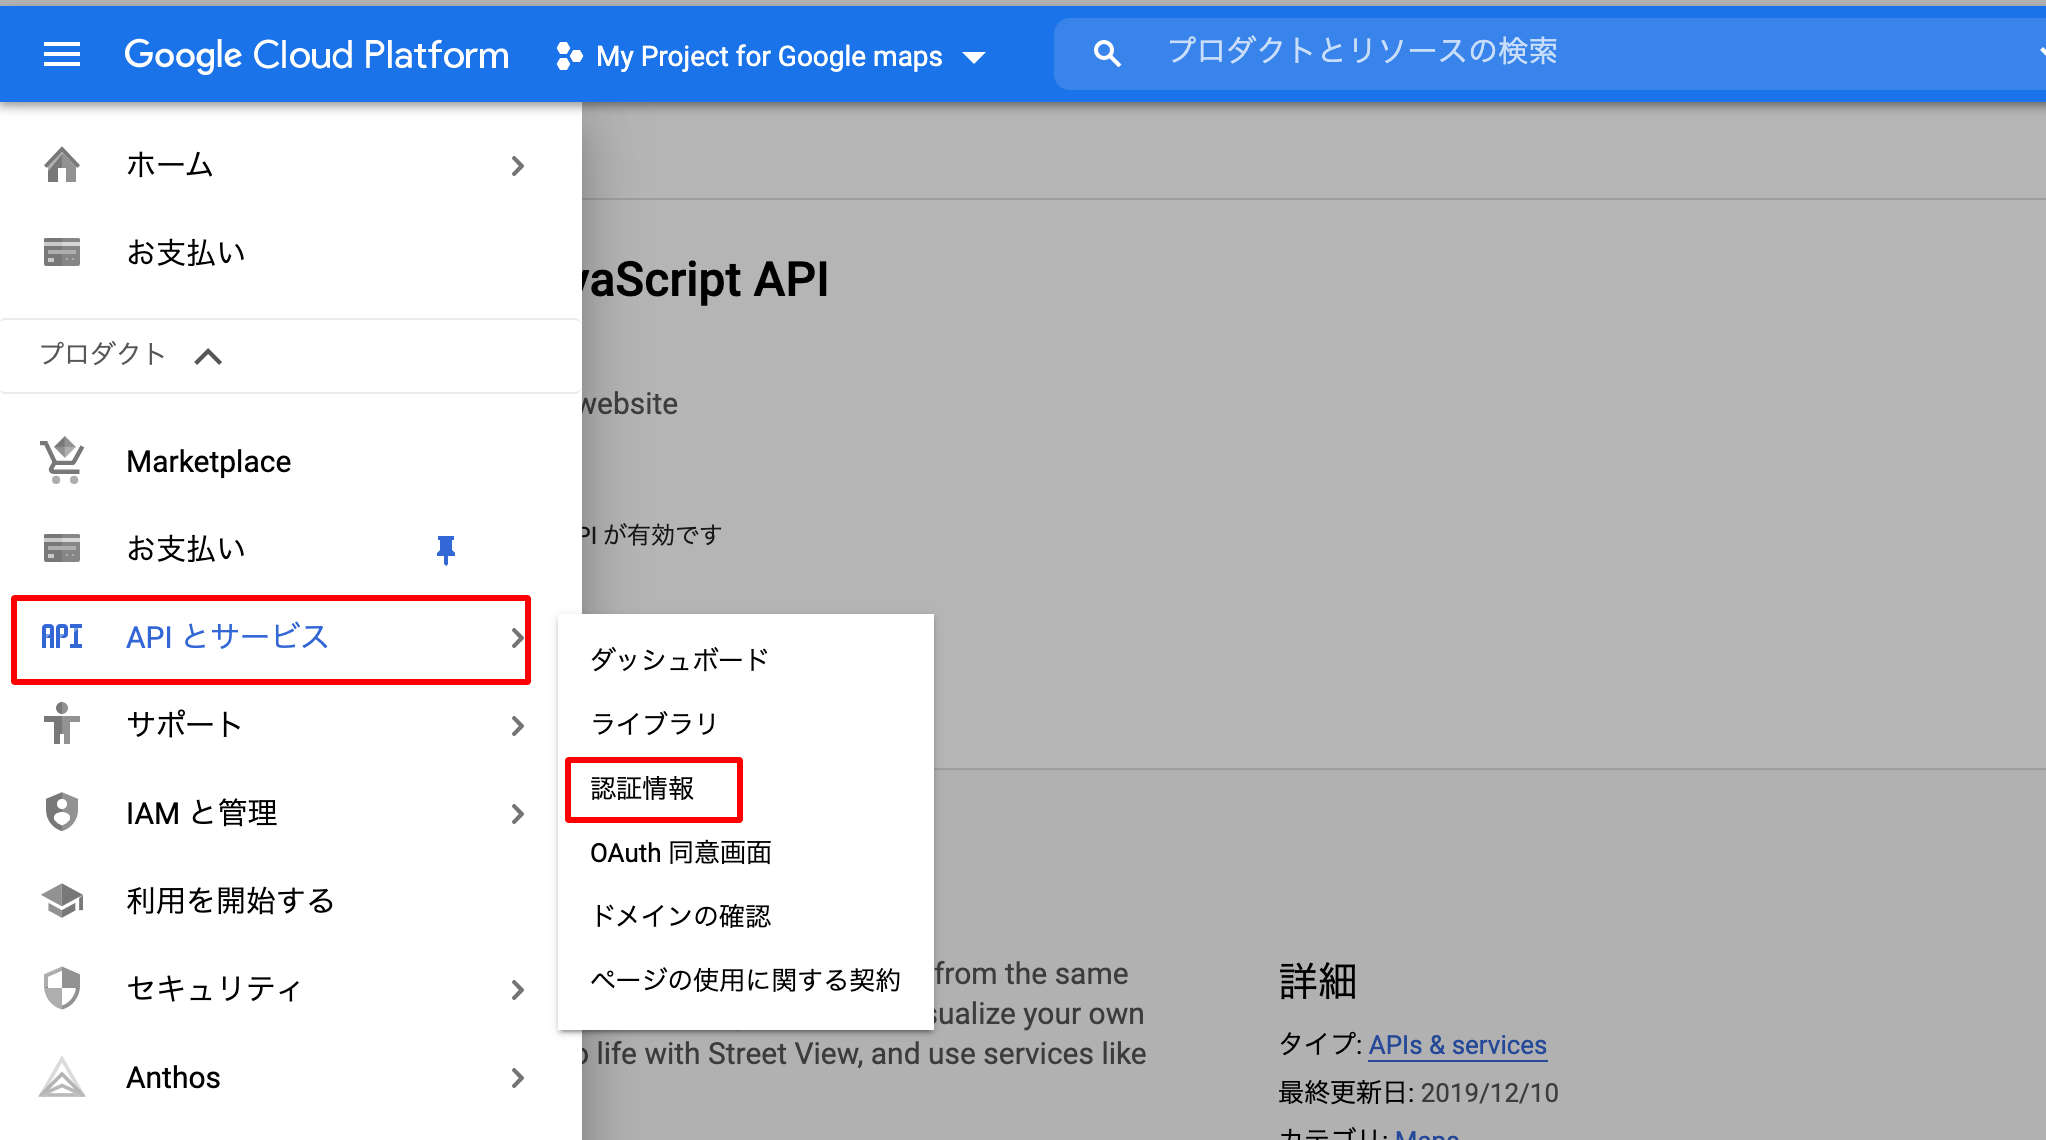
作成したプロジェクトを確認して、「APIとサービズ」→「ダッシュボード」の順番でクリックします。

APIの有効化
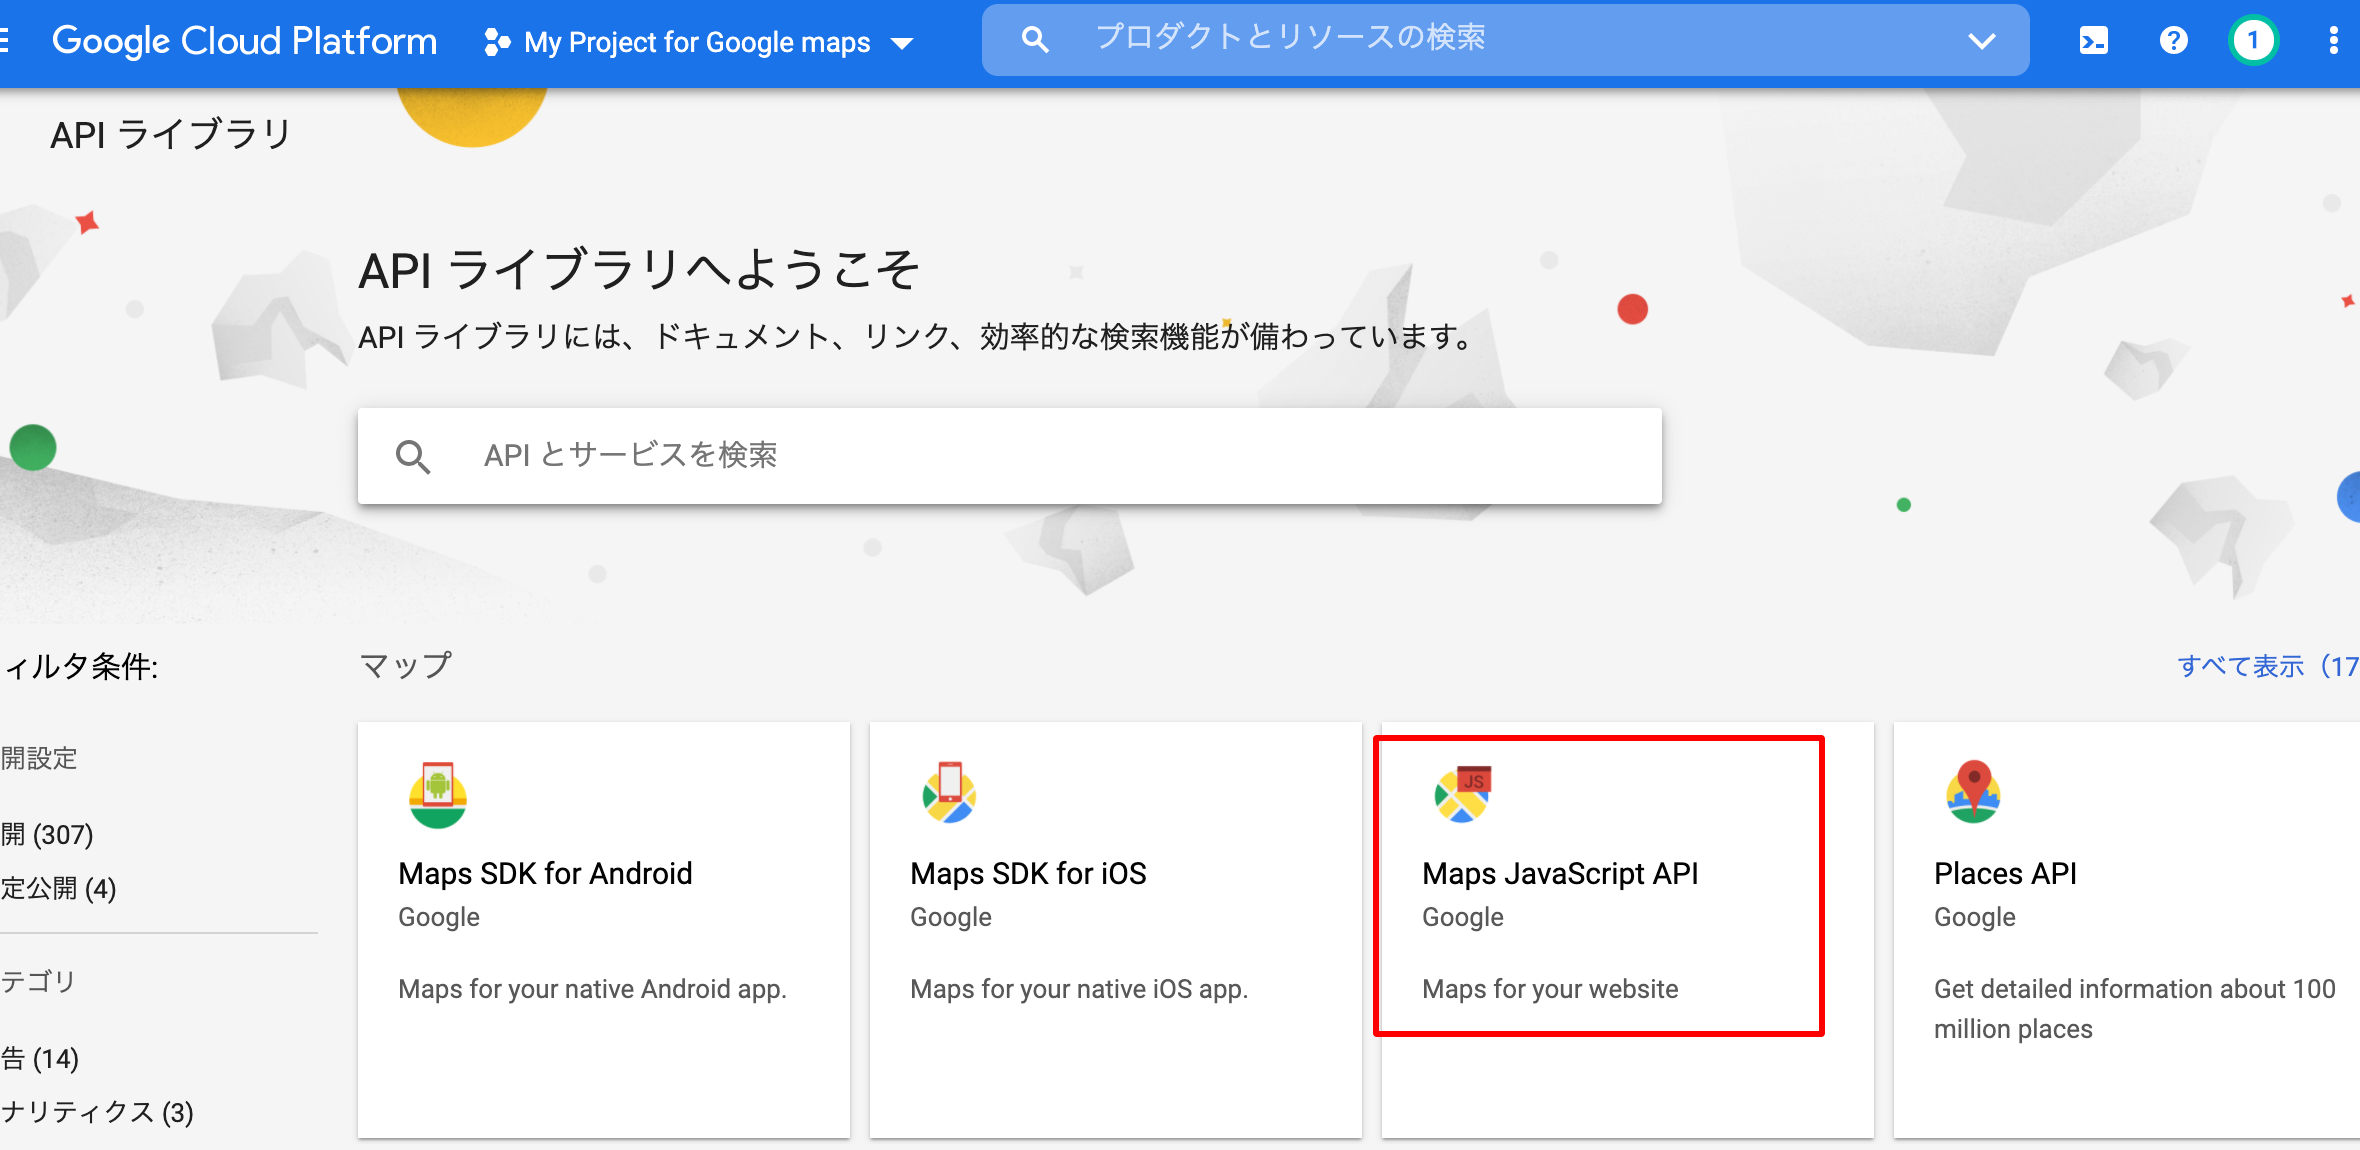
例:Maps JavaScript APIを有効化にしましょう!
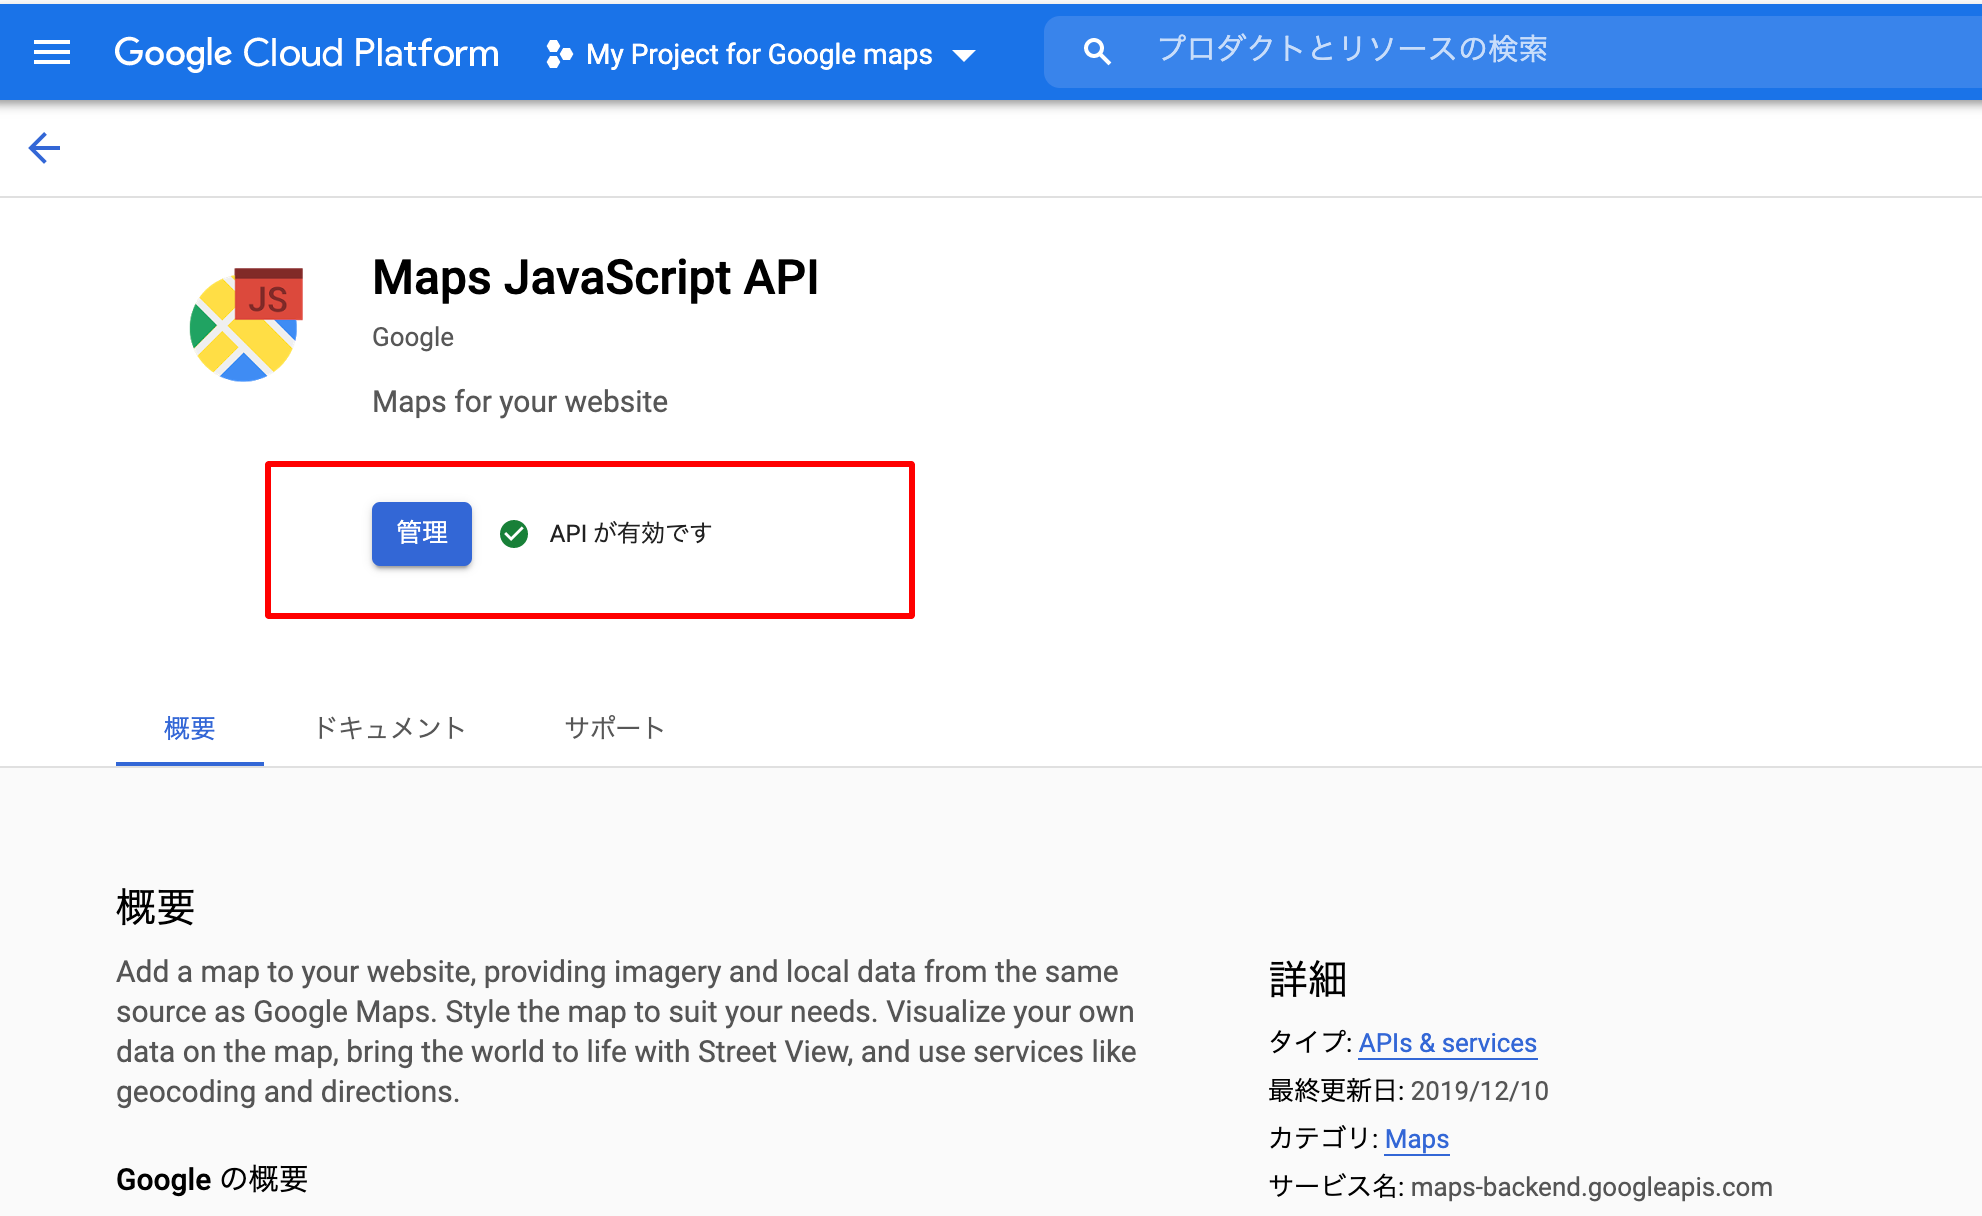
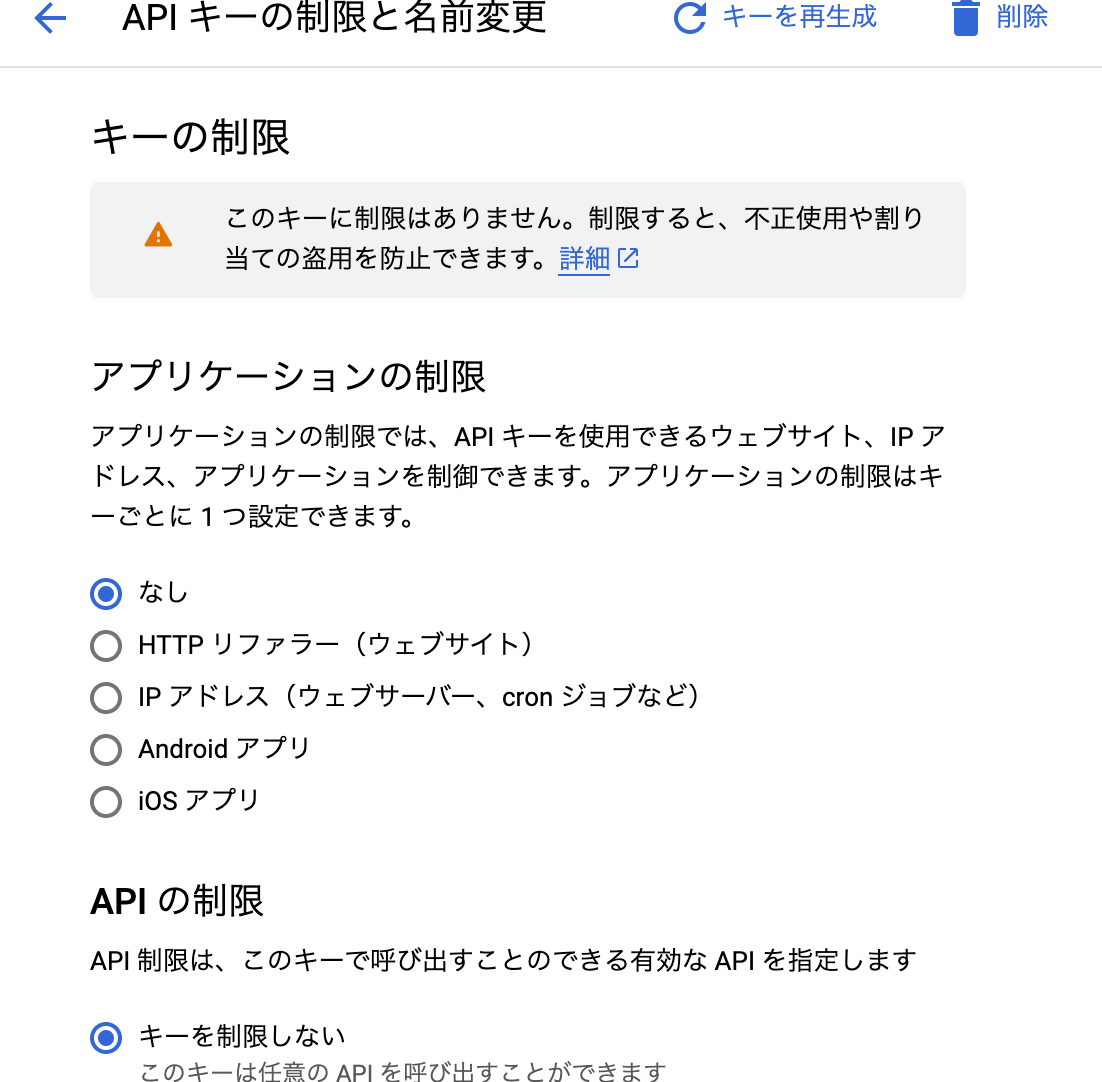
APIキーの取得


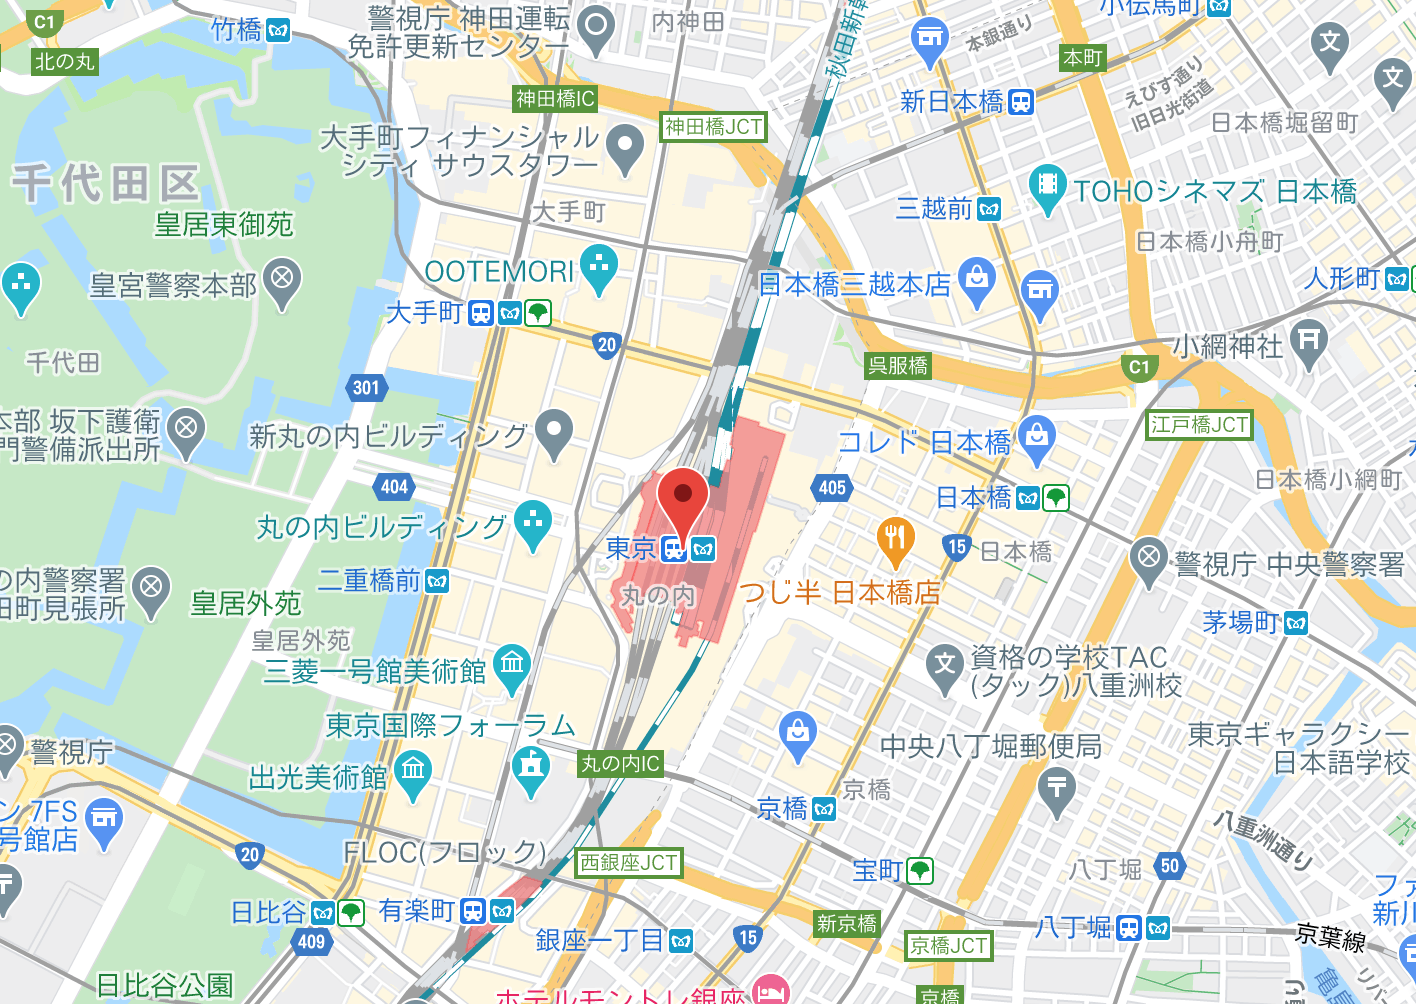
東京駅を表示する
html
<!DOCTYPE html>
<html lang="ja">
<head>
  <meta charset="UTF-8">
  <title>Sample_GoogleMap</title>
  <script src="http://maps.google.com/maps/api/js?key={}&language=ja"></script>
  <style>
    html { height: 100% }
    body { height: 100% }
    #map { height: 100%; width: 100%}
  </style>
</head>
<body>
  <div id="map"></div>
  <script>
    var MyLatLng = new google.maps.LatLng(35.6811673, 139.7670516);
    var Options = {
     zoom: 15,
     center: MyLatLng,
     mapTypeId: 'roadmap'
    };
    var map = new google.maps.Map(document.getElementById('map'), Options);
    var marker = new google.maps.Marker({
      position: map.getCenter(),
      map: map,

    });
  </script>
</body>
</html>
東京駅のマーカーを変更する
html
<!DOCTYPE html>
<html lang="ja">
<head>
<meta charset="UTF-8">
<title>Sample_GoogleMap</title>
<script src="http://maps.google.com/maps/api/js?key={}&language=ja"></script>
<style>
html { height: 100% }
body { height: 100% }
# map { height: 100%; width: 100%}
</style>
</head>
<body>
<div id="map"></div>
<script>
var MyLatLng = new google.maps.LatLng(35.6811673, 139.7670516);
var Options = {
 zoom: 15,
 center: MyLatLng,
 mapTypeId: 'roadmap'
};
var map = new google.maps.Map(document.getElementById('map'), Options);
var marker = new google.maps.Marker({
  position: map.getCenter(),
  map: map,

 // アイコンの画像を表示する。
 icon: {
      url: "https://maps.google.com/mapfiles/ms/micons/yellow.png",
      scaledSize: new google.maps.Size(60, 60)
    }
});
</script>
</body>
</html>
