はじめに
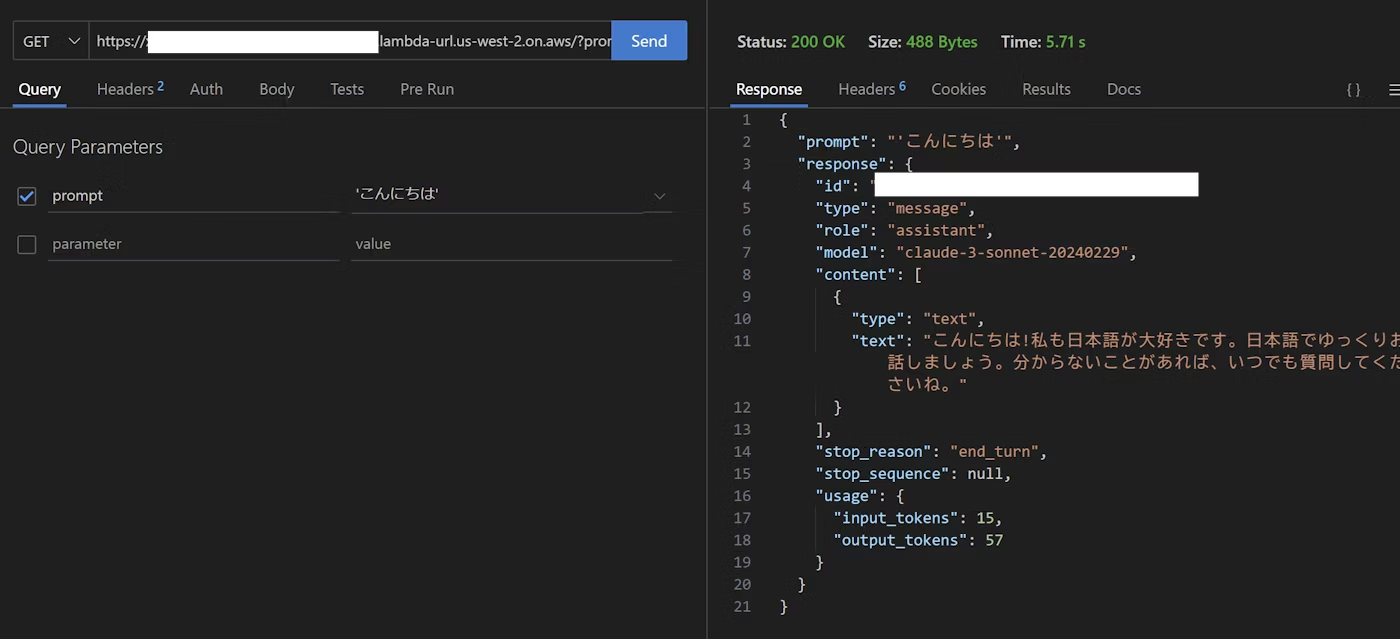
直接APIを実行できることが確認出来たら、画面を作ってみましょう。
こんな感じ

以下コードの<ここは自分の関数URLの値を入れてください>をご自身の関数URLの値に書き換えてから、
ローカルの任意のフォルダに格納し、ブラウザで開いてみてください。
<!DOCTYPE html>
<html lang="ja">
<head>
<meta charset="UTF-8">
<title>Lambda GET Request Form</title>
<style>
body {
font-family: sans-serif;
max-width: 800px;
margin: 20px auto;
padding: 0 20px;
}
.form-group {
margin-bottom: 20px;
}
label {
display: block;
margin-bottom: 8px;
font-weight: bold;
}
textarea {
width: 100%;
min-height: 100px;
padding: 12px;
border: 1px solid #ddd;
border-radius: 4px;
font-size: 16px;
}
button {
background-color: #007bff;
color: white;
padding: 12px 24px;
border: none;
border-radius: 4px;
cursor: pointer;
font-size: 16px;
}
button:hover {
background-color: #0056b3;
}
button:disabled {
background-color: #cccccc;
cursor: not-allowed;
}
#result {
margin-top: 20px;
padding: 15px;
border: 1px solid #ddd;
border-radius: 4px;
display: none;
background-color: #f8f9fa;
}
.loader-container {
display: none;
text-align: center;
margin-top: 20px;
}
.loader {
border: 5px solid #f3f3f3;
border-top: 5px solid #007bff;
border-radius: 50%;
width: 30px;
height: 30px;
animation: spin 1.5s linear infinite;
margin: 0 auto;
}
@keyframes spin {
0% { transform: rotate(0deg); }
100% { transform: rotate(360deg); }
}
.loader-text {
margin-top: 10px;
font-size: 14px;
color: #666;
}
</style>
</head>
<body>
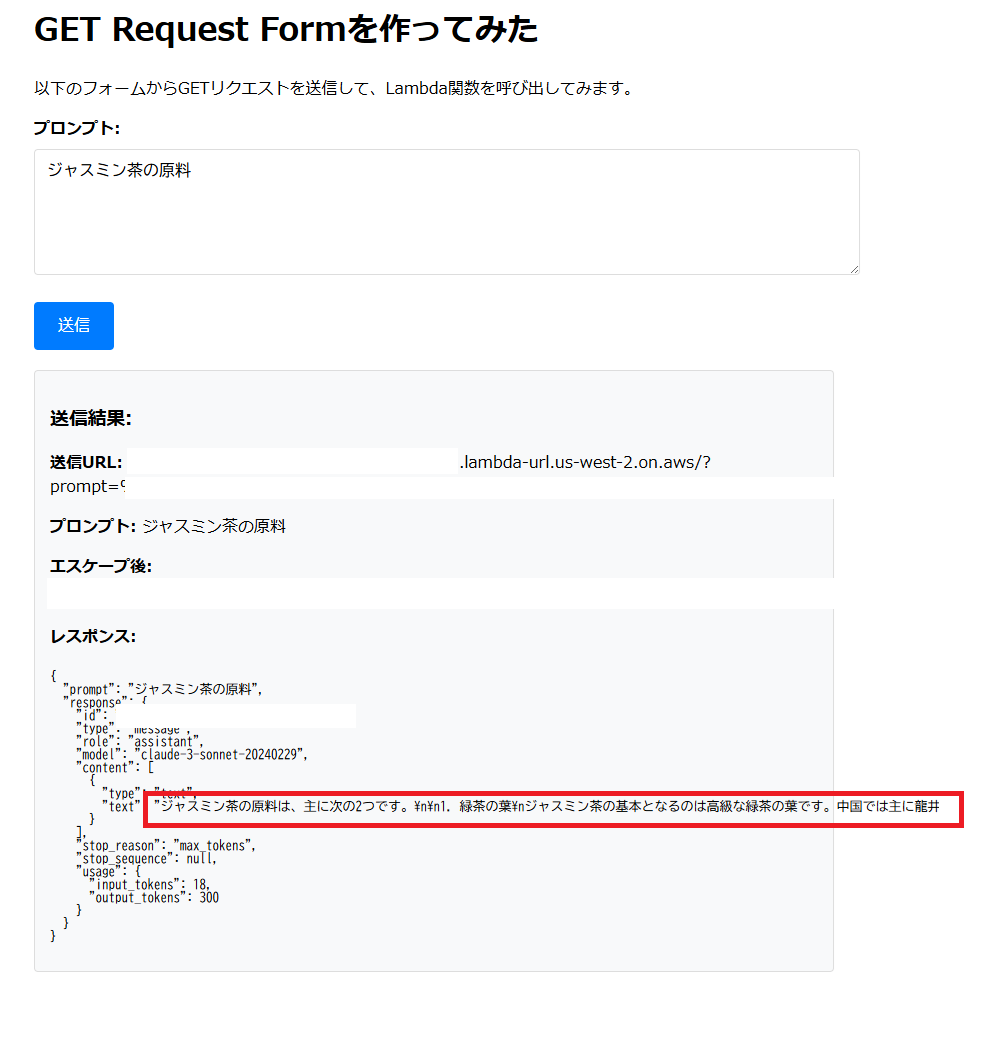
<h1>GET Request Formを作ってみた</h1>
<p>以下のフォームからGETリクエストを送信して、Lambda関数を呼び出してみます。</p>
<form id="getForm" onsubmit="sendGetRequest(event)">
<div class="form-group">
<label for="prompt">プロンプト:</label>
<textarea id="prompt" name="prompt" required>ジャスミン茶の原料</textarea>
</div>
<button type="submit" id="submitButton">送信</button>
</form>
<div class="loader-container" id="loaderContainer">
<div class="loader"></div>
<div class="loader-text">APIリクエスト処理中...</div>
</div>
<div id="result"></div>
<script>
async function sendGetRequest(event) {
event.preventDefault();
// ローディング表示を開始
const loaderContainer = document.getElementById('loaderContainer');
const submitButton = document.getElementById('submitButton');
const resultDiv = document.getElementById('result');
// 以前の結果を非表示にする
resultDiv.style.display = 'none';
// ローダーを表示
loaderContainer.style.display = 'block';
// 送信ボタンを無効化
submitButton.disabled = true;
const prompt = document.getElementById('prompt').value;
const escapedPrompt = encodeURIComponent(prompt);
const url = `https://<ここは自分の関数URLの値を入れてください>.lambda-url.us-west-2.on.aws/?prompt=${escapedPrompt}`;
try {
const response = await fetch(url, {
method: 'GET',
headers: {
'Content-Type': 'application/json',
},
mode: 'cors', // CORSモードを明示的に設定
});
if (!response.ok) {
throw new Error(`HTTP error! status: ${response.status}`);
}
const data = await response.json(); // JSONとしてパース
// 結果を表示
resultDiv.style.display = 'block';
resultDiv.innerHTML = `
<h3>送信結果:</h3>
<p><strong>送信URL:</strong> ${url}</p>
<p><strong>プロンプト:</strong> ${prompt}</p>
<p><strong>エスケープ後:</strong> ${escapedPrompt}</p>
<h4>レスポンス:</h4>
<pre>${JSON.stringify(data, null, 2)}</pre>
`;
} catch (error) {
resultDiv.style.display = 'block';
resultDiv.innerHTML = `
<h3>エラー発生:</h3>
<p>送信URL: ${url}</p>
<p>エラー内容: ${error.message}</p>
`;
} finally {
// ローディング表示を終了
loaderContainer.style.display = 'none';
// 送信ボタンを再度有効化
submitButton.disabled = false;
}
}
</script>
</body>
</html>
テキストエリアに任意のプロンプトを入力して、送信ボタンをクリックすると関数URLを実行します。
しかし以下のようなエラーが発生します。

手順
ローカルで実行
Lambda関数のCORS設定
「Access-Control-Allow-Origin」が許可されてないと怒られているので、追加します
設定 > 関数 URL から編集をクリック

CORSの設定を変更します。
・公開ヘッダー:access-control-allow-origin
・許可ヘッダー:content-type
・許可メソッド:GET、POST

※こんな感じ


保存します。

再度画面から実行すると成功します!やったね!
500系エラーで失敗する場合
timeout時間が短い可能性があります。
以下手順で20秒くらいに増やしてみてください。
S3に格納して公開してみる
今の状態ではローカルでしか画面が見れないので上司に自慢できません。
S3に配置して公開してみましょう。
S3を選択します

バケットを作成
バケットを作成します

名前を入力して、アクセス設定を以下のように設定
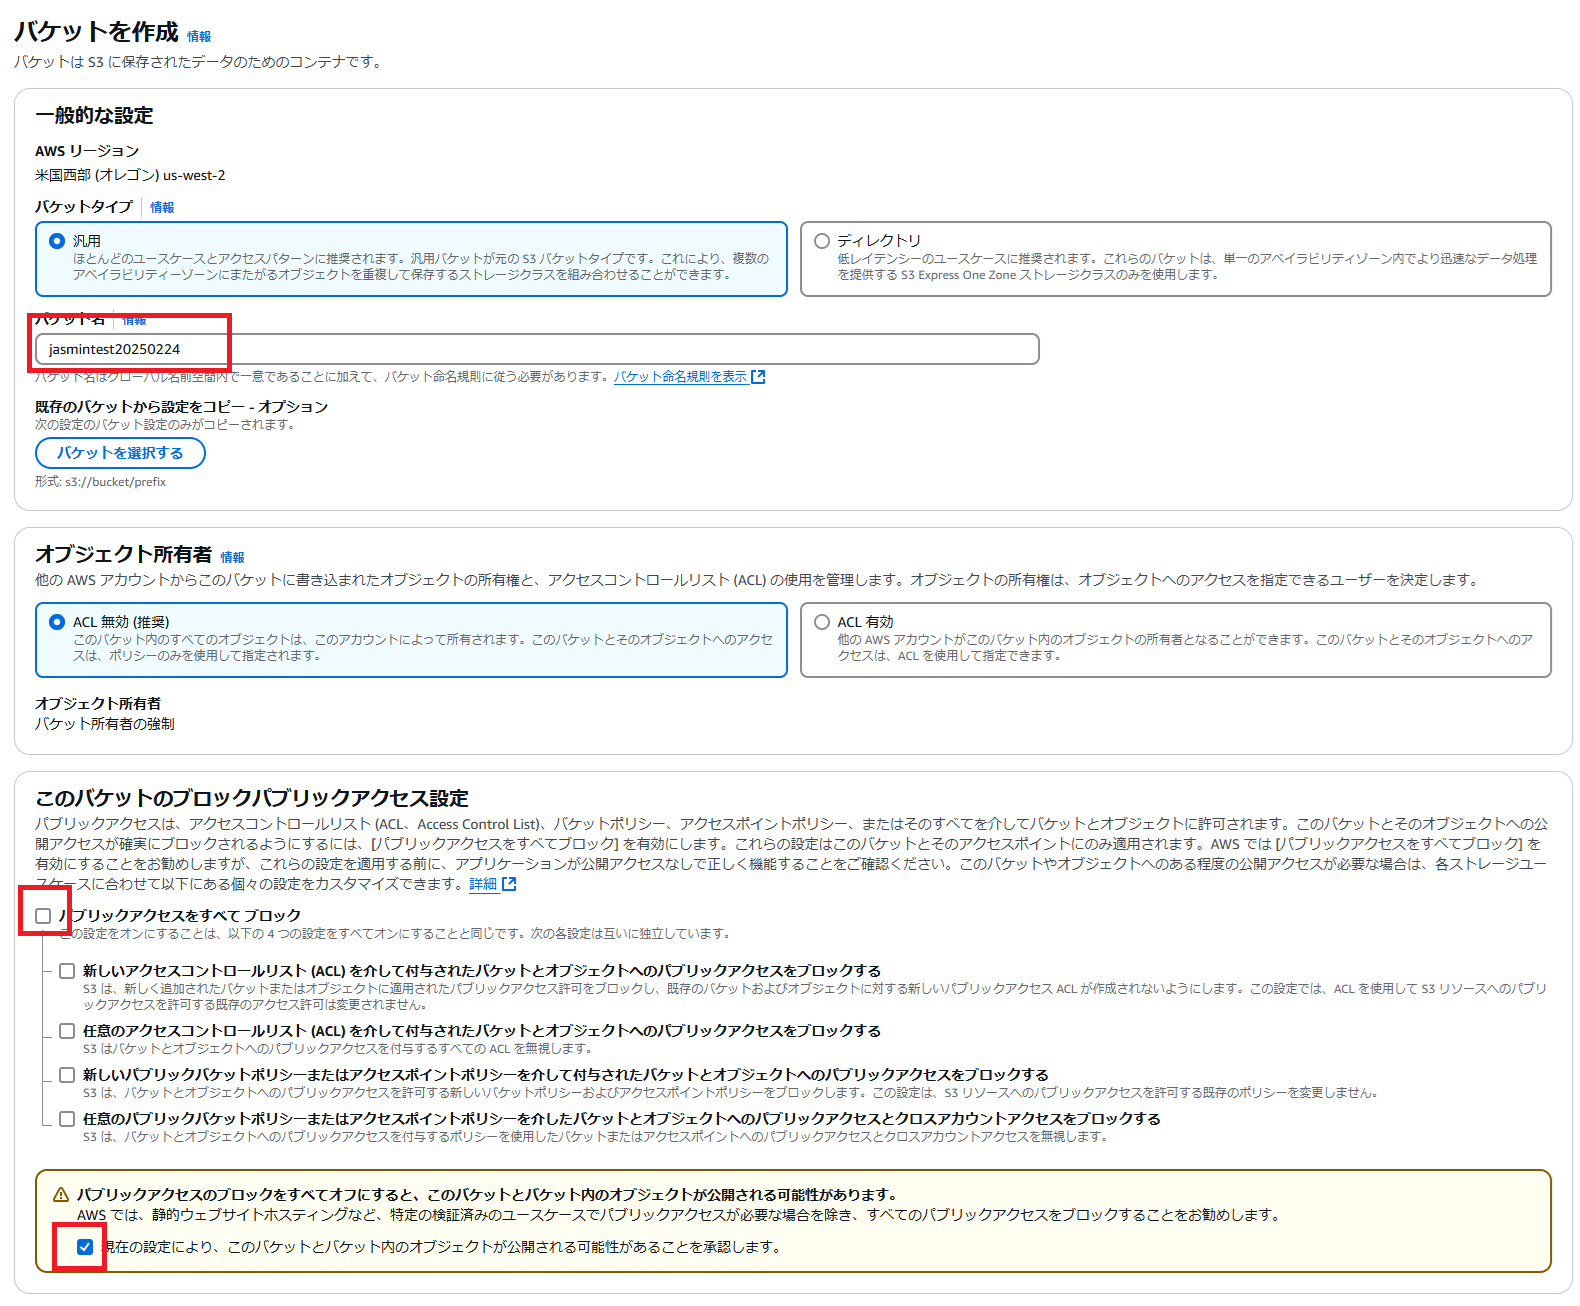
他はデフォルトのままで、バケットを作成
静的ウェブサイトホスティングの設定
作成したバケットを検索して、クリック

プロパティページ一番下の「静的ウェブサイトホスティング」の編集をクリック


静的ウェブサイトホスティングのラジオボタンで有効にするを選択すると、いろいろ出てきます。
インデックスドキュメントに index.htmlをとりあえず設定します。
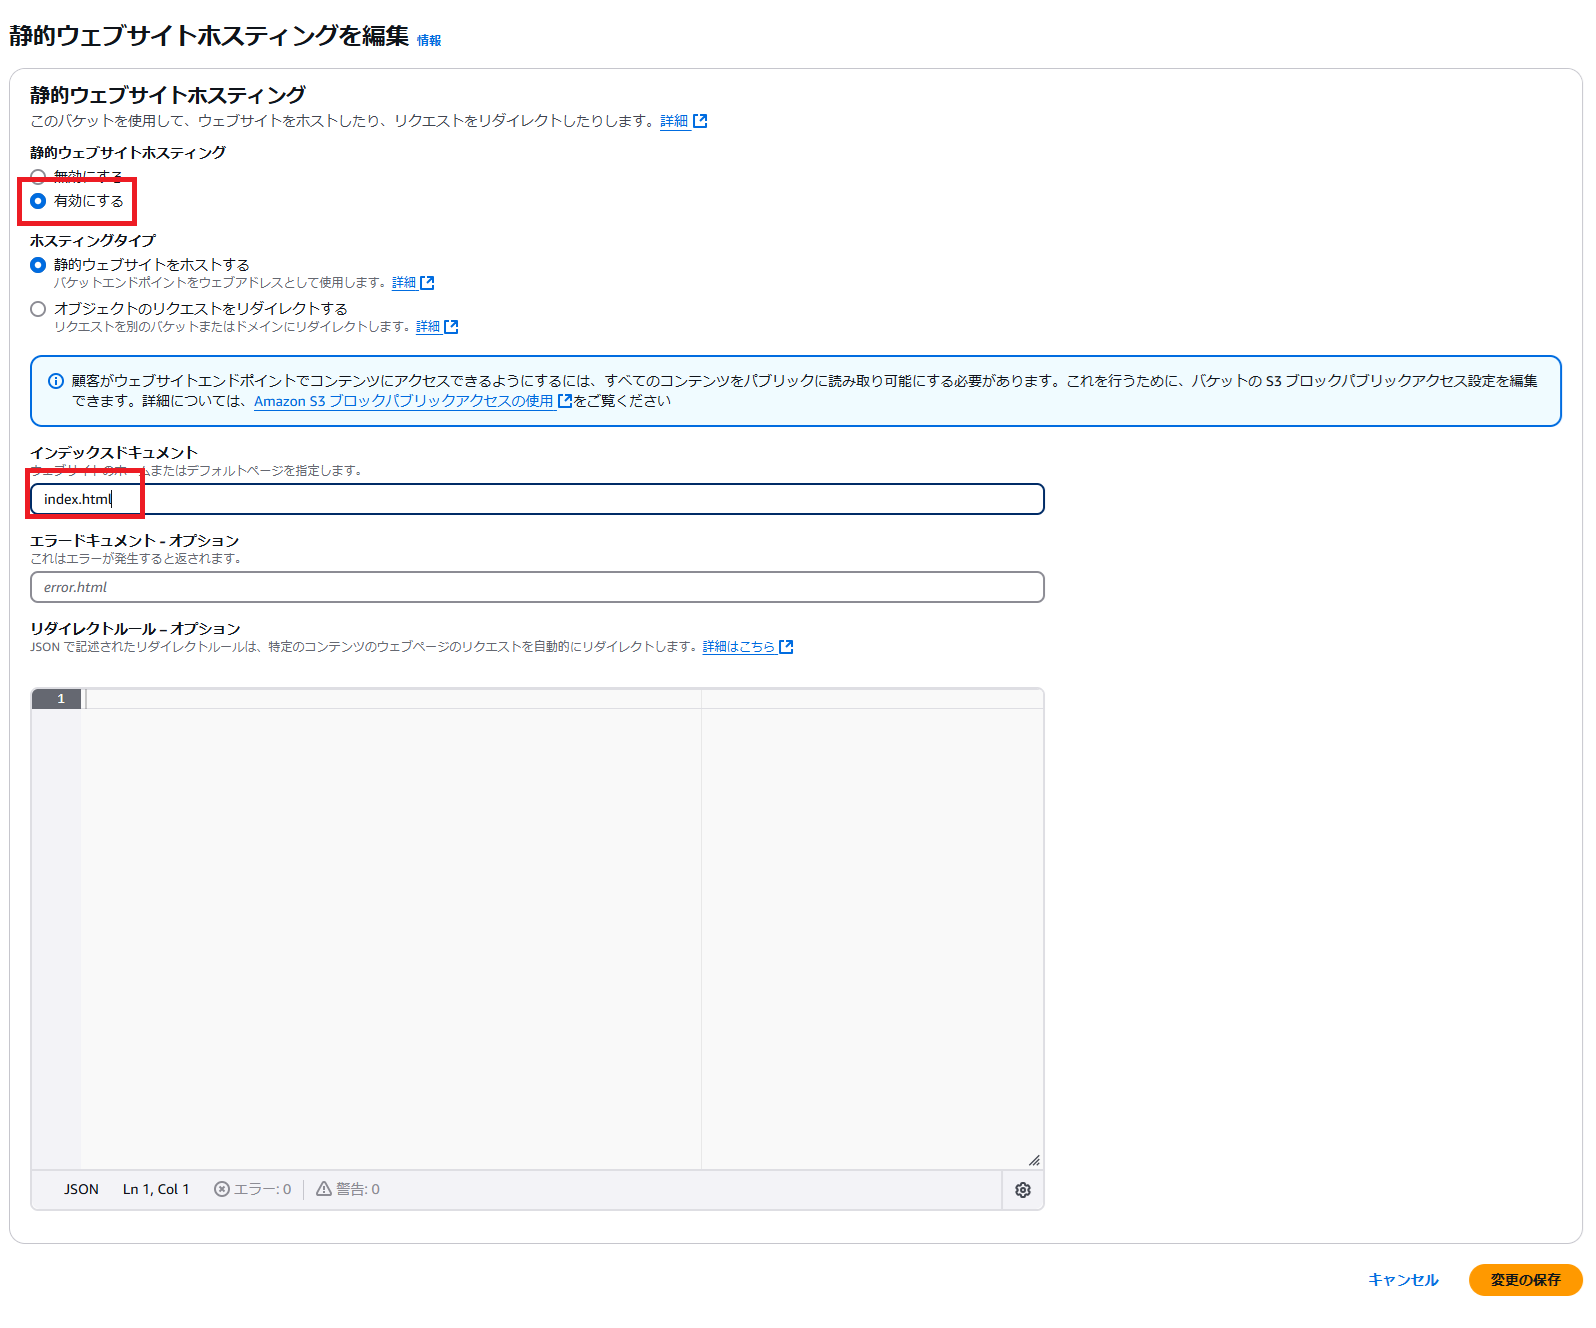
保存
バケットポリシーの設定
バケットポリシーの編集をクリック

赤枠にポリシーを設定して保存

{
    "Version": "2012-10-17",
    "Statement": [
        {
            "Effect": "Allow",
            "Principal": "*",
            "Action": "s3:GetObject",
            "Resource": "arn:aws:s3:::<S3のPath>/*"
        }
    ]
}
画面のファイルをアップロード
オブジェクトのアップロードボタンをクリック

ローカルで確認したHTMLファイルをドラッグアンドドロップでファイルを追加して、アップロード

完了画面を閉じます

プロパティページの一番したにURLがあるのでクリック


画面が開けます。

送信ボタンを押してみると、APIが呼ばれたことが確認できます。
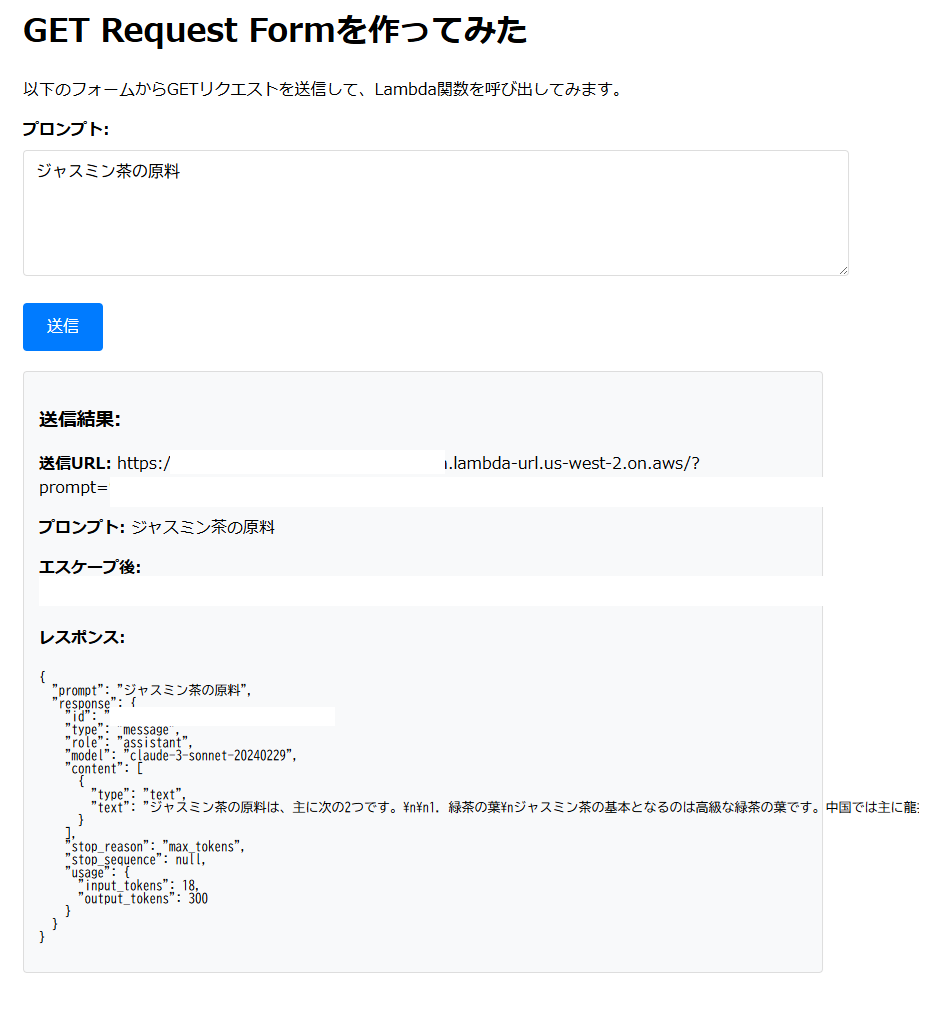
やったー!!!