概要
cv2.resize(img, Size,fx=0,fy=0,interpolation=INTER_LINEAR)
・img: ndarray
・Size: (w,h) サイズの大きさ
・fx x方法の倍率
・fy y方法の倍率
・interpolation: リサイズの処理方法
cv2.resizeはリサイズするために二つの方法が含んでいます。最初にSizeです。希望のサイズを設定して (例え、(256,256) )、画像はこのサイズへ変換します。二つ目の方法は、fxとfyの倍率の方法です。最初に SizeはNoneと設定して、fxとfyのfloatの値により、リサイズを行います。
Sample Code サンプルコード
import matplotlib.pyplot as plt
import cv2
img=cv2.imread("doge.jpg")[:,:,::-1]
#Resize D Size
img_ds=cv2.resize(img,(500,300)) # ( X, Y)
#Resize fx fy
img_fs=cv2.resize(img,None,fx=0.5,fy=0.5)

fig,axs=plt.subplots(1,3,figsize=(12,8))
axs[0].imshow(img)
axs[0].set_title("Original")

axs[1].imshow(img_ds)
axs[1].set_title("Resize 300x500")

axs[2].imshow(img_fs)
axs[2].set_title("Resize fx 0.5 fy 0.5")
Interpolationについて
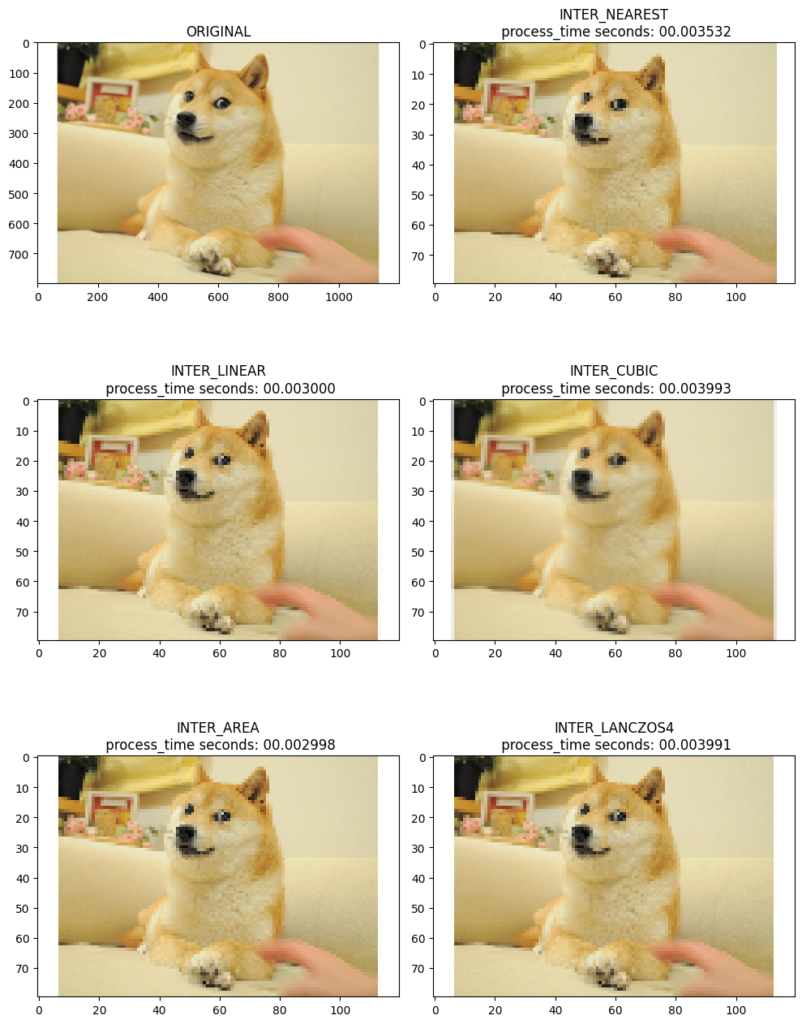
Interpolationは5つの種類があり、標準の設定はcv2.INTER_LINEARです。それぞれは方法や計算時間が異なっています。
・cv2.INTER_NEAREST :最近傍補間
・cv2.INTER_LINEAR : バイリニア補間(デフォルト)
・cv2.INTER_AREA :ピクセル領域の関係を利用したリサンプリング.画像を大幅に縮小する場合は,モアレを避けることができる良い手法です.
・cv2.INTER_CUBIC : 4x4 の近傍領域を利用するバイキュービック補間
・cv2.INTER_LANCZOS4 : 8x8 の近傍領域を利用する Lanczos法の補間
from datetime import datetime

def plot_resize_test(img_h,resize):
  dim_h=img_h.shape
  #resizeのオプション
  interpolations=["ORIGINAL",cv2.INTER_NEAREST,cv2.INTER_LINEAR,cv2.INTER_AREA,cv2.INTER_CUBIC,cv2.INTER_LANCZOS4]
  interpolation_names=["INTER_NEAREST","INTER_LINEAR","INTER_AREA","INTER_CUBIC","INTER_LANCZOS4"]
  fig,axs=plt.subplots(3,2,figsize=(10,15))
  axs=axs.reshape(-1)

  out_dic={}

  for ax,inter in zip(axs,interpolations):

    if inter == "ORIGINAL":
      ax.imshow(img_h)
      ax.set_title("ORIGINAL")
      out_dic["ORIGINAL"]=[1,img_h]

    else:
      start=datetime.now()
      img_pl_resize=cv2.resize(img_h,resize,interpolation=inter)
      end=datetime.now()
      print(dim_h,img_pl_resize.shape)
      p_time=end-start
     # p_time=p_time #.strftime('%S.%f')
      print(p_time)


      ax.imshow(img_pl_resize)
      ax.set_title(interpolation_names[inter]+ f"\n process_time (s): {str(p_time).split(':')[-1]}")

    fig.tight_layout()
機械学習のマスク画像の注意点
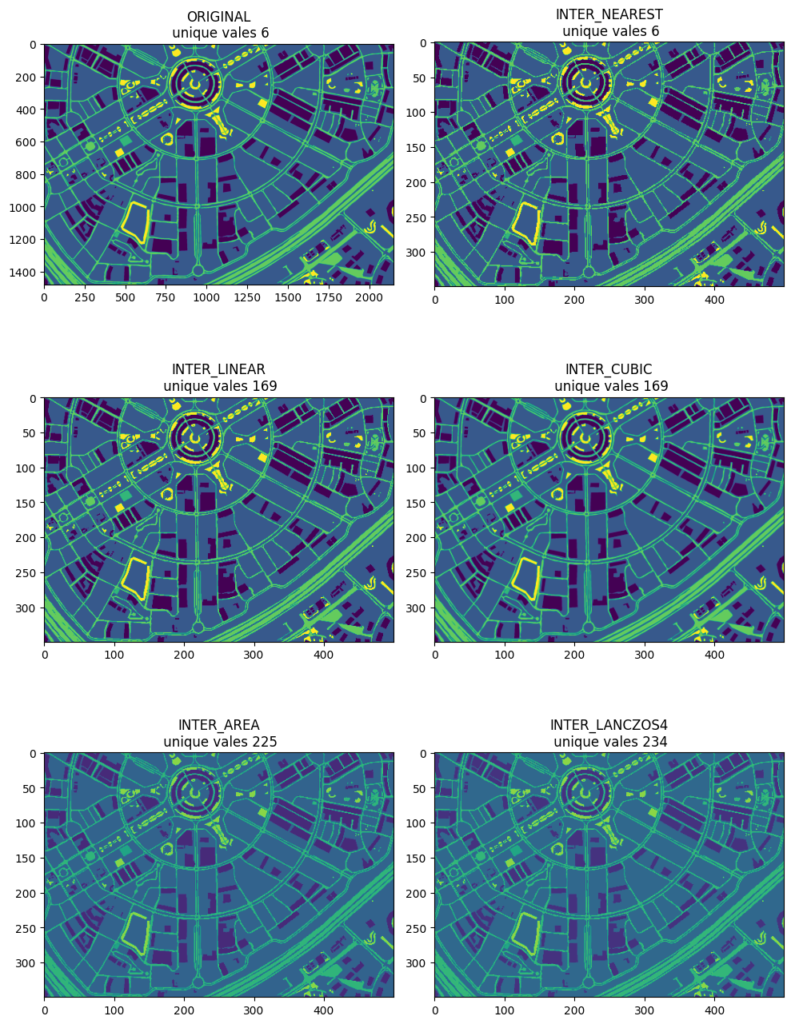
画像のセグメンテーションを訓練したいなら、マスクのデータが必要です。画像の中で、物体の範囲は普通に1つの値が割り当てられていますが、リサイズを行うときに、このラベル値を変化できます。ラベル数は少ないときに、あまり影響がありませんが、多いラベル数の場合、問題が発生します。なぜなら、ほとんどのInterpolationは値を変化するからです。INTER_NEARESTのみで値を変化しません。
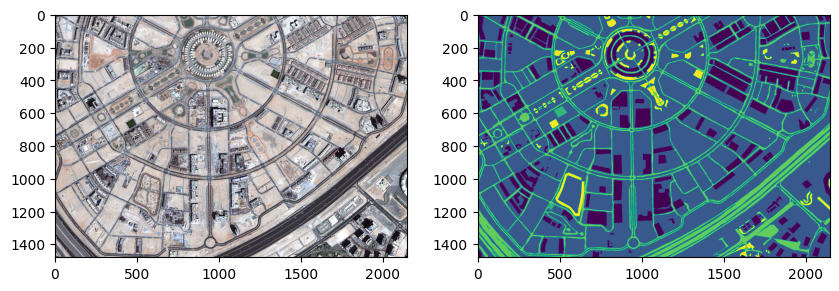
上記に例の人工衛星があり、左にはこの画像のマスクのデータです。画像のサイズは、1479x2149で6種のラベルがあります。下記にリサイズを行い、それぞれのInterplationの唯一のラベル数を計算します。

INTER_NEAREST以外のInterpolationはラベル数を増えてしまいました。


