はじめに
対象者
- SpringBoot + Gradle + Tymeleafでフロント開発する方
- 対象スクリプト:html, css
※フロントではなんとか使えるレベルだが、管理画面は何故か更新されないので、別の方法を考案中。2023/09/22
前提
- Win11 WSL Ubuntus22.*
- Docker Desktop
- 開発環境が構築されていること
※開発環境が未構築の場合は下記URLをご参考に
https://zenn.dev/junki555/articles/4358b1c7ca169d
必要なもの
- IntelliJ IDEA 2023.2.2 (Ultimate Edition)
- Windows Terminal Preview
SpringBoot設定
①application.propertiesをresources下へ配置
src
└── main
    ├── java
    └── resources
        ├── application.properties ←ココ
        ├── static
        │   ├── css
        │   └── js
        └── templates
            └── index.html
spring.devtools.restart.enabled=true
spring.devtools.livereload.enabled=true
spring.devtools.restart.exclude=templates/**,static/**
spring.thymeleaf.cache=false
spring.thymeleaf.prefix=classpath:/templates/
spring.resources.cache.period=0
Windows Terminal Preview
①IntelliJでbootjarして.jarを適切な場所へ設置
②docker compose up --buildを実行

③起動確認

IntelliJ 設定
①IntelliJを立ち上げる
②Crtl + Alt + S で設定画面を出す
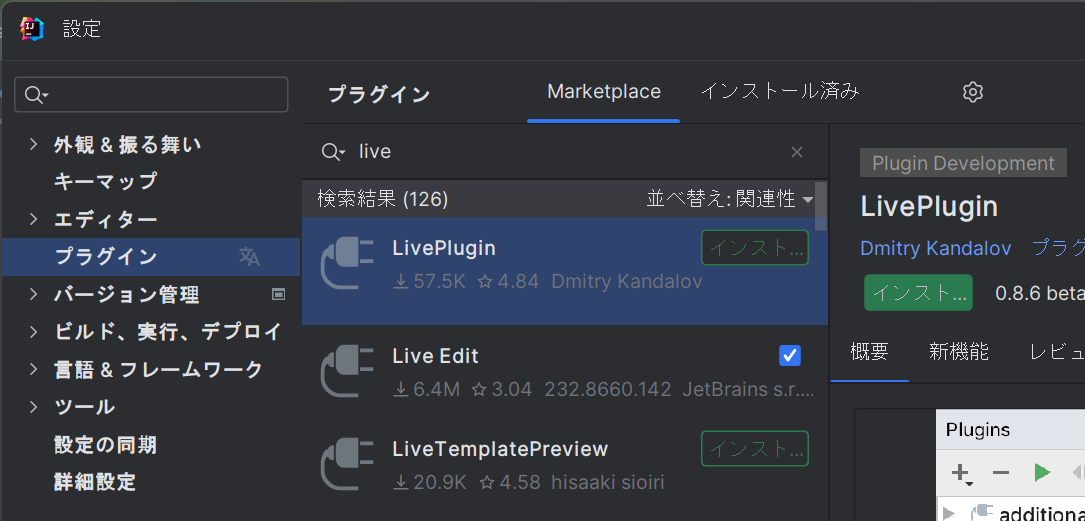
プラグイン設定
③左メニュー『プラグイン』をクリック
④『Marketplace』をクリック
⑤入力フォームに『live』と入力して『Live Edit』と『LiveEdit patch for Javascript module...』をインストール>チェックを入れて有効にする>画面右下の『OK』をクリック>再起動

⑥必要なプラグインを確認、なければ設定する
- Live Edit
- LiveEdit patch for Javascript module...
- JavaScript and TypeScript
- JavaScript Debugger
- Thymeleaf


⑥LiveEditの設定を確認(ご参考まで

IntelliJで『実行構成』を追加する
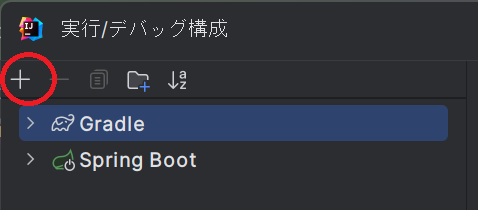
①画面上の『実行 / デバッグ構成』から、実行構成の編集をクリック

②プラス+をクリック

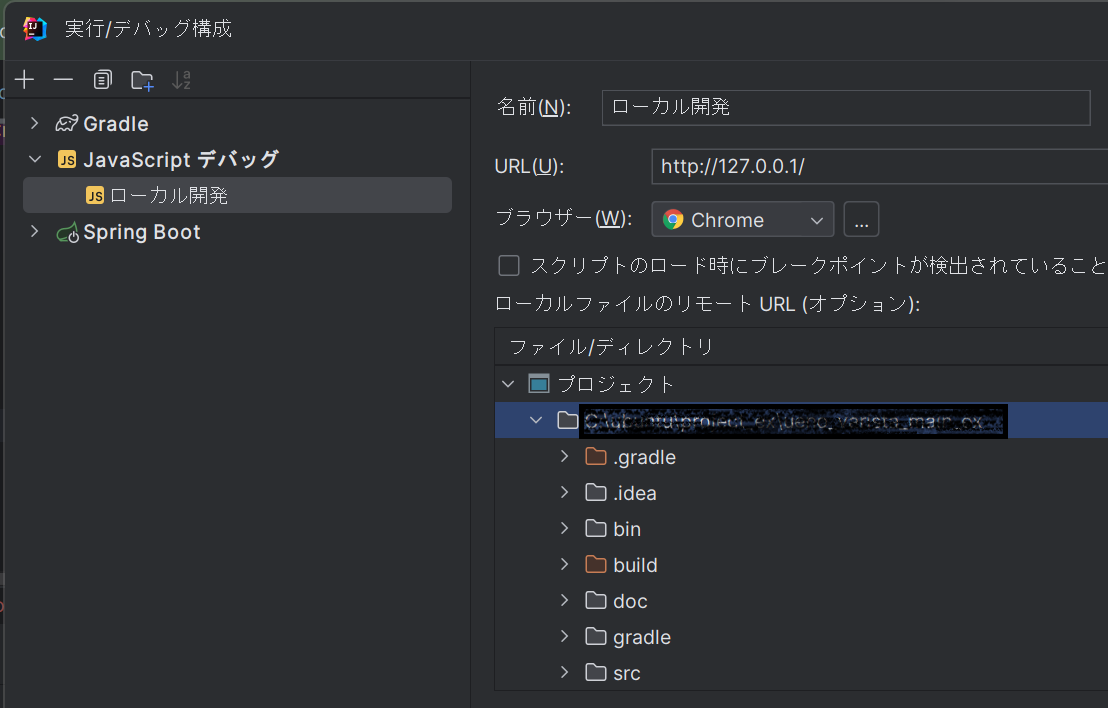
③JavaScript Debugをクリック

④実行構成の設定
名前:ローカル開発 ※お好きな名前
URL:http://127.0.0.1/ ※任意のURL
プロジェクトのディレクトリが選択されていることを確認して右下『適用』>『OK』の順番でクリック

IntelliJで確認
①設定が追加されたことを確認して、デバッグボタンをクリック

②ブラウザが立ち上がるので、編集したいページへ遷移、ブラウザとIntelliJを画面2分割して、編集しながらブラウザが確認できる状態にして、動作を確認する

Tips
-
最初は設定がうまく反映されないかもしれません。その場合は下記の再起動を試す。
-
うまく動作したと思っても、同一ファイル内で、リアルタイムで更新される場所と更新されない場所があったりすることがあるかもしれない。その場合は下記の再起動を試す。
-
調子が良い時は長時間の開発でもリアルタイムに更新されます。
再起動
IntelliJ再起動>ビルド>Docker再起動
※必要であれば設定を見直す
参考記事
https://tech.excite.co.jp/entry/2021/12/19/145720
https://qiita.com/kohei_sasaki/items/93b32177df46b4c450f3
https://loglog.xyz/programming/thymeleaf-non-build-applying
https://ti-tomo-knowledge.hatenablog.com/entry/2018/06/19/133105
https://tech.adseed.co.jp/spring-boot-bin-templates
https://ameblo.jp/promari/entry-12494363038.html
https://spring.pleiades.io/spring-boot/docs/current/reference/html/using.html#using.devtools.livereload
https://pleiades.io/help/idea/live-editing.html
あとがき
もしかすると正しい設定ではないところがあるかも。当初はVScodeでの環境構築をググって試したがすべてダメだった。IntelliJならできるかも!と思いググって、それらしい記事を参考にしながら、それまで調べた情報と掛け合わせで必要なもの、不要なものを整理してまとめた情報を記事にしました。もし正しい設定方法がわかる方いましたらアドバイスいただけますと幸いです。