#12 画面に表示される文字を多言語化する[messages.properties]
日本語以外もWeb画面上に表示できるよう設定していきます。
前提条件
この記事はSpringの最低限の知識が必要になります。
また、なるべく分かりやすく書くつもりですが、この記事の目的は自分の勉強のアウトプットであるため、所々説明は省略します。
前回まで
この記事は#10記事の続きとなります。#10ではmessages.propertiesを用いて画面に表示される文字の共通化を行いました。
構築環境
-
各バージョン
Spring Boot ver 2.7.5 -
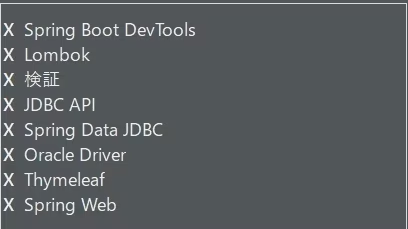
依存関係
成果物
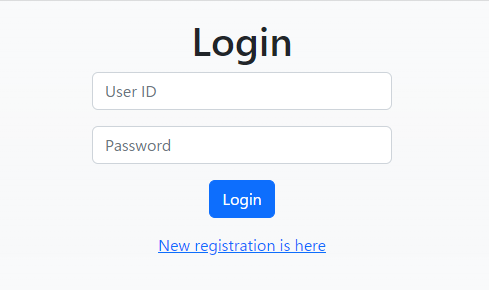
ログイン画面
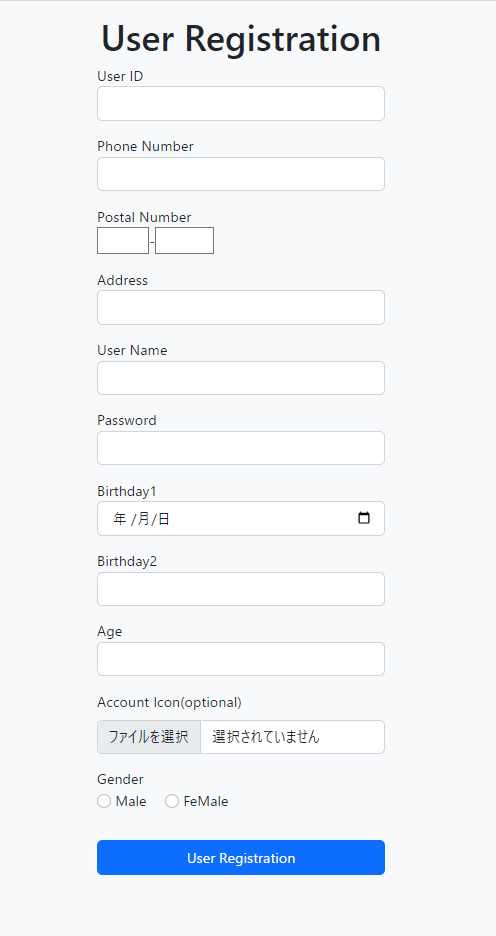
新規登録画面
今回行うこと
今回は以下の流れに沿って進めていきます。
-
環境設定
1. messagesフォルダを作成し、messages.propertiesを移動させる
1. 英語用のmessages_en.propertiesを作成する
1. application.propertiesに移動先のパスを記述する -
messages_en.propertiesに内容を記述する
-
UserService.java、SignupControllの内容を一部変更する
1. 事前準備
1. messagesフォルダを作成し、messages.propertiesを移動させる
src/main/resourcesフォルダの直下にmessagesフォルダを作成し、前回作成したmessages.propertiesを移動させる
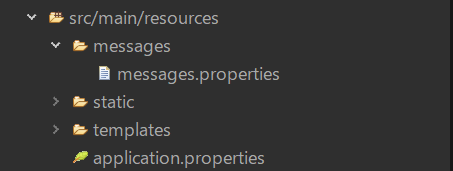
2. 英語用のmessages_en.propertiesを作成する
先ほど作成したmessagesフォルダ内にmessages_en.propertiesを作成する

3. application.propertiesに移動先のパスを記述する
application.properties内にパスを変更するための内容を記述する
#DataSource
spring.datasource.url=jdbc:oracle:thin:@localhost:1521:XE
spring.datasource.username=system
spring.datasource.password=5931
spring.datasource.driver-class-name=oracle.jdbc.driver.OracleDriver

#Message
spring.messages.basename=messages/messages
spring.messages.basenameには、src/main/resourcesからの相対パスを設定します。
なお、拡張子は言語毎に読み込むファイル名が変わるため付けません。
英語ならmessages_en.properties、フランス語ならmessages_fr.propertiesのように名付けます。
2. messages_en.propertiesに内容を記述する
# 共通部分
common.Login = Login
common.UserId = User ID
common.Password = Password

# ログイン画面(新しく追加)
login.ToSignup = New registration is here

# 新規登録画面
user.signup.UsreRegistration = User Registration
user.signup.PhoneNumber = Phone Number
user.signup.PostalNumber = Posta lNumber
user.signup.Address = Address
user.signup.UserName = User Name
user.signup.Birthday = Birthday
user.signup.Age = Age
user.signup.AccountIcon = Account Icon(optional)
user.signup.Gender = Gender
user.signup.Male = Male
user.signup.FeMale = FeMale
3. UserService.java、SignupControllの内容を一部変更する
package com.example.service;

import java.util.LinkedHashMap;
import java.util.Locale;
import java.util.Map;

import org.springframework.beans.factory.annotation.Autowired;
import org.springframework.context.MessageSource;
import org.springframework.stereotype.Service;

@Service
public class UserService {

	/* messages.propertiesのインスタンスを作成 */
	@Autowired
	private MessageSource messagesource;

	/* 性別のMapを生成する */
	public Map<String, Integer> getGenderMap(Locale locale) { // 変更点:引数にlocaleを加える。
		Map<String, Integer> genderMap = new LinkedHashMap<>();
		String male = messagesource.getMessage("user.signup.Male", null, locale); // 変更点:Locale.JAPAN → locale
		String female = messagesource.getMessage("user.signup.FeMale", null, locale); // 変更点:Locale.JAPAN → locale
		genderMap.put(male, 1);
		genderMap.put(female, 2);
		return genderMap;
	}
}
引数を新しく加えたので、呼び出し先であるSignupController.javaの一部も変更します。
package com.example.controller;

import java.util.Locale;
import java.util.Map;

import org.springframework.beans.factory.annotation.Autowired;
import org.springframework.stereotype.Controller;
import org.springframework.ui.Model;
import org.springframework.web.bind.annotation.GetMapping;
import org.springframework.web.bind.annotation.PostMapping;
import org.springframework.web.bind.annotation.RequestMapping;

import com.example.service.UserService;

@Controller
@RequestMapping("/user")
public class SignupController {

	@Autowired
	private UserService userservice;

	/* ユーザー登録画面を表示 */
	@GetMapping("/signup")
	public String getSignup(Model model, Locale locale) { // 変更点:引数にlocaleを加える。
		// 性別を取得
		Map<String, Integer> genderMap = userservice.getGenderMap(locale); // 変更点:引数にlocaleを加える。
		model.addAttribute("genderMap", genderMap);

		// ユーザー登録画面に遷移
		return "user/signup";
	}

	/* ユーザー登録処理 */
	@PostMapping("/signup")
	public String postSignup() {
		// ログイン画面にリダイレクト
		return "redirect:/login";
	}
}
最後に
正しく英語で表示できているか確認します。
今回はGoogle Chromeを使用しているのでこちらでの確認方法を載せます。
参考サイトを載せておきますがこちらで簡単にまとめます。
- 画面右上の
Google Chromeの設定(縦に3つの点のアイコン)をクリックしその中にある設定をクリック - 画面左側にあるメニューバーから
言語をクリック -
優先言語の英語のその他の操作(縦に3つの点のアイコン)をクリックしトップに移動を選択
設定が正しく行われているならば以下のように変更されています。
ログイン画面
新規登録画面
Account Iconの部分を見ると英語に直されていないのですが、type="file"で設定しているこの部分はOSの言語設定に依存してるようなのでWebブラウザの設定を変更しても変えられないようです。