#19 Spring layoutを用いて画面パーツを共通化する
今回はThymeleafでレイアウトを作成できるライブラリ(layout)を用いて画面のパーツを共通化します。
header, footer, sidebarなど、どの画面でも用いる部分はページ毎に書いていると面倒くさいので別で作り、各画面でそれらと紐付け呼び出します。
前提条件
この記事はSpringの最低限の知識が必要になります。
また、なるべく分かりやすく書くつもりですが、この記事の目的は自分の勉強のアウトプットであるため、所々説明は省略します。
さらに、今回はBootstrapというレイアウトのフレームワークを使用しているため、分からない箇所はBootstrapの公式サイトを参考にしてください。
参考にしたサイト
以前自分が書いたBootstrapの機能まとめ
構築環境
1. 各バージョン
Spring Boot ver 2.7.5
jquery ver 3.6.1
bootstrap ver 5.2.2
webjars-locator ver 0.46
thymeleaf-layout-dialect ver 3.0.0
2. 依存関係
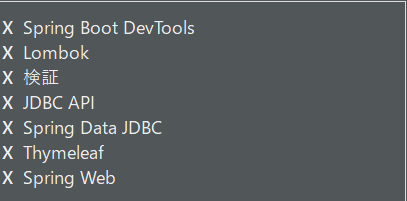
依存関係は上記の画像になりますが、今回の記事ではこれに加えthymeleaf-layout-dialectを追加します。
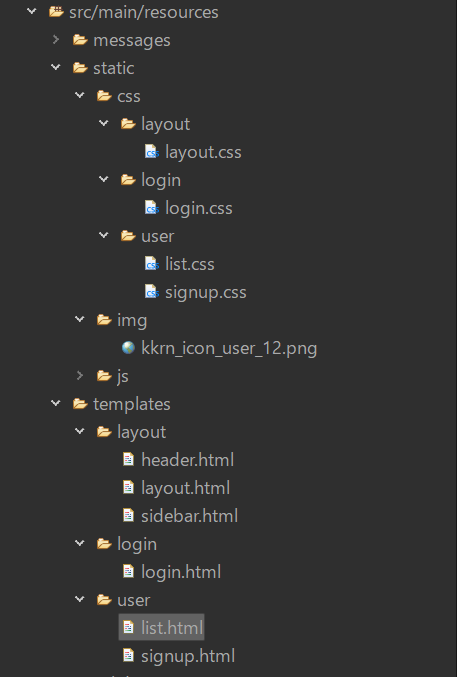
3. ツリー構成
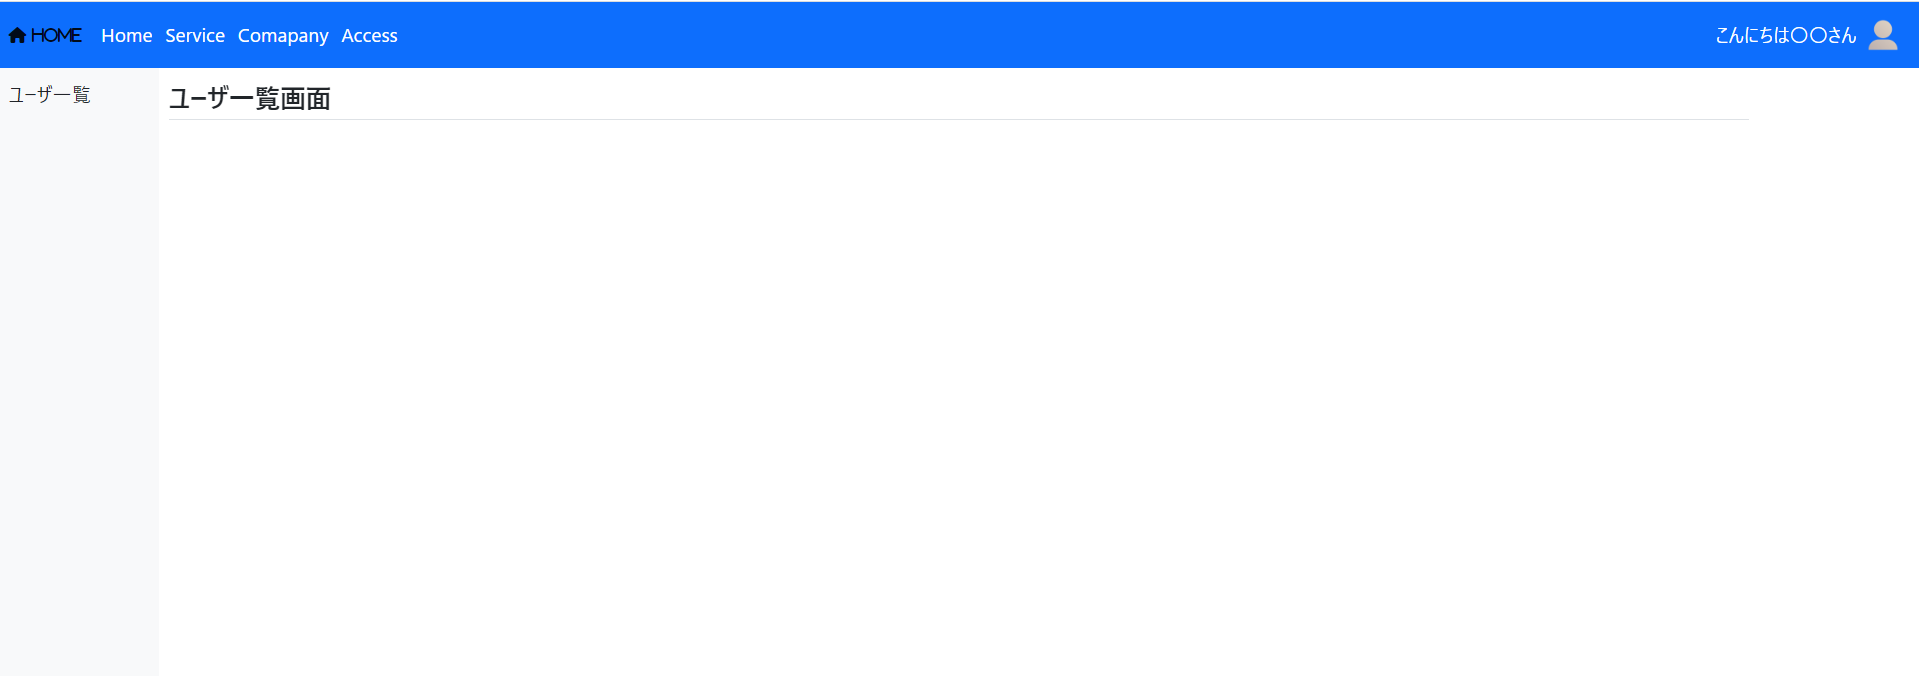
成果物
今回行うこと
今回は以下の流れに沿って進めていきます。
- thymeleaf-layout-dialectの追加
- 共通レイアウト(layout.html)の作成
- ヘッダー部分(header.html)の作成
- サイドバー部分(sidebar.html)の作成
- コンテンツ部分(list.html)の作成
- 各コントローラの作成
- layout:replaceとlayout:fragmentの違い
1. layout:replace
2. layou:fragment
1. thymeleaf-layout-dialectの追加
Thymeleafでレイアウトを作成するためのライブラリを追加します。
pom.xmlのdependenciesタグ内に以下のコードを追加します。
    <!-- 1部省略 -->
	<dependencies>
		<!-- thymeleaf-layout-dialect -->
		<dependency>
			<groupId>nz.net.ultraq.thymeleaf</groupId>
			<artifactId>thymeleaf-layout-dialect</artifactId>
		</dependency>
    <!-- 1部省略 -->
    <dependencies>
2. 共通レイアウト(layout.html)の作成
<!DOCTYPE html>
<html xmlns:th="http://www.thymeleaf.org"
xmlns:layout="http://www.ultraq.net.nz/thymeleaf/layout">
<head>
<meta charset="UTF-8">
<meta name="viewport" content="width=device-width, initial-scale=1, shrink-to-fit=no">
<!-- 共通CSS読み込み -->
<link rel="stylesheet" th:href="@{/webjars/bootstrap/css/bootstrap.min.css}">
<link rel="stylesheet" th:href="@{https://cdnjs.cloudflare.com/ajax/libs/font-awesome/6.2.1/css/all.css}">
<link rel="stylesheet" th:href="@{/css/layout/layout.css}">
<!-- 共通JS読込 -->
<script th:src="@{/webjars/jquery/jquery.min.js}" defer></script>
<script th:src="@{/webjars/bootstrap/js/bootstrap.min.js}" defer></script>
<title></title>
</head>
<body>
	<!-- ヘッダー -->
	<nav layout:replace="~{layout/header::header}"></nav>
	<!-- サイドバー -->
	<div class="container-fluid">
		<div class="row">
			<nav class="col-sm-1 bg-light sidebar pt-2">
				<div layout:replace="~{layout/sidebar::sidebar}"></div>
			</nav>
		</div>
	</div>
	<main class="position-relative position">
		<!-- コンテンツ -->
		<div class="container-fluid">
			<div class="row">
				<div class="col-sm-10 offset-sm-1">
					<div layout:fragment="~{list}"></div>
				</div>
			</div>
		</div>
	</main>
</body>
</html>
content="width=divice-width:コンテンツをデバイスの幅に合わせる
initial-scale=1:初期倍率1倍
shrink-to-fit=no":IOSの古いバージョンによるバグをなくすために利用されている(現在ではあまり使われていない)
参考文献
ここでのポイントは2つあります。
- htmlタグに「xmlns:layout="http://www.ultraq.net.nz/thymeleaf/layout" 」を読込み
- layout:replaceで読み込むファイルのパスとキーを指定
2.の「layout:replaceで読み込むファイルのパスとキーを指定」に関して、ファイルパスはsrc/main/resources/templatesからの相対パスを指定します。キーには任意の値を設定します。今回、header.htmlはsrc/main/resources/templates/layout/header.htmlにあるため、layout/headerと記述している。
3. ヘッダー部分(header.html)の作成
<!DOCTYPE html>
<html xmlns:th="http://www.thymeleaf.org"
xmlns:layout="http://www.ultraq.net.nz/thymeleaf/layout"
layout:decorate="~{layout/layout}">
<head>
</head>
<body>
<nav layout:fragment="header" class="navbar navbar-expand-lg navbar-light bg-primary color fixed-top fs-4">
  <div class="container-fluid">
    <a class="navbar-brand fa fa-house" th:href="@{#}"> Home</a>
    <button class="navbar-toggler" type="button" data-bs-toggle="collapse" data-bs-target="#navbarNav" aria-controls="navbarNav" aria-expanded="false" aria-label="Toggle navigation">
      <span class="navbar-toggler-icon"></span>
    </button>
    <div class="collapse navbar-collapse" id="navbarNav">
      <ul class="navbar-nav me-auto">
        <li class="nav-item">
          <a class="nav-link" th:href="@{#}">Home</a>
        </li>
        <li class="nav-item">
          <a class="nav-link" th:href="@{#}">Service</a>
        </li>
        <li class="nav-item">
          <a class="nav-link" th:href="@{#}">Comapany</a>
        </li>
        <li class="nav-item">
          <a class="nav-link" th:href="@{#}">Access</a>
        </li>
      </ul>
      <ul class="navbar-nav align-items-center">
      	<li class="nav-item align-middle text-white">こんにちは〇〇さん</li>
      	<li class="nav-item">
      		<a class="nav-link" th:href="@{/login/login}">
      			<img th:src="@{/img/kkrn_icon_user_12.png}" alt="アイコン画像"  th:width="50px" th:height="50px">
      		</a>
      	</li>
      </ul>
    </div>
  </div>
</nav>
</body>
</html>
ここでのポイントは2つあります。
- layout.decorateでどのHTMLファイルに組み込むかを設定
- layout.fragmentで組み込む箇所を指定
1.の「layout.decorateでどのHTMLファイルに組み込むかを設定」に関して、先ほどと同様にsrc/main/resources/templatesからの相対パスを指定します。index.htmlはsrc/main/resources/templates/index.htmlになるので、layout:decorate="~{layout/layout}"となります。
2.の「layout.fragmentで組み込む箇所を指定」に関して、先ほどindex.htmlで設定したキー名を組み込みたい箇所に指定します。layout.htmlで設定した"~{layout/header::header}"とlayout:fragment="header"を一致させます。
4. サイドバー部分(sidebar.html)の作成
行うことは3. ヘッダー部分(header.html)の作成と同様です。
- head部分に
layout:decorate="~{layout/layout}"を記述 -
layout:fragment="sidebar"で紐付け
<!DOCTYPE html>
<html xmlns:th="http://www.thymeleaf.org"
xmlns:layout="http://www.ultraq.net.nz/thymeleaf/layout"
layout:decorate="~{layout/layout}">
<head>
</head>
<body>
	<div layout:fragment="sidebar" class="bg-light">
		<ul class="navbar-nav nav-pills">
			<li class="nav-item">
				<a class="nav-link fs-4" th:href="@{'/user/list'}">ユーザ一覧</a>
			</li>
		</ul>
	</div>
</body>
</html>
5. コンテンツ部分(list.html)の作成
こちらもheader.html、sidebar.htmlと同様なので説明は割愛します。
<!DOCTYPE html>
<html xmlns:th="http://www.thymeleaf.org"
	xmlns:layout="http://www.ultraq.net.nz/thymeleaf/layout"
	layout:decorate="~{layout/layout}">
<head>
<title>ユーザー一覧</title>
<!-- 個別CSS読込 -->
<link rel="stylesheet" th:href="@{/css/user/list.css}">
</head>
<body>
	<div layout:fragment="~{list}">
		<div class="header border-bottom">
			<h1 class="h2">ユーザ一覧画面</h1>
		</div>
    <div>
</body>
</html>
6. 各コントローラの作成
各コントローラの作成は今回は割愛します。
7. layout:replaceとlayout:fragmentの違い
メインのレイアウトlayout.htmlから各画面を紐付けるためにheader.html、sidebar.htmlはlayout:replace=を用いたのに対して、list.htmlはlayout:fragment="list"を用いました。
この2つはどちらも画面を紐付けるための方法ですが、この2つには違いがあります。
1. layout:replace
<!--レイアウト側のHTMLサンプル-->
<div layout:replace="~{layout/sample::sample}" class="sample1"></div>
<!-- コンテンツ側のHTMLサンプル -->
<div layout:fragment="sample" class="sample2">
    <p>Hello World</p>
<div>
<!-- layout.replaceで生成されたHTML -->
<div class="sample2">
    <p>Hello World</p>
</div>
コンテンツ側のHTMLでレイアウト側のHTMLが置き換えられる(sample1はsample2に置き換えれたかのよう)
2. layou:fragment
<!--レイアウト側のHTMLサンプル-->
<div layout:fragment="~{sample}" class="sample1"></div>
<!-- コンテンツ側のHTMLサンプル -->
<div layout:fragment="sample" class="sample2">
    <p>Hello World</p>
<div>
<!-- layout.replaceで生成されたHTML -->
<div class="sample1 sample2">
    <p>Hello World</p>
</div>
コンテンツ側のHTMLをレイアウト側のHTMLに追加する(sample1とsample2の両要素を持つ)
最後に
layout:replaceとlayout:fragmentの違いを理解して使い分けることが重要!!!
例えば、コンテンツ画面で個別のCSSファイルを読み込ませたい場合はlayout:fragmentを用いる
(layout:replaceを用いるとレイアウト側のHTMLのheadで上書きされてしまうから)