こんにちはジャムです。
Railsを一通り学んだので、自分自身のポートフォリオ用にTwitter風のwebアプリケーションを作成して行きます。
今回はSTEP1として、プロジェクトフォルダの立ち上げからユーザーの新規登録までやっていきます。
でわ、早速
プロジェクトフォルダの作成
今回はそのまんまでtwitterという名にします。
コマンドライン
$ rails new twitter #twitterという名のプロジェクトフォルダ作成
ユーザーを登録するモデル、テーブルの構築
Userモデルの作成
今回のWEBアプリのユーザー情報はメールアドレスとパスワードを設定
コマンドライン
$ rails g model User email:string password_digest:string #userモデルの作成
$ rails db:migrate #データベースへの反映、usersテーブルの作成
Gemfileにbcryptを追記
bycryptはusersテーブルにパスワードを保存する際に暗号化し、セキュリティを高めることができるgemです。
Gemfile
gem 'bcrypt'
インストール
コマンドライン
$ bundle install
userモデルにパスワード暗号化用のおまじないとバリデーションを追記
app/models/user.rb
class User < ApplicationRecord
  validates :email, presence: true,uniqueness: true
  validates :password, presence: true
  has_secure_password
end
presence:Eメールを登録する際に空白だった場合エラーを返す
ルーティングの設定
config/routes.rb
Rails.application.routes.draw do
  resources :users
  root "users#index"
end
ユーザーコントローラーの作成
index new createコントローラーとビュー作成
コマンドライン
rails g controller Users index new create
コントローラーの修正
app/controller/users_controller.rb
class UsersController < ApplicationController

  def index
    @user = User.all
  end

  def new
    @user = User.new
  end

  def create
    @user = User.new(user_params)
    @user.save
    redirect_to "/"
  end

  private
  def user_params
    params.require(:user).permit(:email,:password,:password_confirmation)
  end
end
View関連を作成
全体のhtmlを構成するviewを若干修正
app/views/layouts/application.html.erb
<!DOCTYPE html>
<html>
  <head>
    <title>Twitter</title>
    <%= csrf_meta_tags %>
    <%= csp_meta_tag %>

    <%= stylesheet_link_tag    'application', media: 'all', 'data-turbolinks-track': 'reload' %>
    <%= javascript_include_tag 'application', 'data-turbolinks-track': 'reload' %>
    <meta name="viewport" content="width=device-width, initial-scale=1, shrink-to-fit=no">
  </head>

  <body>
    <%= render "shared/header" %> #ここを追記
    <div class="container">
    <%= yield %>
    </div>
  </body>
</html>
ヘッダーを作成
先ほど記載した<%= render "shared/header" %>で読み込まれるファイル
app/views/shared/_header.html.erb
<nav class="navbar navbar-inverse">
  <div class="navbar-header">
    <%= link_to "Twitter style Web application","/", class: "navbar-brand" %>
    <button type="button" class="navbar-toggle" data-toggle="collapse" data-target="#gnavi">

      <span class="sr-only">メニュー</span><!--音声ブラウザにメニューがあることを伝えています-->
      <span class="icon-bar"></span><!--ハンバーガーメニューの三本線を設定-->
      <span class="icon-bar"></span><!--ハンバーガーメニューの三本線を設定-->
      <span class="icon-bar"></span><!--ハンバーガーメニューの三本線を設定-->

    </button>

  </div>

  <div id="gnavi" class="collapse navbar-collapse"><!--ハンバーガーメニュー内に折り畳まれる部分の設定-->
    <ul class="nav navbar-nav navbar-right">
      <li><%= link_to "新規登録",new_user_path %></li>
    </ul>
  </div>
</nav>
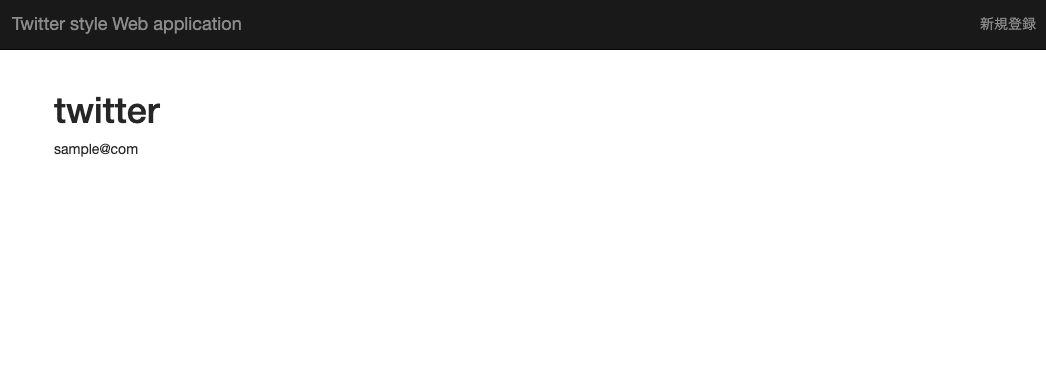
ユーザーの一覧を表示するビューを作成
app/views/users/index.html.erb
<h3>ユーザーリスト</h3>
<ul class="list-group">
<% @user.each do |user| %>
<li class="list-group-item"><%= link_to user.email,user_path(user.id) %></li>
<% end %>
</ul>
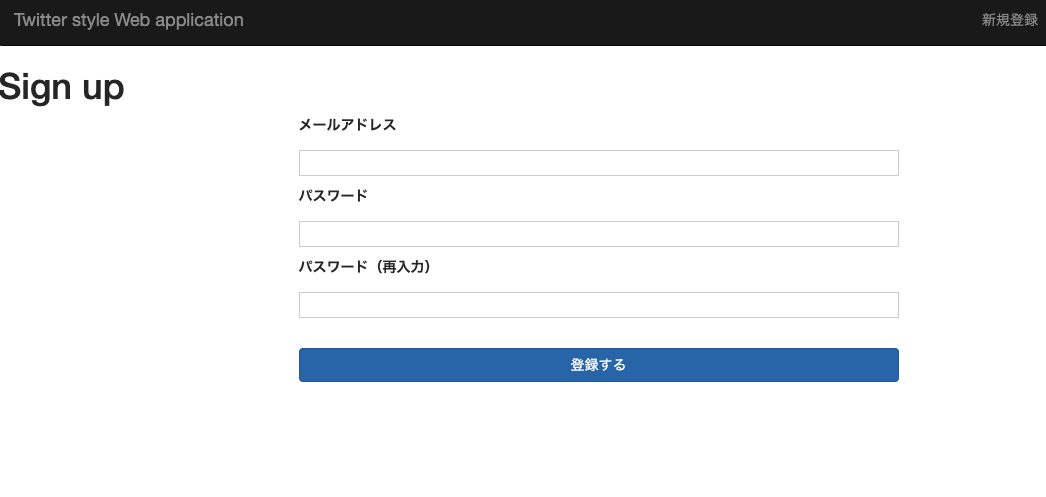
新規登録用のビューを作成
app/views/users/new.html.erb
  <div class="row">
  <div class="col-md-6 col-md-offset-2">
    <h3 class="page-header">新規登録する</h3>
    <%= form_for(@user) do |f| %>
    <p><%= f.label :email , "メールアドレス"%></p>
    <p><%= f.email_field :email %></p>
    <p><%= f.label :password,"パスワード" %></p>
    <p><%= f.password_field :password %></p>
    <p><%= f.label :password_confirmation, "パスワード(再入力)" %></p>
    <p><%= f.password_field :password_confirmation %></p>
    <p><%= f.submit "登録する", class: "btn btn-primary" %></p>
    <% end %>
  </div>
</div>
bootstrapの導入
Gemfaiに追記
Gemfile
gem 'bootstrap-sass'
gem 'jquery-rails'
インストール
コマンドライン
$ bundle install
custom.scssを作成し、以下の内容を追記
app/assets/stylesheets/custom.scss
@import "bootstrap-sprockets";
@import "bootstrap";

@media screen and (min-width: 500px) {
   /* 画面サイズ 500px以上で適用 */
   input {width:600px;}
   textarea {
     width:600px;
     height:300px;
   }
 }

@media screen and (max-width: 499px) {
   /* 画面サイズ 499pxまで適用 */
   input {width:300px;}
   textarea {
     width:300px;
     height:200px;
   }
 }

 .btn {
   margin-top:20px;
 }

 a {
   text-decoration:none;
 }

 a:hover {
   color:red;
 }

 .badge a {
   color:white;
 }
jqueryの設定追記
app/assets/javascripts/application.js
//= require jquery3
//= require bootstrap-sprockets
一旦、ブラウザで確認
コマンドライン
$ rails s -b 192.168.33.11 -d #192.168.33.11はipアドレスを確認してください
ブラウザを開いて192.168.33.11:3000にアクセス
新規登録をクリック
登録したユーザーが表示される
今回はここまで
次回はユーザーの編集、削除機能の実装をします。コチラ


