目次
はじめに
コード品質を維持するためにはテストが不可欠ですが、手動での実行は手間がかかります。GitHub Actionsを使えば、push時やpull_request時に自動でテストを実行し、開発フローにシームレスに組み込めます。
本記事では5分でできるGitHub Actionsによる自動テスト設定方法を紹介します。KaggleやAI開発プロジェクトに取り組む際にも有用です。これで新機能開発時も、プッシュ時やプルリクエスト前に自動テストを回して品質を確保できます。
たった5分の手間が、後々のデバッグ時間を大幅に削減します!
事前準備
- GitHubリポジトリの用意:対象となるPythonプロジェクトがGitHub上にあること
-
テストコードの用意:
pytestで動くテストがあること -
requirements.txtの用意:
requirements.txtにpytestなど必要なモジュールが記載されていることrequirements.txt-e . pytest (他のモジュールも記載) -
pyproject.tomlによる設定(任意):
pyproject.tomlでpytestのオプションを指定し、pythonpathを設定可能(srcディレクトリをモジュール探索パスに含めるなど)pyproject.toml[tool.pytest.ini_options] pythonpath = ["src", "tests"]
ローカルでテストが通る状態であれば、あとはActions設定を追加するだけでOKです。
下記はローカルでpytestを実行した際の例です:
$ pytest
================================================================================ test session starts ================================================================================
:
:
collected 3 items

tests\test_main.py ..                                                                                                                                                          [ 66%]
tests\mod\test_module_1.py .                                                                                                                                                   [100%]

================================================================================= 3 passed in 0.03s =================================================================================
ディレクトリ構成例
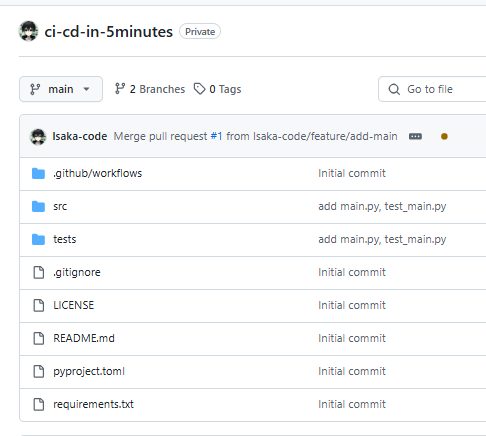
以下は、典型的なディレクトリ構成例です。
.
├── src
│   ├── __init__.py
│   ├── main.py
│   └── mod
│       ├── __init__.py
│       └── module_1.py
├── tests
│   ├── __init__.py
│   ├── test_main.py
│   └── mod
│       ├── __init__.py
│       └── test_module_1.py
├── requirements.txt
├── pyproject.toml
└── .github
    └── workflows
        └── test.yml
ソースコードは下記のGitHubレポジトリーから入手可能です:
サンプルコード例
プロダクトコード例 (src配下)
src/main.py
from src.mod import module_1


def main(a: int, b: int) -> int:
    return a + b


def hello() -> str:
    return module_1.hello()
src/mod/module_1.py
def hello() -> str:
    return "Hello from module_1"
テストコード例 (tests配下)
tests/test_main.py
def test_main():
    from src.main import main

    assert main(1, 2) == 3


def test_hello():
    from src.mod import module_1

    assert module_1.hello() == "Hello from module_1"
tests/mod/test_module_1.py
def test_hello():
    from src.mod import module_1
    assert module_1.hello() == "Hello from module_1"
pytest実行時、testsディレクトリ以下にあるtest_で始まるファイルが自動的に読み込まれ、test_で始まる関数がテストとして実行されます。
テスト関数内でインポートしているのは、テストエラーが起きた際にエラーログがその関数単位で明確になるからです。pytestにおける御作法の一つになります。
ワークフローファイルの作成
プロジェクトルートに.github/workflowsディレクトリを作成し、test.ymlファイルを配置します。
以下はmainブランチとfeature/で始まるブランチへのpush、およびそれらブランチをターゲットとしたpull_requestの際にPython 3.10でテストを実行する例です。
name: Run Tests on Push or PR

on:
  push:
    branches: [ main, 'feature/*' ]
  pull_request:
    branches: [ main, 'feature/*' ]

jobs:
  test:
    runs-on: ubuntu-latest
    steps:
      - name: Check out repo
        uses: actions/checkout@v3

      - name: Set up Python
        uses: actions/setup-python@v4
        with:
          python-version: '3.10'

      - name: Install dependencies
        run: |
          pip install -r requirements.txt

      - name: Run tests
        run: pytest
ポイント
-
on:セクションでpushとpull_requestを指定。これにより、指定のブランチへコードをpushした時と、そのブランチに対するPRが作成・更新された時両方でテストが走る。 - Pythonバージョンは
3.10でKaggle環境と合わせ、再現性を高める。
実行例
-
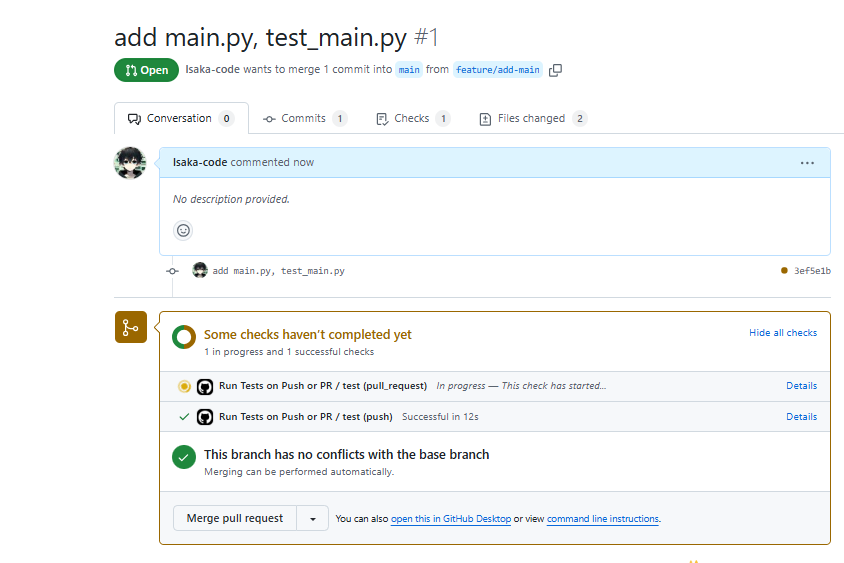
feature/*ブランチにローカルで変更を加え、pushすると、Actionsでテストが自動実行 - 同ブランチから
mainへのプルリクエストを作成すると、PRページ上でテスト結果が確認可能。マージ前にテスト合格を一目で確認できます。
これにより、コード品質を常に確認しながら安心して開発を進められます。
まとめ
- GitHub Actionsは、
pushやpull_request時の自動テスト実行を簡単に実現 - YAMLファイルと
pytestで、品質チェックを自動化 - Python 3.10指定でKaggleと同等環境を再現し、MLプロジェクトでの利便性向上
5分でできる自動テストの導入で、コード品質向上と開発効率UPをぜひ体験してみてください。
参考にしたもの

