はじめに
3Dプリンタで造形するものがパターン化してきて、数字を入れたら勝手にモデルができたら楽だなーと思ってググってたら、numpy-stlなるものを知ったのでメモ的にまとめてみた。
numpy-stlってなに?
公式ドキュメントをざっくり翻訳するとこんなかんじ。
STLファイル(ならびに一般的な3Dモデル)を素早く簡単に扱うためのシンプルなライブラリです。
すべての操作がnumpyに大きく依存しており、Python用のSTL向けライブラリの中で最も高速なものの一つです。
要はnumpy的に3Dモデルを作ったり、既存のSTLファイルをいじってみたりできるライブラリという所。
公式サイトとか参考資料
- numpy-stlプロジェクトページ https://pypi.org/project/numpy-stl/
- numpy-stl ドキュメンテーション https://numpy-stl.readthedocs.io/en/latest/
- 3Dプリント×Python ~コードからアプローチする3Dプリンティング~ https://www.slideshare.net/TakuroWada/3dpython3d
インストール
基本的にはpipでOK。
今回はmacOS Catalina 10.15.6, python 3.7.7で実行した。
pip3 install numpy-stl
生成した3Dモデルを確認する場合は以下のライブラリもインストールしておく。
pip3 install mpl_toolkits
pip3 install matplotlib
操作いろいろ
回転に関しても気が向いたら追加します。(とはいえ、numpy-stlでググるとそれっぽい記事が結構出てきたりする。)
立方体(正六面体)作りたい
せっかくなので関数化しました。引数のscale_x, scale_y, scale_zに大きさを入れます。
単位系にもよりますが、引数無しのデフォルト状態で縦横高さがともに1の立方体ができるはず。
import numpy as np
from stl import mesh

def cube_model(scaleX=1, scaleY=1, scaleZ=1):
    scaleX = scaleX / 2
    scaleY = scaleY / 2
    scaleZ = scaleZ / 2

    vertices = np.array([\
        [-1*scaleX, -1*scaleY, -1*scaleZ],
        [+1*scaleX, -1*scaleY, -1*scaleZ],
        [+1*scaleX, +1*scaleY, -1*scaleZ],
        [-1*scaleX, +1*scaleY, -1*scaleZ],
        [-1*scaleX, -1*scaleY, +1*scaleZ],
        [+1*scaleX, -1*scaleY, +1*scaleZ],
        [+1*scaleX, +1*scaleY, +1*scaleZ],
        [-1*scaleX, +1*scaleY, +1*scaleZ]])

    faces = np.array([\
        [0,3,1],
        [1,3,2],
        [0,4,7],
        [0,7,3],
        [4,5,6],
        [4,6,7],
        [5,1,2],
        [5,2,6],
        [2,3,6],
        [3,7,6],
        [0,1,5],
        [0,5,4]])

    cube = mesh.Mesh(np.zeros(faces.shape[0], dtype=mesh.Mesh.dtype))
    cube.remove_duplicate_polygons=True
    for i, f in enumerate(faces):
        for j in range(3):
            cube.vectors[i][j] = vertices[f[j],:]

    return cube
読み込むプログラムはこちら
import numpy as np
from stl import mesh
from mpl_toolkits import mplot3d
from matplotlib import pyplot
from cube_model import cube_model

figure = pyplot.figure()
axes = mplot3d.Axes3D(figure)

your_mesh = cube_model(10,10,10)
axes.add_collection3d(mplot3d.art3d.Poly3DCollection(your_mesh.vectors))

scale = your_mesh.points.flatten()
print(scale)
axes.auto_scale_xyz(scale, scale, scale)

pyplot.show()
自分のSTLを読み込みたい
your_stl_model.stlに自身のSTLファイルを指定する。
import numpy as np
from stl import mesh
from mpl_toolkits import mplot3d
from matplotlib import pyplot

figure = pyplot.figure()
axes = mplot3d.Axes3D(figure)

your_mesh = mesh.Mesh.from_file('your_stl_model.stl')
axes.add_collection3d(mplot3d.art3d.Poly3DCollection(your_mesh.vectors))

scale = cube_comb.points.flatten()
axes.auto_scale_xyz(scale, scale, scale)

pyplot.show()
3Dモデルを原点に揃えたい
読み込んだSTLが変な方向に飛んでいた場合に、モデルの中心を(0,0,0)に合わせる際などに使う。
引数のmy_meshにはSTLファイルなどを読み込んだ際のmeshオブジェクトを入れる。
import numpy as np
from stl import mesh

def mesh_location_zero(my_mesh):
    midPosRel = (my_mesh.max_ - my_mesh.min_)/2
    my_mesh.x = my_mesh.x - (midPosRel[0] + my_mesh.min_[0])
    my_mesh.y = my_mesh.y - (midPosRel[1] + my_mesh.min_[1])
    my_mesh.z = my_mesh.z - (midPosRel[2] + my_mesh.min_[2])
    return my_mesh
meshの情報を更新する
meshオブジェクト内のメンバを更新するため、座標系をあわせることも含め移動したり、モデルを拡大、回転させたり変化を加えた際にはこれも実行しておく。引数は同じく。
import numpy as np
from stl import mesh

def mesh_update(my_mesh):
    my_mesh.update_areas()
    my_mesh.update_max()
    my_mesh.update_min()
    my_mesh.update_units()
    return my_mesh
3Dモデルを拡大・縮小したい
拡大・縮小も関数化した。my_meshには各自の3Dモデルのものを入れ、scale_x, scale_y, scale_zには1.0を100%として拡大率を入れる。
import numpy as np
from stl import mesh

def mesh_scale(my_mesh, scale_x, scale_y, scale_z):
    my_mesh.x = my_mesh.x * scale_x
    my_mesh.y = my_mesh.y * scale_y
    my_mesh.z = my_mesh.z * scale_z
    return my_mesh
3Dモデルを移動したい
mesh.translateで移動できる。引数はnumpy.arrayで指定する。(今回はcube_model.pyもあわせて使っています。)
import numpy as np
from stl import mesh
from mpl_toolkits import mplot3d
from matplotlib import pyplot
from cube_model import cube_model

figure = pyplot.figure()
axes = mplot3d.Axes3D(figure)

your_mesh = cube_model(5,20,5)
your_mesh.translate(np.array([1,3,1]))

axes.add_collection3d(mplot3d.art3d.Poly3DCollection(your_mesh.vectors))

scale = cube_comb.points.flatten()
print(scale)
axes.auto_scale_xyz(scale, scale, scale)

pyplot.show()
3Dモデルを結合したい
なんとnumpy.concatenateでモデルを結合できる。numpyでモデルを作れることを名売っているだけあるなぁ。(今回はcube_model.pyもあわせて使っています。)
import numpy as np
from stl import mesh
from mpl_toolkits import mplot3d
from matplotlib import pyplot
from cube_model import cube_model

figure = pyplot.figure()
axes = mplot3d.Axes3D(figure)

your_mesh = cube_model(10,10,10)
your_mesh2 = cube_model(5,20,5)
your_mesh2.translate(np.array([1,1,1]))

cube_comb = mesh.Mesh(np.concatenate([
    your_mesh.data.copy(),
    your_mesh2.data.copy(),
]))

axes.add_collection3d(mplot3d.art3d.Poly3DCollection(cube_comb.vectors))

scale = cube_comb.points.flatten()
print(scale)
axes.auto_scale_xyz(scale, scale, scale)

pyplot.show()
3Dモデルを保存したい
mesh.saveで保存できる。引数は保存先のパスおよびファイル名。
import numpy as np
from stl import mesh
from cube_model import cube_model

your_mesh = cube_model(10,10,10)
your_mesh2 = cube_model(5,20,5)
your_mesh2.translate(np.array([1,1,1]))

cube_comb = mesh.Mesh(np.concatenate([
    your_mesh.data.copy(),
    your_mesh2.data.copy(),
]))

cube_comb.save('your_model.stl')
空のmeshを作る
3Dモデルの結合とループを組み合わせて動的にモデルを構築する際に使えるかも。
dtypeを忘れがちなので注意。
import numpy as np
from stl import mesh
from cube_model import cube_model

emptyMesh = mesh.Mesh(np.array([], dtype=mesh.Mesh.dtype))
おまけ
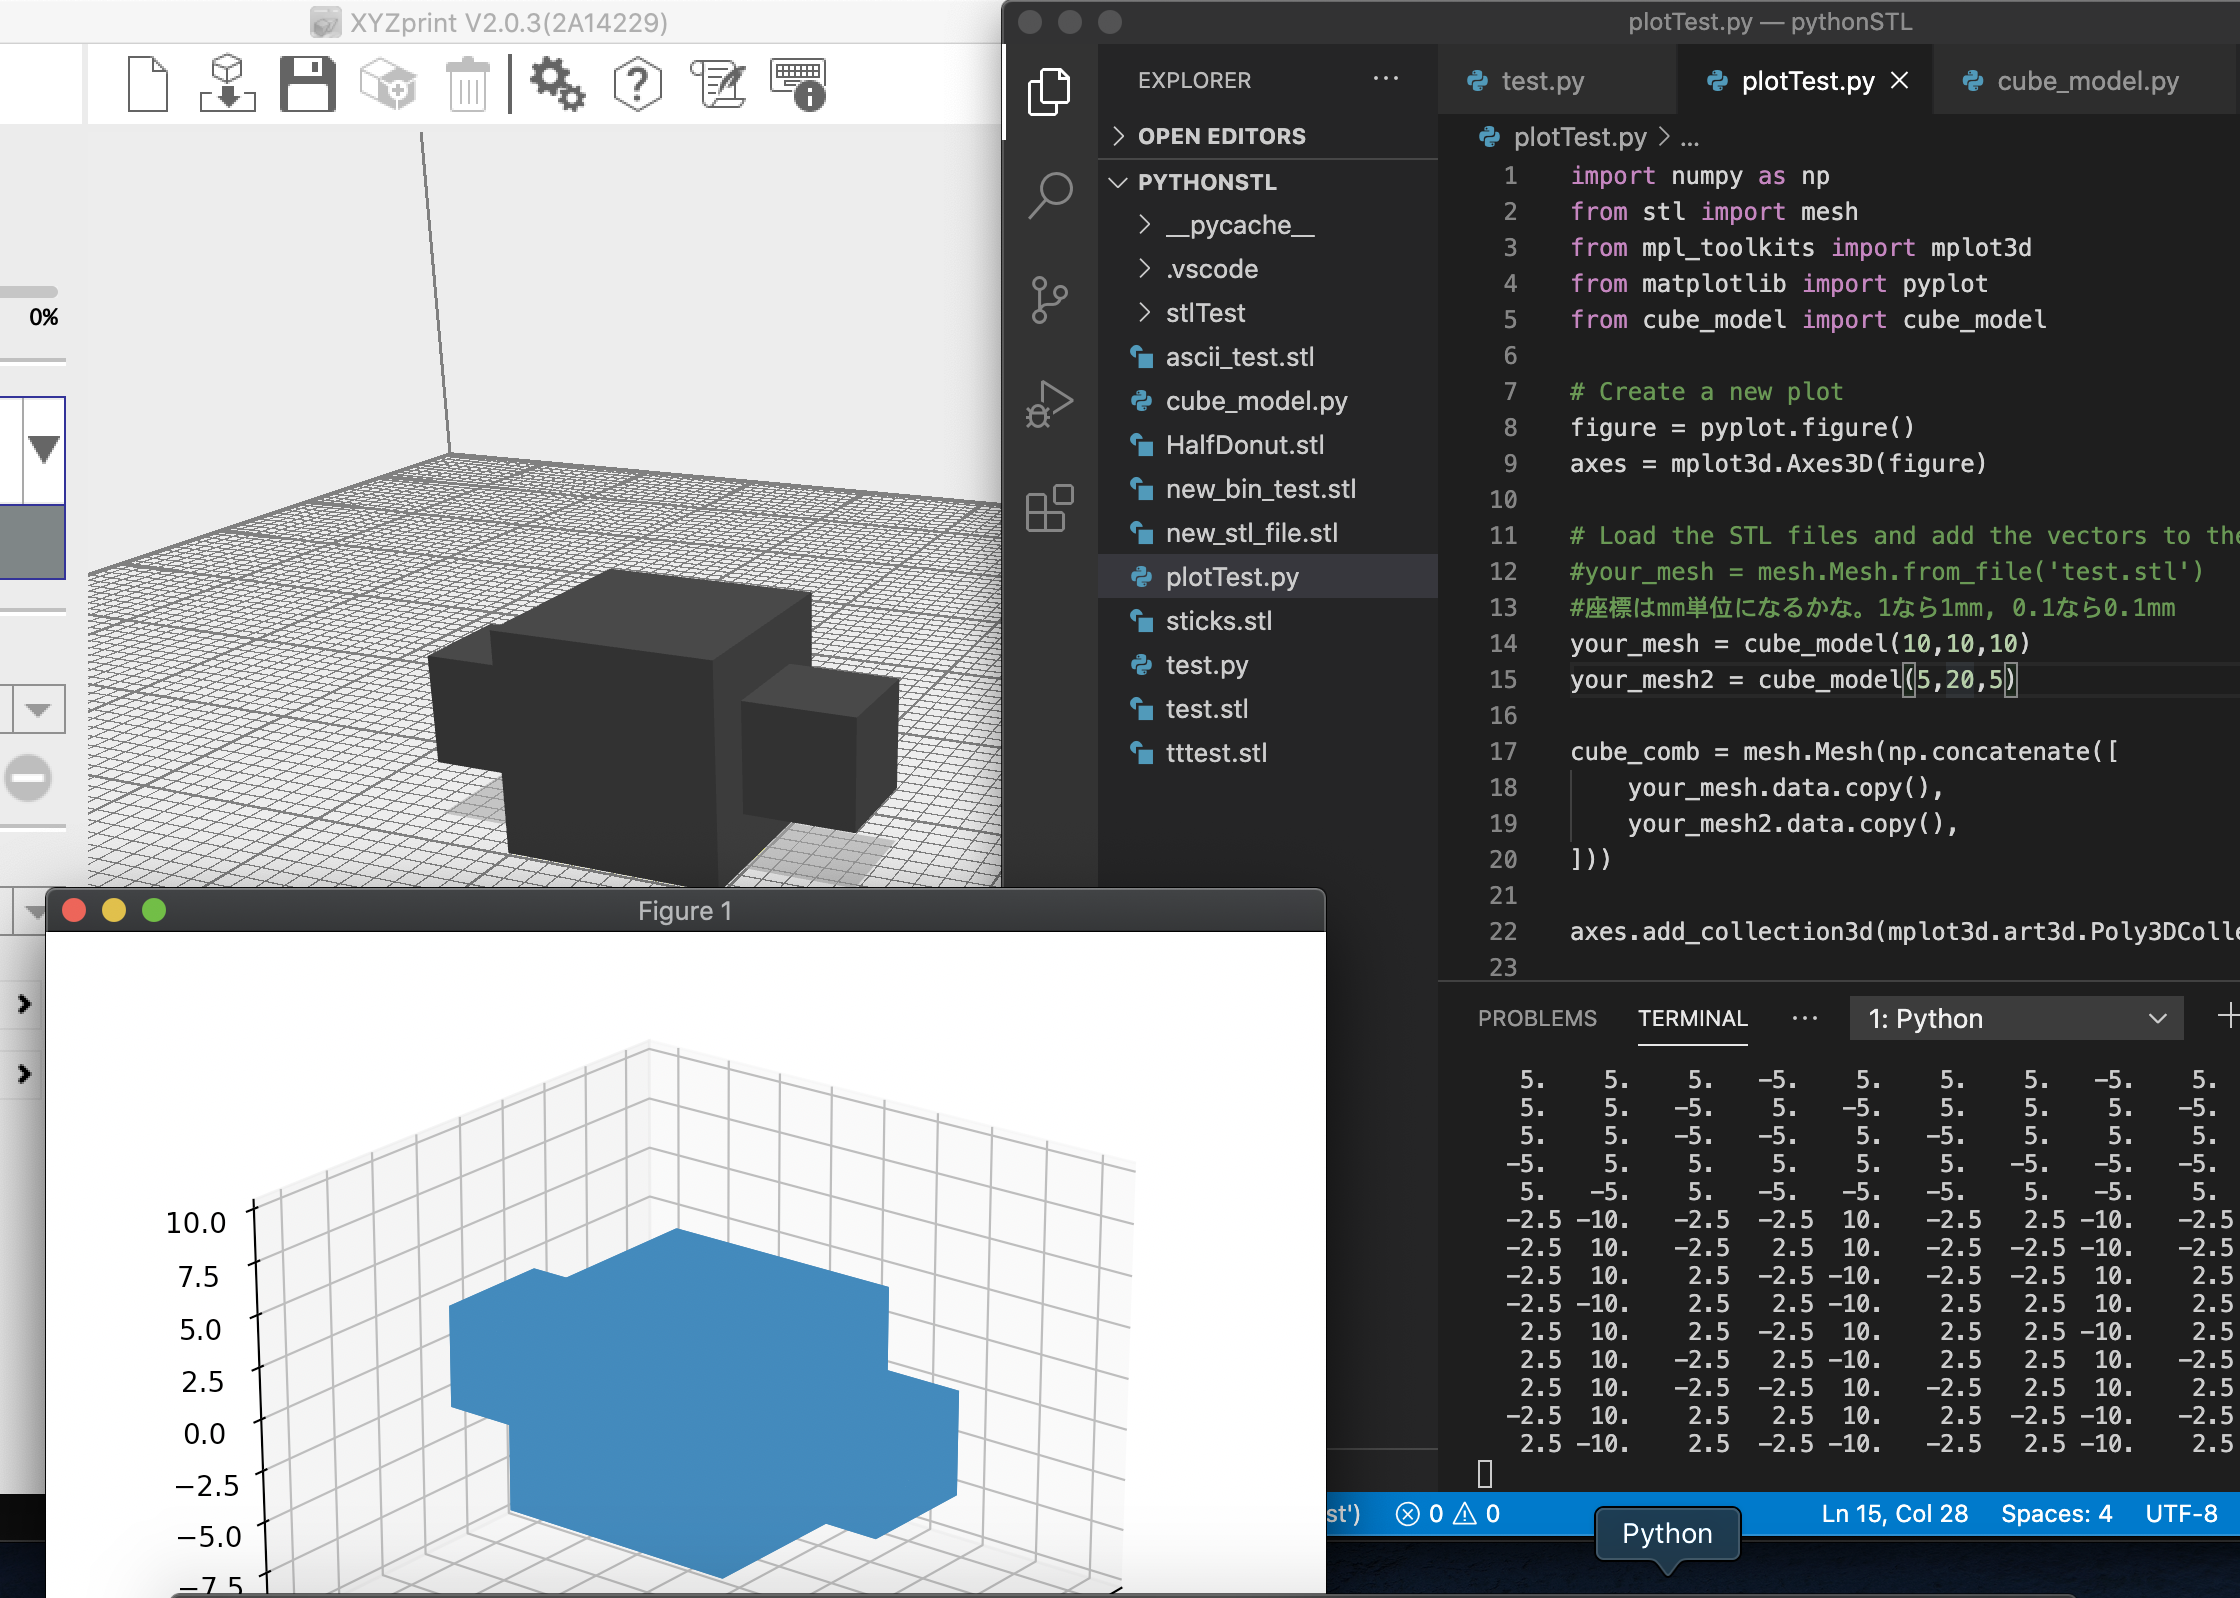
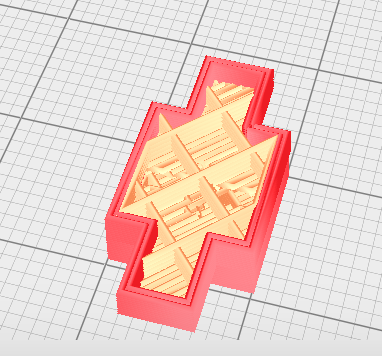
XYZprinting製3Dプリンタで造形データを流したりするために使うソフトウェア"XYZprint”に作成したSTLデータを流してみた。ちゃんと積層データも作れているようで嬉しい。


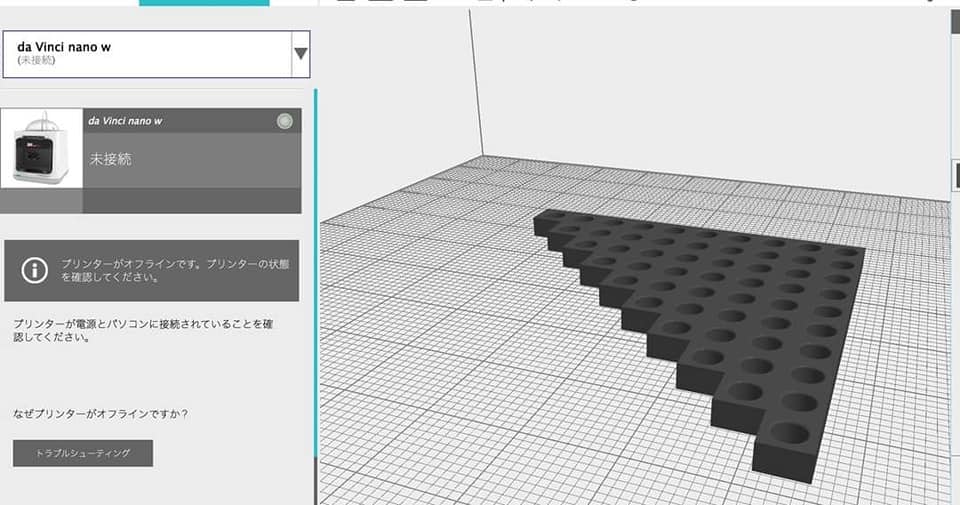
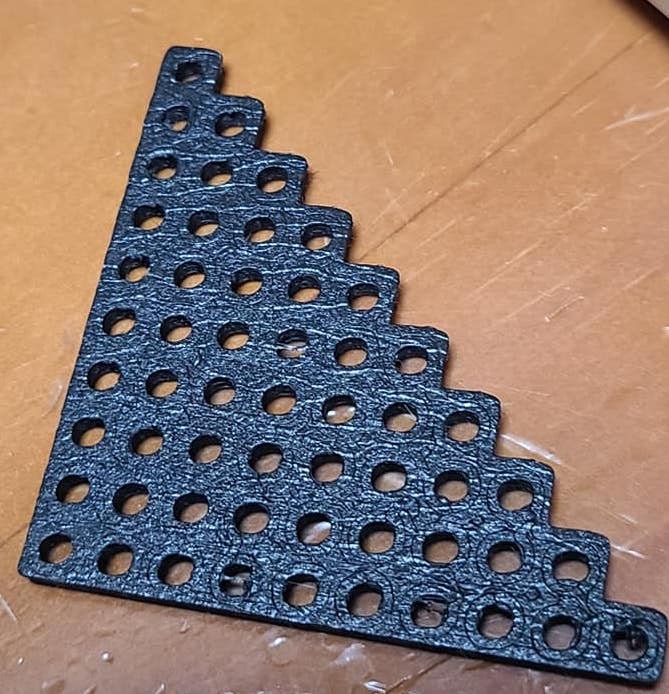
そのほか、forループと3Dモデルの結合、空meshを使ってユニバーサルプレートもどきを作ってみた。


おわりに
今回はnumpy-stlを一通り操作してみました。
一般的に使いそうな操作が他にあったら気が向いたときに追加します。
おまけ:参考にしたありがたいページ
自身が課題に当たったときに参照した、ありがたいページを列挙します。
- Dr.レオ様のPythonでSTLを操作できるnumpy-stlライブラリ
→モデルを中央に揃える際に参照しました。x,y,z軸のメッシュ点の最小値と最大値から中央を算出しようとしていたところ、既存メソッドの存在を教えてくれたので非常に助かりました。。