この記事ではChrome, Heroku, SourceTree, Atom, Node.jsを使用しています。
大学の研究室で開催している勉強会の資料共有とアーカイブのためにQiitaに投稿しています。
前回はHTMLとCSSの基本的な使い方を学びました。
今回はJavaScriptを勉強します。
JavaScriptとは
HTMLはサイトの骨組となり、CSSはその骨組みにデザインをつけていくようなものでした。
JavaScriptはそのHTMLやCSSを動かすためのものです。
| 言語 | 役割 |
|---|---|
| HTML | 骨組みや構造を表す |
| CSS | デザインを決定する |
| JavaScript | 様々な動きをつける |
JavaScriptでHello world!
その前にまずはHerokuでアプリを作成しましょう。
Herokuではクレジットカードの登録がない場合5個までしかアプリを無料で作成できません。アプリが作成できない場合はクレジットカードを登録するか要らないアプリを消してください。
JavaScriptファイルの作成
まずpublic/javascriptsフォルダにindex.jsというファイルを作成します。
そしてそこには1行だけ以下のようにコードを追記します。
alert("Hello world!");
JavaScriptの読み込み
index.htmlのbodyタグの閉じタグ寸前に次のコードを追加します。
<!DOCTYPE html>
<html>
  <head>
    <meta charset="utf-8">
    <title>JavaScript</title>
    <link rel='stylesheet' href='/stylesheets/style.css' />
  </head>
  <body>
    <h1>JavaScript</h1>
    <script src="/javascripts/index.js"></script>
  </body>
</html>
ページを開くとすぐにダイアログが表示されます。
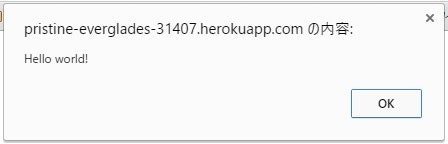
JavaScriptは読み込みと同時に実行もされるため読み込みファイルに書かれたJavaScriptは基本的にすべて実行されます。ただし関数の定義などは除きます。
コンソールでHello world!
他の開発同様コンソールというものがWebにもあります。
WindowsのChromeではF12を押すことでコンソールを含めた様々な開発者ツールを使用することができます。
まずはindex.jsを書き換えて見ます。
console.log("Hello world!");
この状態でサイトを開いても何もおきません。F12を押して開発者ツールを開きConsoleタブを開きます。

これがコンソールです。エラーなどもここで確認することができます。
HTMLでHello world!
次にHTMLをJavaScriptで書き換えるDOM操作をします。DOMとはDocument Object Modelの略でHTMLのタグ一つ一つをオブジェクトとして扱います。今回は最もシンプルな使い方をします。
まずindex.htmlにtextというidを持つpタグを追加します
<!DOCTYPE html>
<html>
  <head>
    <meta charset="utf-8">
    <title>JavaScript</title>
    <link rel='stylesheet' href='/stylesheets/style.css' />
  </head>
  <body>
    <h1>JavaScript</h1>
    <!-- このpタグを操作する -->
    <p id="text"></p>
    <script src="/javascripts/index.js"></script>
  </body>
</html>
そしてindex.jsを次のように書き換えます。
document.getElementById('text').textContent = "Hello world!";
実行してみます。
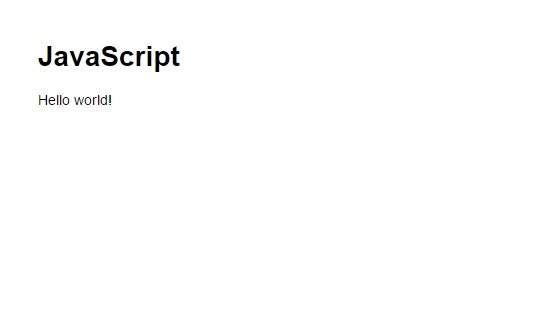
pタグの中にHello world!とテキストが追加されました。
JavaScriptにおける関数
JavaScriptで関数を定義します。index.jsを再び書き換えましょう。
function hello(){
    document.getElementById('text').textContent = "Hello world!";
}
この状態では開いても何も起きません。開発者ツールのConsoleを開き、hello()と入力します。
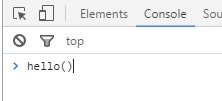
すると関数が実行され先ほどと同様にHello world!と表示されます。
ボタンに関数を割り当てる
JavaScriptの関するはボタンを押した時に実行するものとして登録することができます。
ボタンを配置しonclickにhello()を指定します。
<!DOCTYPE html>
<html>
<head>
<meta charset="utf-8">
<title>JavaScript</title>
<link rel='stylesheet' href='/stylesheets/style.css' />
</head>
<body>
<h1>JavaScript</h1>
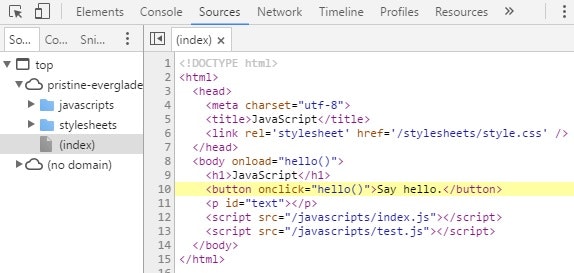
<button onclick="hello()">Say hello.</button>
<p id="text"></p>
<script src="/javascripts/index.js"></script>
</body>
</html>
ボタンを押すと Hello world!と表示されます。
開発者ツールで呼ばれる関数を確認する
せっかくなので開発者ツールのEvent listenersタブについて紹介します。
開発者ツールを開きElementsタブを表示しているときに見られるEvent Listenersタブを開きます。
ここにはElementsタブ内で選択されたタグに割り当てられたJavaScriptの関数を確認することができます。
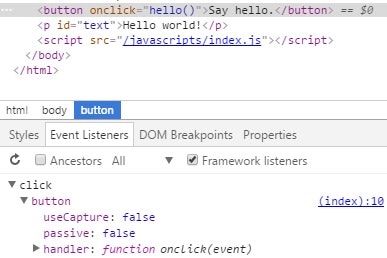
試しにbuttonタグを選択するとclickというイベントに対してJavaScriptが割り当てられているのがわかります。
ここで(index):10というリンクをクリックすると
このようにどこでそのイベントに登録されているかが強調表現されます。
このonclickの中に記述されているものはJavaScriptとして解釈されて実行されます。そのため正確にはhelloという関数を登録したのではなくhello()というJavaScriptを実行するように設定したのです。
ページが読み込まれた時に関数を実行する
最初はページを開くだけで Hello world!が表示されていました。今度はページを開いた時に関数を実行するようにします。
JavaScriptファイルから関数を呼ぶ
JavaScriptファイルは書いてあるコードは読み込みと同時に実行されるので次のようにするだけで読み込み時に実行できます。
function hello(){
    document.getElementById('text').textContent = "Hello world!";
}

hello();
※JavaScriptでは行末の;(セミコロン)が必須です。
これでページを開いた時に Hello world!と表示されます。もはやボタンは意味ないですね。
HTMLファイルから関数を呼ぶ
まず先ほどのJavaScriptを元に戻しページを開いても関数が呼ばれないように戻します。
function hello(){
    document.getElementById('text').textContent = "Hello world!";
}

// hello();
JavaScriptでは//でコメントアウトになります。
そしてindex.htmlのbodyタグにonload属性を追加しhelloを指定します。
<!DOCTYPE html>
<html>
  <head>
    <meta charset="utf-8">
    <title>JavaScript</title>
    <link rel='stylesheet' href='/stylesheets/style.css' />
  </head>
  <body onload="hello()">
    <h1>JavaScript</h1>
    <button onclick="hello()">Say hello.</button>
    <p id="text"></p>
    <script src="/javascripts/index.js"></script>
  </body>
</html>
これで開いた時に Hello world!が表示されます。
2つの違い
この二通りのやり方は少し意味が異なります。まずJavaScriptから呼び出す方法ではJavaScriptファイルが読み込まれた時に行われます。そしてHTMLから呼び出す方法ではすべての読み込みが完了した時に呼ばれたす。
簡単に実験をしてみます。
まずpublic/javascriptsフォルダにtest.jsを以下のように作成します。
console.log('test.js');
さらにindex.htmlとindex.jsを以下のように書き換えます。
<!DOCTYPE html>
<html>
  <head>
    <meta charset="utf-8">
    <title>JavaScript</title>
    <link rel='stylesheet' href='/stylesheets/style.css' />
  </head>
  <body onload="hello()">
    <h1>JavaScript</h1>
    <button onclick="hello()">Say hello.</button>
    <p id="text"></p>
    <script src="/javascripts/index.js"></script>
    <script src="/javascripts/test.js"></script>
  </body>
</html>
function hello(){
    document.getElementById('text').textContent = "Hello world!";
    console.log('hello');
}

console.log('index.js');
そしてサイトを開き開発者ツールのコンソールを開いてみます。
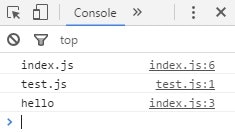
このように表示されました。
これで読み込まれた順番がおわかりいただけたと思います。
WebブラウザはHTMLファイルを順に読み込んで行きJavaScriptファイルは読み込まれた時に順次実行されていきます。そして読み込みが完了するとonloadが実行されるためhelloという関数が呼ばれています。
このJavaScriptやHTMLの読み込みについて知っていないとエラーの原因がわからないことが多々出てくることになりますので順に読み込まれていくことを覚えておきましょう。
JavaScriptでデザインを変更する
JavaScriptはHTMLの他にもCSSのようなデザインに関する部分も書き換えることができます。
まずは変えるためのボタンと文字を用意します。
<!DOCTYPE html>
<html>
<head>
<meta charset="utf-8">
<title>JavaScript</title>
<link rel='stylesheet' href='/stylesheets/style.css' />
</head>
<body onload="hello()">
<h1>JavaScript</h1>
<button onclick="hello()">Say hello.</button>
<p id="text"></p>
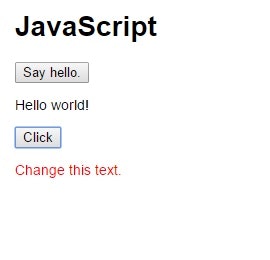
<button onclick="changeColor()">Click</button>
<p id="text-colored">
Change this text.
</p>
<script src="/javascripts/index.js"></script>
</body>
</html>
そして色を変更する関数を定義します。
function hello(){
    document.getElementById('text').textContent = "Hello world!";
}

function changeColor() {
    document.getElementById('text-colored').style.color = "red";
}
ボタンを押すことで文字色が赤くなるか確認してみます。
CSSで行ったような設定内容は.styleに続けて書くことで変更ができます。
JavaScriptにおける変数
JavaScriptでも変数は使用できます。しかし型宣言などはなくすべて型の代わりにvarを用います。
var hello_text = "Hello world!";

function hello(){
    document.getElementById('text').textContent = hello_text;
}

function changeColor() {
    document.getElementById('text-colored').style.color = "red";
}
このように変数は利用できます。
先ほどの色を変える関数と変数を利用してカウントをしてみます。
カウント用の変数と変数を表示するプログラムを追記します。
var hello_text = "Hello world!";
var count = 0;
function hello(){
document.getElementById('text').textContent = hello_text;
}
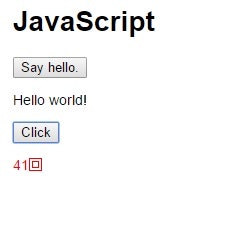
function changeColor() {
count++;
document.getElementById('text-colored').textContent = count+"回";
document.getElementById('text-colored').style.color = "red";
}
これで押した回数をカウントするようになりました。
JavaScriptでタイマーを使う
JavaScriptはタイマーのようなものを作成するのが非常に簡単です。ページを開いてから何秒経ったかを表示するタイマーを追加します。
まずHTMLに秒数を表示するためのタグを追加します。
<!DOCTYPE html>
<html>
  <head>
    <meta charset="utf-8">
    <title>JavaScript</title>
    <link rel='stylesheet' href='/stylesheets/style.css' />
  </head>
  <body onload="hello()">
    <h1>JavaScript</h1>
    <button onclick="hello()">Say hello.</button>
    <p id="text"></p>
    <button onclick="changeColor()">Click</button>
    <p id="text-colored">
        Change this text.
    </p>
    <hr>
    <p>
        経過時間:<span id="time">0</span>秒
    </p>
    <script src="/javascripts/index.js"></script>
  </body>
</html>
こういう時にspanは便利ですね。
index.jsに1000ミリ秒ごとに変数を1ずつ足しては表示するコードを追記します。
var hello_text = "Hello world!";
var count = 0;
var time = 0;

function hello(){
    document.getElementById('text').textContent = hello_text;
}

function changeColor() {
    count++;
    document.getElementById('text-colored').textContent = count+"回";
    document.getElementById('text-colored').style.color = "red";
}

setInterval(function () {
    time++;
    document.getElementById('time').textContent = time;
}, 1000);

/* こういう書き方もできます
function timeCount() {
    time++;
    document.getElementById('time').textContent = time;
}

setInterval(timeCount, 1000);
*/
JavaScriptで画面遷移する
JavaScriptで別のページに遷移するコードを書きます。
まずは遷移先のHTMLをpublicフォルダに作成します。
<!DOCTYPE html>
<html>
  <head>
    <meta charset="utf-8">
    <title>時間切れ</title>
    <link rel='stylesheet' href='/stylesheets/style.css' />
  </head>
  <body>
    <h1>時間切れ!</h1>
  </body>
</html>
JavaScriptに遷移するコードを追記します。
せっかくなので処理を変更し10秒後に遷移するように変更します。
var hello_text = "Hello world!";
var count = 0;
var time = 10;

function hello(){
    document.getElementById('text').textContent = hello_text;
}

function changeColor() {
    count++;
    document.getElementById('text-colored').textContent = count+"回";
    document.getElementById('text-colored').style.color = "red";
}

setInterval(function () {
    time--;
    document.getElementById('time').textContent = time;
    if (time < 0){
        location.href = "time up.html";
    }
}, 1000);
JavaScriptで画像を変える
HTMLやCSSで書くあらゆるものはJavaScriptで変更できます。画像も例外ではありません。
まずはimgタグを配置し初期の画像を指定します。
<!DOCTYPE html>
<html>
  <head>
    <meta charset="utf-8">
    <title>JavaScript</title>
    <link rel='stylesheet' href='/stylesheets/style.css' />
  </head>
  <body onload="hello()">
    <h1>JavaScript</h1>
    <button onclick="hello()">Say hello.</button>
    <p id="text"></p>
    <img src="/images/first.jpg" id="main-image">
    <button onclick="changeColor()">Click</button>
    <p id="text-colored">
        Change this text.
    </p>
    <hr>
    <p>
        経過時間:<span id="time">0</span>秒
    </p>
    <script src="/javascripts/index.js"></script>
  </body>
</html>
次にJavaScriptを変更しますがせっかくなので5秒経過した時に変更するようにします。
var hello_text = "Hello world!";
var count = 0;
var time = 10;

function hello(){
    document.getElementById('text').textContent = hello_text;
}

function changeColor() {
    count++;
    document.getElementById('text-colored').textContent = count+"回";
    document.getElementById('text-colored').style.color = "red";
}

setInterval(function () {
    time--;
    document.getElementById('time').textContent = time;
    if (time < 0){
        location.href = "time up.html";
    }else if (time == 5){
        document.getElementById('main-image').src = "/images/second.jpg";
    }
}, 1000);
チャレンジ
- 正解と表示する関数と不正解と表示する関数を用意してそれぞれボタンに割り当てる
- 不正解と正解で画面を遷移する
- 制限時間を秒数でなくprogressタグで表示する