内容
EC2への接続方法を公開鍵認証からパスワード認証へ変更する
類似記事
(Amazon Linux 2の)sshd_configとauthorized_keysを学ぶ
手順
対象のEC2へSSH接続して、ユーザをrootへ切り替えます。
sshd_configのバックアップ取得
設定変更を行う前には必ずバックアップを取得しておきます。
# cd /etc/ssh/
# pwd
/etc/ssh

# ls -l
total 608
...
-rw-r--r-- 1 root root       2276 Mar 15 12:25 ssh_config
-rw------- 1 root root       3977 Mar 15 12:04 sshd_config
...

# cp -p sshd_config sshd_config_yyyymmdd
# ls -l
total 608
...
-rw-r--r-- 1 root root       2276 Mar 15 12:25 ssh_config
-rw------- 1 root root       3977 Mar 15 12:04 sshd_config
-rw------- 1 root root       3977 Mar 15 12:04 sshd_config_yyyymmdd
...
sshd_config設定変更
sshd_configの設定を変更していきます。
(変更前)
#PubkeyAuthentication yes
PasswordAuthentication no
(変更後)
PubkeyAuthentication no
PasswordAuthentication yes
# vi sshd_config
# cat sshd_config | grep PubkeyAuthentication
# PubkeyAuthentication yes
PubkeyAuthentication no

# cat sshd_config | grep PasswordAuthentication
PasswordAuthentication yes
# PasswordAuthentication no

# systemctl restart sshd.service
viコマンドで設定変更を行い、cat+grepで変更箇所が問題なく変更されていることを確認します。
その後、systemctlコマンドでsshd.serviceを再起動します。
パスワード認証での接続確認
Teratermを使用して、パスワード認証でログインできるかを確認します。
その際、現在の接続は保ったまま行ってください。
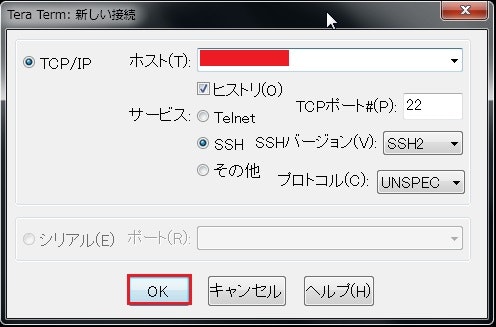
IPアドレスを入力してOKを押下します。
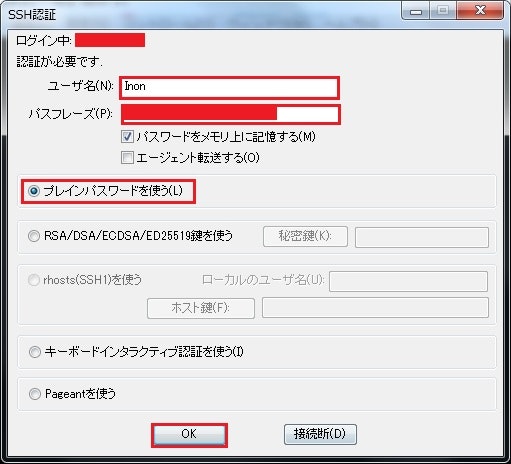
ユーザ名とパスワードを入力して**ブレインパスワードを使う(L)**を選択して接続します。
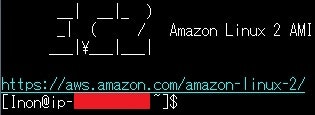
接続できました。
終わり
これでパスワード認証へ変更が出来た。
出来たがパスワード認証はあまりよろしくないので元に戻しましょう。
# cp -p  sshd_config_yyyymmdd sshd_config
# systemctl restart sshd.service