◆はじめに
- LINEのMessaging APIが面白そうだったので、自分でも少しかじってみました。
- 最近は官公庁や自治体が様々なオープンデータを公開しているので、今回は携帯の通信容量が無くなった時のために最寄りWi-Fiスポットを探してくれるBotを作りました。
◆作ったもの
- 今回作ったものはこの3つです。(これら3つのファイルは同じディレクトリに保存します)
- ① app.py
- Botを動かすプログラム本体です。
- ② .env
- LINEの認証情報を入れておくファイルです。
- ③ Wi-FiスポットのCSVファイル
- オープンデータから取得して加工したデータです。各スポットの緯度経度情報が含まれます。
- ① app.py
◆必要なもの
- ① Pythonの実行環境
- Python3系が動けばWindows/Mac/Linuxどれでも動くと思います。
- 筆者の環境はWindows11、Python3.9.9です。
- Python3系が動けばWindows/Mac/Linuxどれでも動くと思います。
- ② LINEアカウント
- LINE Developersの登録に必要です。
- ③ Botのデプロイ先
- LINEとWebhook通信するため、外部と通信できるサーバー環境が必要です。
- 今回はngrokを使ってローカルのサーバーを外部に公開して動かしました。
- Heroku等のPaaSを使うのもアリです。
◆作り方
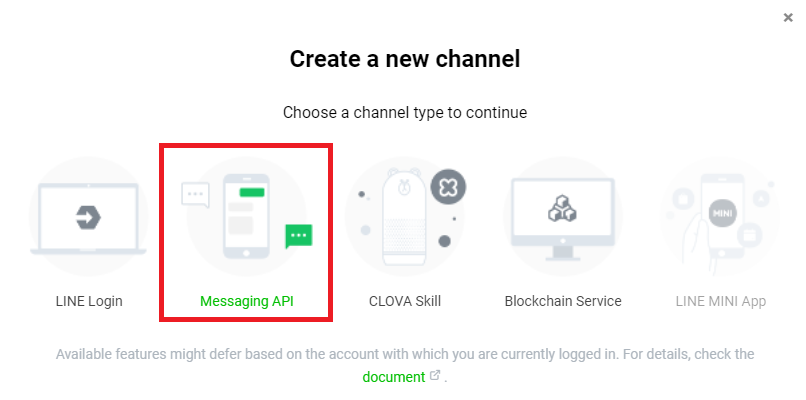
1. LINE Developersに登録し、プロバイダとチャネルを作成する
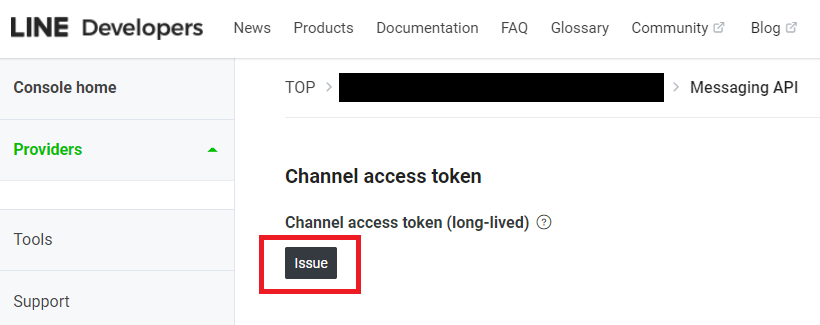
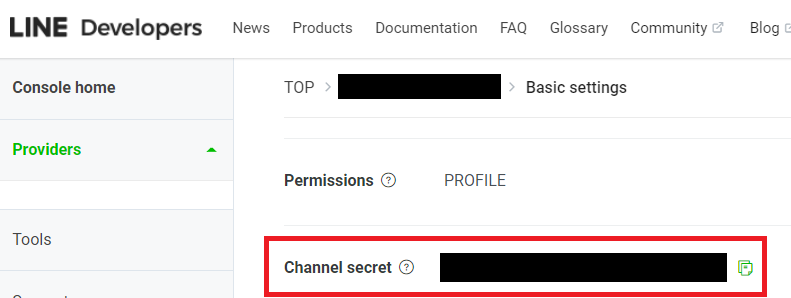
2. Channel access tokenとChannel secretを取得する
- チャネルを作成したらChannel access tokenとChannel secretを取得します。
3. 必要なライブラリをインストールする
- LINEbotを動かすのに必要なPythonライブラリをpipコマンドでインストールします。
$ pip install python-dotenv
$ pip install flask
$ pip install geopy
$ pip install line-bot-sdk
4. CSVデータとプログラムを作成する
①プログラム本体
- 下記コードをapp.pyとして保存します。
app.py
import os
import sys
import csv
from dotenv import load_dotenv
from flask import Flask, request, abort
from linebot import (LineBotApi, WebhookHandler)
from linebot.exceptions import (InvalidSignatureError)
from linebot.models import (MessageEvent, TextSendMessage)
from geopy.distance import geodesic

# .env読み込み
load_dotenv()

# Messaging API 認証情報
line_bot_api = LineBotApi(os.environ.get('CHANNEL_ACCESS_TOKEN'))
handler = WebhookHandler(os.environ.get('CHANNEL_SECRET'))

# CSV読み込み(最初のコマンドライン引数にCSVのパスを指定する)
ap_list = []
with open(sys.argv[1], 'r', encoding = 'utf8') as file_p:
	csv_reader = csv.reader(file_p)
	csv_header = next(csv_reader)
	for row in csv_reader:
		ap_list.append({
			'id': row[0],
			'name': row[1],
			'address': row[2],
			'ssid': row[3],
			'latitude': row[4],
			'longitude': row[5]
		})

app = Flask(__name__)

# WebhookのPOST先
@app.route('/callback', methods = ['POST'])
def callback():
	signature = request.headers['X-Line-Signature']
	body = request.get_data(as_text = True)
	try:
		handler.handle(body, signature)
	except InvalidSignatureError:
		print('Invalid signature. Check your channel access token or channel secret.')
		abort(400)

	return 'OK'

# メッセージの返信処理
@handler.add(MessageEvent)
def handler_message(event):
	if event.type == 'message':
		if event.message.type == 'location':
			# 最寄りWi-Fiスポットを検索
			ap_distance = {}
			for ap_data in ap_list:
				start_point = (event.message.latitude, event.message.longitude)
				# CSVの空白以外(「-」以外)のデータを使う
				if ap_data['latitude'] != '-' and ap_data['longitude'] != '-':
					dest_point = (float(ap_data['latitude']), float(ap_data['longitude']))
					ap_distance[ap_data['id']] = geodesic(start_point, dest_point).km
				else:
					continue
			min_distance_idx = min(ap_distance, key = ap_distance.get)
			# ルート地図のURL生成
			route_url = 'https://www.openstreetmap.org/directions?engine=fossgis_osrm_foot&route=' + str(event.message.latitude) + '%2C' + str(event.message.longitude) + '%3B' + ap_list[int(min_distance_idx)]['latitude'] + '%2C' + ap_list[int(min_distance_idx)]['longitude'] + '#map=16/' + str(event.message.latitude) + '/' + str(event.message.longitude)
			# 返信するメッセージを生成
			reply_message = '最寄りのWi-Fi接続スポットは「' + ap_list[int(min_distance_idx)]['name'] + '」です。\n'
			reply_message = reply_message  + '◆住所:\n' + ap_list[int(min_distance_idx)]['address'] + '\n'
			reply_message = reply_message + '◆SSID:\n' + ap_list[int(min_distance_idx)]['ssid'] + '\n'
			reply_message = reply_message + '◆ルート:\n' + route_url
			line_bot_api.reply_message(event.reply_token, TextSendMessage(reply_message))

if __name__ == '__main__':
	app.run()
<1> CSVファイル読み込み
- csvモジュールを使ってWi-Fiスポットの位置情報データを読み込みます。
- next(csv_reader)でヘッダ部分を飛ばします。
ap_list = []
with open(sys.argv[1], 'r', encoding = 'utf8') as file_p:
	csv_reader = csv.reader(file_p)
	csv_header = next(csv_reader)
	for row in csv_reader:
		ap_list.append({
			'id': row[0],
			'name': row[1],
			'address': row[2],
			'ssid': row[3],
			'latitude': row[4],
			'longitude': row[5]
		})
<2> Webhookの処理
- Messaging APIのWebhook先パスを設定し、handler_messageメソッドの中でWebhookに対して返す処理を記述します。
# WebhookのPOST先
@app.route('/callback', methods = ['POST'])
def callback():
	signature = request.headers['X-Line-Signature']
	body = request.get_data(as_text = True)
	try:
		handler.handle(body, signature)
	except InvalidSignatureError:
		print('Invalid signature. Check your channel access token or channel secret.')
		abort(400)

	return 'OK'

# メッセージの返信処理
@handler.add(MessageEvent)
def handler_message(event):
...
<3> 最寄りWi-Fiスポットの検索
- LINEで送られた位置情報から緯度経度を取得し、geopyライブラリを使い距離を計算して最寄りWi-Fiスポットを検索します。
# 最寄りWi-Fiスポットを検索
ap_distance = {}
for ap_data in ap_list:
	start_point = (event.message.latitude, event.message.longitude)
	# CSVの空白以外(「-」以外)のデータを使う
	if ap_data['latitude'] != '-' and ap_data['longitude'] != '-':
		dest_point = (float(ap_data['latitude']), float(ap_data['longitude']))
		ap_distance[ap_data['id']] = geodesic(start_point, dest_point).km
	else:
		continue
min_distance_idx = min(ap_distance, key = ap_distance.get)
<4> メッセージを返す
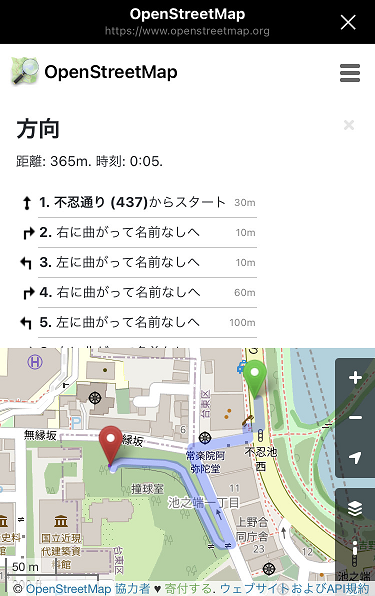
- 現在位置の緯度経度と最寄りWi-Fiスポットの緯度経度をもとにルートマップのURLを生成します。
- 地図の表示にはOpenStreetMapを使います。
- URLパラメータを設定することでルート情報のURLを動的に生成します。
# ルート地図のURL生成
route_url = 'https://www.openstreetmap.org/directions?engine=fossgis_osrm_foot&route=' + str(event.message.latitude) + '%2C' + str(event.message.longitude) + '%3B' + ap_list[int(min_distance_idx)]['latitude'] + '%2C' + ap_list[int(min_distance_idx)]['longitude'] + '#map=16/' + str(event.message.latitude) + '/' + str(event.message.longitude)
# 返信するメッセージを生成
reply_message = '最寄りのWi-Fi接続スポットは「' + ap_list[int(min_distance_idx)]['name'] + '」です。\n'
reply_message = reply_message  + '◆住所:\n' + ap_list[int(min_distance_idx)]['address'] + '\n'
reply_message = reply_message + '◆SSID:\n' + ap_list[int(min_distance_idx)]['ssid'] + '\n'
reply_message = reply_message + '◆ルート:\n' + route_url
line_bot_api.reply_message(event.reply_token, TextSendMessage(reply_message))
②.envファイル
- 先ほど取得したChannel access tokenとChannel secretを.envファイルに記述します。
.env
CHANNEL_ACCESS_TOKEN='<取得したChannel access token>'
CHANNEL_SECRET='<取得したChannel secret>'
③CSVデータ
- Wi-Fiスポットの位置情報CSVファイルを下記6つのヘッダを先頭にしたフォーマットで作成します。(空白データは「-」で埋めます)
- id
- 各レコードの項番です。0からスタートとします。
- name
- Wi-Fiスポットの名前です。
- address
- Wi-Fiスポットの住所です。
- ssid
- Wi-Fiスポットのアクセスポイント名です。
- latitude
- Wi-Fiスポットの緯度です。
- longitude
- Wi-Fiスポットの経度です。
- id
- ファイルのイメージ↓

◆動かしてみる
1. Pythonプログラムを実行
- ターミナルでapp.pyを実行します。
- 引数にWi-Fiスポットの位置情報データのCSVファイル名を指定します。
- 5000番ポートでサーバーが起動します。
$ python app.py ./<Wi-FiスポットのCSVファイル名>.csv
2. ngrokで外部にポートを通す
- 別ウィンドウでターミナルをもう1つ開き、下記コマンドで5000番ポートを外部に公開します。
- ターミナル上の「Forwarding」にhttpsから始まるURLが表示されるので、それをコピーします。
$ ngrok http 5000
3. Webhookを設定する
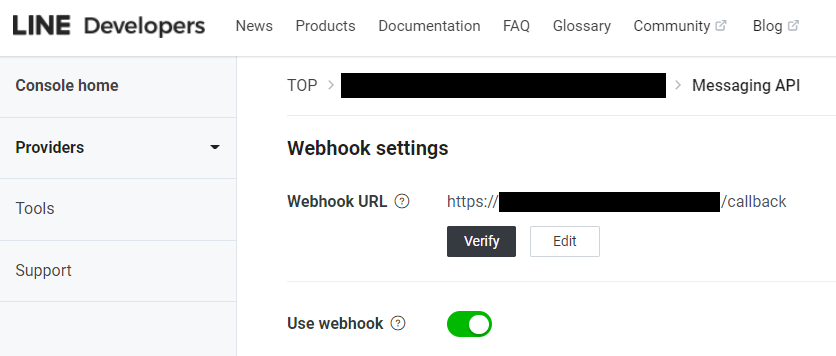
- チャネルページの「Messaging API」タブにある「Webhook settings」に「先ほどコピーしたngrokのURL」+「/callback」を入力し、保存します。
- 「Verify」ボタンでngrokのURLへのPOSTリクエストをテストできます。
- 「Use webhook」もONにします。
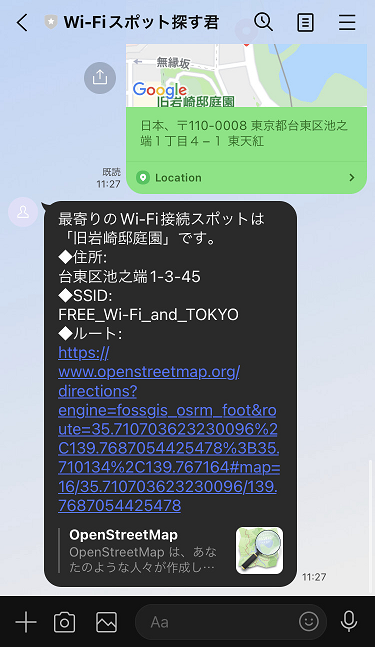
4. LINEで位置情報を送る
- チャネルページの「Messaging API」タブにあるQRコードでチャネルと友達になり、位置情報を送ります。
以上です。
Botで遊んでみると結構いろいろな場所にWi-Fiスポットってありますね。
自治体の提供しているもの以外に、お店に置いてあるWi-Fiスポットの情報も入ると良さそうです。
