はじめに
最近UIKitを学び始めた初心者です。
同じ初心者、初学者の方を対象にしてます。また、自分のメモ、備忘録です。
Storyboardでやった方が楽ですが、UIScrollViewをコードのみで実装してみたかった。
この記事のサンプルプロジェクト.
Xcode Version 14.0.1で実行してます。
StoryboardでUIScrollViewの実装はこの記事がわかりやすいです。
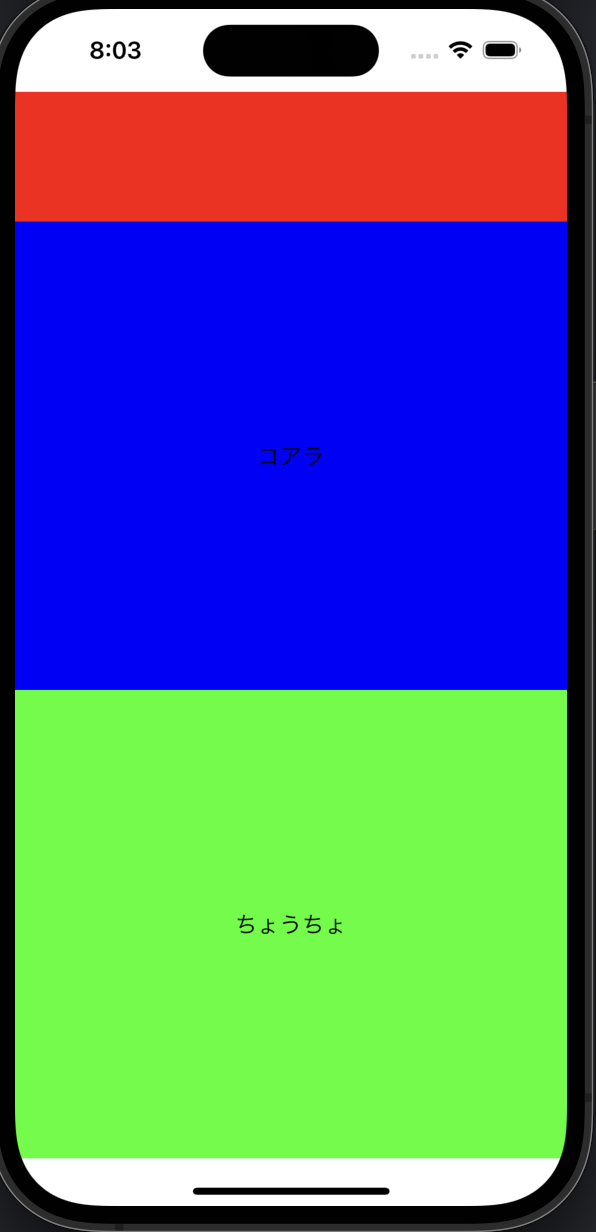
できるもの
こんな感じです。
スクロールします。
Storyboardを使わないプロジェクトの設定をします
やり方知らないかたはこちらの記事どうぞ.
LabelViewControllerを作成
まず、StackViewにLabelを3つ入れただけLabelViewControllerを作成します。
このLabelViewControllerをこの後、ScrollViewの子ビューのcontainerViewに実装します。
import UIKit

class LabelViewController: UIViewController {
    var stacView: UIStackView!
    var label1: UILabel!
    var label2: UILabel!
    var label3: UILabel!

    override func viewDidLoad() {
        super.viewDidLoad()

        view.backgroundColor = .white

        stacView = UIStackView()
        stacView.axis = .vertical
        stacView.alignment = .fill
        stacView.distribution = .fillEqually
        stacView.spacing = 0
        stacView.translatesAutoresizingMaskIntoConstraints = false
        view.addSubview(stacView)

        label1 = UILabel()
        label1.text = "パンダ"
        label1.textAlignment = .center
        label1.backgroundColor = .red
        stacView.addArrangedSubview(label1)

        label2 = UILabel()
        label2.text = "コアラ"
        label2.textAlignment = .center
        label2.backgroundColor = .blue
        stacView.addArrangedSubview(label2)

        label3 = UILabel()
        label3.text = "ちょうちょ"
        label3.textAlignment = .center
        label3.backgroundColor = .green
        stacView.addArrangedSubview(label3)

        NSLayoutConstraint.activate([
            stacView.topAnchor.constraint(equalTo: view.safeAreaLayoutGuide.topAnchor),
            stacView.trailingAnchor.constraint(equalTo: view.safeAreaLayoutGuide.trailingAnchor),
            stacView.leadingAnchor.constraint(equalTo: view.safeAreaLayoutGuide.leadingAnchor),
            stacView.bottomAnchor.constraint(equalTo: view.safeAreaLayoutGuide.bottomAnchor),
        ])
    }


}
ScrollViewControllerを作成
元々あったViewControllerを消してScrollViewControllerを作成します。
class ScrollViewController: UIViewController {
    var scrollView: UIScrollView!
    var containerView: UIView!

    // containerViewにViewControllerを入れる関数
    func displayContentController(content: UIViewController, container: UIView) {
        addChild(content)
        // オートレイアウト使用するためにfalseにする
        content.view.translatesAutoresizingMaskIntoConstraints = false
        container.addSubview(content.view)
        // LabelVeiwContorollerをcontanierViewに合わせる制約を貼る
        NSLayoutConstraint.activate([
            content.view.topAnchor.constraint(equalTo: container.topAnchor),
            content.view.leadingAnchor.constraint(equalTo: container.leadingAnchor),
            content.view.rightAnchor.constraint(equalTo: container.rightAnchor),
            content.view.bottomAnchor.constraint(equalTo: container.bottomAnchor)
        ])

        content.didMove(toParent: self)
    }

    override func viewDidLoad() {
        super.viewDidLoad()

        view.backgroundColor = .white

        scrollView = UIScrollView()
        scrollView.translatesAutoresizingMaskIntoConstraints = false
        view.addSubview(scrollView)

        containerView = UIView()
        containerView.backgroundColor = .red
        containerView.translatesAutoresizingMaskIntoConstraints = false
        scrollView.addSubview(containerView)


        displayContentController(content: LabelViewController(), container: containerView)

        NSLayoutConstraint.activate([
            // スクロールビューの制約
            scrollView.topAnchor.constraint(equalTo: view.safeAreaLayoutGuide.topAnchor),
            scrollView.trailingAnchor.constraint(equalTo: view.safeAreaLayoutGuide.trailingAnchor),
            scrollView.leadingAnchor.constraint(equalTo: view.safeAreaLayoutGuide.leadingAnchor),
            scrollView.bottomAnchor.constraint(equalTo: view.safeAreaLayoutGuide.bottomAnchor),
            // containerViewの制約
            containerView.topAnchor.constraint(equalTo: scrollView.contentLayoutGuide.topAnchor),
            containerView.trailingAnchor.constraint(equalTo: scrollView.contentLayoutGuide.trailingAnchor),
            containerView.leadingAnchor.constraint(equalTo: scrollView.contentLayoutGuide.leadingAnchor),
            containerView.bottomAnchor.constraint(equalTo: scrollView.contentLayoutGuide.bottomAnchor),
            containerView.widthAnchor.constraint(equalTo: scrollView.frameLayoutGuide.widthAnchor, multiplier: 1),
            containerView.heightAnchor.constraint(equalToConstant: 1000),

        ])

    }

}
SceneDelegate.swiftのルートビューを変更します。
// ルートビュー指定
window.rootViewController = ScrollViewController()
完成
おまけ
ScrollViewControllerのdisplayContentController関数使わないとこんな感じでできます。
import UIKit

class ScrollViewController: UIViewController {
    var scrollView: UIScrollView!
    var containerView: UIView!


    override func viewDidLoad() {
        super.viewDidLoad()

        view.backgroundColor = .white

        scrollView = UIScrollView()
        scrollView.translatesAutoresizingMaskIntoConstraints = false
        view.addSubview(scrollView)

        containerView = UIView()
        containerView.backgroundColor = .red
        containerView.translatesAutoresizingMaskIntoConstraints = false
        scrollView.addSubview(containerView)

        let viewController = LabelViewController()
        addChild(viewController)
        viewController.view.translatesAutoresizingMaskIntoConstraints = false
        containerView.addSubview(viewController.view)

        NSLayoutConstraint.activate([
            // スクロールビューの制約
            scrollView.topAnchor.constraint(equalTo: view.safeAreaLayoutGuide.topAnchor),
            scrollView.trailingAnchor.constraint(equalTo: view.safeAreaLayoutGuide.trailingAnchor),
            scrollView.leadingAnchor.constraint(equalTo: view.safeAreaLayoutGuide.leadingAnchor),
            scrollView.bottomAnchor.constraint(equalTo: view.safeAreaLayoutGuide.bottomAnchor),
            // containerViewの制約
            containerView.topAnchor.constraint(equalTo: scrollView.contentLayoutGuide.topAnchor),
            containerView.trailingAnchor.constraint(equalTo: scrollView.contentLayoutGuide.trailingAnchor),
            containerView.leadingAnchor.constraint(equalTo: scrollView.contentLayoutGuide.leadingAnchor),
            containerView.bottomAnchor.constraint(equalTo: scrollView.contentLayoutGuide.bottomAnchor),
            containerView.widthAnchor.constraint(equalTo: scrollView.frameLayoutGuide.widthAnchor, multiplier: 1),
            containerView.heightAnchor.constraint(equalToConstant: 1000),

            viewController.view.topAnchor.constraint(equalTo: containerView.topAnchor),
            viewController.view.trailingAnchor.constraint(equalTo: containerView.trailingAnchor),
            viewController.view.leadingAnchor.constraint(equalTo: containerView.leadingAnchor),
            viewController.view.bottomAnchor.constraint(equalTo: containerView.bottomAnchor),

        ])
        viewController.didMove(toParent: self)
    }

}

