Jupyter Notebookでプログラムを書く際、今まで自分で見出しに番号をつけて整理していたが、拡張機能を有効にして見出しを付けたら自動的に番号をふってくれる機能があると知った。
また、調べてみるとその他にもいろんな拡張機能があったので、こちらにメモを残しておく。
環境
- Windows 10
- python 3.7.0
- Jupyter Notebook 5.6.0
拡張機能のインストール
anacondaプロンプトで以下のコードを入力
conda install -y -c conda-forge jupyter_contrib_nbextensions
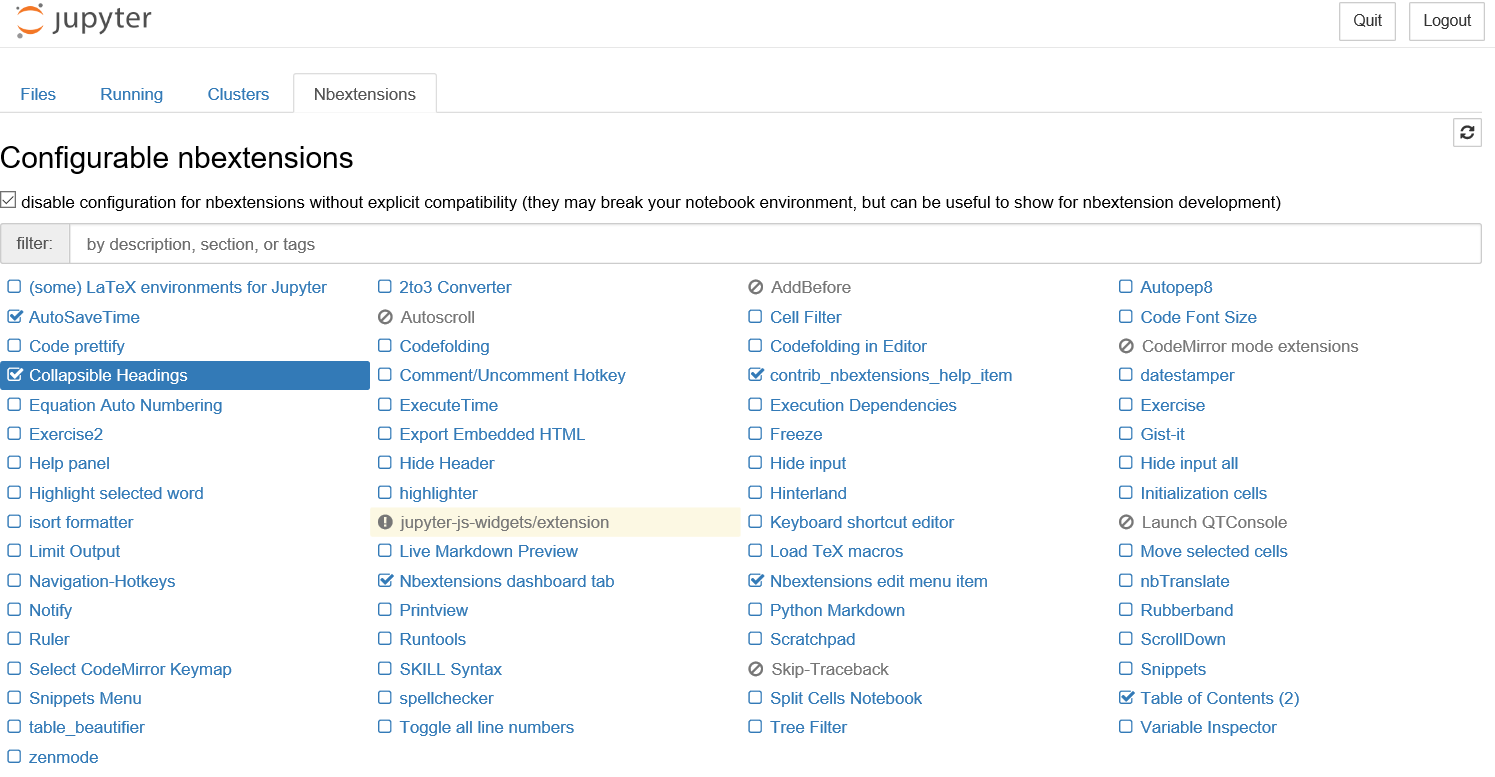
インストール完了後Jupyter Notebookを起動させると、下のようにNbextensionsというタブが新たに追加されているのが確認できる。
お気に入りの拡張機能
1. Table of Content(2)
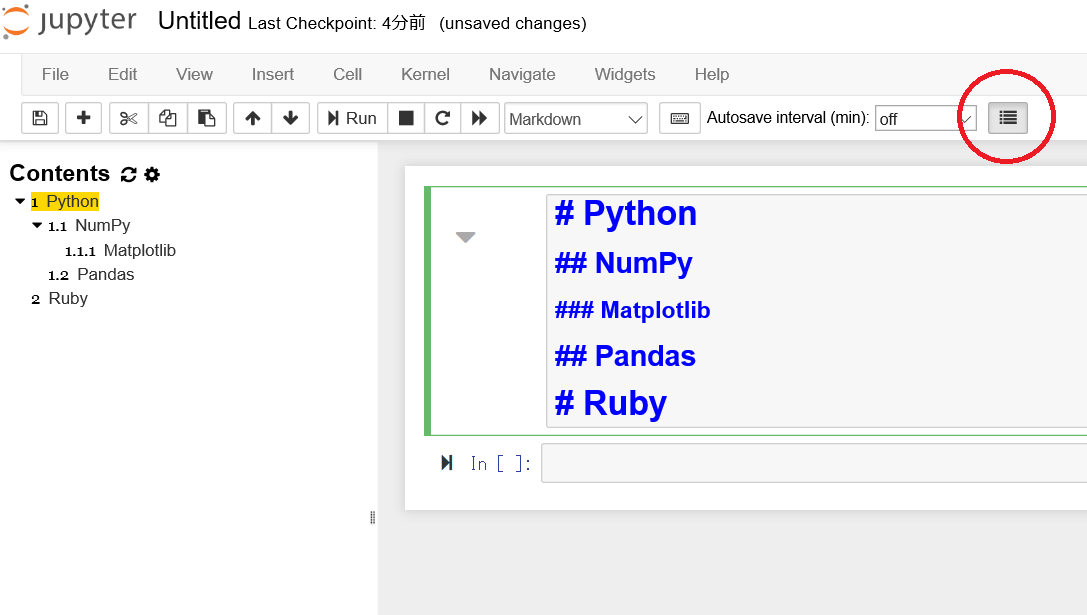
写真の赤丸のアイコンをクリックすると、画面左にContentsのポップアップが表示される。
「#」の個数を使い分けて、見出しの番号を自動的にふることができる。
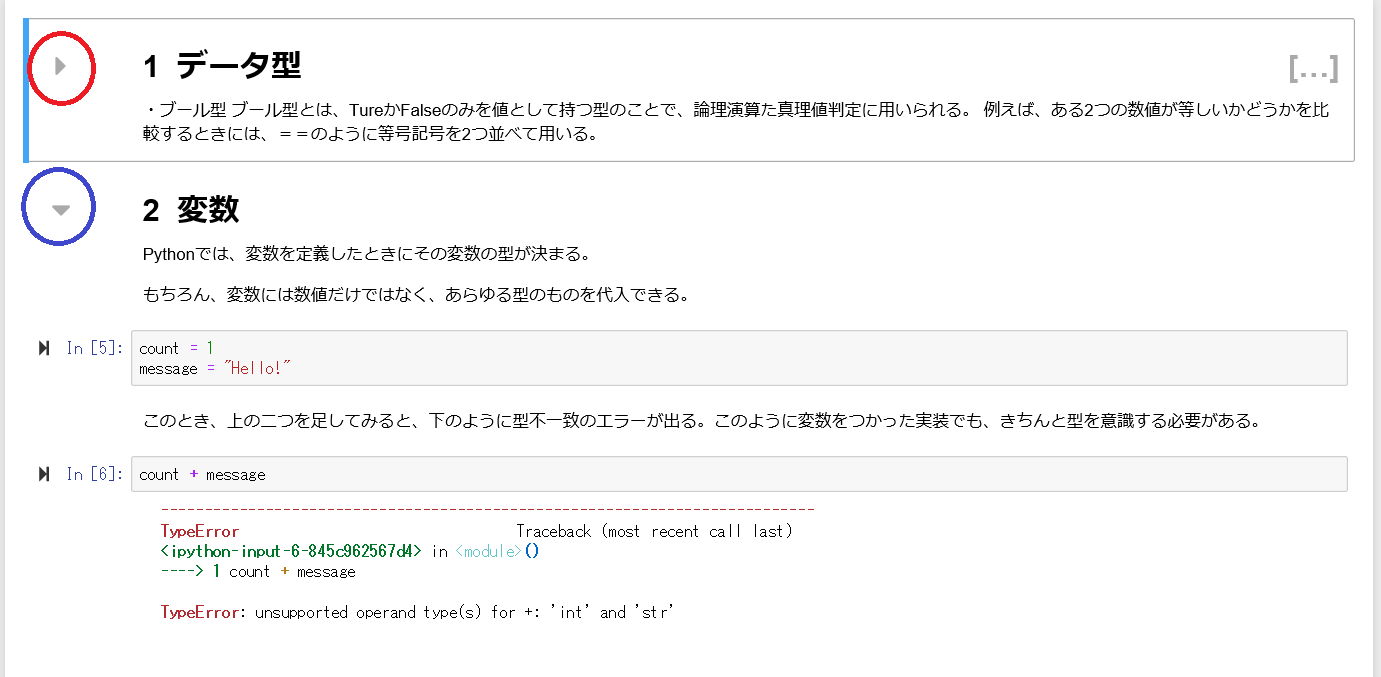
2. Collapsible Headings
見出し(Heading)の階層ごとに、セルを閉じることができるのでプログラム全体が見やすくなる。
下の写真の赤丸が閉じてある状態、青丸が開いている状態。
3. AutoSaveTime
一定の間隔(自分で時間間隔の設定可能)で自動保存される。