追記(2024-12-17)
下記もわかりやすい記事で参考になります
Designing macOS menu bar extras
色は無視されるため、テンプレート画像アートワークは単色アイコンとして作成する必要があります。必要に応じて、さまざまなレベルの不透明度を使用して陰影を付けることができます。これは、音量や Wi-Fi の強度などの状態を示すためによく使用されます。Apple は通常、無効な要素を示すために 35% の不透明度を使用します。
概要
- 以下のようにメニューバーアイコンを作って表示してみる。

- HIGによるとメニューバーアイコンにはテンプレートイメージを使う。
- つまり黒と透明度のみでデザインされた画像とすることが推奨。
Use a template image to represent your menu bar extra. A template image discards color information and uses a mask to produce the appearance you see onscreen. Template images automatically adapt to the user’s appearance settings, so they look good on both dark and light menu bars, and when your menu bar extra is selected.
- ライト/ダークモードで視認しやすい色で表示されるのが嬉しい。
- Appleのものを見ると基本テンプレート画像なのでそれに調和させる。(Siriは多分例外)
- Providing Images for Different Appearances
- 画像の高さは28pxとする。(公式な記載がないので私の感覚)
GitHub
-
qiita-menubar-icon-design
- イラストレータとXcodeのプロジェクトをそれぞれ配置。
イラストレータでの画像の作成/出力
- 塗りには黒のみを使用。
- 不透明度の変更による表現は可能。
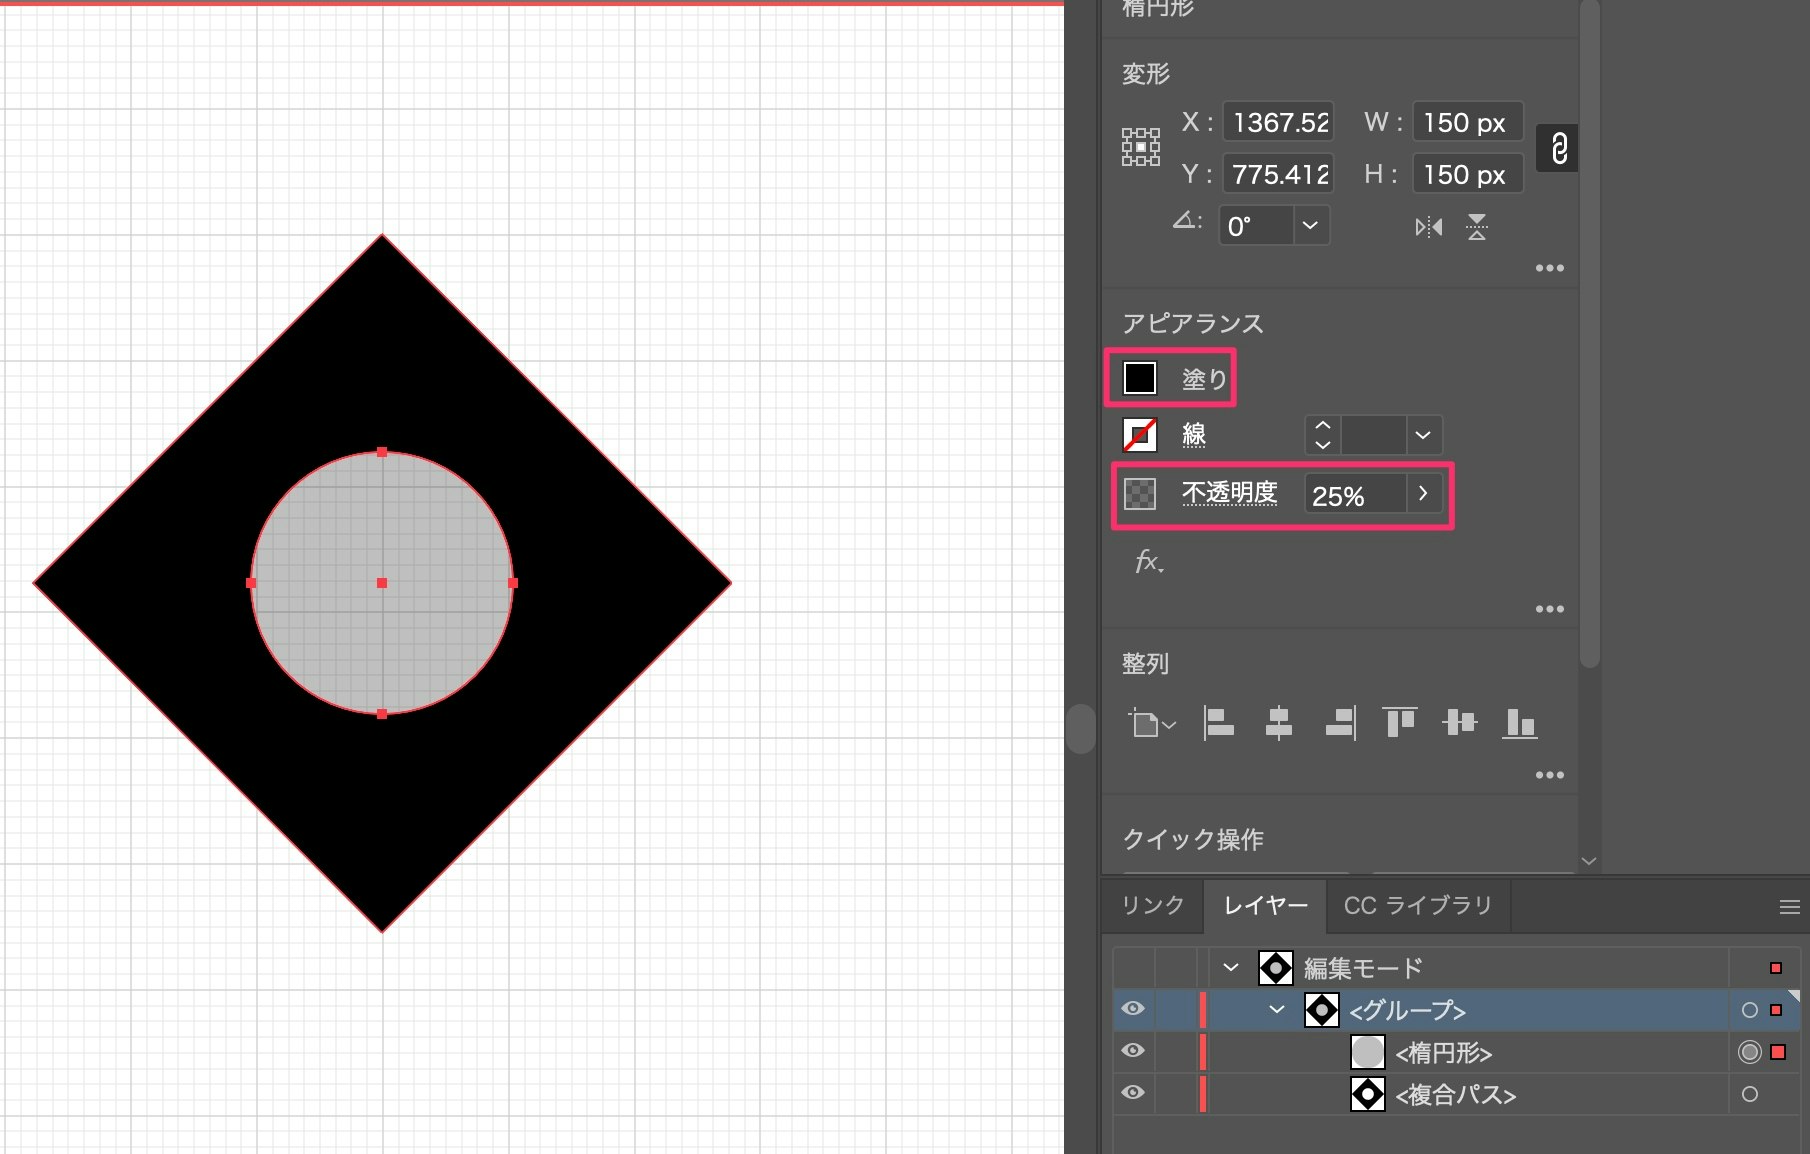
- 1x,2x,3x用にそれぞれ14,28,42pxで出力。

Xcode
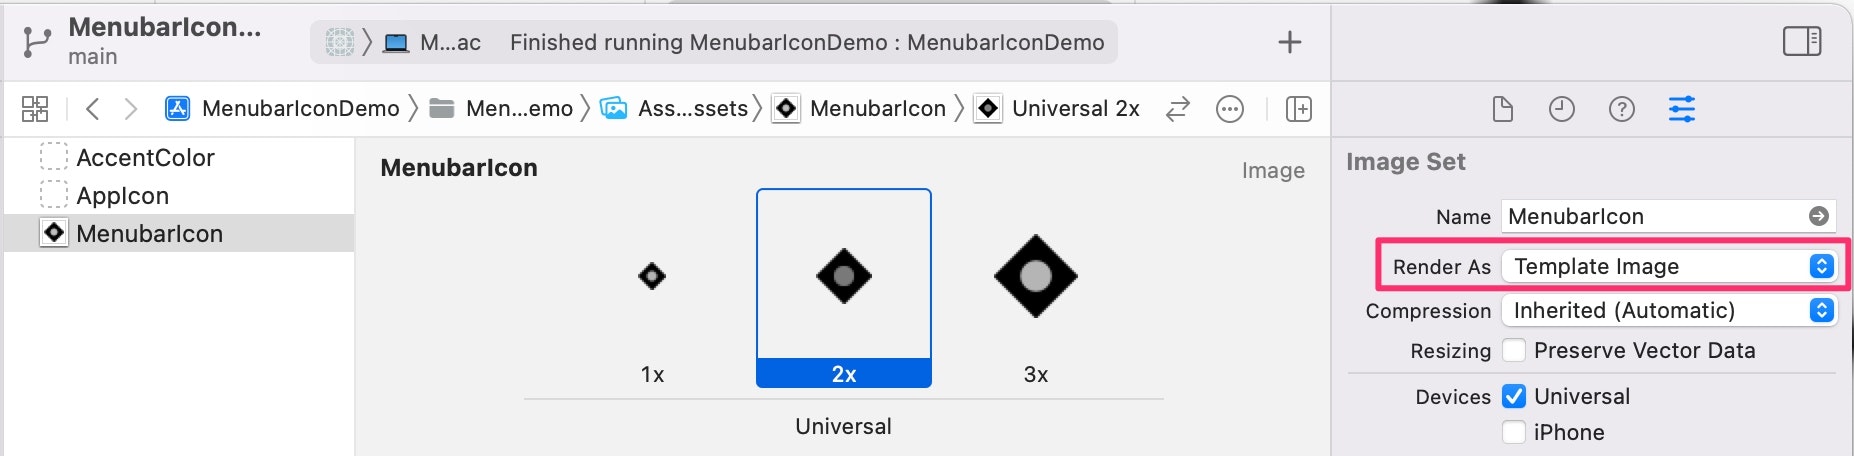
Assetsの設定
-
Render AsでTemplate Imageを選択。
実装
- メニューバーにアイコンを表示するだけの実装。
- AppDelegateで
StatusBarIconControllerのインスタンスをプロパティと持たせておく。- 実際の運用では
Notificationでアイコンを変更したいことがあるので。
- 実際の運用では
import AppKit

class StatusBarIconController: NSObject {

    // MARK: - Properties

    private let systemStatusItem: NSStatusItem

    private var menubarIconStandard: NSImage {
        return NSImage(named:NSImage.Name("MenubarIcon"))!
    }

    // MARK: - LifeCycle

    override init() {
        systemStatusItem = NSStatusBar.system.statusItem(withLength: NSStatusItem.squareLength)
        super.init()
        systemStatusItem.button?.image = menubarIconStandard
    }
}
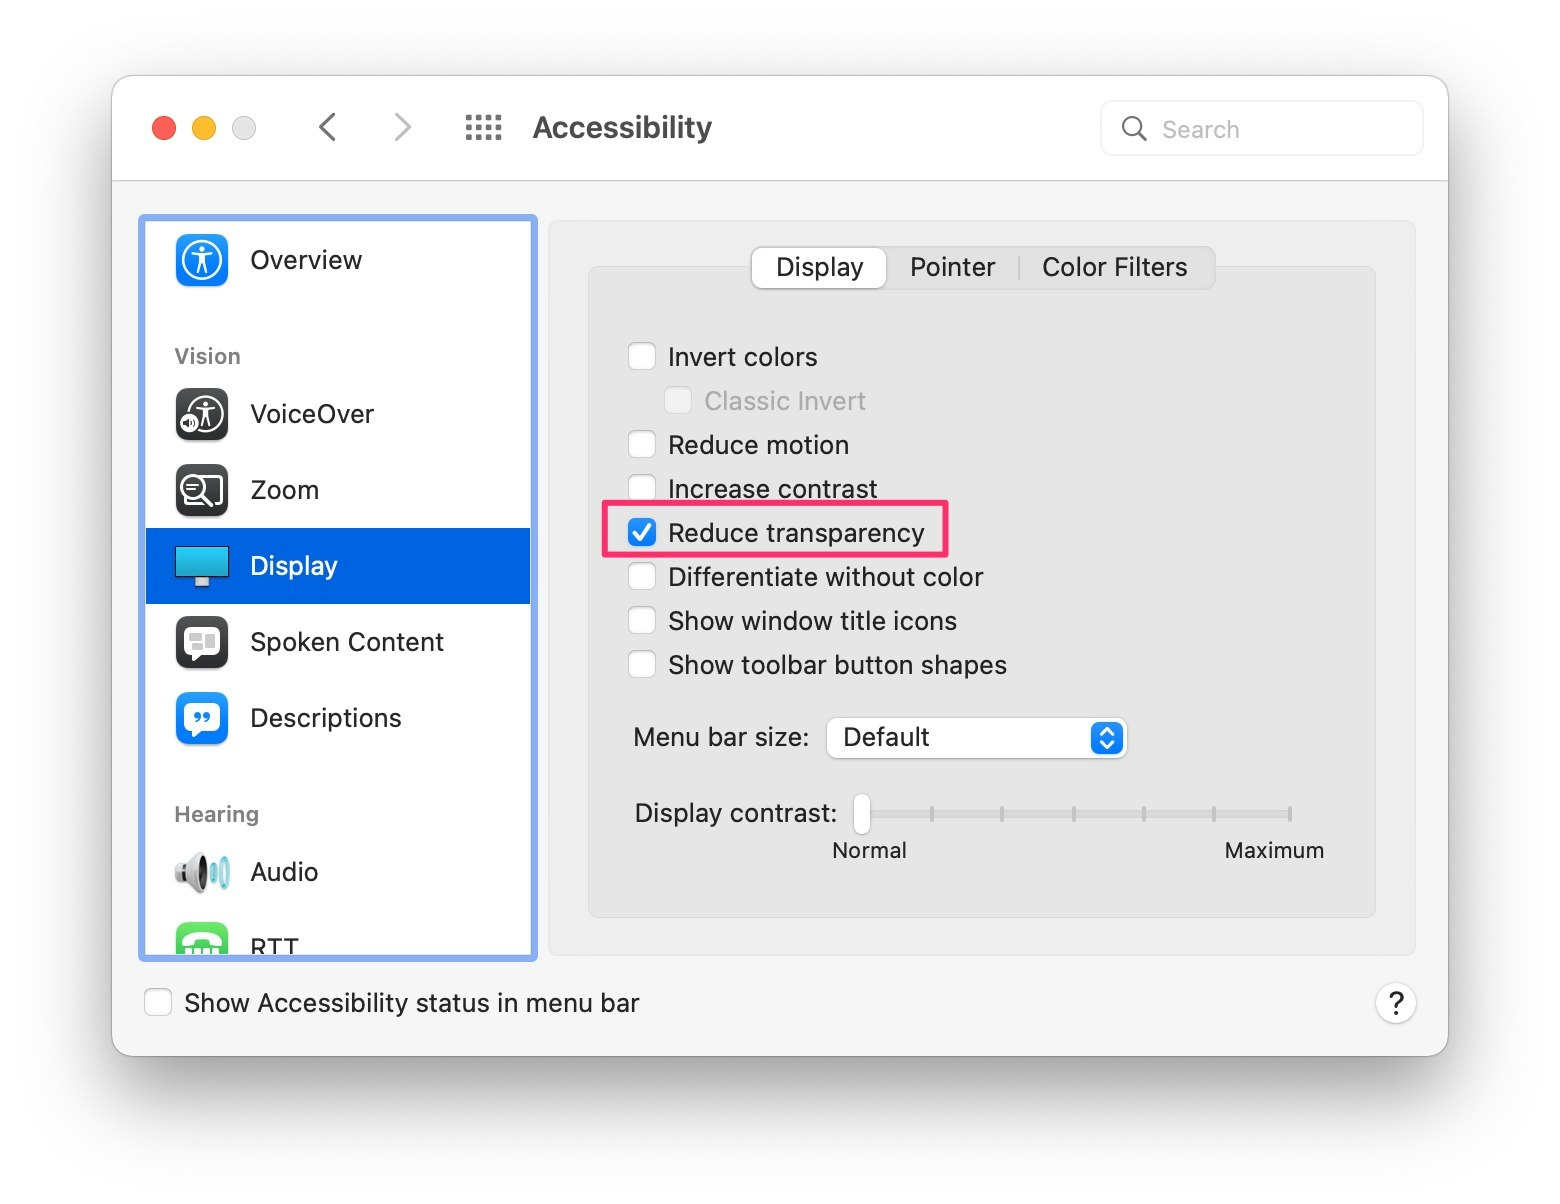
テンプレート画像の反転した状態を確認
-
Accfessibility>DisplayからReduce trasparencyでテンプレート画像の表示を変更でき、ライト/ダークモードの時の確認がそれぞれできる。