二番煎じですが、Hashicorp製ツールottoの事始めです。
環境
MacOSX10.11.1 & homebrew
今回Windows, Linuxでの動作確認は行っていません。
ottoとは?
ottoとは、簡単に言ってしまうと、アプリケーションエンジニアのための、インフラ自動構築ツールです。いわゆるはやりのDevOpsってやつですね。(よくわかってない)
アプリケーションエンジニアは開発に勤しんで、インフラはottoに任せなっ的な意味ですね。
詳しい解説なんかは、ブログとかSlideshareとかにあるので、そっち呼んだほうがわかりやすいと思います。
次期バージョンではrubyのバージョンを自動で判別したり、プラグインの作成が可能になるなど、いろいろ期待できます。
ottoをインストールする
早速やっていきましょう。
Macですとhomebrewでサクッとインストールできます。
$ brew install otto
$ otto -v

Otto v0.1.2
formulaマジ感謝![]()
Railsアプリを作成する
早速開発するRailsアプリをnewします。
今回はデータベースにMySQLを利用します。
$ rails new otto-rails -d mysql
rails new するのが面倒だわって人は、僭越ながら空っぽのアプリをgithubに公開していますのでご利用ください。
rails new しただけのアプリ
- ssh用クローンURL git@github.com:ikea-dless/otto-rails.git
- http用クローンURL https://github.com/ikea-dless/otto-rails.git
インストール or クローンできたら
$ cd otto-rails
$ otto compile
==> Loading Appfile...
==> No Appfile found! Detecting project information...
    No Appfile was found. If there is no Appfile, Otto will do its best
    to detect the type of application this is and set reasonable defaults.
    This is a good way to get started with Otto, but over time we recommend
    writing a real Appfile since this will allow more complex customizations,
    the ability to reference dependencies, versioning, and more.
==> Fetching all Appfile dependencies...
==> Compiling...
    Application:    otto-rails (rails)
    Project:        otto-rails
    Infrastructure: aws (simple)

    Compiling infra...
    Compiling foundation: consul
==> Compiling main application...
==> Compilation success!
    This means that Otto is now ready to start a development environment,
    deploy this application, build the supporting infrastructure, and
    more. See the help for more information.

    Supporting files to enable Otto to manage your application from
    development to deployment have been placed in the output directory.
    These files can be manually inspected to determine what Otto will do.

$ ls -a | grep otto
.otto_id
.otto/
本来ならば、アプリケーションのルートディレクトリ直下にAppfileという名前でファイルを作成して、その中にアプリケーションの情報を記入していくのですが、今回はシンプルになっていますので、必要ありません。
application {
  name = "example"
  type = "ruby"
}

customization "ruby" {
  ruby_version = "2.2"
}
Appfileでrubyのバージョンを指定しない場合は基本的に最新版がインストールされます。
ちなみに rubyのバージョンを細かく指定することはできません。
brightbox/ruby-ngというppaを使ってインストールしているので、2.1と指定すれば2.1の最新版で、2.2と指定すれば2.2.3がインストールされます。
ここらへんは現状修正される見込みはないので、プラグインなんかを誰か作ってくれるとありがたいなぁ。
$ otto compile
==> Loading Appfile...
==> Fetching all Appfile dependencies...
==> Compiling...
    Application:    example (ruby)
    Project:        otto-rails
    Infrastructure: aws (simple)

    Compiling infra...
    Compiling foundation: consul
==> Compiling main application...
==> Compilation success!
    This means that Otto is now ready to start a development environment,
    deploy this application, build the supporting infrastructure, and
    more. See the help for more information.

    Supporting files to enable Otto to manage your application from
    development to deployment have been placed in the output directory.
    These files can be manually inspected to determine what Otto will do.
開発環境を作ってみます。
環境構築の準備は整いました。構築はコマンド1発打つだけです。
$ otto dev
==> Creating local development environment with Vagrant if it doesn't exist...
    Raw Vagrant output will begin streaming in below. Otto does
    not create this output. It is mirrored directly from Vagrant
    while the development environment is being created.

Bringing machine 'default' up with 'virtualbox' provider...
==> default: Importing base box 'hashicorp/precise64'...

.
.
.
vagrantのboxはhashicorp/precise64です。Debian系です。
コンパイルされた情報から仮想環境を構築してくれます。
ottoはv0.1.2からgemと依存関係のあるライブラリを自動でインストールしてくれる機能を持っています。
今回の例ですと、mysql2とnokogiriかな?に依存関係のあるライブラリがインストールされます。
Gem: Library
curb: "libcurl3 libcurl3-gnutls libcurl4-openssl-dev"
capybara-webkit: "libqt4-dev"
mysql2: "libmysqlclient-dev"
nokogiri: "zlib1g-dev"
pg: "libpq-dev"
rmagick: "libmagickwand-dev"
sqlite3: "libsqlite3-dev"
libxml-ruby: "libxml-dev"
paperclip: "imagemagick"
$ otto dev
.
.
.
==> default: Dec  1 08:37:09 precise64 otto: Dec  1 08:37:09 precise64 otto: /ho
me/vagrant/.gem/gems/activerecord-4.2.5/lib/active_record/connection_adapters/my
sql2_adapter.rb:18:in `mysql2_connection'
==> default: Dec  1 08:37:09 precise64 otto: Dec  1 08:37:09 precise64 otto: /h$
me/vagrant/.gem/gems/activerecord-4.2.5/lib/active_record/connection_adapters/a$
stract/connection_pool.rb:438:in `new_connection'
==> default: Dec  1 08:37:09 precise64 otto: Dec  1 08:37:09 precise64 otto: /h$
me/vagrant/.gem/gems/activerecord-4.2.5/lib/active_record/connection_adapters/a$
stract/connection_pool.rb:448:in `checkout_new_connection'
==> default: Dec  1 08:37:09 precise64 otto: Dec  1 08:37:09 precise64 otto: /h$
me/vagrant/.gem/gems/activerecord-4.2.5/lib/active_record/connection_adapters/a$
stract/connection_pool.rb:422:in `acquire_connection'
==> default: Dec  1 08:37:09 precise64 otto: Dec  1 08:37:09 precise64 otto: /ho
me/vagrant/.gem/gems/activerecord-4.2.5/lib/active_record/connection_adapters/ab
stract/connection_pool.rb:349:in `block in checkout'
==> default: Dec  1 08:37:09 precise64 otto: Dec  1 08:37:09 precise64 otto: /ho
me/vagrant/.gem/gems/activerecord-4.2.5/lib/active_record/connection_adapters/ab
stract/connection_pool.rb:348:in `checkout'
おっとエラーが出ました。(ottoだけに)
これはrailsのdatabase.ymlにMySQLの接続先をlocalhostに設定しているけど、MySQLServerが見つからないよというエラーです。
リモートのMySQLに繋ぐか、MySQLサーバをインストールすれば回避できるエラーです。
ここまでくればもうほとんどゴールです。
MySQLサーバが必要な人はインストールします。
ピンクの画面でパスワードを聞かれますが、今回は何も入力せずにEnterを押していきます。
$ otto dev ssh

vagrant@precise64:/vagrant$ sudo apt-get install -y mysql-server
vagrant@precise64:/vagrant$ rake db:setup
もろもろの設定ができたら動いているか確認します。
$ otto dev address | pbcopy
$ otto dev ssh
vagrant@precise64:/vagrant$ rails s -b 0.0.0.0
仮想マシンのipアドレスをクリップボードにコピーしてブラウザからipアドレスを叩いてみます。

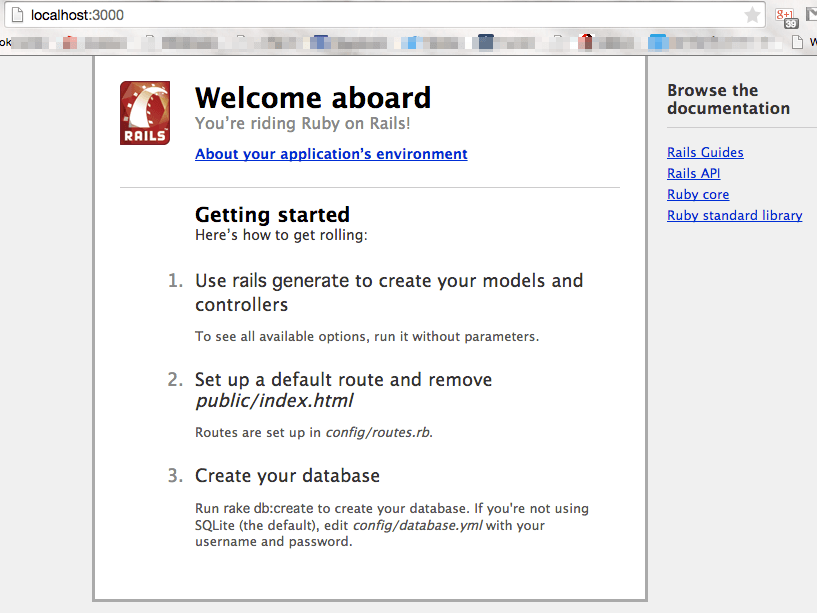
Railsのお馴染みの画面が出てきたら、開発環境の構築は終了です。
最後に
今回は開発環境の構築だけでしたが、本来はAWSへのデプロイまでをする予定でした。orz
時間ギリギリになってビルドにこけたとき、心が折れてしまいましたが、AWSへのデプロイをする記事もそのうち書きたいと思います。時間管理能力の甘さよ...