はじめに
この記事はAndroidのLiveWallpaperについての記事です。
対象は以下のような人になります。
- android開発はしているけど、Processingはあまり触ったことがない。
- android開発はしているけど、LiveWallpaperはあまり触ったことがない。
LiveWallpaperとは
Android2.1から使える、「動く壁紙」です。
ユーザーのタッチしている座標、加速度センサー、GPSなどの端末の情報を使うこともでき、見た目に楽しい壁紙にすることができます。
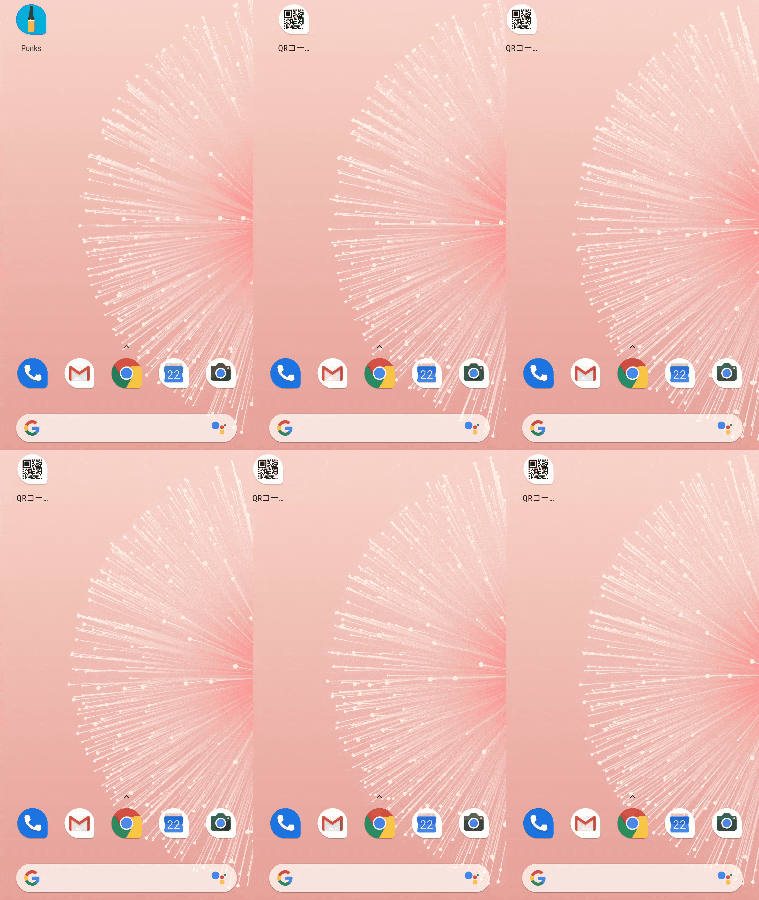
例えば、Pixel3の標準壁紙にも、画面のタッチに反応して動くLiveWallpaperなど、いくつかのLiveWallpaperが含まれています。
Processingとは
電子アートとビジュアルデザインのためのプログラミング言語であり、統合開発環境である。アーティストによるコンテンツ制作作業のために、詳細な設定を行う関数を排除している。 視覚的なフィードバックが即座に得られるため、初心者がプログラミングを学習するのに適しており、電子スケッチブックの基盤としても利用できる。Java を単純化し、グラフィック機能に特化した言語といえる。
(Wikipediaより)
公式サイト : https://processing.org/
LiveWallpaper with Processing
ProcessingのAndroid Modeを使うことで、Processingで書いたコードをAndroidアプリとして出力することができます。
2017/9リリースのAndroid Modeバージョン4.0でLiveWallpaper、Watch Face、VRがサポートされ、Processingで書いたコードを直接LiveWallpaper、Watch Face、VRアプリとして出力することができるようになりました。ただし、以下の条件があります。
- LiveWallpaper : Android4.2以上
- Watch Face : Android Wear2.0(Wear OS by Google 1.0)以上
- VR : Android4.4以上
LiveWallpaperやWatchFaceなどのビジュアルデザインが主な要素となるアプリにおいて、Processingはとても相性が良いのではないかと思います。
簡単なLiveWallpaperアプリを作る
Android Modeの追加

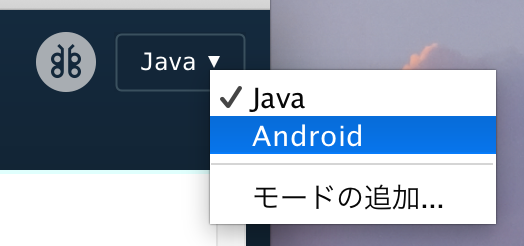
初めはJavaモードしか使えないので、Android Modeを追加します。
PDE(開発環境)右上のJavaと書いてあるところから、「モードの追加」を選択します。
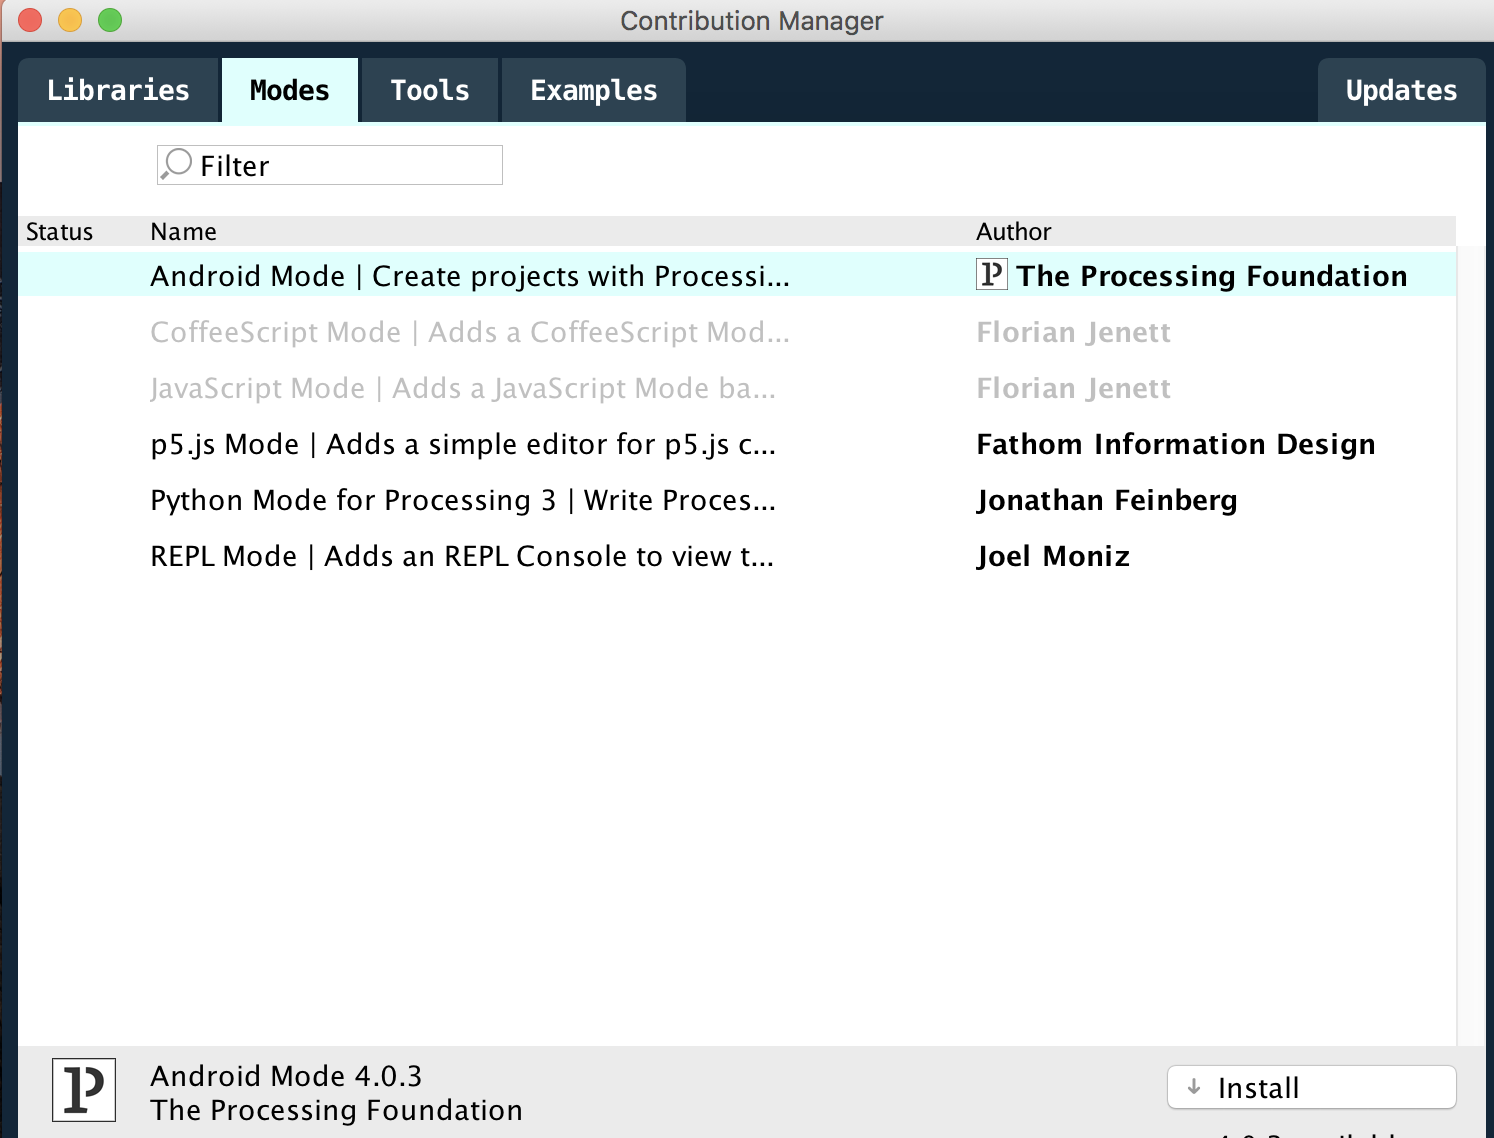
モード管理画面が開くので、「Android Mode」を選択し、インストールします。
スケッチの作成
void setup() {
  strokeWeight(12);
}

void draw() {
  background(204);

  // White line
  stroke(255);
  line(width/2, height/2, mouseX, mouseY);

  // Black line
  stroke(0);
  float mx = map(mouseX, 0, width, width*3/4, width/4);
  float my = map(mouseY, 0, height, height*3/4, height/4);
  line(width/2, height/2, mx, my);
}
Processingで書かれたプログラムはスケッチと呼ばれます。
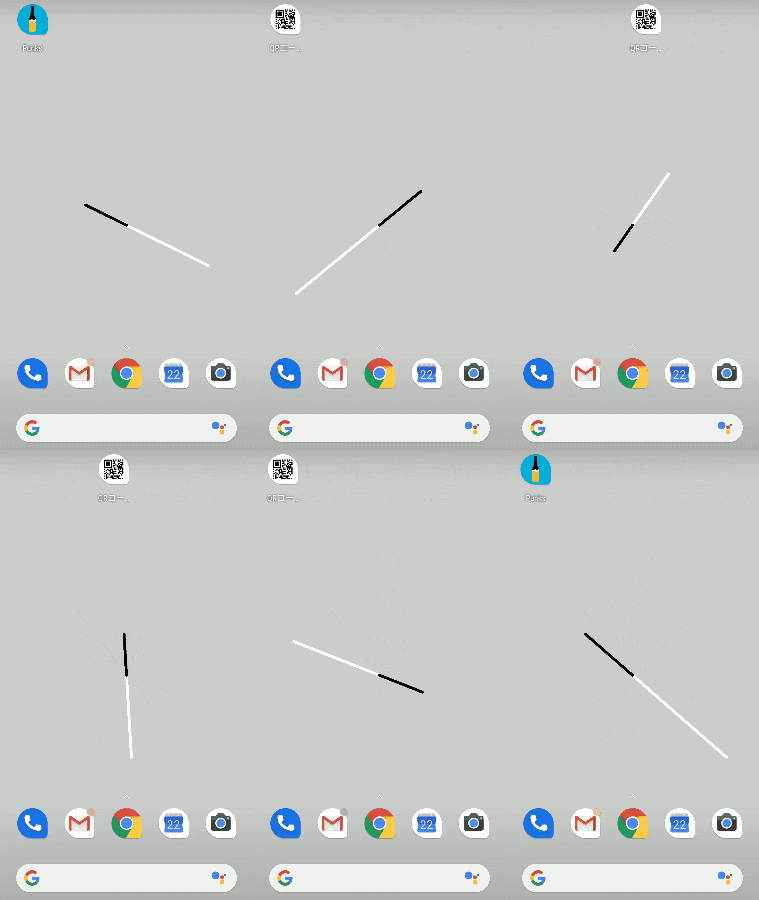
白い線を画面中心からタッチしている位置に引き、黒い線を白い線の半分の長さで反対方向に引く。
というコードです。
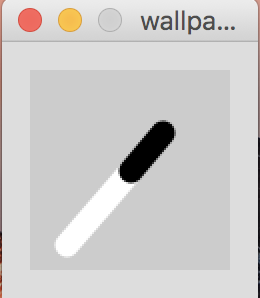
普通にJavaモードで実行するとこんな感じです。
LiveWallpaperアプリとして出力する
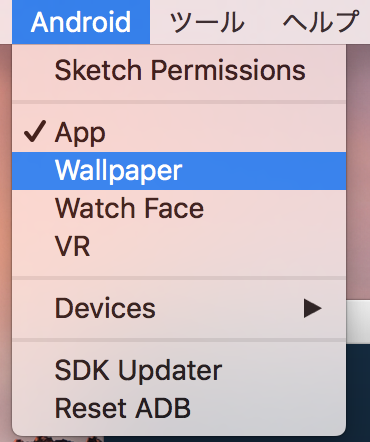
ProcessingのメニューにAndroidが表示されるので、「Wallpaper」を選択します。

端末をPCに接続するとDevicesに接続している端末が出ているはずです。
この状態で実行すると、接続しているAndroid端末にLiveWallpaperアプリがインストールされ、壁紙の変更から作成したLiveWallpaperを使うことができます。
センサー情報を取得する
通常のAndroidでの取得方法と同じです。
下記は、最新の加速度センサーの情報をテキスト表示する例です。
import android.content.Context;
import android.hardware.Sensor;
import android.hardware.SensorManager;
import android.hardware.SensorEvent;
import android.hardware.SensorEventListener;

Context context;
SensorManager manager;
Sensor sensor;
AccelerometerListener listener;
float ax, ay, az;

void setup() {
  fullScreen();

  context = getContext();
  manager = (SensorManager)context.getSystemService(Context.SENSOR_SERVICE);
  sensor = manager.getDefaultSensor(Sensor.TYPE_ACCELEROMETER);
  listener = new AccelerometerListener();
  manager.registerListener(listener, sensor, SensorManager.SENSOR_DELAY_GAME);

  textFont(createFont("SansSerif", 30 * displayDensity));
}

void draw() {
  background(0);
  text("X: " + ax + "\nY: " + ay + "\nZ: " + az, 0, height/3, width, height);
}

class AccelerometerListener implements SensorEventListener {
  public void onSensorChanged(SensorEvent event) {
    ax = event.values[0];
    ay = event.values[1];
    az = event.values[2];
  }
  public void onAccuracyChanged(Sensor sensor, int accuracy) {
  }
}
Ketaiライブラリを使って端末情報を取得する
センサー情報や位置情報などのAndroid端末からの情報をProcessingコードから簡単に取得できるライブラリとして、Ketaiがあります。端末からの情報取得部分をラップしてくれています。
http://ketai.org/
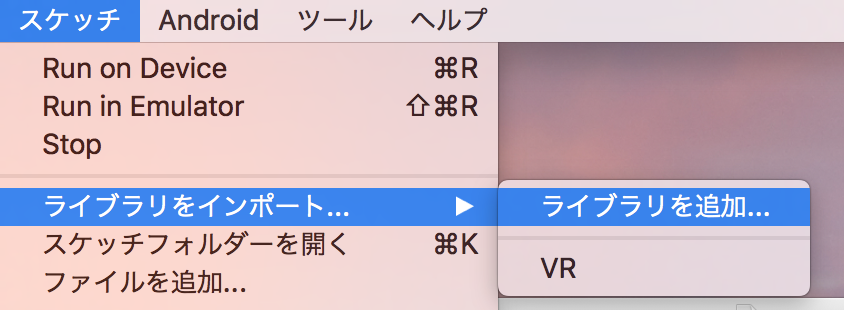
メニュー > スケッチ > ライブラリをインポート > ライブラリを追加、からライブラリの追加ができます。
 ライブラリをインポートからKetaiを選択すると、import文がスケッチに追加されます。
(必要のないものまで追加されてしまうので、手で書いたほうが良いかもしれません)
KetaiSensorクラスを使うと、先程の最新の加速度センサーの情報を表示する例は、以下のようなコードになります。
import ketai.sensors.*;

KetaiSensor sensor;
float ax, ay, az;

void setup() {
  fullScreen();

  sensor = new KetaiSensor(this);
  sensor.start();

  textFont(createFont("SansSerif", 30 * displayDensity));
}

void draw() {
  background(0);
  text("Ketai-X: " + ax + "\nKetai-Y: " + ay + "\nKetai-Z: " + az, 0, height/3, width, height);
}

void onAccelerometerEvent(float x, float y, float z){
  ax = x;
  ay = y;
  az = z;
}
その他にも、カメラやNFC、Wifiを使うこともできるようです。
以下にチュートリアルがあります。
http://ketai.org/tutorials/
パーミッションの取得
位置情報の取得など、端末の情報取得にパーミッションが必要な場合があります。
例えば、以下はKetaiを使って位置情報を取得し画面に表示するコードですが、初期状態で動かしてもパーミッションがないため位置情報を取得することできません。
import ketai.sensors.*;

double longitude, latitude, altitude;
KetaiLocation location;

void setup() {
  fullScreen();
  location = new KetaiLocation(this);

  textAlign(CENTER, CENTER);
  textSize(displayDensity * 36);
}

void draw() {
  background(78, 93, 75);
  if (location == null  || location.getProvider() == "none") {
    text("Location data is unavailable. \n" +
      "Please check your location settings.", 0, 0, width, height);
  } else {
    text("Latitude: " + latitude + "\n" +
      "Longitude: " + longitude + "\n" +
      "Altitude: " + altitude + "\n" +
      "Provider: " + location.getProvider(), 0, 0, width, height);
  }
}

void onLocationEvent(double lat, double lon, double alt) {
  longitude = lon;
  latitude = lat;
  altitude = alt;
}

 メニュー > Android > Sketch Permissionsを選択し、必要なパーミッションにチェックを付けて実行することで、パーミッションの確認をすることができます。
 付与したパーミッションは、壁紙選択時に確認され、許可をしてもらう事で情報を取得することができます。
アプリの署名と配布
 「Export Signed Package」というメニューがありますが、普段Android開発をしている方であれば、「Export Android Project」で作成したスケッチをAndroidプロジェクトとして出力し、通常通りbuild.gradleにsigning configを指定するのがわかりやすいかと思います。
Android StudioでのProcessing開発
上記で示したように、Processingで書いたスケッチはAndroidプロジェクトに変換され実行されます。PDE(Processingの統合開発環境)は補完が効かないなど使いにくいところが多いので、AndroidStudioで開発すると効率的にコードが書けます。また、Kotlinで書けることもメリットかと思います。
Android用のProcessingライブラリを追加
implementation 'org.p5android:processing-core:4.0.3'
org.p5android:processing-coreを依存関係に追加します。
描画部分のクラス作成
class Wallpaper01 : PApplet() {

    private var longitude: Double = 0.0
    private var latitude: Double = 0.0
    private var altitude: Double = 0.0
    private var location: KetaiLocation? = null

    override fun setup() {
        location = KetaiLocation(this)

        textAlign(PConstants.CENTER, PConstants.CENTER)
        textSize(displayDensity * 36)
    }

    override fun draw() {
        background(78f, 93f, 75f)
        if (location == null || location!!.provider === "none") {
            text("Location data is unavailable. \n" + "Please check your location settings.", 0f, 0f, width.toFloat(), height.toFloat())
        } else {
            text("Latitude: " + latitude + "\n" +
                    "Longitude: " + longitude + "\n" +
                    "Altitude: " + altitude + "\n" +
                    "Provider: " + location!!.provider, 0f, 0f, width.toFloat(), height.toFloat())
        }
    }
PAppletを継承したクラスを作ります。PAppletにProcessingで使えるメソッドが定義してあるため、あとはProcessingで書いていたのと同じようにコードを書いていくだけです。
LiveWallpaper用のクラス作成
class MainService : PWallpaper() {
    override fun createSketch(): PApplet {
        return Wallpaper01()
    }
}
LiveWallpaperを作る場合は、PWallpaperを継承したServiceを作成し、createSketchメソッドをオーバーライドして、先程作ったPApplet継承クラスのインスタンスを生成して返せば完了です。
まとめ
Processingを使ったLiveWallpaperアプリの作成を紹介しました。
綺麗な壁紙や面白い壁紙を作れるようにがんばります。
参考
https://android.processing.org/
http://ketai.org/
https://gist.github.com/beesandbombs
