はじめに
「NavigationBarItemなどで上に配置してもいいけど、デザイン的に何か違う...」、「機能が二つだからタブで分けるほどじゃない...」こんな時にはビュー上にスクロールで動かないボタンを配置したくなります。ここではコードベースで動かないボタンを実装していきます。なお、コードベースでレイアウトを組む時に便利なSnapKitを利用しています。(snpがついているところ)本来CGRect()やCGSize()で指定するところなので、必要に応じて読み替えて下さい。なお、storyboardを使う場合はこちらが参考になると思います。
ちなみにFlutterやAndroidではFloatingButtonというらしいです。Flutterで新規アプリを作成するとはじめにできてるカウントアプリでも使われてたはず...
Viewの準備
クラスの作成
FloatingButtonViewというUIViewを継承したクラスを作成し、初期化の準備とUIButton, UITableViewの定義をします。
import UIKit
import SnapKit

class FloatingButtonView: UIView {

    let tableView =  UITableView()
    let floatingButton = UIButton()

    override init(frame: CGRect) {
        super.init(frame: frame)

    }

    required init?(coder: NSCoder) {
        fatalError("init(coder:) has not been implemented")
    }
}
tableViewの準備
setupTableViewという関数のなかで大きさや配置の定義を行います。
private func setupTableView() {
        addSubview(tableView)
        tableView.snp.makeConstraints {
            $0.center.equalToSuperview()
            $0.size.equalToSuperview()
        }
    }
floatingButtonの準備
setupFloatingButtonという関数のなかで大きさや配置の定義を行います。
せっかくなのでlayer.cornerRadiusを使い丸くしています。一辺の長さの半分にすることで綺麗な円になります。
private func setupFloatingButton() {
        floatingButton.backgroundColor = .blue
        addSubview(floatingButton)
        floatingButton.snp.makeConstraints {
            $0.width.equalTo(50)
            $0.height.equalTo(50)
            $0.right.equalToSuperview().offset(-30)
            $0.bottom.equalToSuperview().offset(-30)
        }
        floatingButton.layer.cornerRadius = 25
    }
全体のソースコード
import UIKit
import SnapKit

class FloatingButtonView: UIView {

    let tableView =  UITableView()
    let floatingButton = UIButton()

    override init(frame: CGRect) {
        super.init(frame: frame)
        setupTableView()
        setupFloatingButton()
    }

    required init?(coder: NSCoder) {
        fatalError("init(coder:) has not been implemented")
    }

    private func setupTableView() {
        addSubview(tableView)
        tableView.snp.makeConstraints {
            $0.center.equalToSuperview()
            $0.size.equalToSuperview()
        }
    }
    private func setupFloatingButton() {
        floatingButton.backgroundColor = .blue
        addSubview(floatingButton)
        floatingButton.snp.makeConstraints {
            $0.width.equalTo(50)
            $0.height.equalTo(50)
            $0.right.equalToSuperview().offset(-30)
            $0.bottom.equalToSuperview().offset(-30)
        }
        floatingButton.layer.cornerRadius = 25
    }
}
ViewControllerの準備
準備といっても、Viewdで作ったものを貼り付けるだけですが。
クラスの作成
import UIKit

class FloatingButtonViewController: UIViewController {

    override func viewDidLoad() {
        super.viewDidLoad()
    }
}
loadViewの準備
loadViewのなかで自身の持つviewを先ほど作ったFloatingViewにします。
override func loadView() {
        view = FloatingButtonView()
}
全体のソースコード
import UIKit

class FloatingButtonViewController: UIViewController {

    override func loadView() {
        view = FloatingButtonView()
    }
    override func viewDidLoad() {
        super.viewDidLoad()
    }
}
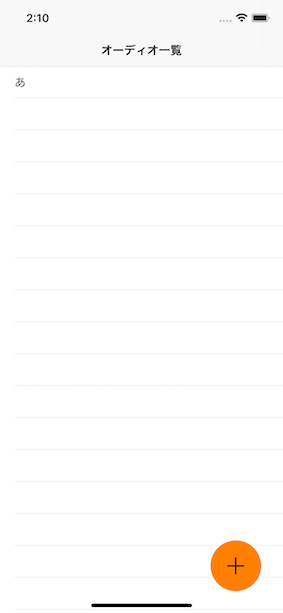
完成!