今日はシングルサインオンSSOのことをサンプルを作りながら説明します。
SSOとは
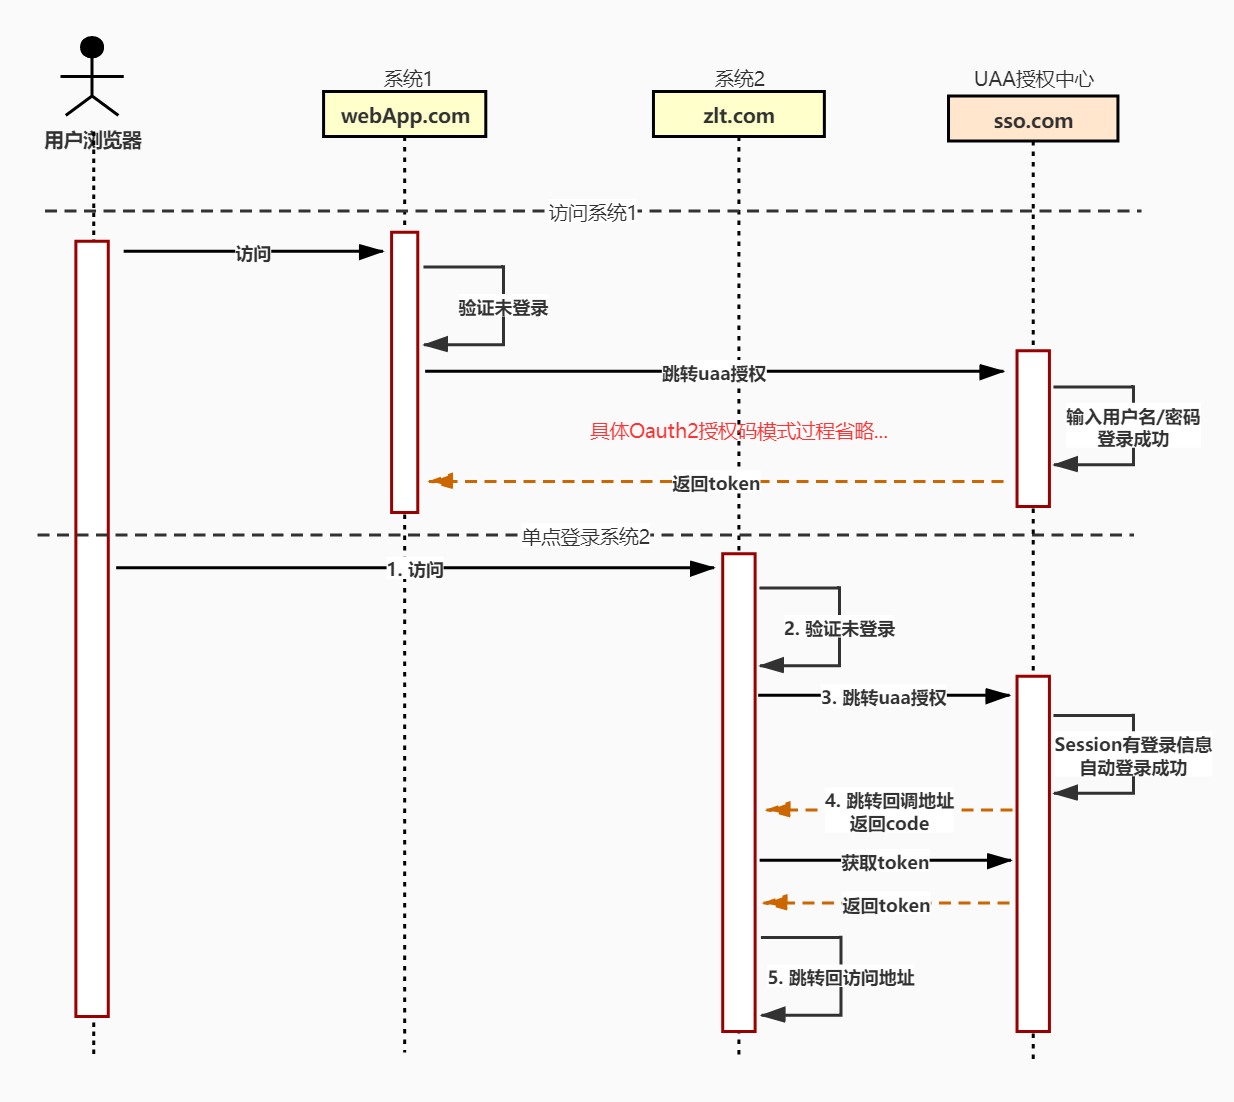
Single Sign Onの略。1つのIDとパスワードを入力して、複数のWebサービスやアプリケーションにログインする仕組み。入力や管理の手間を省き、セキュリティを強化することができる。
イメージは以下のように参照しましょう。
SS0機能実装
本記事はサンプルプロジェクトを作って説明します。主にSpring Security Oauth2を活用してSSO機能を実現します。
環境準備
予めspring security、oauth2.0などの知識を持っていればよいです。
- Eclipse
- Java8
- Spring
- OAuth2.0
親プロジェクトを作る
mavenで親のプロジェクトを作りました。sso-oauth2-demoをネーミングします。
pom.xmlに下記のように配置します。
<project xmlns="http://maven.apache.org/POM/4.0.0"
         xmlns:xsi="http://www.w3.org/2001/XMLSchema-instance"
         xsi:schemaLocation="http://maven.apache.org/POM/4.0.0 http://maven.apache.org/xsd/maven-4.0.0.xsd">
    <modelVersion>4.0.0</modelVersion>

    <groupId>com.example</groupId>
    <artifactId>sso-oauth2-demo</artifactId>
    <version>1.0-SNAPSHOT</version>

    <properties>
        <java.version>1.8</java.version>
        <spring-boot.version>2.1.9.RELEASE</spring-boot.version>
        <spring-security.version>2.1.9.RELEASE</spring-security.version>
    </properties>

    <dependencies>
        <dependency>
            <groupId>org.springframework.boot</groupId>
            <artifactId>spring-boot-starter-security</artifactId>
        </dependency>

        <dependency>
            <groupId>org.springframework.security.oauth.boot</groupId>
            <artifactId>spring-security-oauth2-autoconfigure</artifactId>
            <version>${spring-security.version}</version>
        </dependency>
    </dependencies>

    <dependencyManagement>
        <dependencies>
            <dependency>
                <groupId>org.springframework.boot</groupId>
                <artifactId>spring-boot-dependencies</artifactId>
                <version>${spring-boot.version}</version>
                <scope>import</scope>
                <type>pom</type>
            </dependency>
        </dependencies>
    </dependencyManagement>
</project>
SSO認証サーバを作る
SSO認証サーバ配置
(1).上記の親プロジェクトの下に子供のモジュールを作って、auth-serverをネーミングします。
auth-serverプロジェクトのpom.xmlに下記のように配置します。
<?xml version="1.0" encoding="UTF-8"?>
<project xmlns="http://maven.apache.org/POM/4.0.0" xmlns:xsi="http://www.w3.org/2001/XMLSchema-instance"
         xsi:schemaLocation="http://maven.apache.org/POM/4.0.0 https://maven.apache.org/xsd/maven-4.0.0.xsd">
    <modelVersion>4.0.0</modelVersion>
    <parent>
        <groupId>com.example</groupId>
        <artifactId>sso-oauth2-demo</artifactId>
        <version>1.0-SNAPSHOT</version>
        <relativePath/> <!-- lookup parent from repository -->
    </parent>

    <artifactId>auth-server</artifactId>
    <version>0.0.1-SNAPSHOT</version>
    <name>auth-server</name>
    <description>Demo project for Spring Boot</description>

    <dependencies>
        <dependency>
            <groupId>org.springframework.boot</groupId>
            <artifactId>spring-boot-starter-web</artifactId>
        </dependency>

        <dependency>
            <groupId>org.springframework.boot</groupId>
            <artifactId>spring-boot-starter-test</artifactId>
            <scope>test</scope>
        </dependency>
    </dependencies>

    <build>
        <plugins>
            <plugin>
                <groupId>org.springframework.boot</groupId>
                <artifactId>spring-boot-maven-plugin</artifactId>
            </plugin>
        </plugins>
    </build>

</project>
(2).application.ymlを作成して下記のように配置します。
ここでは、sso認証サーバーのポート(8300)を指定します。
server:
  port: 8300
  servlet:
    context-path: '/auth'
SSO認証サーバ実装
(1).mainクラスを実装
下記のとおり、実装してみよう。
@EnableResourceServerアノテーションをmainクラスの上に付けます。このアノテーションが重要です。
@SpringBootApplication
@EnableResourceServer
public class  AuthServerApplication
{
    public static void main( String[] args )
    {
     SpringApplication.run(AuthServerApplication.class, args);
    }
}
(2).authクラスを実装
/**
 * SSO認証サーバー
 * @author hyman
 */
@Configuration
@EnableAuthorizationServer
public class AuthServerConfig extends AuthorizationServerConfigurerAdapter {

    @Autowired
    private BCryptPasswordEncoder passwordEncoder;

    @Override
    public void configure(final AuthorizationServerSecurityConfigurer oauthServer) throws Exception {
        oauthServer.tokenKeyAccess("permitAll")
                .checkTokenAccess("isAuthenticated()");
    }

    @Override
    public void configure(final ClientDetailsServiceConfigurer clients) throws Exception {
        clients.inMemory()
                .withClient("SampleClientId")
                .secret(passwordEncoder.encode("secret"))
                .authorizedGrantTypes("authorization_code")
                .scopes("user_info")
                .autoApprove(true)
                .redirectUris("http://localhost:8301/login", "http://localhost:8302/login");
    }


}
(3).securityクラスを実装
ここでユーザidとパスワードはソースの中で定義します。
ユーザーID:hyman
パスワード:hyman123
/**
 * security配置
 * ここでユーザidとパスワードはソースの中で定義します。
 * @author hyman
 *
 */
@Configuration
@Order(1)
public class SecurityConfig extends WebSecurityConfigurerAdapter {

    @Override
    protected void configure(HttpSecurity http) throws Exception {
        http.requestMatchers()
                .antMatchers("/login", "/oauth/authorize")
                .and()
                .authorizeRequests()
                .anyRequest()
                .authenticated()
                .and()
                .formLogin()
                .permitAll()
                .and().csrf().disable();
    }

    @Override
    protected void configure(AuthenticationManagerBuilder auth) throws Exception {
        auth.inMemoryAuthentication()
                .withUser("hyman") // ユーザーID:hyman
                .password(passwordEncoder().encode("hyman123"))  // パスワード:hyman123
                .roles("USER");
    }

    @Bean
    public BCryptPasswordEncoder passwordEncoder() {
        return new BCryptPasswordEncoder();
    }
}
(3).SSO認証APIクラスを実装
SSO認証サーばーへアクセスURLはhttp://localhost:8300/auth/user/me となります。
@RestController
@RequestMapping(value = "user")
public class UserAction {

    @GetMapping(value = "me")
    public Principal me(Principal principal) {
        System.out.println("アクセスユーザー情報:" + principal);
        return principal;
    }
}
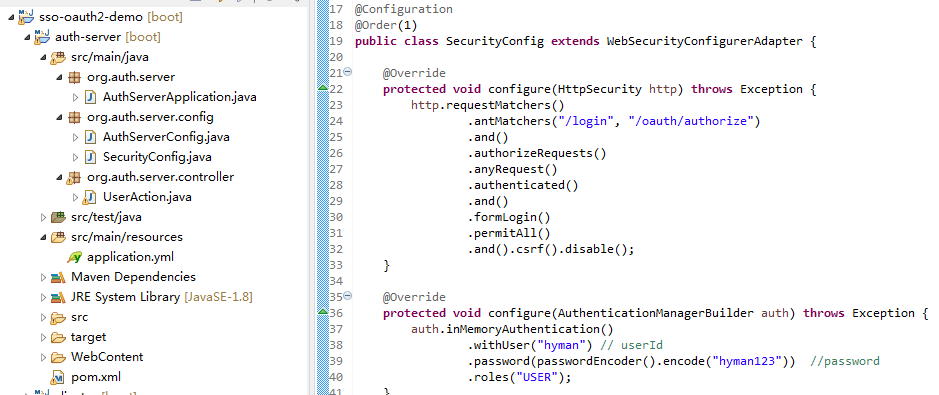
ここまで、SSO認証サーバーの実装は終りました。パッケージなどの階層は以下のとおり、参照ください。
クライアントアプリケーションを作る
ここから、クライアントアプリケーションを作り始めます。本記事は二つのクライアントアプリケーションをつくります。client-aとclient-bです。
client-aアプリケーション
client-a配置
(1).親のsso-oauth2-demoプロジェクトの下にclient-aモジュールを作成します。
client-aモジュールのpom.xmlに下記のように配置します。
<?xml version="1.0" encoding="UTF-8"?>
<project xmlns="http://maven.apache.org/POM/4.0.0" xmlns:xsi="http://www.w3.org/2001/XMLSchema-instance"
         xsi:schemaLocation="http://maven.apache.org/POM/4.0.0 https://maven.apache.org/xsd/maven-4.0.0.xsd">
    <modelVersion>4.0.0</modelVersion>
    <parent>
        <groupId>com.example</groupId>
        <artifactId>sso-oauth2-demo</artifactId>
        <version>1.0-SNAPSHOT</version>
        <relativePath/> <!-- lookup parent from repository -->
    </parent>

    <artifactId>client-a</artifactId>
    <version>0.0.1-SNAPSHOT</version>
    <name>client-a</name>
    <description>Demo project for Spring Boot</description>

    <dependencies>
        <dependency>
            <groupId>org.springframework.boot</groupId>
            <artifactId>spring-boot-starter-web</artifactId>
        </dependency>

        <dependency>
            <groupId>org.springframework.boot</groupId>
            <artifactId>spring-boot-starter-test</artifactId>
            <scope>test</scope>
        </dependency>

        <dependency>
            <groupId>org.springframework.boot</groupId>
            <artifactId>spring-boot-starter-thymeleaf</artifactId>
        </dependency>

        <dependency>
            <groupId>org.thymeleaf.extras</groupId>
            <artifactId>thymeleaf-extras-springsecurity5</artifactId>
        </dependency>
    </dependencies>

    <build>
        <plugins>
            <plugin>
                <groupId>org.springframework.boot</groupId>
                <artifactId>spring-boot-maven-plugin</artifactId>
            </plugin>
        </plugins>
    </build>

</project>
(2).application.xml配置
下記のとおり、client-aを配置します。
ここでclient-aのポートを8301で定義します。
server:
  port: 8301
  servlet:
    session:
      cookie:
        name: CLIENT_A_SESSION

security:
  oauth2:
    client:
      client-id: SampleClientId
      client-secret: secret
      access-token-uri: http://localhost:8300/auth/oauth/token
      user-authorization-uri: http://localhost:8300/auth/oauth/authorize
    resource:
      user-info-uri: http://localhost:8300/auth/user/me # SSO認証サーバーのアドレス

spring:
  thymeleaf:
    cache: false
client-a実装
(1).securityクラスの実装
@EnableOAuth2Ssoアノテーションが重要ですから、忘れずに、クラスの上に付けます。
@EnableOAuth2Sso
@Configuration
public class MySecurityConfig extends WebSecurityConfigurerAdapter {

    @Override
    public void configure(HttpSecurity http) throws Exception {
        http.antMatcher("/**")
            .authorizeRequests()
            .antMatchers("/", "/login**")
            .permitAll()
            .anyRequest()
            .authenticated();
    }

}
(2).画面の実装
resourcesフォルダの下にtemplaesフォルダを作って、画面表示用のindex.htmlファイルを作ります。
下記の内容をindex.htmlに書き込みます。
<!DOCTYPE html>
<html lang="en">
<head>
<meta http-equiv="Content-Type" content="text/html; charset=utf-8" />
<title>Spring Security SSO</title>
<link rel="stylesheet"
	href="https://maxcdn.bootstrapcdn.com/bootstrap/3.3.2/css/bootstrap.min.css" />
</head>

<body>
<div class="container">
	<div class="col-sm-12">
		<h1>Spring Security SSO クライアントアプリケーションA</h1>
		<a class="btn btn-primary" href="securedPage">Login</a>
	</div>
</div>
</body>
</html>
上記と同じの場所でsecuredPage.htmlを作って下記のように実装します。
<!DOCTYPE html>
<html lang="en" xmlns:th="http://www.w3.org/1999/xhtml">
<head>
<meta http-equiv="Content-Type" content="text/html; charset=utf-8" />
<title>Spring Security SSO</title>
<link rel="stylesheet"
	href="https://maxcdn.bootstrapcdn.com/bootstrap/3.3.2/css/bootstrap.min.css" />
</head>

<body>
<div class="container">
	<div class="col-sm-12">
		<h1>Secured Page, Client A</h1>
		Welcome, <span th:text="${#authentication.name}">Name</span>
	</div>
</div>
</body>
</html>
(2).Controllerクラス実装
@Controller
public class IndexAction {

    @GetMapping(value = "")
    public String index() {
        System.out.println("ClientAのindex画面へ遷移する");
        return "index.html";
    }

    @GetMapping(value = "securedPage")
    public String home() {
        System.out.println("ClientAのsecuredPage画面へ遷移する");
        return "securedPage.html";
    }
}
ここまで行くと、client-aは終りました。
client-bアプリケーション
client-bアプリケーションの作り方はclient-aと同じですから、ここで略です。
ただ、client-bアプリケーションを作成する際にあるところでclient-bの名称を書き換えるが必要です。
たとえば、client-bのポートを8302に変わってます。
ここでSS0機能実装は全部完了しました。
SS0機能検証
まず、それぞれ三つのプロジェクトを起動します。
- auth-server
- client-a
- client-b
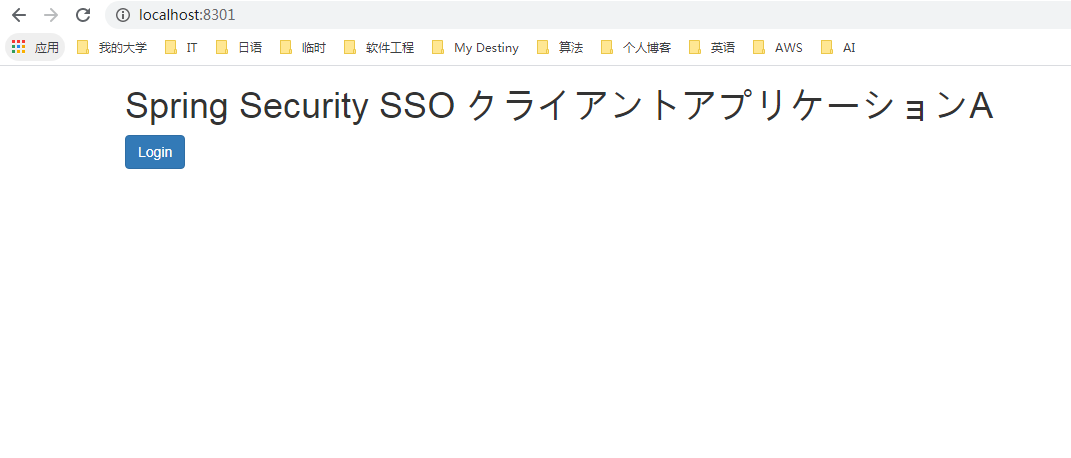
あと、client-aをアクセスします。urlはhttp://localhost:8301となります。
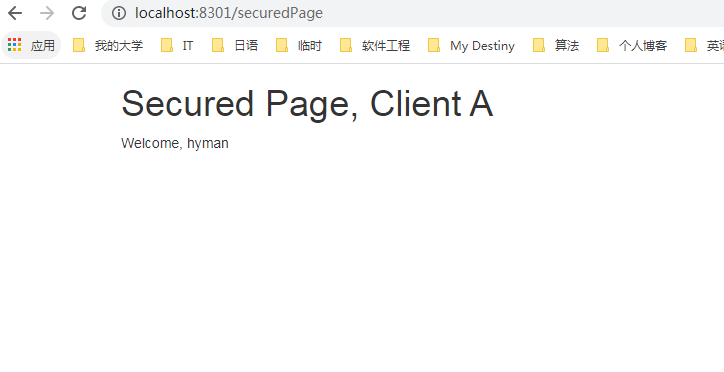
Loginボタンをクリックします。Login画面でユーザーID(hyman)とパスワード(hyman123)を入力してログインします。
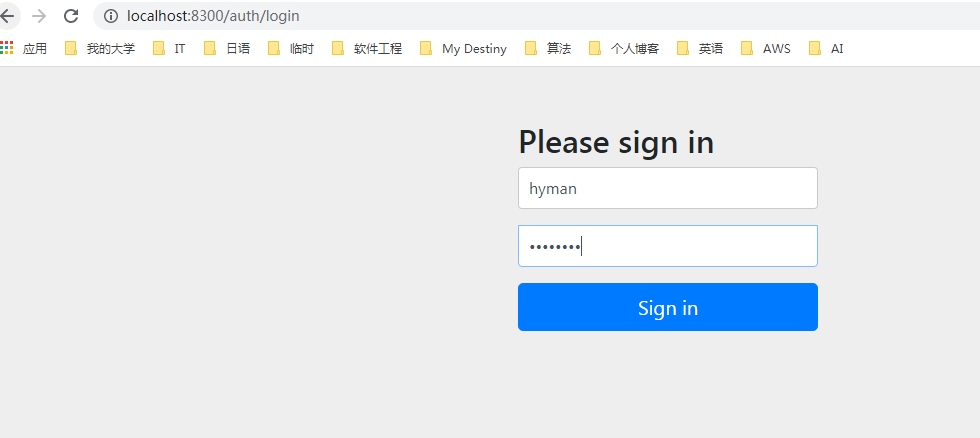
ここまで、client-aを経由してログインできましたので、SSO機能の影響でclient-bをアクセスするときにclient-bのindex画面でLoginボタンをクリックしてユーザーIDとパスワードを入力ずに、ログインできるはずです。
じゃあ、検証してみましょう。
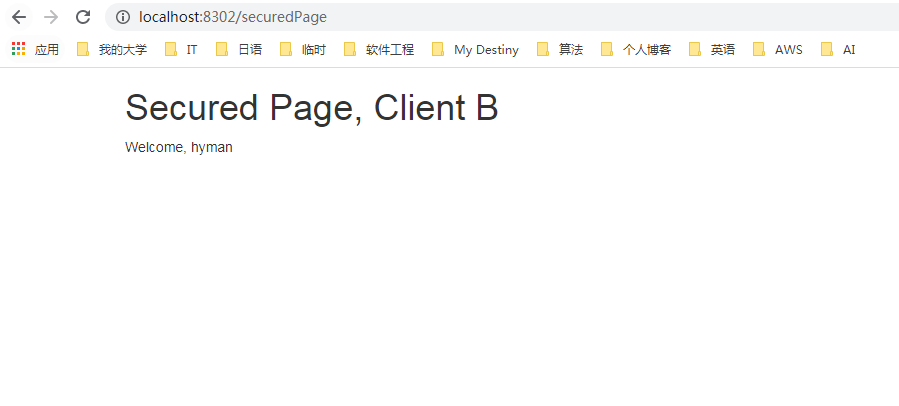
http://localhost:8302/ を経由してclient-bをアクセスします。
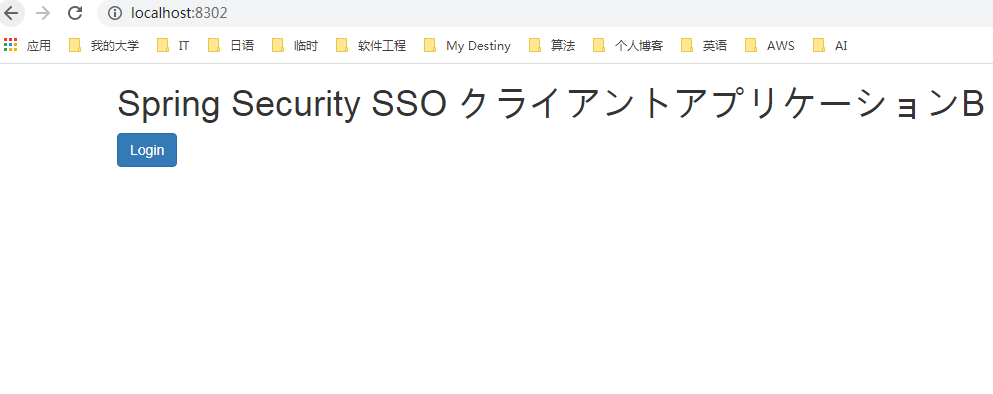
Loginボタンをクリックすると、ログイン画面へ遷移しないでclient-bのsecuredPage画面にいきます。
だから、SSOの機能はうまくいけました。
最後に
最後まで読んでいただき、ありがとうございます。
ソースコードはこちらでダウンロードできます。
ソースコード:https://github.com/Hyman1993/Demo-Projects/tree/master/sso-oauth2-demo
