前の記事の続きになります。
前提条件としてHierarchyにFlowchart、LuaEnvironment、LuaScriptの3つの配置が必要です。
ステップ1 HierarchyにCharacterを配置する
Tools > Fungus > Create > Character
を選択し、HierarchyにCharacterを配置します。
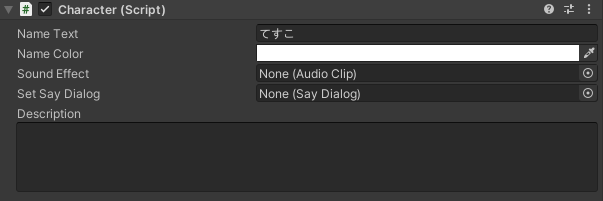
ステップ2 CharacterのNameText、Portraitsの設定
配置したCharacterのNameTextで名前を変更し、Portraitsにキャラクターの画像を追加します。
Portraitsは複数配置でき、表情の差分を登録できます。
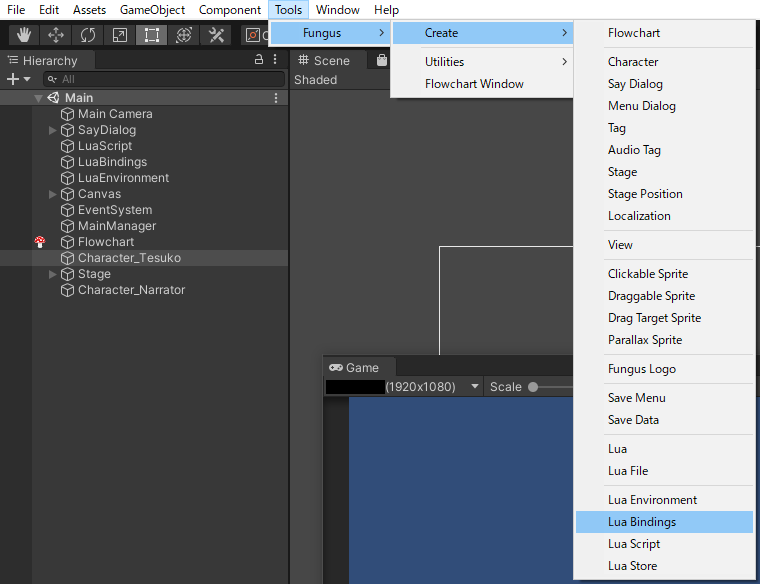
ステップ3 HierarchyにLuaBindingsを配置する
Tools > Fungus > Create > LuaBindings
を選択し、HierarchyにLuaBindingsを配置します。
ステップ4 LuaBindingsにCharacterを登録する
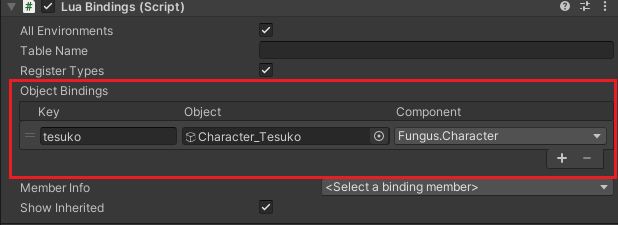
ステップ3で追加したLuaBindingsのObjectBindingsにステップ2で配置したCharacterを登録します。
Key名を任意の名称に変更してください。この名前でLuaからキャラクターを表示します。
また、ObjectBindingsのComponentをFungus.Characterに変更してください。
ステップ5 Luaからキャラクターを呼び出す方法
Luaからsetcharacter関数を呼び出します。
setcharacter(tesuko, "Actor4_0_0_L00")
第一引数はステップ4で登録したObjectBindingsのKey
第二引数はステップ2で登録したPortraitsのElementにあるSprite名を文字列
で指定してください。
第二引数を変更することで表情の差分を切り替えることができます。
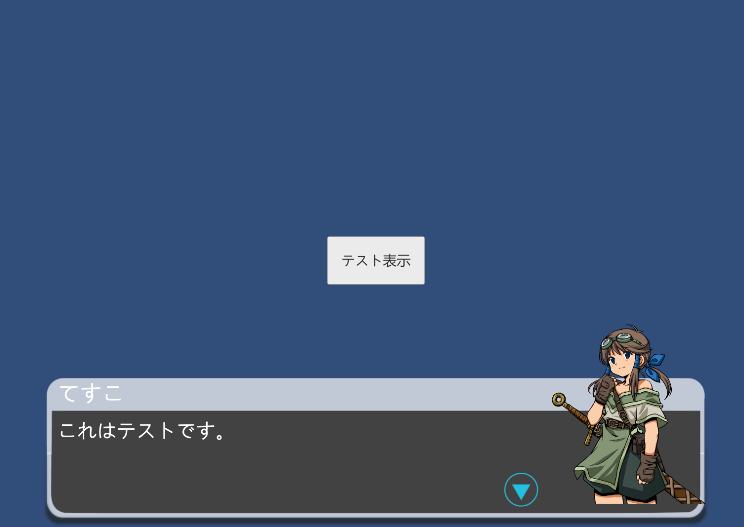
うまくいけば下の画像のようにキャラクターが表示されます。


