Homebrewとは
HomebrewはMacOS用のパッケージ管理システムです。
このパッケージ管理システムというのは、パケージをインストールしてりインストールしたり、アンインストールできるシステムのことです。
特徴
Homebrewの特徴は、
・1行叩くだけでパッケージがインストールできる
・パッケージの依存関係も管理してくれる
というような点が挙げられます。
上記で述べた依存関係というのは、例えばAというパッケージを使うためにはBがインストールされている必要があるとします。そのような場合、当然まず最初にBをインストールしてから、Aをインストールする必要がありますが、Homebrewを使用すればAをインストールするだけで、Bも自動的にインストールしてくれます。これが依存関係を管理してくれるということです。結果的には必要なパッケージのインストールコマンドのみ叩けばいいので、1行叩くだけで作業が済みます。
今回の実行環境
MacOS Mojave 10.41.1
Homebrewをインストールする手順
Homebrewインストールの手順は大きく分けて3段階です。
1 インストール用のスクリプトをコピペで実行
2 Xcode Command Line Toolsのインストール
3インストールできたかを確認
以上です!
1 スクリプト実行
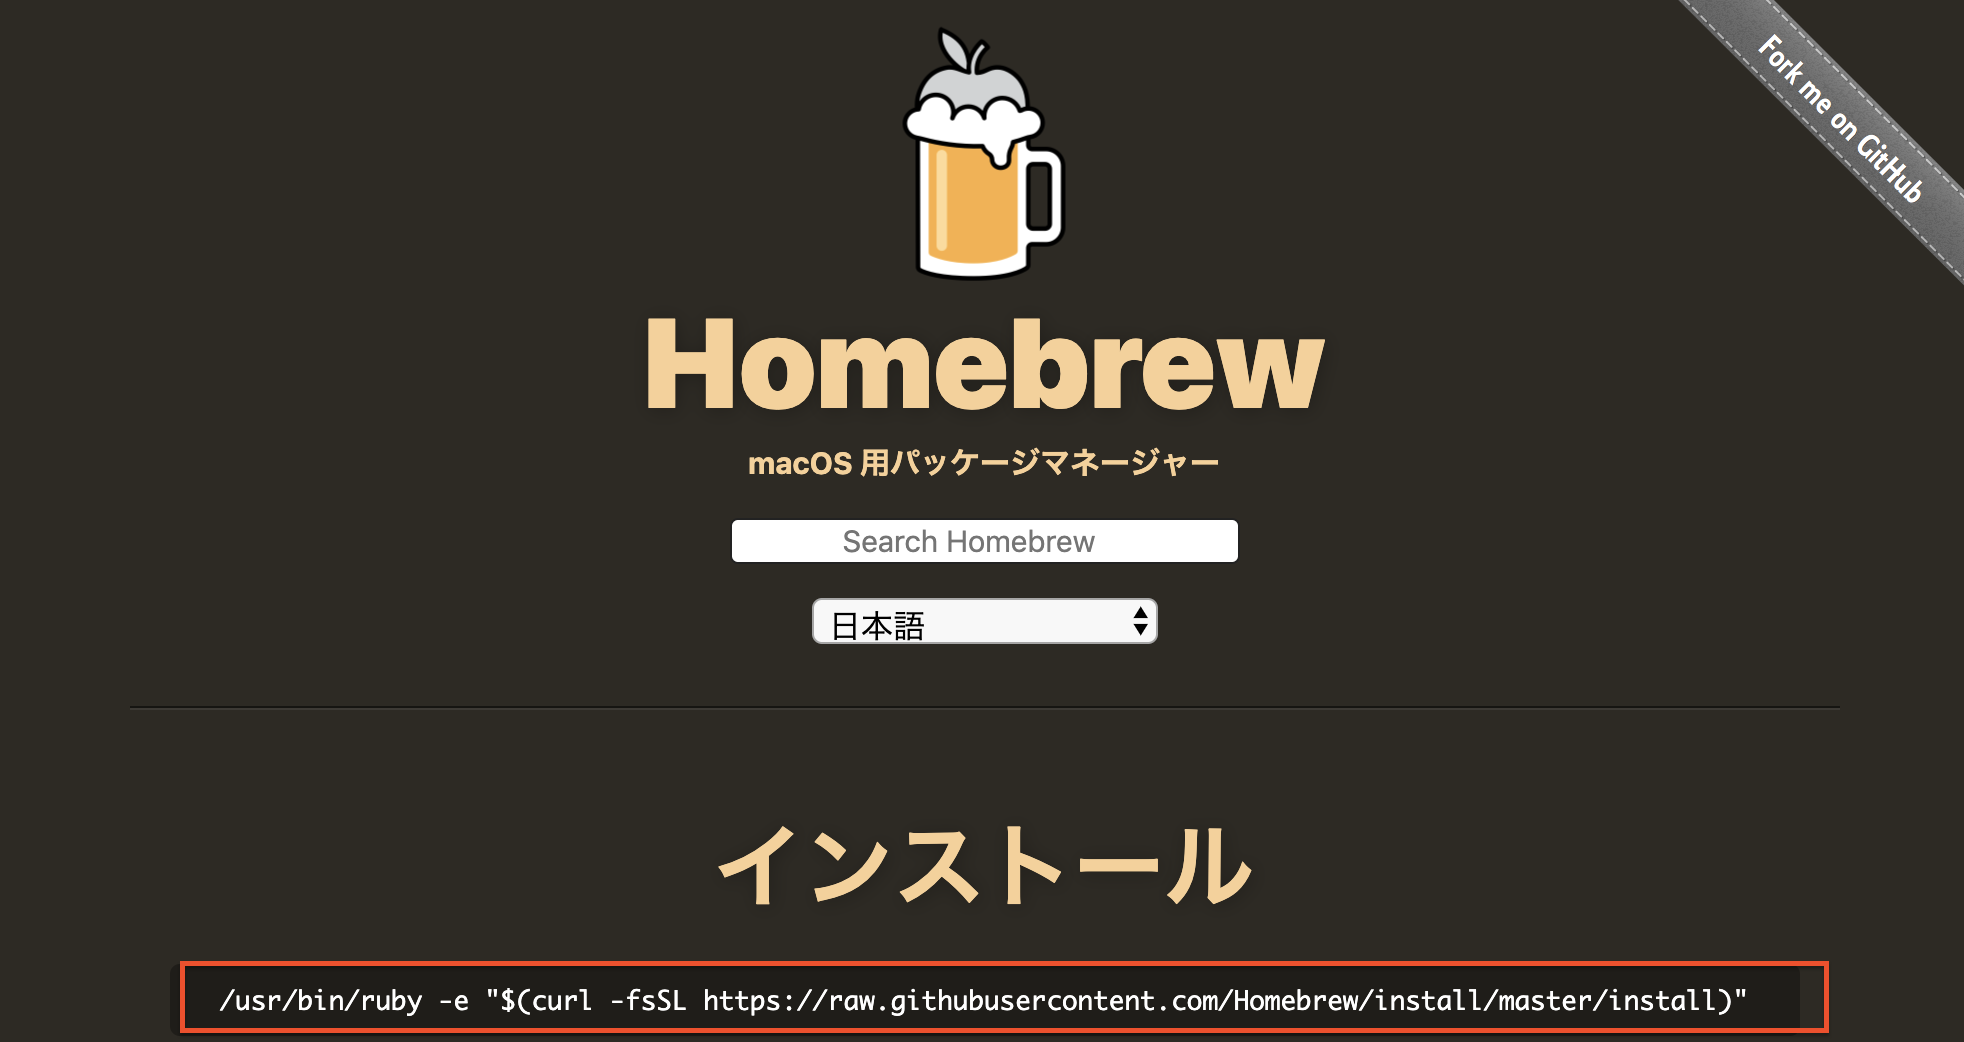
Homebrew公式サイトにアクセスしていただき、赤枠で囲んでいるコマンドをコピペしてターミナルに打ち込みます。
/usr/bin/ruby -e "$(curl -fsSL https://raw.githubusercontent.com/Homebrew/install/master/install)"
上記のコードを叩くわけですが、見てみるとrubyのコードで書かれています。一見rubyをインストールしていない端末だと、リジェクトされてしまいそうですが、Macには標準でrubyがインストールされているので問題ありまっせん。
$ /usr/bin/ruby -e "$(curl -fsSL https://raw.githubusercontent.com/Homebrew/install/master/install)"
  ==> This script will install:
  /usr/local/bin/brew
  /usr/local/share/doc/homebrew
  /usr/local/share/man/man1/brew.1
  /usr/local/share/zsh/site-functions/_brew
  /usr/local/etc/bash_completion.d/brew
  /usr/local/Homebrew
  ==> The following existing directories will be made group writable:
  /usr/local/bin
  /usr/local/share
  /usr/local/share/man
  /usr/local/share/man/man1
  ==> The following existing directories will have their owner set to user-name:
  /usr/local/bin
  /usr/local/share
  /usr/local/share/man
  /usr/local/share/man/man1
  ==> The following existing directories will have their group set to admin:
  /usr/local/bin
  /usr/local/share
  /usr/local/share/man
  /usr/local/share/man/man1
  ==> The following new directories will be created:
  /usr/local/Cellar
  /usr/local/Homebrew
  /usr/local/Frameworks
  /usr/local/etc
  /usr/local/include
  /usr/local/lib
  /usr/local/opt
  /usr/local/sbin
  /usr/local/share/zsh
  /usr/local/share/zsh/site-functions
  /usr/local/var
  ==> The Xcode Command Line Tools will be installed.

  Press RETURN to continue or any other key to abort
Copy
上記が実行結果になります。
以上のようにログに表示されたら問題ありません。
2 Xcode Command Line Toolsのインストール
==> The Xcode Command Line Tools will be installed.
Press RETURN to continue or any other key to abort
Copy
先ほどの実行ログの最後から3行目に上記のような記述があります。
これを訳しますと、「Xcode Command Line Toolsをインストールされます。続ける場合RETURNを押してください。」と書いてあります。
指示通りRETURNキーを押すと、その直後にパスワードの入力を求められるので、Macの画面のロックを解除するパスワードを入力しましょう。
これでXcode Command Line Toolsがインストールされます。
==> /usr/bin/sudo /bin/chmod u+rwx /usr/local/bin /usr/local/share /usr/local/share/man /usr/local/share/man/man1
  Password:
  ==> /usr/bin/sudo /bin/chmod g+rwx /usr/local/bin /usr/local/share /usr/local/share/man /usr/local/share/man/man1
  ==> /usr/bin/sudo /usr/sbin/chown user-name /usr/local/bin /usr/local/share /usr/local/share/man /usr/local/share/man/man1

  ︙
  ︙

  Resolving deltas: 100% (56/56), done.
  Tapped 4572 formulae (4,825 files, 12.2MB)
  ==> Cleaning up /Library/Caches/Homebrew...
  ==> Migrating /Library/Caches/Homebrew to /Users/user-name/Library/Caches/Homebrew...
  ==> Deleting /Library/Caches/Homebrew...
  Already up-to-date.
  ==> Installation successful!

  ==> Homebrew has enabled anonymous aggregate user behaviour analytics.
  Read the analytics documentation (and how to opt-out) here:
    https://docs.brew.sh/Analytics.html

  ==> Next steps:
  - Run `brew help` to get started
  - Further documentation:
    https://docs.brew.sh
上記のようにログに表示されたらインストール完了です。
3 確認
$ brew help
  Example usage:
    brew search [TEXT|/REGEX/]
    brew info [FORMULA...]
    brew install FORMULA...
    brew update
    brew upgrade [FORMULA...]
    brew uninstall FORMULA...
    brew list [FORMULA...]

  Troubleshooting:
    brew config
    brew doctor
    brew install --verbose --debug FORMULA

  Contributing:
    brew create [URL [--no-fetch]]
    brew edit [FORMULA...]

  Further help:
    brew commands
    brew help [COMMAND]
    man brew
    https://docs.brew.sh
brew helpコマンドを実行したら、上記のようにhome brew一覧が表示されたら正常にインストールされています。
パッケージをインストールしてみる
//wgetがインストール名
brew install wget
上記のコマンドでインストールします。
$ brew install wget
  ==> Installing dependencies for wget: gettext, libunistring, libidn2, openssl
  ==> Installing wget dependency: gettext
  ==> Downloading https://homebrew.bintray.com/bottles/gettext-0.19.8.1.high_sierr
  ######################################################################## 100.0%

  ︙
  ︙

  ==> Summary
    /usr/local/Cellar/openssl/1.0.2o_1: 1,791 files, 12.3MB
  ==> Installing wget
  ==> Downloading https://homebrew.bintray.com/bottles/wget-1.19.5.high_sierra.bot
  ######################################################################## 100.0%
  ==> Pouring wget-1.19.5.high_sierra.bottle.tar.gz
    /usr/local/Cellar/wget/1.19.5: 50 files, 3.7MB
上記のような表示で、無事にインストールされています。
最後に
今回はHomebrewのインストール方法を紹介しましたが、Linux用のLinuxbrewも存在していてるので、それと混同し内容気をつけてください。