MySQLを使用する準備作業の説明機会が最近多かったためそのメモ
作業環境:macOS Mojave 10.14.4
0. はじめに
インストールをHomebrewで行うため、まだない場合はその準備
0-1. Homebrewをインストール
/usr/bin/ruby -e "$(curl -fsSL https://raw.githubusercontent.com/Homebrew/install/master/install)"
0-2. Homebrewのコマンド一覧が出るか確かめる
$ brew help
## 1. インストール
1-1. Homebrewを使いMySQLをインストールする
$ brew install mysql
**1-2. インストールしたMySQLを確認する**
$ brew info mysql
**1-3. MySQLを起動する**
$ mysql.server start
以下のメッセージが出力されたら成功
Starting MySQL
.. SUCCESS!
**1-4. MySQLの状態を確認する**
$ mysql.server status
以下のメッセージが表示される
SUCCESS! MySQL running (1253)
**1-5. MySQLを停止する**
$ mysql.server stop
以下のメッセージが表示されたら成功
Shutting down MySQL
.. SUCCESS!
**1-6. MySQLをもう一度起動する**
$ mysql.server start
**1-7. 起動中のMySQLで再起動する**
$ mysql.server restart
以下のメッセージが表示されたら成功
Shutting down MySQL
... SUCCESS!
Starting MySQL
... SUCCESS!
- 以後、MySQLが起動しているということを前提としての説明
## 2. rootユーザーの設定
2-1. 初期設定を開始する
$ mysql_secure_installation
**2-2. パスワードの強度チェックを行うVALIDATE PASSWORDコンポーネントをセットアップするか質問される**
-
yを入力しセットアップをする
VALIDATE PASSWORD COMPONENT can be used to test passwords
and improve security. It checks the strength of password
and allows the users to set only those passwords which are
secure enough. Would you like to setup VALIDATE PASSWORD component?

Press y|Y for Yes, any other key for No:
- もし強度が低いパスワードでも良い場合は
nを入力する-
nを入力した場合は下記の**2-3.**は省略される- その場合パスワードの文字数などの制限がなくなる
-
**2-3. パスワードの強度に関して質問される**
- このパスワードの強度は他のユーザーを追加する際にも適応される
- パスワードの強度は以下の通り
- 0(LOW):任意の8文字以上
- 1(MEDIUM):数字・大文字小文字英字・特殊文字をそれぞれ含んだ任意の8文字以上
- 2(STRONG):数字・大文字小文字英字・特殊文字をそれぞれ含んだ任意の8文字以上
- STRONGの場合、4文字以上の文字列が辞書ファイル内の単語と一致してはならない
There are three levels of password validation policy:

LOW    Length >= 8
MEDIUM Length >= 8, numeric, mixed case, and special characters
STRONG Length >= 8, numeric, mixed case, special characters and dictionary                  file

Please enter 0 = LOW, 1 = MEDIUM and 2 = STRONG: 0, 1 or 2
**2-4. 選択した強度の条件に合致したパスワードを2回入力する**
New password:

Re-enter new password:
**2-5. 入力したパスワードの強度が出力される**
- 今入力したパスワードで確定するなら
yを、再度入力し直すならnを入力する-
nを入力した場合は**2-4. **に戻る
-
Estimated strength of the password: 50
Do you wish to continue with the password provided?(Press y|Y for Yes, any other key for No) : y or n
**2-6. 匿名ユーザーーを削除するか質問される**
-
yと入力し削除する
By default, a MySQL installation has an anonymous user,
allowing anyone to log into MySQL without having to have
a user account created for them. This is intended only for
testing, and to make the installation go a bit smoother.
You should remove them before moving into a production
environment.

Remove anonymous users? (Press y|Y for Yes, any other key for No) : y
以下のメッセージが出力されたら成功
Success.
**2-7. リモートからrootユーザーでのログインを禁止にするか質問される**
-
yと入力し禁止にする
Normally, root should only be allowed to connect from
'localhost'. This ensures that someone cannot guess at
the root password from the network.

Disallow root login remotely? (Press y|Y for Yes, any other key for No) : y
**2-8. デフォルトで作成されているtestデータベースを削除するか質問される**
-
yと入力し削除する
By default, MySQL comes with a database named 'test' that
anyone can access. This is also intended only for testing,
and should be removed before moving into a production
environment.

Remove test database and access to it? (Press y|Y for Yes, any other key for No) : y
以下のメッセージが表示されたら成功
 - Dropping test database...
Success.

 - Removing privileges on test database...
Success.
**2-9. 権限テーブルの再ロードをすぐに行うか質問される**
-
yと入力し変更内容を反映させる
Reloading the privilege tables will ensure that all changes
made so far will take effect immediately.

Reload privilege tables now? (Press y|Y for Yes, any other key for No) : y
以下のメッセージが表示されたら成功
Success.

All done!
## 3. rootユーザーでログイン
3-1. MySQLにrootユーザーでログインする
$ mysql -u root -p
**3-2. 設定したパスワードを入力する**
Enter password:
以下の表示に変われば成功
mysql>
**3-3. MySQLのポート番号を確認する**
mysql> show variables like 'port';
以下のようにポート番号が3306になっていれば成功
+---------------+-------+
| Variable_name | Value |
+---------------+-------+
| port          | 3306  |
+---------------+-------+
**3-4. 確認できたためログアウトする**
mysql> quit
## 4. データベースを作成
rootユーザーでログインしている状態で以下のデータベースを作成する
- データベース名:sample
4-1. データベースを作成する
mysql> CREATE DATABASE sample;
**4-2. データベース一覧を確認する**
mysql> SHOW DATABASES;
以下のようにデータベース名がsampleのデータベースが存在すれば成功
+--------------------+
| Database           |
+--------------------+
| information_schema |
| mysql              |
| performance_schema |
| sample             |
| sys                |
+--------------------+
## 5. ユーザーを追加
rootユーザーでログインしている状態で以下のユーザーを追加する
- ユーザー名:yamada
- ホスト名:localhost
- パスワード:abcd1234
- パスワードの強度は2. で設定した強度に準ずる
5-1. ユーザーを追加する
mysql> CREATE USER 'yamada'@'localhost' IDENTIFIED BY 'abcd1234';
**5-2. ユーザー名とポート名を確認する**
mysql> select User, Host from mysql.user;
以下のようにユーザー名がyamada、ホスト名がlocalhostのユーザーが存在していれば成功
+------------------+-----------+
| User             | Host      |
+------------------+-----------+
| mysql.infoschema | localhost |
| mysql.session    | localhost |
| mysql.sys        | localhost |
| root             | localhost |
| yamada           | localhost |
+------------------+-----------+
**5-3. ログアウトし追加したユーザーでログインする**
$ mysql -u yamada -pabcd1234
-
ログイン時のユーザー名の入力は
ユーザー名@ホスト名であるが、localhostに限りホスト名は省略できる -
ログイン時、
-pに続けてパスワードを入力しておくとパスワードの要求をスキップできる
**5-4. 設定したパスワードを入力する**
Enter password:
以下の表示に変われば成功
mysql>
## 6. 追加したユーザーにデータベースの接続権限を付与
6-1. 追加したユーザーでログインする
$ mysql -u yamada -pabcd1234
**6-2. 作成したsampleデータベースに接続してみる**
mysql> USE sample
以下のエラーが表示される
ERROR 1044 (42000): Access denied for user 'yamada'@'localhost' to database 'sample'
**6-3. ログアウトする**
mysql> quit
**6-4. rootユーザーでログインする**
$ mysql -u root -p
**6-5. 追加したユーザーがsampleデータベースに接続できる権限を与える**
mysql> GRANT ALL PRIVILEGES ON sample.* TO 'yamada'@'localhost';
**6-6. ログアウトする**
mysql> quit
**6-7. 追加したユーザーでログインする**
$ mysql -u yamada -pabcd1234
**6-8. 再度sampleデータベースに接続してみる**
mysql> USE sample
以下のメッセージが出力されたら成功
Database changed
## 7. MySQL Workbenchをインストール
- MySQLのGUIのツールをインストール
7-1. MySQLを起動する
$ mysql.server start
**7-2. [このページ]()にアクセスする**
**7-3. ページ下部のDownloadボタンをクリック**
**7-4. 遷移先のページ下部のNo thanks, just start my download.をクリック**
ここでダウンロードが開始する
**7-5. ダウンロードされたファイルを開き、Applicationsディレクトリにコピー** 
7-6. ApplicationsディレクトリからMySQL Workbenchを起動
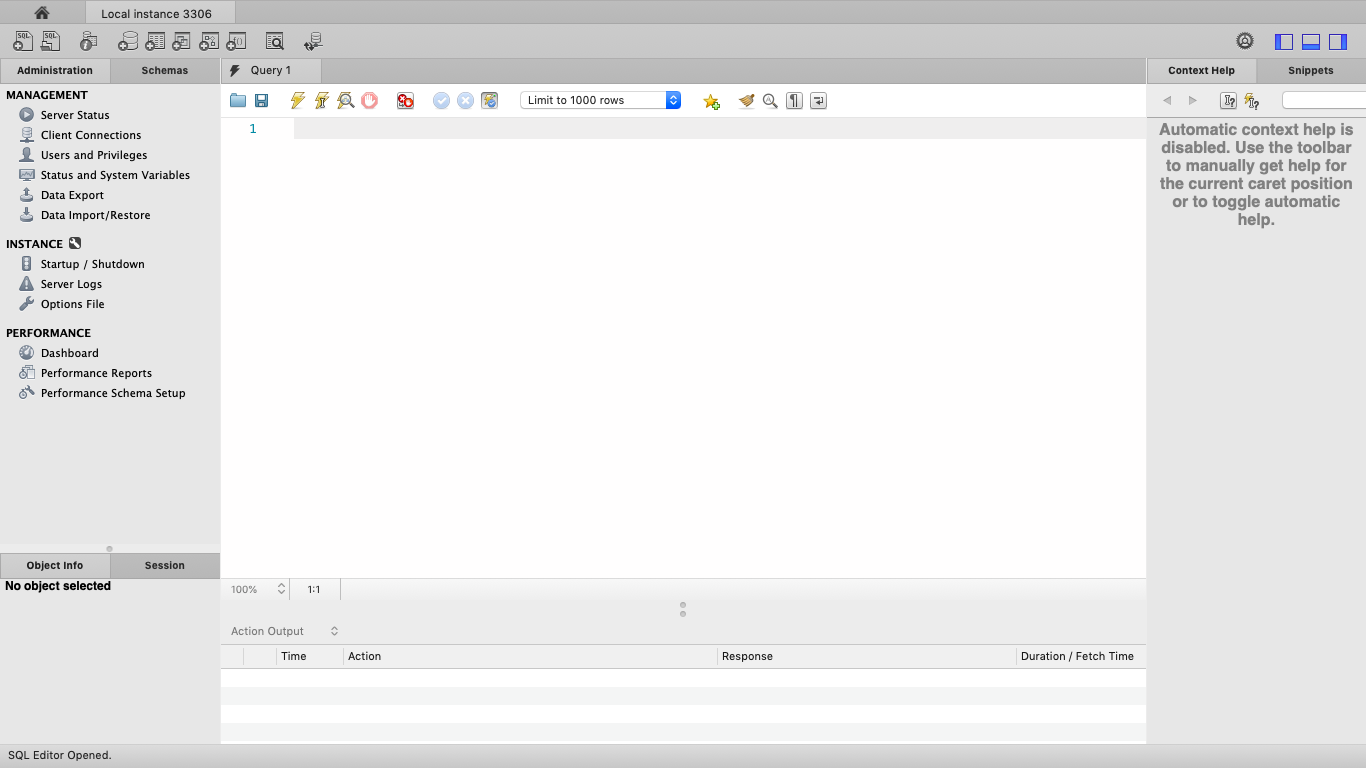
**7-7. 画面左にある`Local instance 3306`をクリック** 
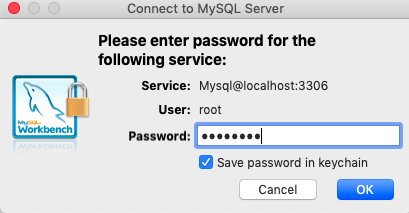
7-8. rootユーザーのパスワードを入力しSave password in keychainにチェックをつける

## ex1. ユーザーーの認証方式をmysql_native_password
PHPでMySQLを使用したい場合に必要
ex1-1. rootユーザーでログインし各ユーザー名と認証方式を確認する
mysql> select User, Plugin from mysql.user;
以下のように各ユーザー名と認証方式が表示される
+------------------+-----------------------+
| User             | Plugin                |
+------------------+-----------------------+
| mysql.infoschema | caching_sha2_password |
| mysql.session    | caching_sha2_password |
| mysql.sys        | caching_sha2_password |
| root             | caching_sha2_password |
| yamada           | caching_sha2_password |
+------------------+-----------------------+
デフォルトでは**caching_sha2_password**になっているが、この認証方式ではPHPのMySQL接続ライブラリが対応していないため接続できない
**ex1-2. 追加したユーザーの認証方式を`mysql_native_password`に変更する**
mysql> ALTER USER 'yamada'@'localhost' IDENTIFIED WITH mysql_native_password BY 'abcd1234';
**ex1-3. 再度各ユーザー名と認証方式を確認する**
mysql> select User, Plugin from mysql.user;
以下のようにユーザーyamadaの認証方式が**mysql_native_password**になっていれば成功
+------------------+-----------------------+
| User             | Plugin                |
+------------------+-----------------------+
| mysql.infoschema | caching_sha2_password |
| mysql.session    | caching_sha2_password |
| mysql.sys        | caching_sha2_password |
| root             | caching_sha2_password |
| yamada           | mysql_native_password |
+------------------+-----------------------+
## ex2. アンインストール
ex2-1. MySQLを停止する
$mysql.server stop
**ex2-2. HomebrewでMySQLをアンインストールする**
$ brew remove mysql
**ex2-3. Homebrewのキャッシュを削除する**
$ brew cleanup
**ex2-4. MySQLで使っていたファイル群を削除する**
rm -rf /usr/local/var/mysql/
**ex2-5. mysqlコマンドが使えないことを確認する**
$ mysql -v
以下のメッセージが出力されたら成功
-bash: /usr/local/bin/mysql: No such file or directory
