1章、2章の続きで、ラズパイをAmazon Echo化したいと思います。
本章:Alexa Voice Service(AVS) をRaspberry Piにインストールして、Alexaとしゃべりたい
ラズパイをEcho化した先駆者の記事。
まずはAlexa Voice Serviceにログイン
下記メインサイトの右上のサインインから、開発者として新規登録しましょう。
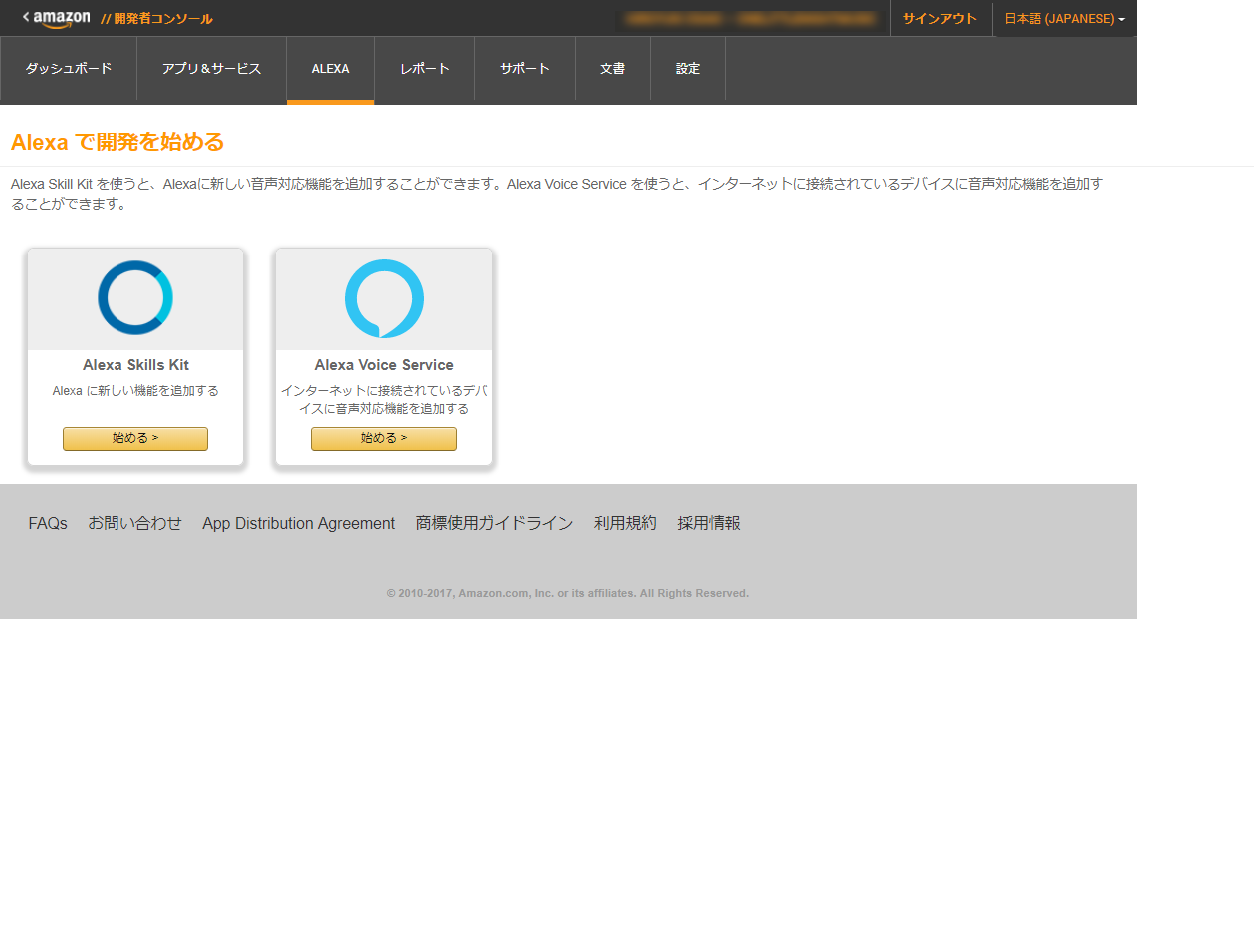
ログインするとこんな画面に入れます。
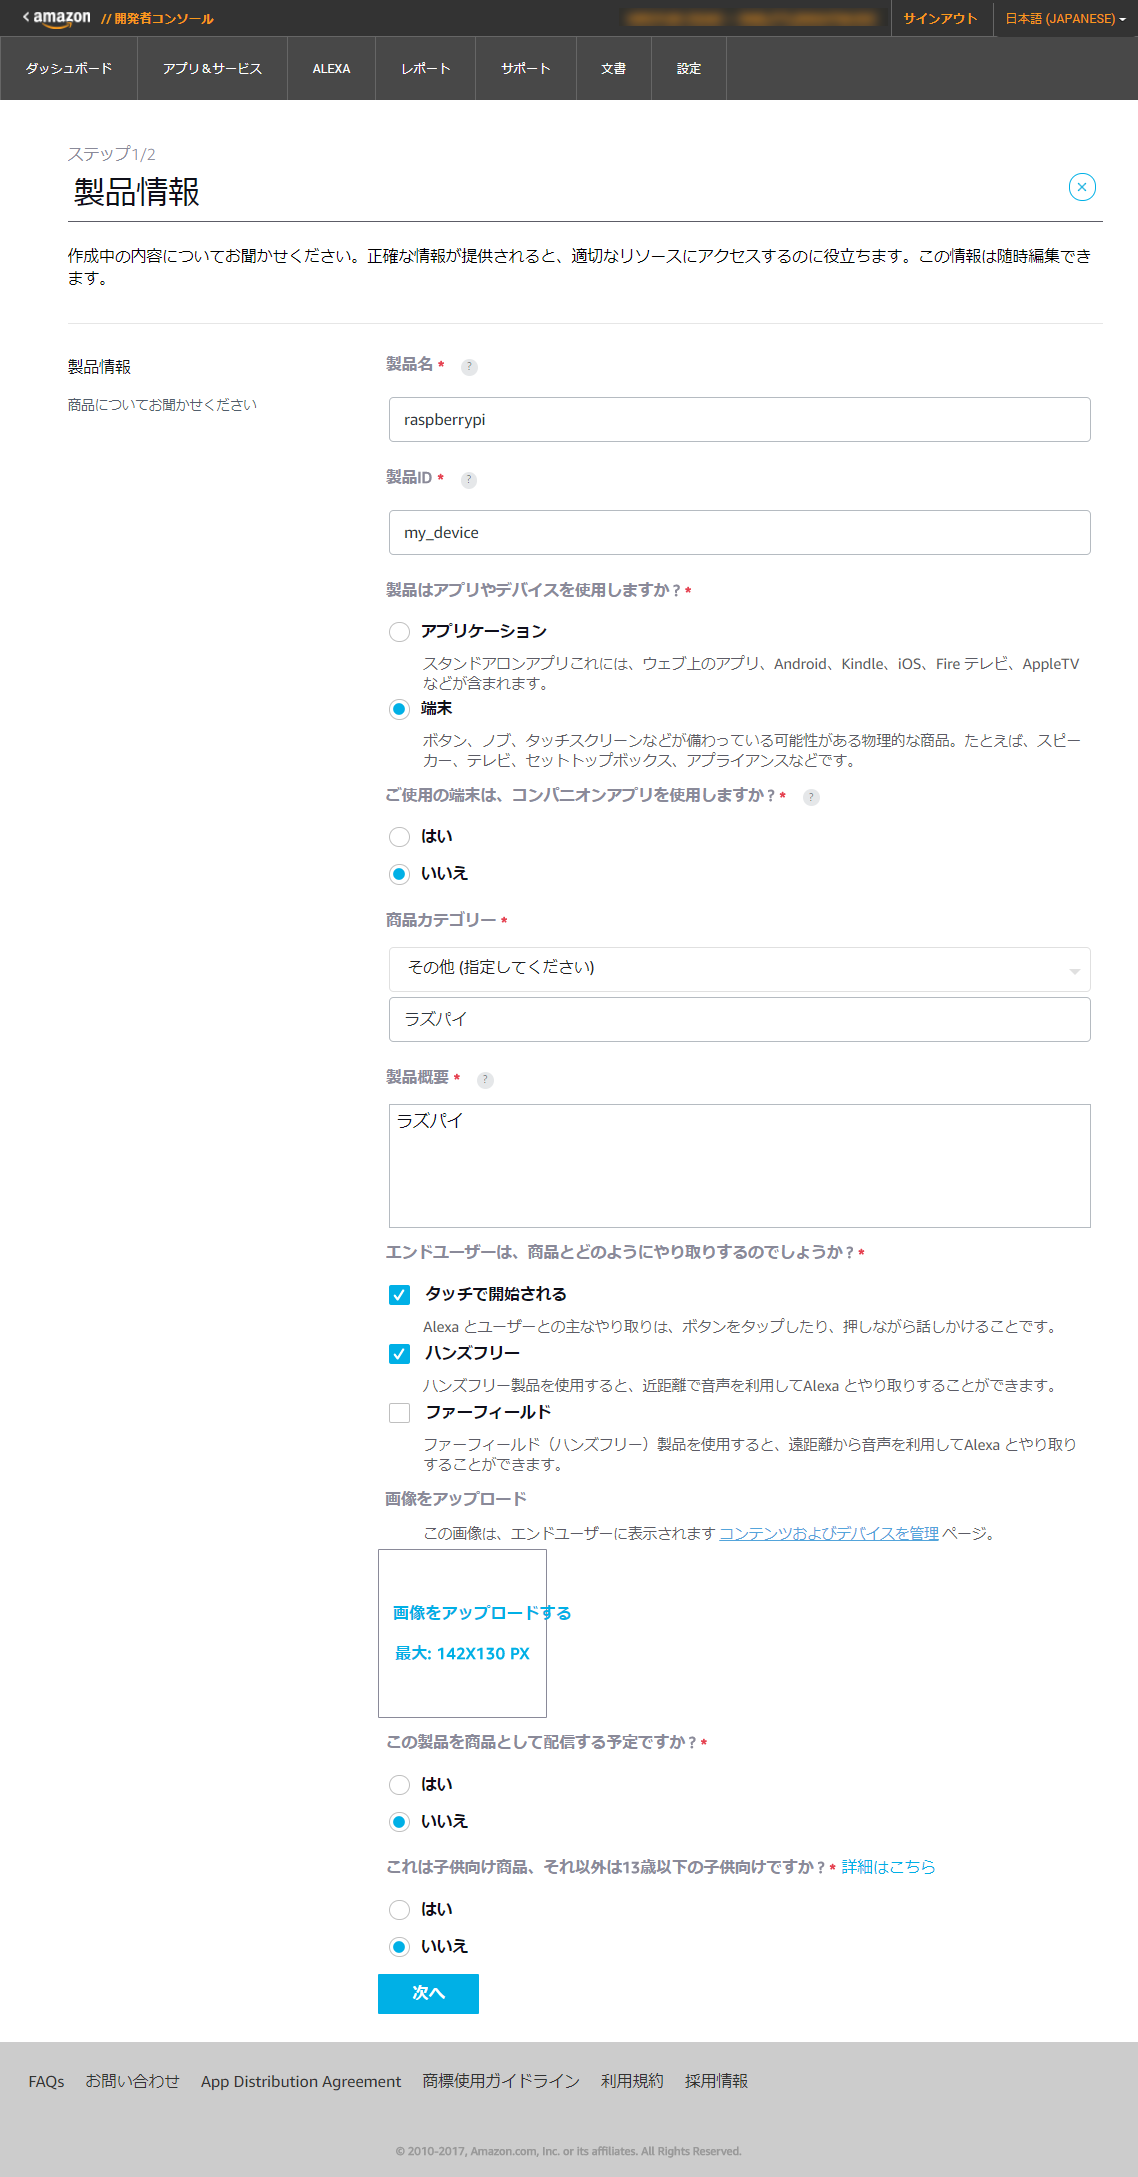
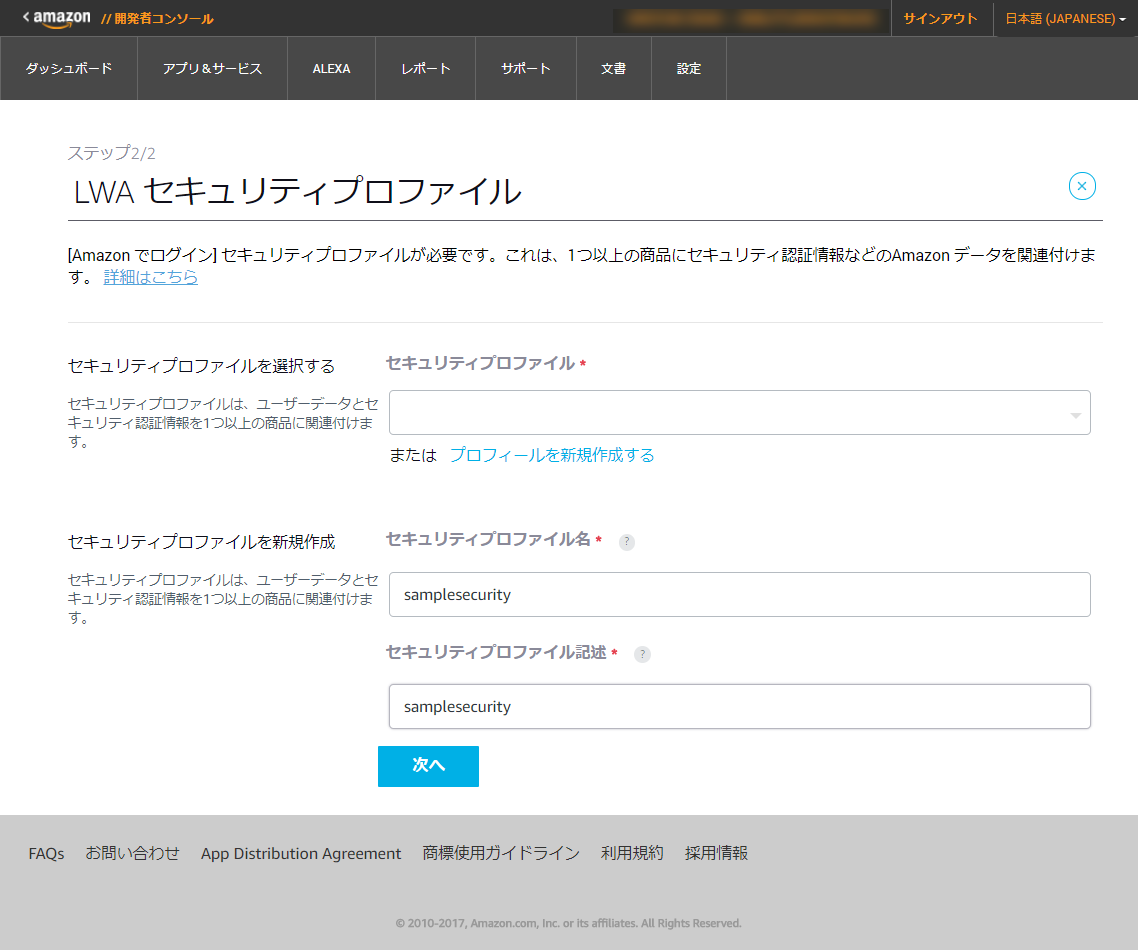
Alexa Voice Serviceの「始める」から
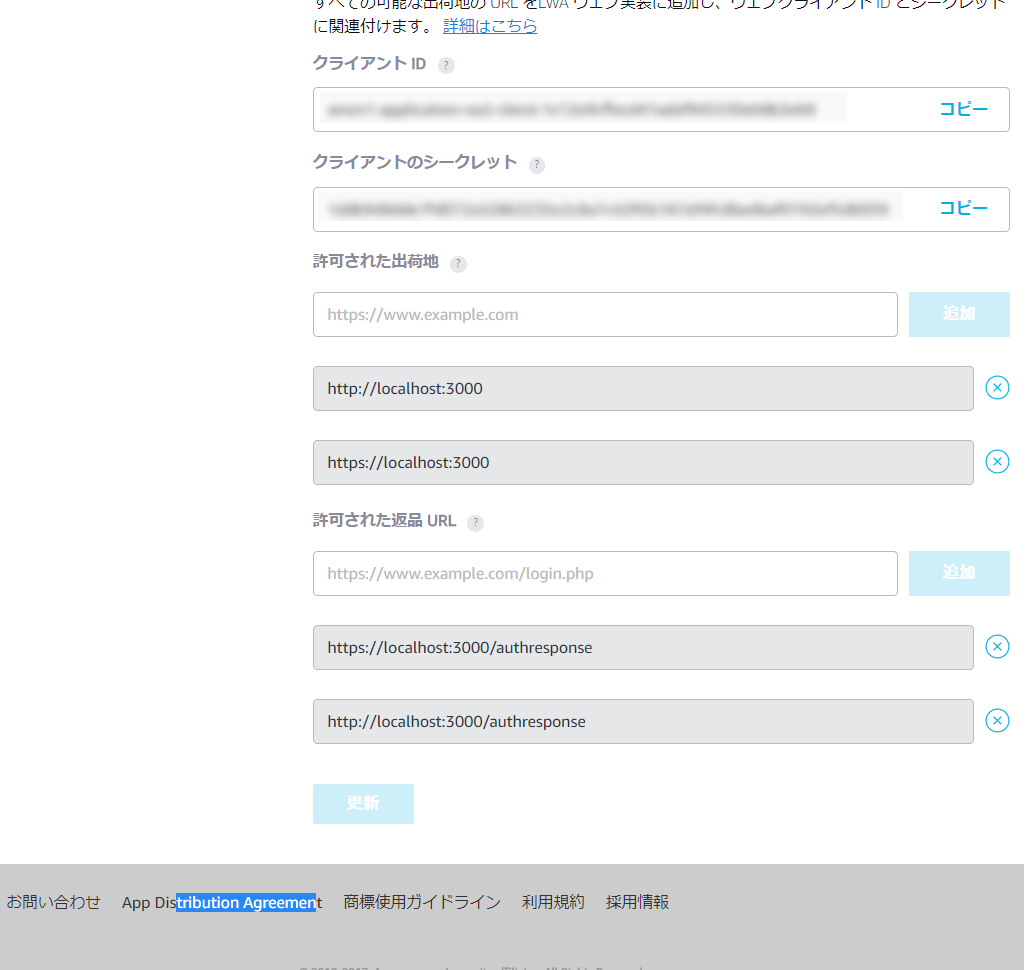
セキュリティプロファイルにはURLを4種類登録します。「許可された出荷地」(= Allowed origin)に2種類。「許可された返品URL」(= Allowed Return URL)に2種類。
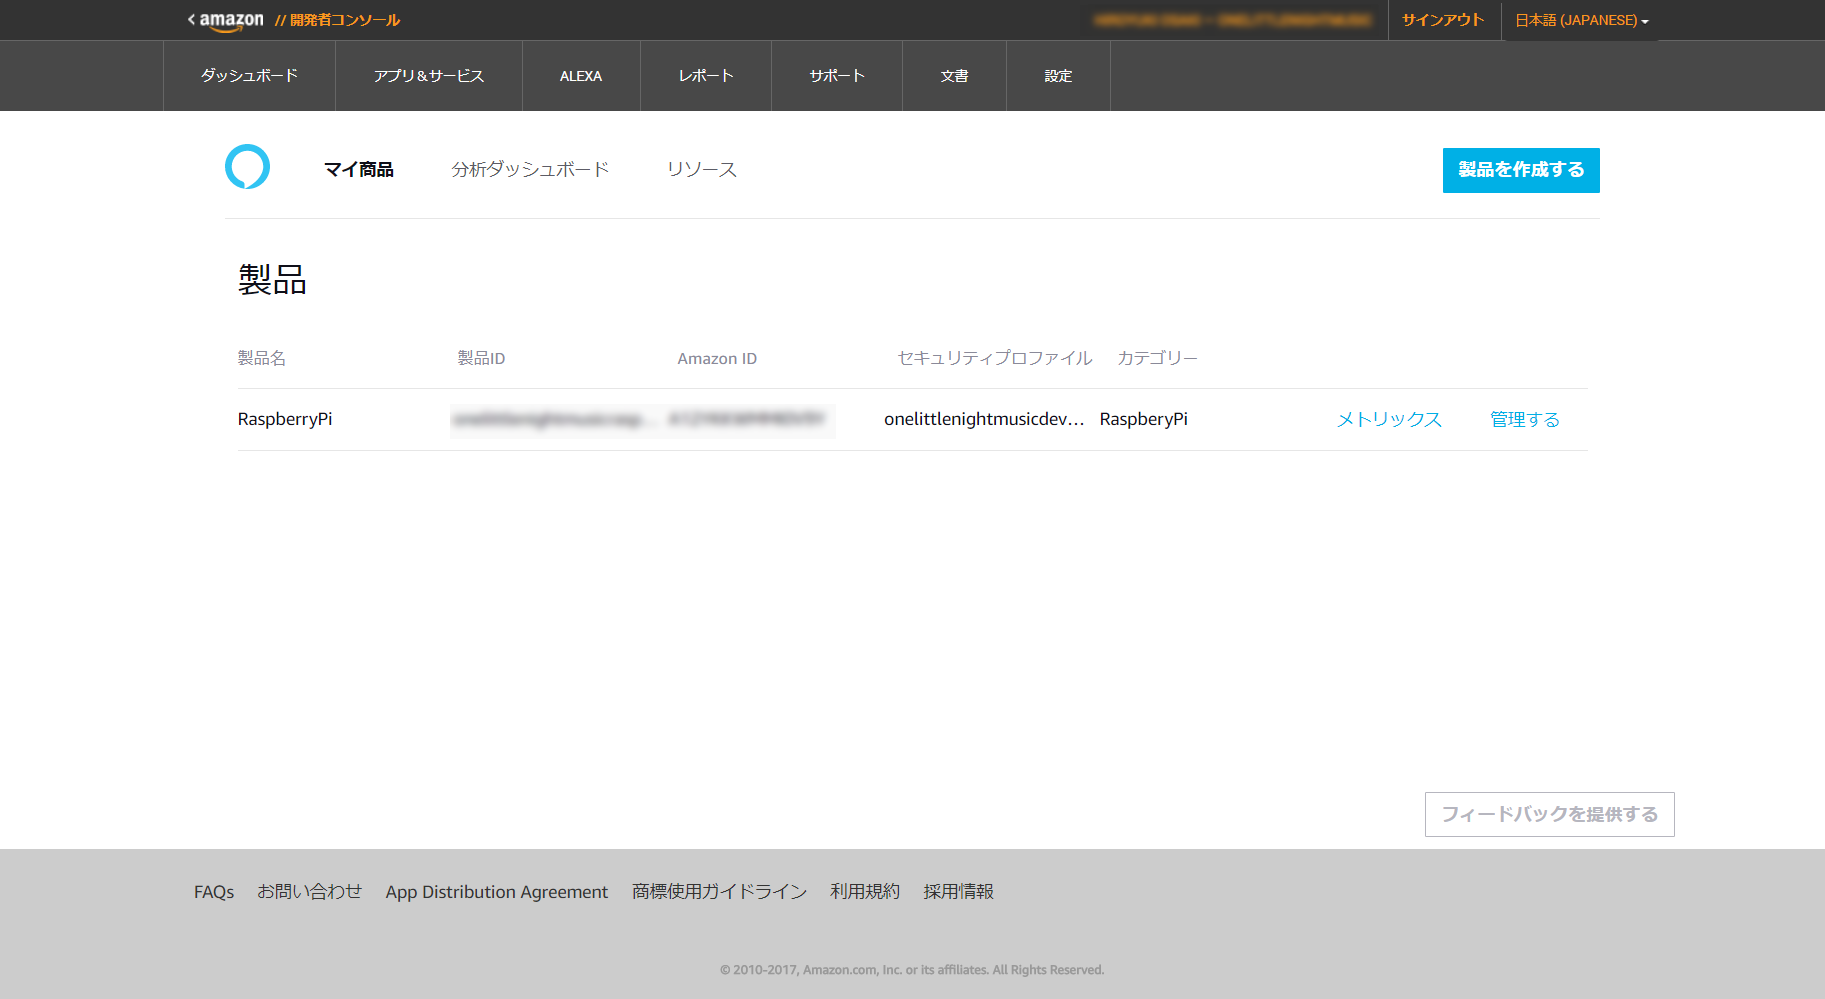
最終的には登録されてこうなります。
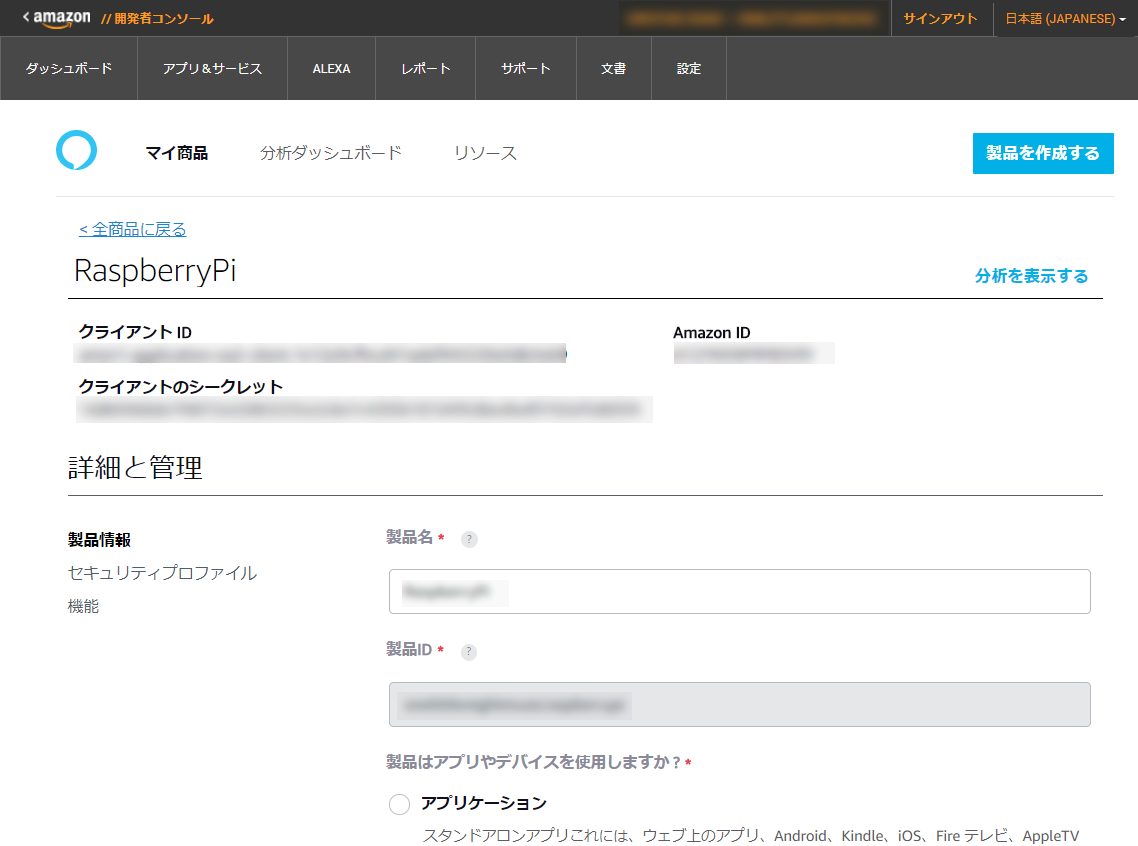
「管理する」を押すと、再度クライアントIDやクライアントのシークレットを確認することができます。
sdkのダウンロードとクライアントIDの記載
下記記事にある通り、必要なsample-appをダウンロードします。
git clone https://github.com/alexa/alexa-avs-sample-app.git
cd alexa-avs-sample-app-master
# !/bin/bash

# -------------------------------------------------------
# Paste from developer.amazon.com below
# -------------------------------------------------------
# This is the name given to your device or mobile app in the Amazon developer portal. To look this up, navigate to https://developer.amazon.com/edw/home.html. It may be labeled Device Type ID.
ProductID=YOUR_PRODUCT_ID_HERE ←ここ

# Retrieve your client ID from the web settings tab within the developer console: https://developer.amazon.com/edw/home.html
ClientID=YOUR_CLIENT_ID_HERE ←ここ

# Retrieve your client secret from the web settings tab within the developer console: https://developer.amazon.com/edw/home.html
ClientSecret=YOUR_CLIENT_SECRET_HERE ←ここ
これを編集した後にインストールを実行します。
. ./automated_install.sh
下記のような質問に答えていくと、インストールが完了します。
====== AVS + Raspberry Pi Licenses and Agreement ======


This code base is dependent on several external libraries and virtual environments like Kitt-Ai, Sensory, ALSA, Atlas, Portaudio, VLC, NodeJS, npm, Oracle JDK, OpenSSL, Maven & CMake.

Please read the document "Installer_Licenses.txt" from the sample app repository and the corresponding licenses of the above.

Do you agree to the terms and conditions of the necessary software from the third party sources and want to download the necessary software from the third party sources?
=======================================================
[y/quit] >> y

Do you have an Amazon developer account?
[y/n/quit] >> y


ProductID >> ########
ClientID >> ##########
ClientSecret >> ##############
Is this information correct?
[y/n] >> y


Which locale would you like to use?
=======================================================
1) en-US
2) en-GB
3) de-DE
4) en-CA
5) en-IN
6) ja-JP
Please select an option [1-6] 6


==== Setting Audio Output =====
Are you using 3.5mm jack or HDMI cable for audio output?
=======================================================
1) 3.5mm jack
2) HDMI audio output

Please select an option [1-2] 1


=== Enabling Hands Free Experience using Wake Word "Alexa" ====
Do you want to enable "Alexa" Wake Word Detection?
=======================================================
[y/n/quit] >> y

(インストールが始まる)

...
[100%] Built target wakeWordAgentTest
chown: changing ownership of ‘/home/pi/alexa-avs-sample-app-master/samples/wakeWordAgent/ext/lib/libblas.so.3’: Operation not permitted

=============================
*****************************
========= Finished ==========
*****************************
=============================

To run the demo, do the following in 3 seperate terminals:
Run the companion service: cd /home/pi/alexa-avs-sample-app-master/samples/companionService && npm start
Run the AVS Java Client: cd /home/pi/alexa-avs-sample-app-master/samples/javaclient && mvn exec:exec
Run the wake word agent:
  Sensory: cd /home/pi/alexa-avs-sample-app-master/samples/wakeWordAgent/src && ./wakeWordAgent -e sensory
  KITT_AI: cd /home/pi/alexa-avs-sample-app-master/samples/wakeWordAgent/src && ./wakeWordAgent -e kitt_ai
  GPIO: PLEASE NOTE -- If using this option, run the wake word agent as sudo:
  cd /home/pi/alexa-avs-sample-app-master/samples/wakeWordAgent/src && sudo ./wakeWordAgent -e gpio
これでインストールは完了です。あとは端末アプリと認証です。
実行方法(認証とアプリ起動)
コマンドで順番に3つを実行。
cd alexa-avs-sample-app/samples
cd companionService && npm start & # ①
cd javaclient && mvn exec:exec & # ②
cd wakeWordAgent/src && ./wakeWordAgent -e sensory & # ③
それぞれのプログラムは、1.認証用のwebサービス、2. 1やAVSにアクセスする端末アプリ(画面)、3. マイクをウォッチしてwakeコマンド(「Alexa」という呼びかけ)を検出するプログラム、だそうです。
ここでYesを押し、RaspberryPi側でブラウザを立ち上げます。
私の環境ではFirefoxを使いましたが、Chromium-browserを使ってもよいです。
firefox &
ブラウザのURL入力欄に、すでに先ほどのURL(すでにYesボタンを押した結果Clipboardにコピーされているので)をCtrl+Vで貼り付けます。
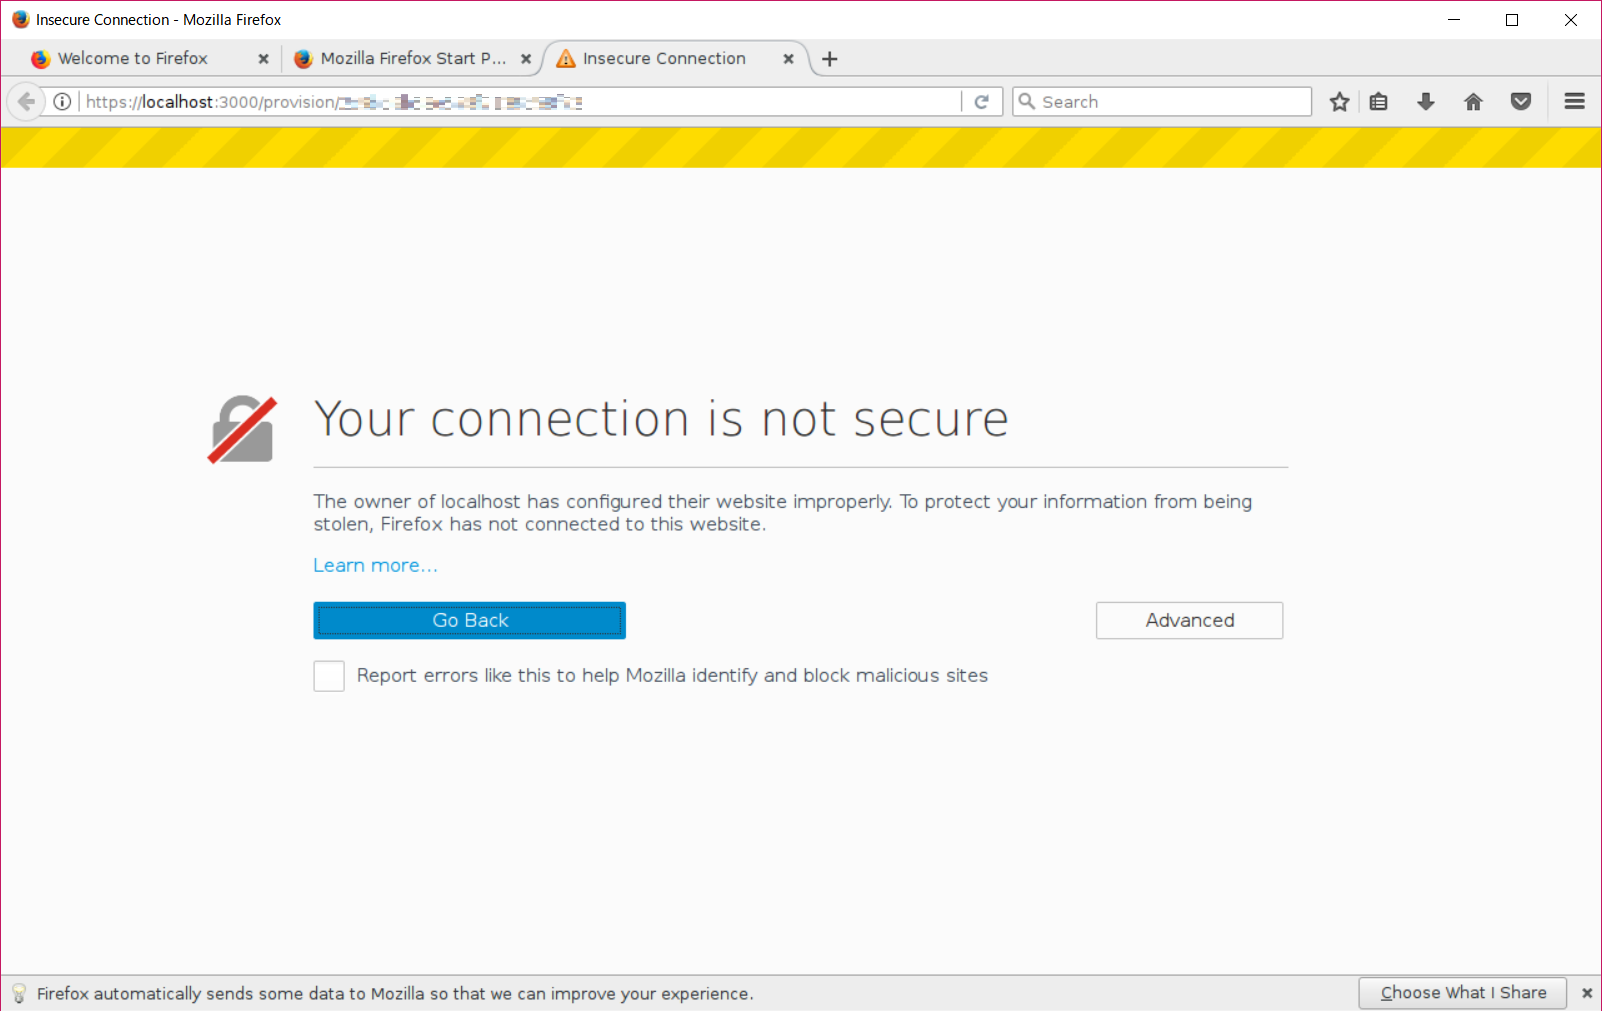
証明書エラーですが、どのブラウザでも特例として認可すれば通過できます。
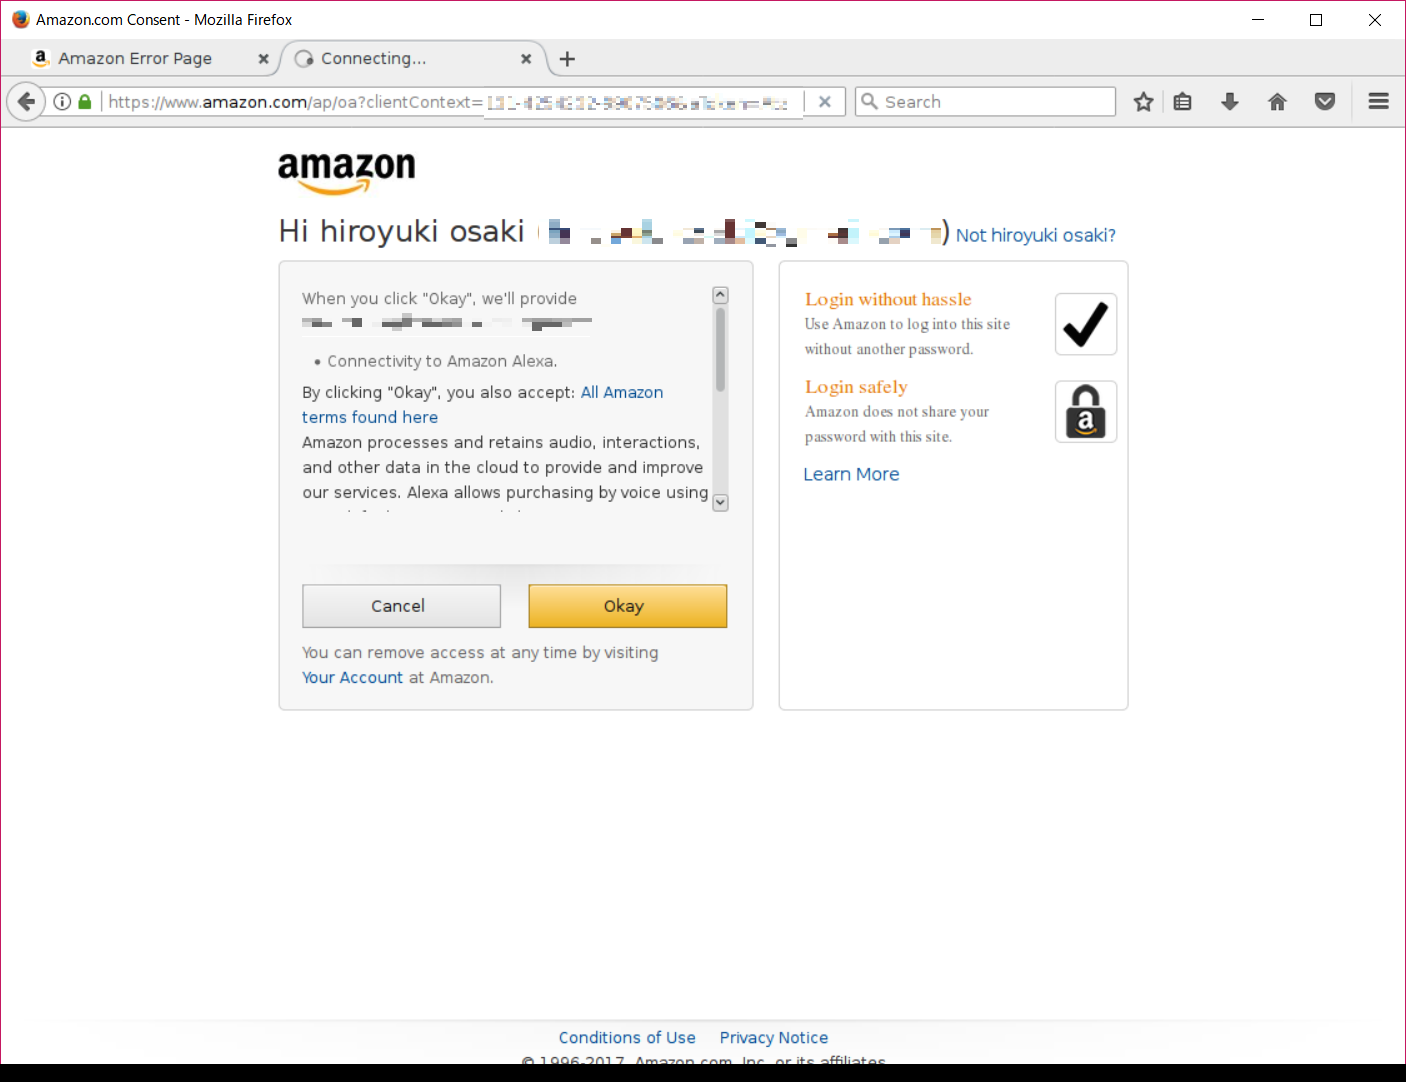
Okayを押し、
ここまで行けばAVSとの認証が完了しています。
JavaアプリにもどってOKを押します。
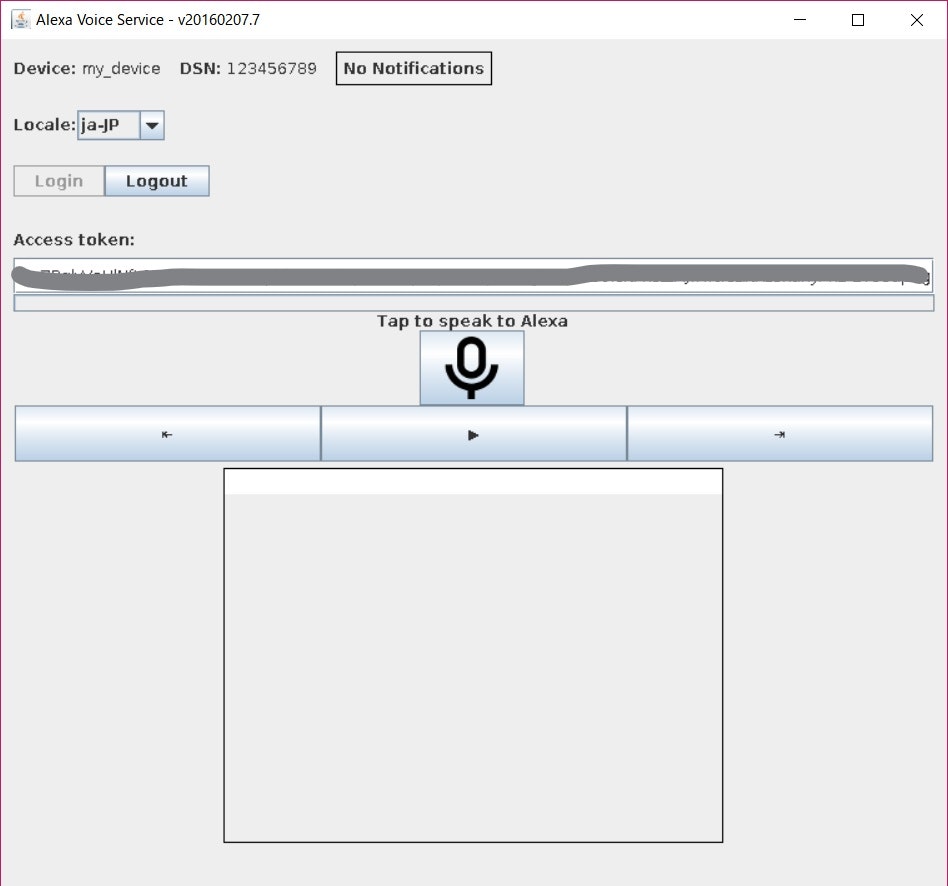
下記のようにトークンが入力済みでログオンされた状況になります。
ここでボタンを押して会話から話し始めてもよいですし、3.のコマンドを実行することでwakeコマンド待ちになっていますので、「Alexa」と話しかければ勝手に会話Onになります。
実行結果
マイクから「Alexa、明日の天気は?」と話しかけるとWestLakeの天気を教えてくれます。
履歴も下記で閲覧可能です。
https://alexa.amazon.com/spa/index.html#settings/dialogs
(日本語) https://alexa.amazon.co.jp/spa/index.html#settings/dialogs
注意したいのは、alexa.amazon.co.jpの同一管理画面もあるのですが、こちらにはなぜか紐づきません。
(開発者ダッシュボードのどこかでサーバ設定ができたのかもしれませんが、どこかよくわかっていません)
alexa.amazon.comにアクセスすれば履歴が見られます。
上記も嘘でした。amazon.co.jpのアカウントをちゃんと開発者アカウントとして登録すればいけます。
amazon.com, amazon.co.jp両方に同じメールアドレス、パスワードでアカウントがあるとまずいらしいです。(最初にamazon.comで認証してだめならamazon.co.jpに飛ばすんですね。。。へぇ)
https://qiita.com/Dimeiza/items/182c4847d7c1ead7df54#amazoncojp%E3%81%A8amazoncom%E3%81%AE%E3%82%A2%E3%82%AB%E3%82%A6%E3%83%B3%E3%83%88%E3%81%AB%E3%81%A4%E3%81%84%E3%81%A6
https://dev.classmethod.jp/voice-assistant/solution-of-a-problem-amazon-com-account-conflict/
うまくいかなかったこと
音声がbluetoothスピーカから出ずになぜかアナログ出力から出てきます。。。
いろいろ調べてみたのですが、いくつかの条件が重なってまだ未対応な部分となっています。
- もともとこのアプリがOracle JDKベースで実装されていること
- OracleJDKはLinuxのPulseAudioという仕掛けに対応できないこと
- PulseAudioを使わないとBluetoothに接続できないこと
- OpenJDKを使ってみるとこんどは別のSSL認証で失敗すること。。。
(修正 2018/1/3)
bluetoothから音が出ました!
1章に追記しましたが、下記を記述することでPulseAudio→Bluetoothで音がなりました。
javax.sound.sampled.Clip=com.sun.media.sound.DirectAudioDeviceProvider
javax.sound.sampled.Port=com.sun.media.sound.PortMixerProvider
javax.sound.sampled.SourceDataLine=com.sun.media.sound.DirectAudioDeviceProvider
javax.sound.sampled.TargetDataLine=com.sun.media.sound.DirectAudioDeviceProvider
