Bluetoothを使う目的
Raspberry Piはとても手軽なデバイスで、WifiもあるのでSSHなどでログインすると普通のLinuxとしても利用でき、HTTPでもいろんなサービスにアクセスでき、重宝します。
私も今週買って試しているのですが、とてもよい!
せっかくなので起動しっぱなしにして必要に応じてHTTPでアクセスしていろんなIoT的な使い方をしたくなりますね。
でも、リブートしたり、またはお家のWifi環境を変えてしまったときにでIPアドレスが変わってしまいSSHでアクセスできなくなります。
Raspberry Pi自体に画面がつけていればip addrコマンドで調べられますが、画面がついていない状態からわざわざセットアップするのが面倒です。
そこで今回は、Bluetoothというペアリング機能を使ってPCと接続状態をいつでも構築できるようにしておき、その接続を使ってTTYでログインできるようにしておきたいと思います。
(これで少なくともSSHがつながらないときに、Bluetoothで一度ログインし、IPだけでも調べることができるようになります)
ペアリング
(2017/12追記)
接続元はWindows 10を使います。設定→デバイスでBluetoothをみたときに、下記のような状況にしなければなりません。

手順は下記に書いてありますが、raspberry piをbluetoothで検出可能にします。
sudo bluetoothctl
[bluetooth] power on
[bluetooth] discoverable on
[bluetooth] agent on
[bluetooth] default-agent
次に、Windows 10から「+Bluetoothまたはその他のデバイスを追加する」→「Bluetooth」を選択するとRaspberry Piが見つかるはずと思います(だめであれば、一回Raspberry Pi側でquitしてから何回か上のコマンドをやり直してみる。)

ペアリングできたらこうなります。

Bluetoothをシリアル接続で使う設定方法
殆どは上記記載の通りでうまくいきました。説明も細かくとても良い記事です。
一部だけ変更(watch コマンド)
設定が終わったら、あとは接続先のRaspberry Piでの接続待ち方法を変更し、下記コマンドを打ちます。
sudo rfcomm -r watch 0 22 /sbin/agetty -L rfcomm0 115200 &
(必要ならこのあとdisown %1か何かで、ログアウト後も動き続けるようにデーモン化しておきましょう)
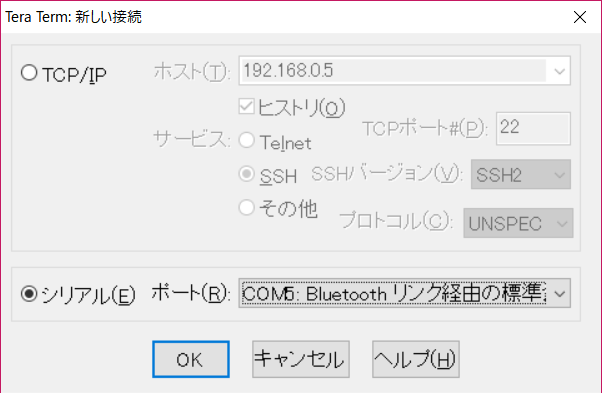
これでCOMポートにシリアル通信してみましょう。Tera Termを使うならこんな感じ。
(私の場合COM5になっていますが、そこは環境によって変えましょう)
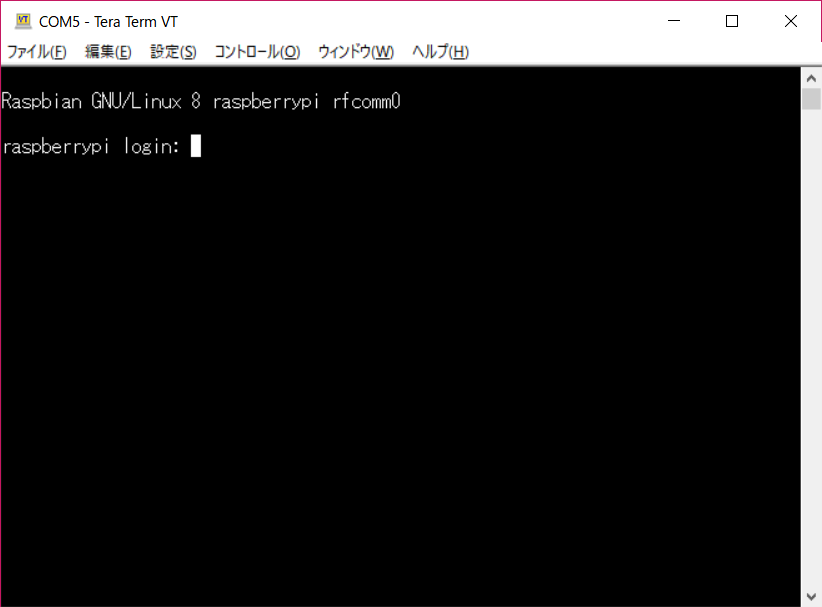
少し待ちますが、このようにログイン待機になります。
これでわざわざ画面を触る必要がなくなり、少しハッピーになりました。
再起動後も自動起動するようにデーモン化
あと少しです。
デーモン化はこちらが詳しいです。
http://mattintosh.hatenablog.com/entry/20170702/1498985041
かんたんに言うと
sudo vi /etc/systemd/system/dbus-org.bluez.service でExecStart=/usr/lib/bluetooth/bluetoothd --compatのあとに下記を追加します。
ExecStartPost=/usr/bin/sdptool add SP
次に、rfcomm.serviceという、先程のWatchのデーモンを作ります。
[Unit]
Description=RFCOMM service
After=bluetooth.service
Requires=bluetooth.service

[Service]
ExecStart=/usr/bin/rfcomm watch 0 1 /sbin/agetty rfcomm0 115200 linux

[Install]
WantedBy=multi-user.target
最後にそれをロード。
sudo systemctl daemon-reload
sudo systemctl restart bluetooth
sudo systemctl start rfcomm
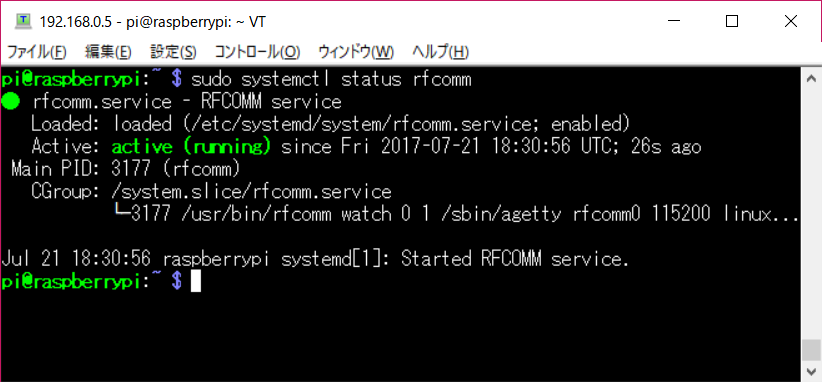
最後にこうなればいいですね。
お疲れ様でした。結構ハッピーです。


