2
1

Delete article

Deleted articles cannot be recovered.

Draft of this article would be also deleted.

Are you sure you want to delete this article?

More than 3 years have passed since last update.

Windows 10に.Net 3.5をインストールする方法

Last updated at Posted at 2021-05-02

Windows 10に.Net3.5を入れる必要があり、Microsoftのサイトからインストーラーをダウンロードし、インストールを試みたのですが、
「0x800f081f」や「0x800F0954」というエラーが発生し、うまくインストールできませんでした。
(いわゆる、ハマったというやつです、、、)

色々と調べた結果、やり方が分かったので、メモとして残しておこうと思います。

1. インストール前の準備

1-1. WSUSを無効にする
まず、レジストリーエディタを起動します。
2021-05-03_00h22_02.png

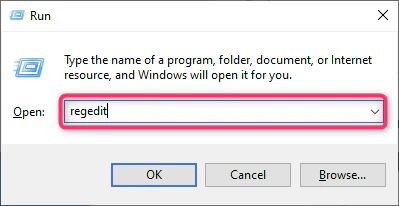
次に、以下のキーを探し、値を[1] => [0]に変更します。

\HKEY_LOCAL_MACHINE¥SOFTWARE¥Policies¥Microsoft¥Windows¥WindowsUpdate¥AU

2021-05-03_00h24_51.png

1-2. Windows Updateを再起動する
”サービス”を起動します (services.msc)。
2021-05-03_00h28_43.png

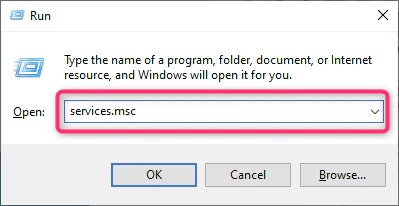
次に、Windows Updateを探し、再起動します。
2021-05-03_00h32_13.png

2. .Net 3.5のインストール

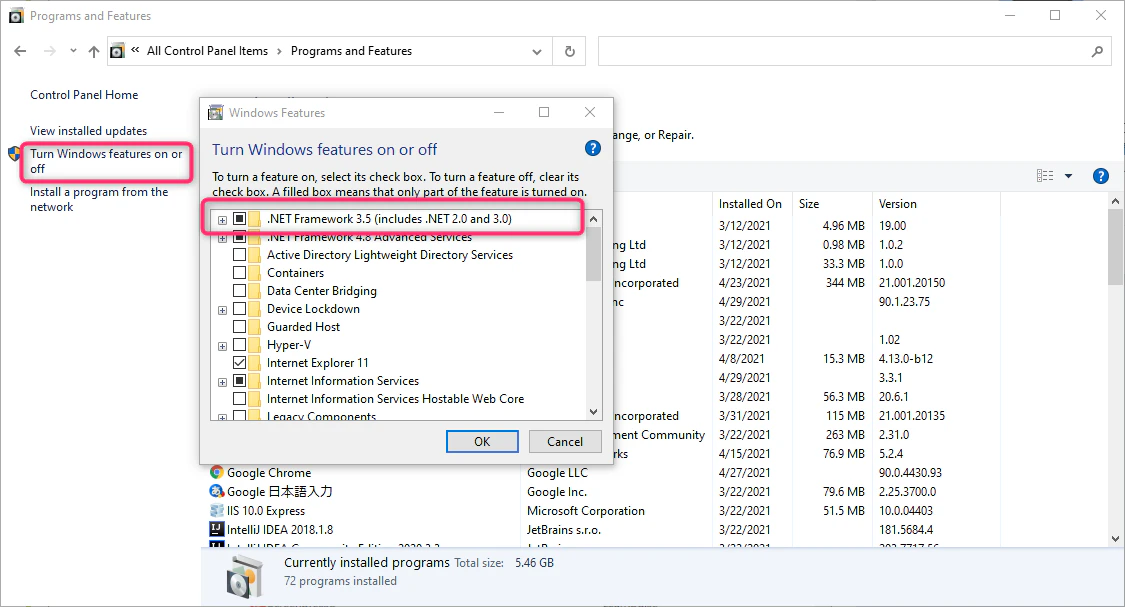
コントロールパネルを起動し、”プログラムと機能”を選択します。
2021-05-03_00h36_15.png

次に、Windowsの機能の有効化または無効化 を選択し、.NET Framework 3.5 (.NET 2.0および3.0を含む) を選択します。

2021-05-03_00h35_10.png

3. レジストリーを元に戻す

ここまでで、インストールは完了できている(はず)ですので、先ほど変更したレジストリーを元に戻し、
Windows Updateを再起動して、作業は完了です。
(手順は、"インストール前の準備" と同じです。)


2
1
0

Register as a new user and use Qiita more conveniently

  1. You get articles that match your needs
  2. You can efficiently read back useful information
  3. You can use dark theme
What you can do with signing up
2
1

Delete article

Deleted articles cannot be recovered.

Draft of this article would be also deleted.

Are you sure you want to delete this article?