はじめに
Spring Boot + Thymeleaf を使用して,インテグレーションしながらWebアプリケーションを作りたいと思います.
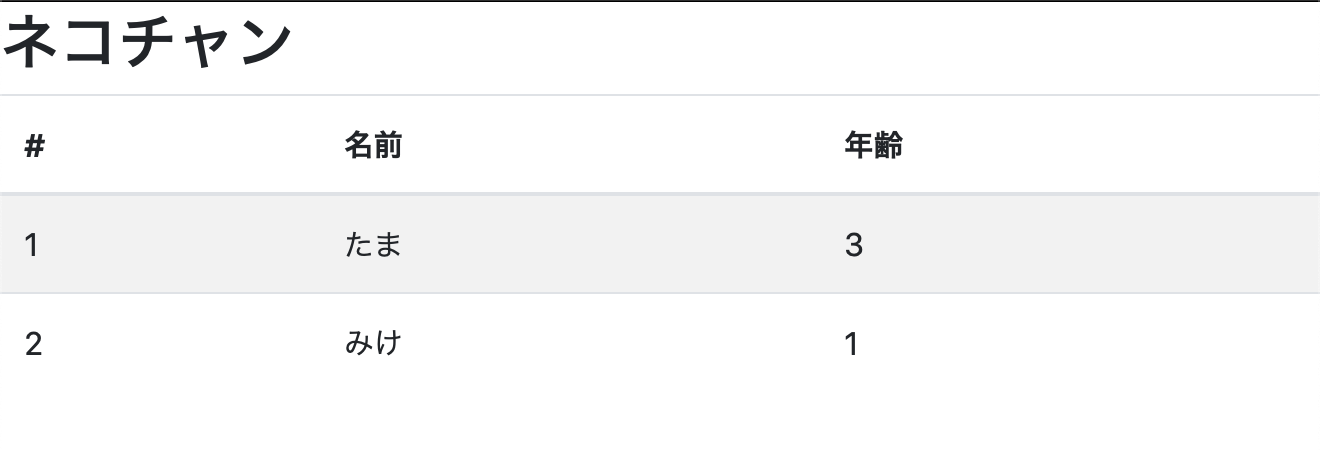
本投稿では以下のような画面を表示することがゴールです.

今回の材料
- Eclipse
- Gradle
- Spring Boot
- Thymeleaf
完成したソースはこちらから参照可能です.
環境構築
Eclipseの Java Standard Edition 64bit をインストールします.
※ 詳細は割愛
まずはプロジェクトを作成していきましょう.

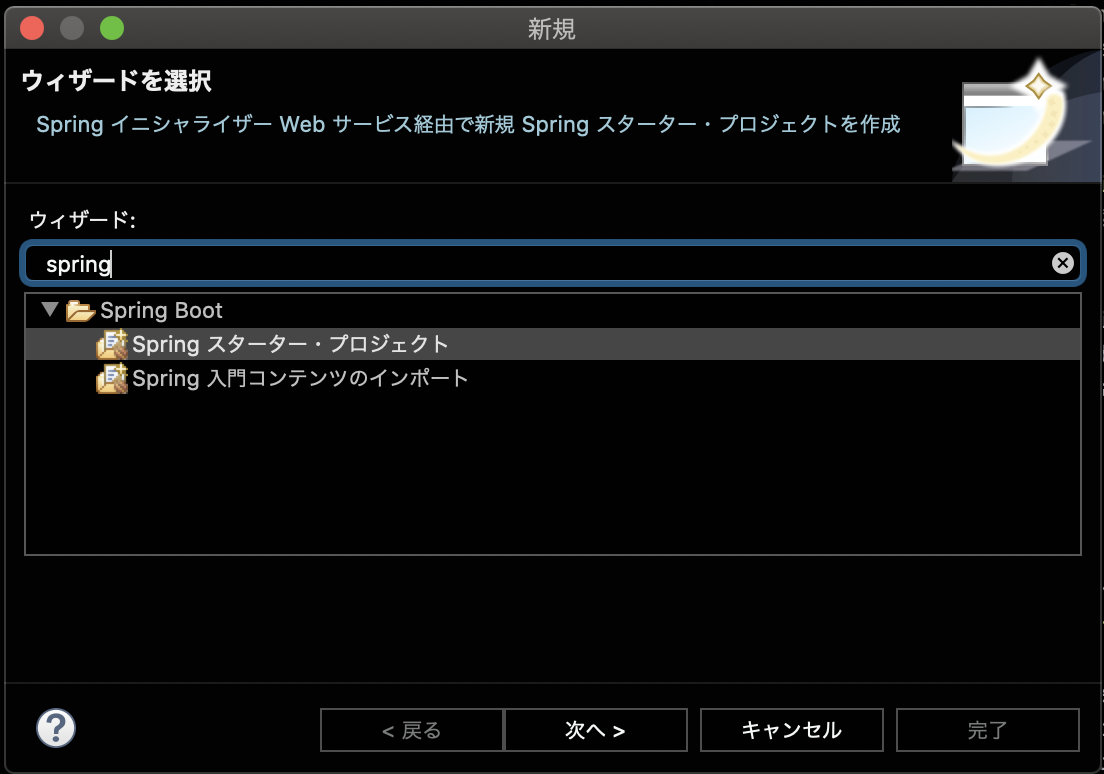
Eclipse で新規作成から「Spring スタータープロジェクト」を選択します.

名前や Java のバージョンを指定します.
今回は Gradle を選択し,名前を「neko」としておきます.

依存関係に以下を追加します.
| 追加するもの | 概要 |
|---|---|
| Spring Boot DevTools | 開発用の便利ツール.とりあえず入れとけ. |
| Spring Web | Web アプリケーションで必要な Spring MVC と Apache, Tomcat |
| Thymeleaf TEMPLATE ENGINES | テンプレートエンジン Thymeleaf |
| Lombok | getter, setter を自動生成してくれる神 |
初期設定直後にエラーが出る場合は Gradle のプロキシなど確認しましょう.
Thymeleaf の HelloWorld
Thymeleaf の作成
まずはsrc/main/resources/templates/hello.htmlを作成します.
<!DOCTYPE html>
<html xmlns="http://www.w3.org/1999/xhtml" xmlns:th="http://www.thymeleaf.org">
  <head>
    <title>Hello</title>
    <meta charset="utf-8" />
  </head>
  <!-- 通常のコメント ブラウザでも表示されます. -->
  <!--/* Thymeleafのコメント ブラウザには表示されません */-->
  <body>
    <h1>Spring boot</h1>
    <p>
      <span th:text="${message}">このメッセージは置換されます.</span>
    </p>
  </body>
</html>
Thymeleaf では templates 配下に HTML ファイルを配置していきます.
通常の HTML にth:で始まる属性が追加されたような感じです.そのため,ファイルを直接ブラウザで表示することも可能です.(JSP にはないメリット)
th:textの場合は設定されている値で text を置き換えます.
Controller の作成
src/main/java/com/example/demo/controller/HelloControllerを作成します.
package com.example.demo.controller;

import org.springframework.stereotype.Controller;
import org.springframework.ui.Model;
import org.springframework.web.bind.annotation.GetMapping;

@Controller
public class HelloController {
	@GetMapping("helloWorld") // helloWorldへのアクセスを制御する
	public String hello(Model model) {
		model.addAttribute("message", "にゃー"); // 変数messageに値をセットする.この値をThymeleafで表示できる
		return "hello"; // hello.htmlをクライアントに返す
	}
}
GET で/helloWorldが呼び出されたときに,messege に値をセットして,先ほど作成したhello.htmlを返す設定です.
起動

Eclipse 上でプロジェクトを右クリックして,「実行」→「Spring Boot アプリケーション」で起動できます.
※ Gradle コマンドの場合は./gradlew bootRunで起動します.
起動するとコンソールに以下が出力されます.
  .   ____          _            __ _ _
 /\\ / ___'_ __ _ _(_)_ __  __ _ \ \ \ \
( ( )\___ | '_ | '_| | '_ \/ _` | \ \ \ \
 \\/  ___)| |_)| | | | | || (_| |  ) ) ) )
  '  |____| .__|_| |_|_| |_\__, | / / / /
 =========|_|==============|___/=/_/_/_/
 :: Spring Boot ::        (v2.3.1.RELEASE)
動作確認
http://localhost:8080/helloWorld
にアクセスして以下の画面が表示されれば OK です.

Thymeleaf の出力する値を変更する
さらに進んで以下の構成にしましょう.
view : thymeleaf
controller : リクエストを処理する
service : データの取得/更新
domain : データオブジェクト
domain
package com.example.demo.domain;
import lombok.Data;
@Data
public class Neko {
	public Neko(String name, int age) {
		this.name = name;
		this.age = age;
	}

	private String name;
	private int age;
}
データオブジェクトです.getter/setter は lombok 様が付与してくださいます.
これといって説明することはありません.
service
package com.example.demo.service;
import java.util.ArrayList;
import org.springframework.stereotype.Service;
import com.example.demo.domain.Neko;

@Service
public class NekoService {
	/**
	 * ねこの一覧を取得する
	 * @return 一覧
	 */
	public ArrayList<Neko> getNekoList() {
		ArrayList<Neko> list = new ArrayList<Neko>();
		list.add(new Neko("たま", 3));
		list.add(new Neko("みけ", 1));
		return list;
	}
}
ねこの一覧を取得するだけです.
今後の投稿で DB から取得するようになるかもしれません.
controller
package com.example.demo.controller;

import org.springframework.beans.factory.annotation.Autowired;
import org.springframework.stereotype.Controller;
import org.springframework.ui.Model;
import org.springframework.web.bind.annotation.GetMapping;
import com.example.demo.service.NekoService;
import lombok.RequiredArgsConstructor;

@Controller
@RequiredArgsConstructor
public class NekoController {
	@Autowired
	private final NekoService service;

	@GetMapping("neko") // nekoへのアクセスを制御する
	public String hello(Model model) {
		model.addAttribute("nekoList", service.getNekoList()); // nekoListにねこを詰め込む
		return "neko"; // neko.htmlをクライアントに返す
	}
}
model.addAttributeで Thymeleaf に渡す値を設定可能です.
今回は service から取得した一覧をnekoListとして値を渡しておきます.
view
<!DOCTYPE html>
<html xmlns="http://www.w3.org/1999/xhtml" xmlns:th="http://www.thymeleaf.org">
  <head>
    <title>にゃー</title>
    <meta charset="utf-8" />
    <link
      rel="stylesheet"
      href="https://stackpath.bootstrapcdn.com/bootstrap/4.3.1/css/bootstrap.min.css"
      integrity="sha384-ggOyR0iXCbMQv3Xipma34MD+dH/1fQ784/j6cY/iJTQUOhcWr7x9JvoRxT2MZw1T"
      crossorigin="anonymous"
    />
  </head>
  <body>
    <h2>ネコチャン</h2>
    <table class="table table-striped">
      <thead>
        <tr>
          <th>#</th>
          <th>名前</th>
          <th>年齢</th>
        </tr>
      </thead>
      <tbody>
        <!-- nekoListの数だけループ -->
        <tr th:each="neko, status : ${nekoList}" th:object="${neko}">
          <!-- countは1スタートでカウント可能 -->
          <td th:text="${status.count}"></td>
          <!-- オブジェクトの値を参照 -->
          <td th:text="${neko.name}"></td>
          <!-- th:objectで指定した場合は*で参照可能 -->
          <td th:text="*{age}"></td>
        </tr>
      </tbody>
    </table>
  </body>
</html>
nekoListを使ってして受け取った値を表示します.
いろいろ使っていますが,以下のように利用可能です.
-
${nekoList}で Controller で設定した値を参照可能 -
th:eachで配列の長さ分ループする.1 つめの変数nekoに値が入り,2 つめの変数statusにインデックスなどの情報が入る(省略可) -
th:objectで指定したオブジェクトは子要素で参照するときに省略して書ける -
${status.count}で 1 始まりのインデックスを取得する.indexだと 0 始まり. -
${neko.name}で値を参照 -
*{age}でth:objectの中を参照する
メッセージをプロパティ化する
ラベルを外部ファイルに記載することも多いと思いますので,メッセージをプロパティファイルに記載します.
まずは,src/main/resources/application.propertiesに以下を記載します.
# プロパティの名前(拡張子なし)
spring.messages.basename=messages
# キャッシュ時間指定なし
spring.messages.cache-seconds=-1
# 文字コード
spring.messages.encoding=UTF-8
そして同じディレクトリにmessages.propertiesを作成して以下のように定義します.
title.neko=ネコチャン!!
label.name=名前
label.age=年齢
最後にHTMLに#{xxx}の形式で記載するとプロパティに記載したメッセージが表示されます.
<h2 th:text="#{title.neko}">Neko CHAN</h2>
まとめ
SpringBoot + Thymeleafを使ってHello world的なアプリケーションを作成できました.
次回はDBアクセスについても作成したいと思います.