実装方針
社内研修のため、なるべく簡単な作り、簡単に
HTMLとJSとCSSで実装ができる、簡単な仕組みを作成する。
簡単な設計
①HTMLファイルと指定の名前のファイルを作成する。
②特定のステート(ユーザーアカウントに紐づくデータ)に現在のページ名を保存
③その状態で画面遷移の処理を呼び出す
これで、①で作成したページへ遷移する。
また、同じアプリケーションにアクセスした場合、ステート(ユーザーデータ)に
保持されたページから再開できる。
実際の実装部分

左にあるファイル一覧について
表示させたい名称のHTMLを作成します。
画面遷移

画像のような処理を用意します。
// 指定したディスプレイを表示する
function getDisplayById(display) {

  var properties = PropertiesService.getUserProperties();
  properties.setProperty('display', display);
  return HtmlService.createHtmlOutputFromFile(display).getContent();
}
ここで行っているのは、画面から画面名を受け取って、処理を行う関数。
propertiiesにユーザープロパティー(アカウントにセーブデータ)オブジェクトをセット。
その中のキー名:displayに対して、表示したいディスプレイ名を保存する。
その上で、HtmlServiceから、createHtmlOutputFromFile()を使用して、
そのファイルが保持しているhtmlファイルを描写する処理。
初期表示処理

// 表示画面選定関数
function getDisplay() {

  var properties = PropertiesService.getUserProperties();
  var display = '';
  if (properties.getProperty('display')){
     display = properties.getProperty('display');
  } else {
     display = 'top';
  }
  return HtmlService.createHtmlOutputFromFile(display).getContent();
}
1個前の画面描写と比較して、プロパティーから取得して表示する。
そのため、初期表示(ブラウザリロードや戻る、進む)の対策として使用している。
画面から呼び出す処理
※JSは1つのファイルにする必要がある(今後改善を探すかも)
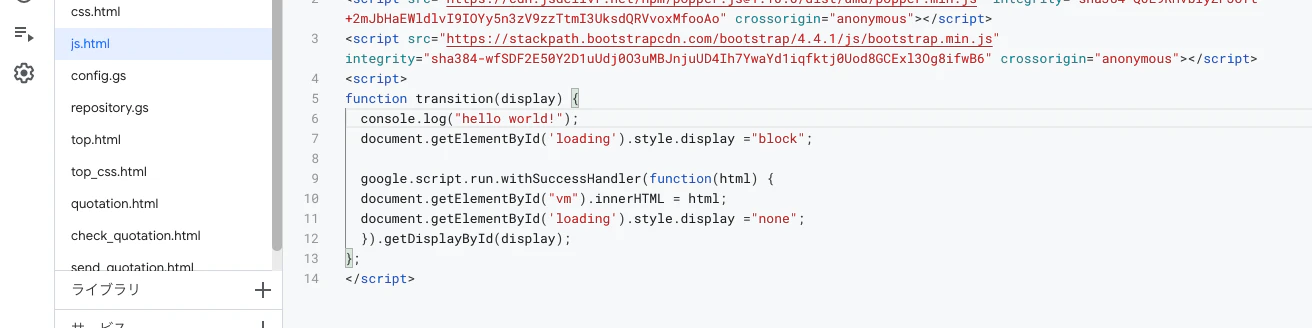
function transition(display) {
  console.log("hello world!");
  document.getElementById('loading').style.display ="block";

  google.script.run.withSuccessHandler(function(html) {
  document.getElementById("vm").innerHTML = html;
  document.getElementById('loading').style.display ="none";
  }).getDisplayById(display);
};
transitionという関数を用意し、displayの名称を引数に画面上のvmというdiv要素の中身を丸ごと書き換える関数を用意する。
google.script.run.withSuccessHandlerが画面上からGASで書いた処理にアクセスできる。
初期描写画面
<!DOCTYPE html>
<html>
<head>
  <base target="_top">
  <meta charset="utf-8">
  <!-- BootStrap読み込み -->
  <?!= HtmlService.createHtmlOutputFromFile('css').getContent(); ?>
  <?!= HtmlService.createHtmlOutputFromFile('top_css').getContent(); ?>
</head>
<body>
  <div class="spinner" id="loading">
    <div class="rect1"></div>
    <div class="rect2"></div>
    <div class="rect3"></div>
    <div class="rect4"></div>
    <div class="rect5"></div>
  </div>
  <div id="vm" class="container-fluid"></div>
<script>document.getElementById("vm").innerHTML = "<?= getDisplay(); ?>"; </script>
<?!= HtmlService.createHtmlOutputFromFile('js').getContent(); ?>
</body>
</html>
画像下部のdiv要素のvmの中身を同的に書き換える。
また、初期表示のために、getDisplay()を呼び出している。
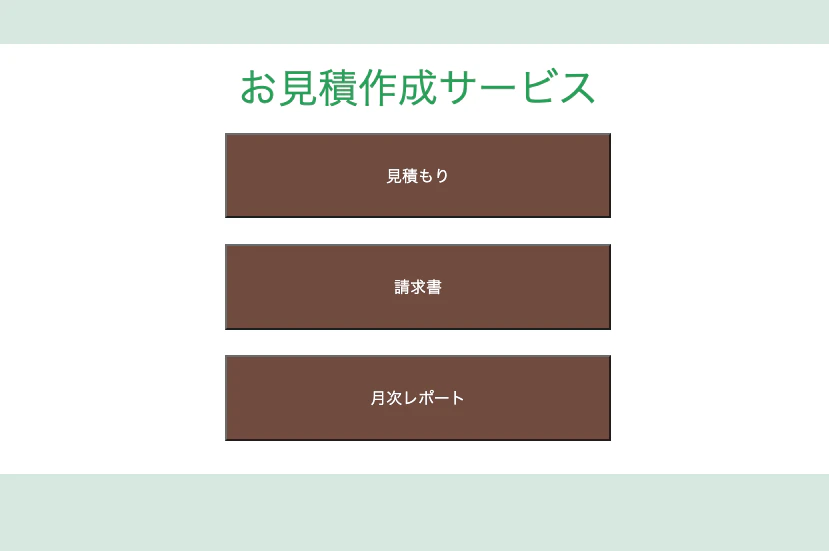
画面遷移処理
先程JSで用意したtransition関数を呼び出す。
 <div id="top">
 <div class="row justify-content-center">
  <h1>お見積作成サービス</h1>
 </div>
 <div class="row justify-content-center">
  <button id="button" onclick="transition('quotation');" type="button" class="button_top col-md-6">見積もり</button>
 </div>
 <div class="row justify-content-center">
  <button type="button" class="button_top col-md-6 text-center">請求書</button>
 </div>
 <div class="row justify-content-center">
  <button type="button" class="button_top col-md-6">月次レポート</button>
 </div>
</div>
呼び出しは普通にonClickでJSの関数を呼び出すだけ。
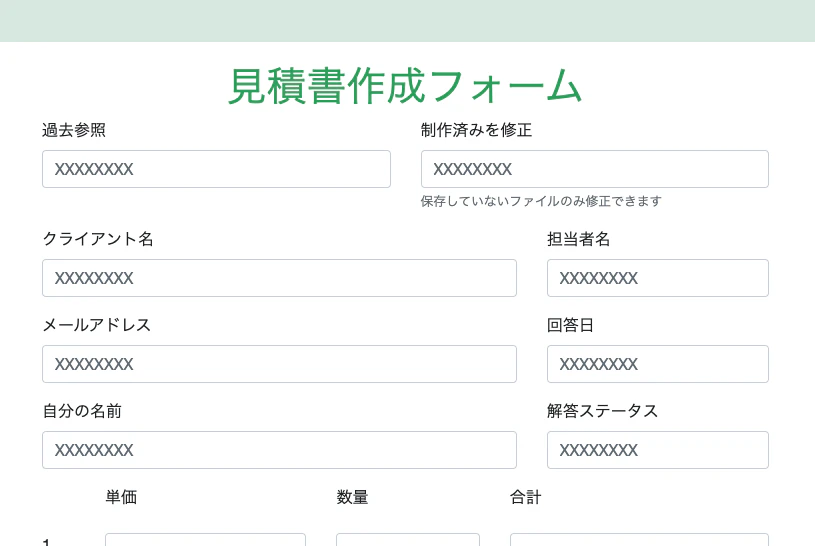
実際の画面遷移
URL遷移なく以下のような画面遷移が実現できる。
※スタイルなどは各人うまいことやってください。

以上です。
社内勉強会の資料として。