概要
二作目。Zabbixでコンテナ監視をするまでをほぼ自動化しました。
Zabbixテンプレートのインポートだけ、まだ上手く自動化できません。
とりあえず公開します。
portainerやCAdvisorが入っていますが、
色々コンテナ監視ツール試したかった名残なので、気にしないでください。
Dockerサーバ環境は以下の通り
OS:CentOS Linux release 7.6.1810 (Core)
Docker:19.03.1
docker-compose:
docker-compose version 1.23.2, build 1110ad01
docker-py version: 3.6.0
CPython version: 3.6.7
docker-compose version 1.23.2, build 1110ad01
git version
git version 2.9.5
ansible 2.8.4
docker-composeのインストール
docker-composeをあらかじめインストールしておきます。
インストール手順は以下のURLに記載されています。
zabbix_apiをインストール
Dockerホスト内の/sys/fs/cgroup/dockerディレクトリ内に記録される
各コンテナのサーバリソースを取得するため、Zabbix APIを利用して取得します。
# pip install zabbix_api
git cloneで資材を取得する
資材をリモートリポジトリをクローンして取得します。
# pwd
/root
# ls
anaconda-ks.cfg  ansible  delete_docker.sh  docker.service  dpr_taglist.sh
# git clone https://gitlab.com/HOBO1108/docker_system001.git
Cloning into 'docker_system001'...
remote: Enumerating objects: 52, done.
remote: Counting objects: 100% (52/52), done.
remote: Compressing objects: 100% (45/45), done.
remote: Total 52 (delta 17), reused 0 (delta 0)
Unpacking objects: 100% (52/52), done.
Checking connectivity... done.
# ls
anaconda-ks.cfg  ansible  delete_docker.sh  docker.service  docker_system001  dpr_taglist.sh
docker-composeで各コンテナをデプロイ
docker-composeで各コンテナをデプロイします。
# cd ~/docker-system001
# pwd
/root/docker_system001
# docker-compose ps
Name   Command   State   Ports
------------------------------
# docker-compose -f docker-compose.yml up -d --build
(略)
Creating docker_system001_zabbix_db_1        ... done
Creating docker_system001_zabbix-agent-xxl_1 ... done
Creating docker_system001_portainer_1        ... done
Creating docker_system001_cadvisor_1         ... done
Creating docker_system001_zabbix_server_1    ... done
Creating docker_system001_zabbix_agent_1     ... done
Creating docker_system001_zabbix_web_1       ... done
# docker-compose ps
               Name                              Command               State               Ports
------------------------------------------------------------------------------------------------------------
docker_system001_cadvisor_1           /usr/bin/cadvisor -logtostderr   Up      0.0.0.0:8080->8080/tcp
docker_system001_portainer_1          /portainer                       Up      0.0.0.0:9000->9000/tcp
docker_system001_zabbix-agent-xxl_1   /zocker-xxl                      Up
docker_system001_zabbix_agent_1       /sbin/tini -- docker-entry ...   Up      10050/tcp
docker_system001_zabbix_db_1          docker-entrypoint.sh mysqld      Up      3306/tcp, 33060/tcp
docker_system001_zabbix_server_1      /sbin/tini -- docker-entry ...   Up      0.0.0.0:10051->10051/tcp
docker_system001_zabbix_web_1         docker-entrypoint.sh             Up      443/tcp, 0.0.0.0:8081->80/tcp
全てのコンテナのStateがUPになっていればコンテナのデプロイは完了です。
Zabbixテンプレートを(手動で...)インポートする
以下のURLにあるZabbixでDockerをコンテナ監視する用のテンプレートをダウンロードします。
ダウンロード後、Zabbix Web GUIへログインして、テンプレートをインポートします。
テンプレートインポート手順は割愛します。(これを自動化したいのですが、うまくいきません...)

AnsibleのZabbixモジュールで構成変更
最後にAnsibleで構成変更を行います。
またPlaybookは後々GitLabに公開しておきます。
# cd ~/
# pwd
/root
# git clone https://gitlab.com/HOBO1108/ansible_system001.git
Cloning into 'ansible_system001'...
Username for 'https://gitlab.com': HOBO1108
Password for 'https://HOBO1108@gitlab.com':
remote: Enumerating objects: 7, done.
remote: Counting objects: 100% (7/7), done.
remote: Compressing objects: 100% (7/7), done.
remote: Total 7 (delta 0), reused 0 (delta 0)
Unpacking objects: 100% (7/7), done.
Checking connectivity... done.
# cd ansible_system001/
# pwd
/root/ansible_system001
# ansible-playbook -i hosts zabbix_config_update.yml --syntax-check

playbook: zabbix_config_update.yml
# ansible-playbook -i hosts zabbix_config_update.yml -vv
(略)
PLAY RECAP **************************************************************************************************************************************************************************
localhost                  : ok=4    changed=3    unreachable=0    failed=0    skipped=0    rescued=0    ignored=0
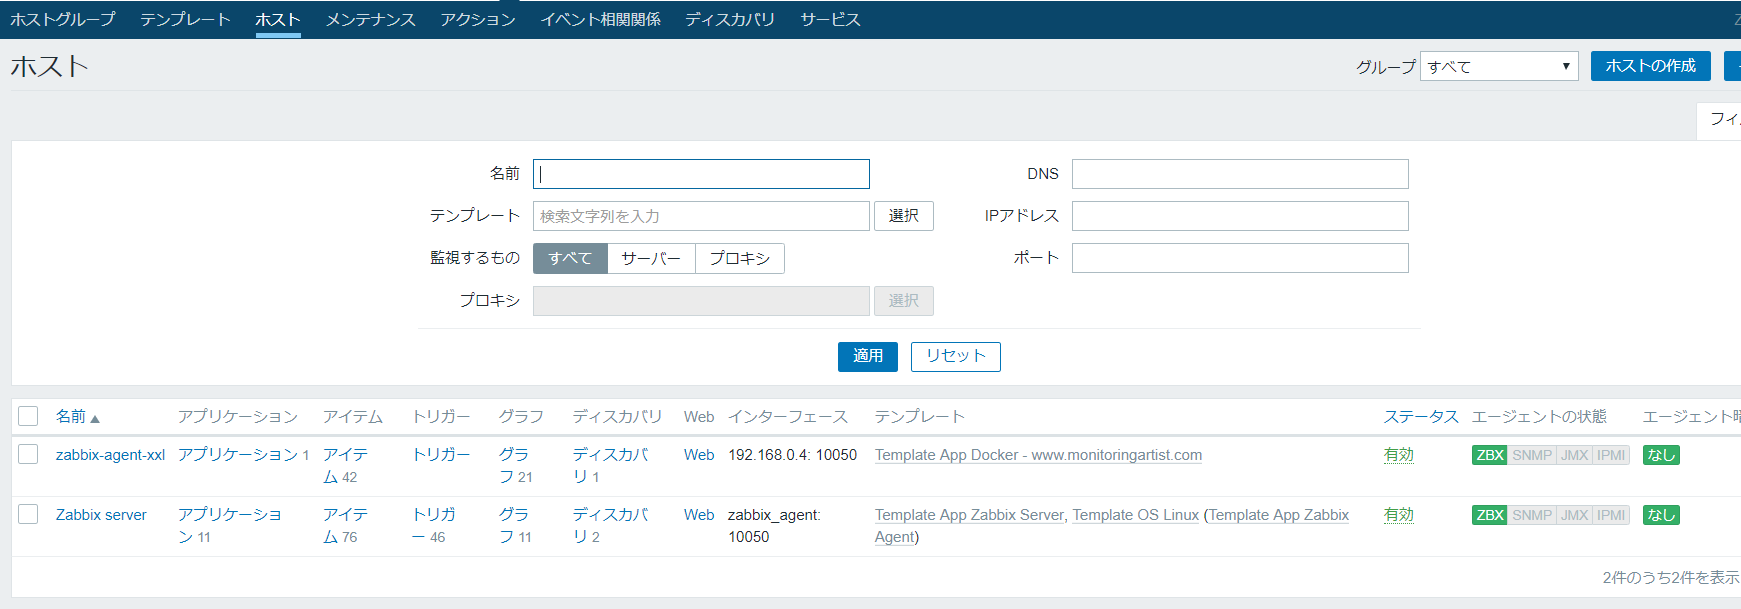
Zabbix Web GUIをリロードしてホスト画面を確認すると、
[zabbix-agent-xxl]というホストが新規作成されていると思います。
しばらく待っていると、ZabbixAgentの状態の「ZBX」が緑色になります。
Zabbixでのコンテナでのアイテム取得状態を確認する
最後に[監視データ]-[最新データ]より[zabbix-agent-xxl]を適用して、
各リソースの取得状況を確認してください。

手短ですが以上です。
docker-compose自体の編集はだいぶ慣れてきました。
もう少し練習したいと思います。
なにかご指摘あればコメント頂けるとありがたいです。