目的
横幅を変更できるナビゲーションパネルを待つWPFを作る
方針
段階に分けて解説します。
1.画面分割をしナビゲーションの下地とトグルボタンを配置する。
2.ナビゲーションパネルにいくつかのUI要素を追加
3.ナビゲーションパネルの横幅を変えるアニメーションを追加
1 画面分割をしナビゲーションの下地とトグルボタンを配置する
・後でアニメーションを追加したり整形しやすいように画面をいくつかのGridに分割する。
・トグルボタンをチェックすればナビゲーションパネル以外の画面の透明度を変更するようにする。
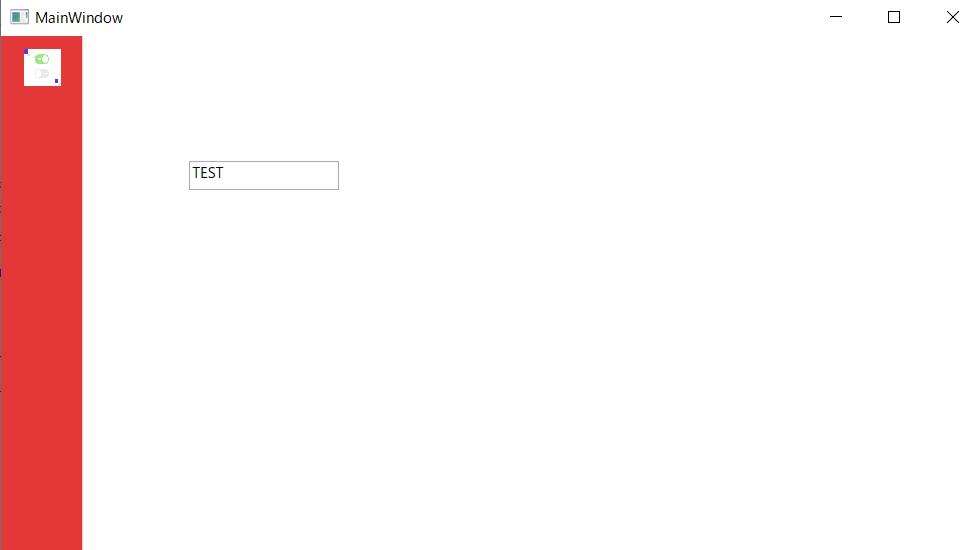
UI:初期状態
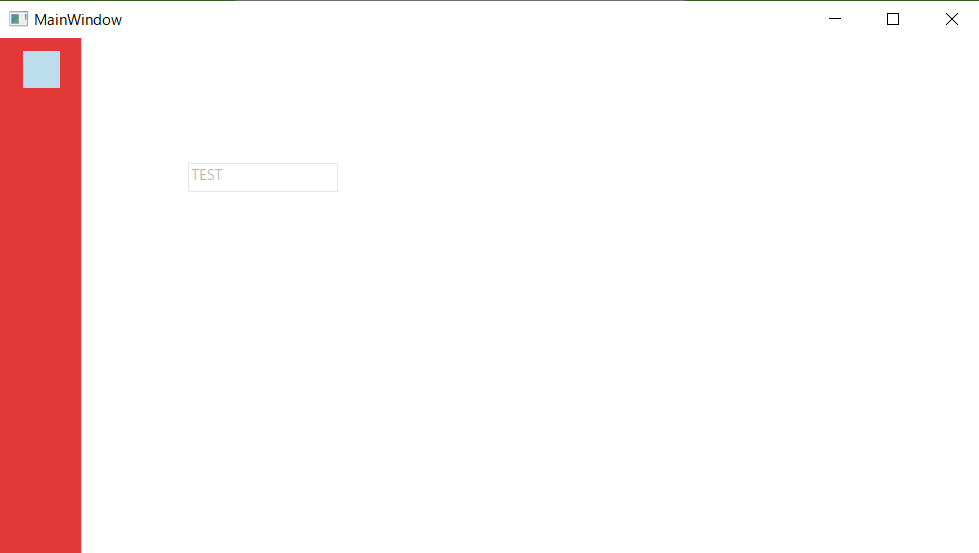
UI:トグルをクリック後"TEST"表記を透明にする
XMAL
<Window x:Class="NavigationPanel01.MainWindow"
        xmlns="http://schemas.microsoft.com/winfx/2006/xaml/presentation"
        xmlns:x="http://schemas.microsoft.com/winfx/2006/xaml"
        xmlns:d="http://schemas.microsoft.com/expression/blend/2008"
        xmlns:mc="http://schemas.openxmlformats.org/markup-compatibility/2006"
        xmlns:local="clr-namespace:NavigationPanel01"
        mc:Ignorable="d"
        Title="MainWindow" Height="450" Width="800">
    <Grid>
        <Grid x:Name="main" Margin="65,0,0,0">
            <TextBox HorizontalAlignment="Left" Height="23" Margin="85,100,0,0" TextWrapping="Wrap" Text="TEST" VerticalAlignment="Top" Width="120"/>
        </Grid>
        <Grid x:Name="nav_pnl"
              HorizontalAlignment="Left"
              Width="65"
              Background="#FFE33838">
            <StackPanel x:Name="st_pn1">
                <ToggleButton x:Name="Tg_Btn"
                          VerticalAlignment="Center"
                          HorizontalAlignment="Left"
                          Margin="18,10,0,0"
                          Height="30"
                          Width="30"
                          BorderThickness="0"
                          Unchecked="Tg_Btn_Unchecked" Checked="Tg_Btn_Checked">
                    <ToggleButton.Background>
                        <ImageBrush ImageSource="Icon\Drawer\toggle.png"
                                Stretch="Fill"/>
                    </ToggleButton.Background>
                </ToggleButton>
            </StackPanel>
        </Grid>
    </Grid>
</Window>
ロジック
namespace NavigationPanel01
{
    /// <summary>
    /// MainWindow.xaml の相互作用ロジック
    /// </summary>
    public partial class MainWindow : Window
    {
        public MainWindow()
        {
            InitializeComponent();
        }

        private void Tg_Btn_Checked(object sender, RoutedEventArgs e) => main.Opacity = 0.3;

        private void Tg_Btn_Unchecked(object sender, RoutedEventArgs e) => main.Opacity = 1;
    }
}
解説
UI左上にある四角いトグルボタンをチェックすると、"TEXT"表示のあるテキストボックスを含めたナビゲーションパネル以外の画面を透明にします。
XMAL上で以下のことを行います。
・UiをGrid(x:Name="main")とNavigationPanel(Grid x:Name="nav_pn1")に分割。
・nav_pn1の上にスタックパネルを配置。
・スタックパネルの上にトグルボタン<ToggleButton x:Name="Tg_Btn"を配置。
・トグルボタン内にアクションとしてチェック機能UncheckedとCheckedを設定。
・で画像設定。
ロジックコードで以下のことを行います。
・トグルボタン内のチェック機能の中身を実装する。
中身はGrid(main)の透明度Opacityを設定する。
2 ナビゲーションパネルにいくつかのUI要素を追加
・ナビゲーションパネルを縦方向にトグルエリアと"Apple, Orange, Bananaアイコン"に分割する
・Apple, Orange, Bananaアイコンとテキストを追加する
UI
テキストは配置しているが、初期状態では見えない

VisualStudio上でナビゲーションパネルを横に広げればテキストが隠れていると分かる

XMAL
     <Grid>
        <Grid x:Name="main" Margin="65,0,0,0">
            <TextBox HorizontalAlignment="Left" Height="23" Margin="240,100,0,0" TextWrapping="Wrap" Text="TEST" VerticalAlignment="Top" Width="120"/>
        </Grid>


        <Grid x:Name="nav_pnl"
              HorizontalAlignment="Left"
              Width="65"
              Background="#FFE33838">

            <StackPanel x:Name="st_pn1">

                <!--トグルを置くGridエリア-->
                <Grid Height="90">
                    <ToggleButton x:Name="Tg_Btn"
                          VerticalAlignment="Center"
                          HorizontalAlignment="Left"
                          Margin="18,-20,0,0"
                          Height="30"
                          Width="30"
                          BorderThickness="0"
                          Unchecked="Tg_Btn_Unchecked" Checked="Tg_Btn_Checked">
                        <ToggleButton.Background>
                            <ImageBrush ImageSource="Icon\Drawer\toggle.png"
                                Stretch="Fill"/>
                        </ToggleButton.Background>
                    </ToggleButton>
                </Grid>

                <!--他のアイコンを置くListViewエリア-->
                <ListView x:Name="LV"
                          Background="Transparent"
                          BorderBrush="Transparent"
                          ScrollViewer.HorizontalScrollBarVisibility="Disabled">

                    <!--Apple-->
                    <ListViewItem HorizontalAlignment="Left" Margin="0,0,0,15">
                        <StackPanel Orientation="Horizontal" Height="50" Width="180">
                            <Image Source="Icon\Drawer\Apple.png" Width="50" Height="50"
                               Stretch="Fill" Margin="0,0,0,-0.4"/>
                            <TextBlock Text="Apple" Margin="25,0,0,0"/>
                        </StackPanel>
                    </ListViewItem>

                    <!--Orange-->
                    <ListViewItem HorizontalAlignment="Left" Margin="0,0,0,15">
                        <StackPanel Orientation="Horizontal" Height="50" Width="180">
                            <Image Source="Icon\Drawer\Orange.png"
                               Stretch="Fill"/>
                            <TextBlock Text="Orange" Margin="25,0,0,0"/>
                        </StackPanel>
                    </ListViewItem>

                    <!--Banana-->
                    <ListViewItem HorizontalAlignment="Left" Margin="0,0,0,15">
                        <StackPanel Orientation="Horizontal" Height="50" Width="180">
                            <Image Source="Icon\Drawer\Banana.png"
                               Stretch="Fill"/>
                            <TextBlock Text="Banana" Margin="25,0,0,0"/>
                        </StackPanel>
                    </ListViewItem>

                </ListView>

            </StackPanel>

        </Grid>


    </Grid>
解説
・トグルを置くためのGridを作る(名前はここではつけなかった)
・Appleやオレンジアイコンを置くためのListViewエリア(x:Name="LV")を作成
・ListViewエリアに3つのListViewItemを作成
・各ListViewItemにStackpanelを作りOrientaionをHorizontalにし、アイコンの写真とテキストボックスを横並べて配置する
3 ナビゲーションパネルの横幅を変えるアニメーションを追加
・トグルボタンをクリックするとナビゲーションパネルの横幅を変えるアニメーション追加
UI
XMAL
トグルボタン内にイベントを追加
<ToggleButton x:Name="Tg_Btn"
                          VerticalAlignment="Center"
                          HorizontalAlignment="Left"
                          Margin="18,-20,0,0"
                          Height="30"
                          Width="30"
                          BorderThickness="0"
                          Unchecked="Tg_Btn_Unchecked" Checked="Tg_Btn_Checked">
                        <ToggleButton.Background>
                            <ImageBrush ImageSource="Icon\Drawer\toggle.png"
                                Stretch="Fill"/>
                        </ToggleButton.Background>

                        <!--Toggle Button Checked, Unchecked events-->
                        <ToggleButton.Triggers>
                           <!--トグルボタンをアンチェックしたときに起こるイベント-->
                            <EventTrigger RoutedEvent="ToggleButton.Unchecked">
                                <BeginStoryboard>
                                    <Storyboard x:Name="HideStackPanel">
                                        <DoubleAnimation
                                            Storyboard.TargetName="nav_pnl"
                                            Storyboard.TargetProperty="Width"
                                            BeginTime="0:0:0"
                                            From="230" To="65"
                                            Duration="0:0:0.2">

                                        </DoubleAnimation>
                                    </Storyboard>
                                </BeginStoryboard>
                            </EventTrigger>
                            <!--トグルボタンをチェックしたときに起こるイベント-->
                            <EventTrigger RoutedEvent="ToggleButton.Checked">
                                <BeginStoryboard>
                                    <Storyboard x:Name="ShowStackPanel">
                                        <DoubleAnimation
                                            Storyboard.TargetName="nav_pnl"
                                            Storyboard.TargetProperty="Width"
                                            BeginTime="0:0:0"
                                            From="65" To="230"
                                            Duration="0:0:0.3">
                                        </DoubleAnimation>
                                    </Storyboard>
                                </BeginStoryboard>
                            </EventTrigger>

                        </ToggleButton.Triggers>
                    </ToggleButton>
解説
・EventTrigger:イベントへの応答で一連のアクションを適用するトリガーを表します。このイベントトリガーがかかったら次に書かれたストーリーボードを開始する
・BeginStoryboard:ストーリーボードを開始する
・Storyboard:アニメーション作成に使用
nav_pnlと定義されたオブジェクトのWidthを変更するアニメーション
まとめ
3つの段階をへてNavigationPanelについて解説した
1.画面分割をしナビゲーションの下地とトグルボタンを配置する。
2.ナビゲーションパネルにいくつかのUI要素を追加
3.ナビゲーションパネルの横幅を変えるアニメーションを追加


