はじめに
EDB Postgres Advanced Server (EPAS)はEDB社のエンジンを使ったPostgresSQLで、OSS版に対して企業向けの管理機能が追加されています。Oracleデータベースとの互換性が高く、移行ツールがEDB社から提供されています。
Cloud環境に立てたRed Hat Enterprise Linux (RHEL) 7.6にEPAS11を導入しました。データベースのデータ領域に高速なデバイスを割り当てるため、デフォルト設定を変更しましたので、その手順を紹介します。
前提事項
導入対象の環境は次の通りです。
- Red Hat Enterprise Linux (RHEL) 7.6 x86_64
ここにデータベースのデータ領域に使う領域が用意されているものとします。データ領域のディレクトリ名として/edbdataをこの後の説明で使いますが、別の名前でも問題ありません。
[root@rhel7 ~]# df -T
Filesystem                    Type     1K-blocks    Used Available Use% Mounted on
(略)
/dev/mapper/vgdata01-lvdata01 xfs       14665728   32992  14632736   1% /edbdata
参考資料
- EDB Postgres Advanced Server Installation Guide for Linux
導入の流れ
次の順に導入を進めます。
- EPAS11の前提条件確認
- EPELリリースパッケージの導入
- Redhat社へのサブスクリプション
- EDBリポジトリの設定
- EPAS11の導入
- データ領域への権限付与
- EPAS11の設定変更
- データベース作成
- EPAS11の起動
- 動作確認
1. EPAS11の前提条件の確認
1.1 プラットフォーム
EPAS11がサポートしているのはWindows x86-64, Linux x86-64, Linux on Powerの3種類で、今回使うRHEL x86-64についてはバージョン6.xと7.xがサポートされています。
1.2 ファイルシステム
データベースのデータ領域にNFSを割り当てることはできませんが、今回は該当しておらず問題ありません。
2. EPELリリースパッケージの導入
EPELはExtra Packages for Enterprise Linuxの略で、RHELに含まれないOSSライブラリを提供します。次のようにして導入します。
[root@rhel7 ~]# yum -y install https://dl.fedoraproject.org/pub/epel/epel-release-latest-7.noarch.rpm
(中略)
インストール:
  epel-release.noarch 0:7-12
完了しました!
3. Redhat社へのサブスクリプション
3.1 アカウント作成
Redhat社のアカウントを持っていない場合は、ホームページ www.redhat.com をブラウザで開いて、画面右上のLog inボタンを押し、遷移した画面でRegister nowボタンを押してアカウントを作成します。
3.2 サブスクリプション
EPAS11導入時にRedhatのパッケージを利用するため、subscription-managerコマンドで導入対象システムをRedhat社に登録します。
[root@rhel7 ~]# subscription-manager register --auto-attach
登録中: subscription.rhsm.redhat.com:443/subscription
ユーザー名: xxxxxxxx@xxxxxx.com
パスワード:
このシステムは、次の ID で登録されました: xxxxxxxx-xxxx-xxxx-xxxx-xxxxxxxxxxxx
登録したシステム名: rhel7
インストール済み製品の現在の状態:
製品名: Red Hat Enterprise Linux Server
状態:   サブスクライブ済み
4. EDBリポジトリの設定
4.1 クレデンシャル取得
EDB社のアカウントを持っていない場合は、まずEDB社のホームページ www.enterprisedb.com をブラウザで開いて、画面右上のSign Inボタンを押し、遷移した画面でSign upボタンを押してアカウントを作成します。
アカウントを持っていればSign Inして、遷移したDashboard画面の下にあるMy Accountボタンを押します。ここに表示されるRepository UsernameとRepository Passwordがクレデンシャルです。
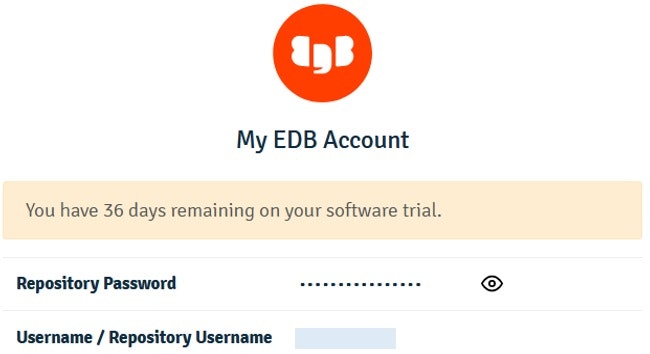
上の画面キャプチャでクレデンシャルの有効期限が残り36日と表示されていますが、Sign upした直後は60日です。
4.2 EDBリポジトリ設定ファイルの作成
次のようにしてedb-repoパッケージを導入します。そのときリポジトリ設定ファイル/etc/yum.repos.d/edb.repoが生成されます。
[root@rhel7 ~]# yum -y install https://yum.enterprisedb.com/edb-repo-rpms/edb-repo-latest.noarch.rpm
(中略)
Installed:
  edb-repo.noarch 0:20-2
Complete!
このファイルにEDB社のクレデンシャルを記入します。具体的には下の<username>と<password>をユーザー名とパスワードで置き換えます。
[edb]
name=EnterpriseDB RPMs $releasever - $basearch
baseurl=https://<username>:<password>@yum.enterprisedb.com/edb/redhat/rhel-$releasever-$basearch
enabled=1
gpgcheck=1
gpgkey=file:///etc/pki/rpm-gpg/ENTERPRISEDB-GPG-KEY

[edb-testing]
name=EnterpriseDB Testing - Not For Production $releasever - $basearch
baseurl=https://<username>:<password>@yum.enterprisedb.com/edb-testing/redhat/rhel-$releasever-$basearch
enabled=0
gpgcheck=1
gpgkey=file:///etc/pki/rpm-gpg/ENTERPRISEDB-GPG-KEY
5. EPAS11の導入
次のようにして導入します。
[root@rhel7 ~]# yum install edb-as11-server
(中略)
Installed:
  edb-as11-server.x86_64 0:11.9.17-1.rhel7
(中略)
Dependency Installed:
  boost-atomic.x86_64 0:1.53.0-28.el7                           boost-chrono.x86_64 0:1.53.0-28.el7
  boost-filesystem.x86_64 0:1.53.0-28.el7                       boost-regex.x86_64 0:1.53.0-28.el7
  edb-as11-pgagent.x86_64 0:4.0.0-1.rhel7                       edb-as11-server-client.x86_64 0:11.9.17-1.rhel7
  edb-as11-server-cloneschema.x86_64 0:1.12-1.rhel7             edb-as11-server-contrib.x86_64 0:11.9.17-1.rhel7
  edb-as11-server-core.x86_64 0:11.9.17-1.rhel7                 edb-as11-server-devel.x86_64 0:11.9.17-1.rhel7
  edb-as11-server-docs.x86_64 0:11.9.17-1.rhel7                 edb-as11-server-indexadvisor.x86_64 0:11.9.17-1.rhel7
  edb-as11-server-libs.x86_64 0:11.9.17-1.rhel7                 edb-as11-server-llvmjit.x86_64 0:11.9.17-1.rhel7
  edb-as11-server-parallel-clone.x86_64 0:1.7-1.rhel7           edb-as11-server-pldebugger.x86_64 0:1.1-1.rhel7
  edb-as11-server-plperl.x86_64 0:11.9.17-1.rhel7               edb-as11-server-plpython.x86_64 0:11.9.17-1.rhel7
  edb-as11-server-pltcl.x86_64 0:11.9.17-1.rhel7                edb-as11-server-sqlprofiler.x86_64 0:4.0-3.rhel7
  edb-as11-server-sqlprotect.x86_64 0:11.9.17-1.rhel7           edb-as11-server-sslutils.x86_64 0:1.3-1.rhel7
  libicu-edb.x86_64 0:53.1-11.rhel7                             llvm5.0.x86_64 0:5.0.1-7.el7
  llvm5.0-libs.x86_64 0:5.0.1-7.el7                             tcl.x86_64 1:8.5.13-8.el7
  uuid.x86_64 0:1.6.2-26.el7

Dependency Updated:
  boost-system.x86_64 0:1.53.0-28.el7                            boost-thread.x86_64 0:1.53.0-28.el7

Complete!
RHELのサブスクリプションまたはリポジトリが無ければ、上のDependency Installedに表示されたboost-atomicなどを導入できず、EPAS11導入も完了しません。
6. データ領域への権限付与
デフォルトのデータ領域は/var/lib/edb/as11/dataですが、これを別途用意したデータ領域/edbdataに変更します。EPAS11がアクセスできるようにディレクトリのオーナーと権限を変更します。
- 補足
- 一階層上の
/var/lib/edb/as11全体を別のディレクトリに置く場合は、そこに向けてシンボリックリンクを貼る方法を用いれば、設定ファイルを変更する必要がなく簡便です。この方法で導入できることを筆者の環境で確認済です。
- 一階層上の
[root@rhel7 ~]# chown enterprisedb:enterprisedb /edbdata
[root@rhel7 ~]# chmod 700 /edbdata
[root@rhel7 ~]# ls -ld /edbdata
drwx------. 3 enterprisedb enterprisedb 17 Sep  7 08:21 /edbdata
7. EPAS11の設定変更
RHEL7のsystemdはサービス、デバイス、ソケットなどをユニットと呼ばれる単位で管理します。各ユニットの設定をユニットファイルに定義します。
EPAS11のユニットファイルをデフォルトの/usr/lib/systemd/systemから/etc/systemd/systemにコピーして、編集します。コピーする理由はEPAS11更新時にデフォルトディレクトリのユニットファイルが上書きされるためです。
[root@rhel7 ~]# cp /usr/lib/systemd/system/edb-as-11.service /etc/systemd/system/

[root@rhel7 ~]# cat /etc/systemd/system/edb-as-11.service
(中略)
# Location of database directory
Environment=PGDATA=/var/lib/edb/as11/data
PIDFile=/var/lib/edb/as11/data/postmaster.pid
(以下略)
このユニットファイルにデフォルトのデータディレクトリ/var/lib/edb/as11/dataが2箇所登録されています。これをエディタで編集して/edbdataに置き換えます。
(中略)
# Location of database directory
Environment=PGDATA=/edbdata
PIDFile=/edbdata/postmaster.pid
(以下略)
8. データベース作成
作成時のオプションを環境変数PGSETUP_INITDB_OPTIONSに設定します。ここではデータベースのエンコーディングとしてUTF-8を設定します。
[root@rhel7 ~]# PGSETUP_INITDB_OPTIONS="-E UTF-8" /usr/edb/as11/bin/edb-as-11-setup initdb
Initializing database ... OK
9. EPAS11の起動
systemctlコマンドでEPAS11サービスを起動して、次にサービスの状態を確認します。下の3行目先頭の丸印は実際には緑色で ● のように表示されています。10行目に/usr/edb/as11/bin/edb-postmaster -D /edbdataと表示されています。このことからデータベースサーバーのデータ領域として/edbdagtaを指していることがわかります。
[root@rhel7 ~]# systemctl start edb-as-11
[root@rhel7 ~]# systemctl status edb-as-11.service
● edb-as-11.service - EDB Postgres Advanced Server 11
   Loaded: loaded (/etc/systemd/system/edb-as-11.service; disabled; vendor preset: disabled)
   Active: active (running) since Mon 2020-09-07 08:48:36 JST; 1min 35s ago
  Process: 22653 ExecStartPre=/usr/edb/as11/bin/edb-as-11-check-db-dir ${PGDATA} (code=exited, status=0/SUCCESS)
 Main PID: 22660 (edb-postmaster)
    Tasks: 9
   CGroup: /system.slice/edb-as-11.service
           ├─22660 /usr/edb/as11/bin/edb-postmaster -D /edbdata
           ├─22661 postgres: logger
           ├─22663 postgres: checkpointer
           ├─22664 postgres: background writer
           ├─22665 postgres: walwriter
           ├─22666 postgres: autovacuum launcher
           ├─22667 postgres: stats collector
           ├─22668 postgres: dbms_aq launcher
           └─22669 postgres: logical replication launcher

Sep 07 08:48:36 rhel7.systemd[1]: Starting EDB Postgres Advanced Server 11...
Sep 07 08:48:36 rhel7.edb-postmaster[22660]: 2020-09-07 08:48:36 JST LOG:  listening on IPv4 address ...5444
Sep 07 08:48:36 rhel7.edb-postmaster[22660]: 2020-09-07 08:48:36 JST LOG:  listening on IPv6 address ...5444
Sep 07 08:48:36 rhel7.edb-postmaster[22660]: 2020-09-07 08:48:36 JST LOG:  listening on Unix socket "...444"
Sep 07 08:48:36 rhel7.edb-postmaster[22660]: 2020-09-07 08:48:36 JST LOG:  redirecting log output to ...cess
Sep 07 08:48:36 rhel7.ugi-tech-jp.com edb-postmaster[22660]: 2020-09-07 08:48:36 JST HINT:  Future log output will ap...og".
Sep 07 08:48:36 rhel7.ugi-tech-jp.com systemd[1]: Started EDB Postgres Advanced Server 11.
Hint: Some lines were ellipsized, use -l to show in full.
10. 動作確認
10.1 ロール作成
データベースのロールを作成します。Postgresにおいてロールはユーザーとユーザーグループの両者を含む概念で、ロールを用いて権限を管理します。
次のようにしてロール yamayama を作成し結果を確認します。SQLとメタコマンドの2通りの確認方法を記載します。
[root@rhel7 ~]# su - enterprisedb
-bash-4.2$ psql -d edb
psql.bin (11.9.17)
Type "help" for help.

edb=# create role yamayama login password 'xxxxxxxx';
CREATE ROLE

edb=# select usename from pg_user;
-[ RECORD 1 ]---------
usename | enterprisedb
-[ RECORD 2 ]---------
usename | yamayama

edb=# \du
List of roles
-[ RECORD 1 ]----------------------------------------------------------
Role name  | aq_administrator_role
Attributes | No inheritance, Cannot login                              +
           | Profile default
Member of  | {}
-[ RECORD 2 ]----------------------------------------------------------
Role name  | enterprisedb
Attributes | Superuser, Create role, Create DB, Replication, Bypass RLS+
           | Profile default
Member of  | {}
-[ RECORD 3 ]----------------------------------------------------------
Role name  | yamayama
Attributes | Profile default
Member of  | {}
10.2 ロールの認証方法設定
作成したロール yamayama の認証方法を設定ファイル/var/lib/edb/as11/data/pg_hba.confに登録します。下の例では4行目に登録しています。本記事では認証方法としてパスワードを使うようにするため、METHODとしてmd5を指定しています。
-bash-4.2$ cat /var/lib/edb/as11/data/pg_hba.conf
(中略)
# TYPE  DATABASE        USER            ADDRESS                 METHOD
local   all             yamayama                                md5

# "local" is for Unix domain socket connections only
local   all             all                                     peer
# IPv4 local connections:
host    all             all             127.0.0.1/32            ident
# IPv6 local connections:
host    all             all             ::1/128                 ident
# Allow replication connections from localhost, by a user with the
# replication privilege.
local   replication     all                                     peer
host    replication     all             127.0.0.1/32            ident
host    replication     all             ::1/128                 ident
この設定ファイルの優先度は上の行が下の行よりも高いです。追加するロールを一番下の行に記入すると、その前の設定が効いてPeer authentication failedというメッセージが表示され、psqlを起動できません。
設定ファイルにロールを登録後、次のようにして設定をEPAS11に反映させます。
-bash-4.2$ /usr/edb/as11/bin/pg_ctl -D /edbdata reload
server signaled

-bash-4.2$ psql postgres -U yamayama
Password for user yamayama:
psql.bin (11.9.17)
Type "help" for help.

postgres=>
10.3 テーブル作成とレコード挿入
Postgresの日本語マニュアルに載っている例を使って確認します。
テーブルを作成してレコードを挿入し、それをselectするSQLは次の通りです。
CREATE TABLE weather (
    city            varchar(80),
    temp_lo         int,           -- 最低気温
    temp_hi         int,           -- 最高気温
    prcp            real,          -- 降水量
    date            date
);
INSERT INTO weather VALUES ('San Francisco', 46, 50, 0.25, '1994-11-27');
SELECT * FROM weather;
実行画面は次のようになります。
postgres=> CREATE TABLE weather (
postgres(>     city            varchar(80),
postgres(>     temp_lo         int,           -- 最低気温
postgres(>     temp_hi         int,           -- 最高気温
postgres(>     prcp            real,          -- 降水量
postgres(>     date            date
postgres(> );
CREATE TABLE

postgres=> INSERT INTO weather VALUES ('San Francisco', 46, 50, 0.25, '1994-11-27');
INSERT 0 1

postgres=> SELECT * FROM weather;
     city      | temp_lo | temp_hi | prcp |        date
---------------+---------+---------+------+--------------------
 San Francisco |      46 |      50 | 0.25 | 27-NOV-94 00:00:00
(1 row)
以上でデータ領域をデフォルトから変更したEPAS11の動作確認は終わりです。