※2018年6月、ML-Agents v0.4に対応するように修正いたしました。
Unity ML-Agents
Unity ML-Agents というUnityを使って強化学習できるライブラリがあります。
公式のほうにチュートリアルも載っているのですぐ試してみることができます。
チュートリアルをやってみると、ボールを落とさないように板を動かす学習モデルができると思います。

今回は自分でゲームを作ってUnity ML-Agentsで強化学習していきたいと思います。
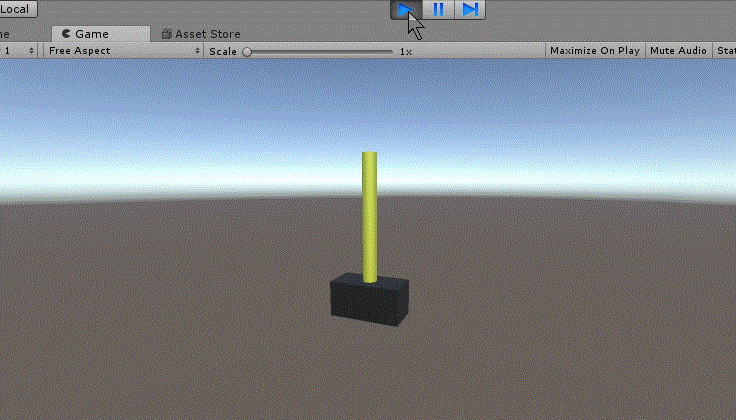
作るゲームは強化学習では王道ともいえる倒立振子です。
棒を倒さないようにするやつですね。
ゲームを作る
公式の方から、ML-Agents をダウンロードしてきます。
unity-environmentをUnityで開きます。

CubeとCylinderを作ります。名前はCartとPoleに替えます。
適当に色を付け、Transformは次のように設定します。


それぞれにRigidbodyをとりつけ、CartはIs Kinematicにチェックを入れ、PoleはDragを0.5にします。
Poleを選択し、Component>Physics>Hinge Jointを付けます。

Connected BodyにCartを入れ、他の設定は画像にようにします。
ML-Agents
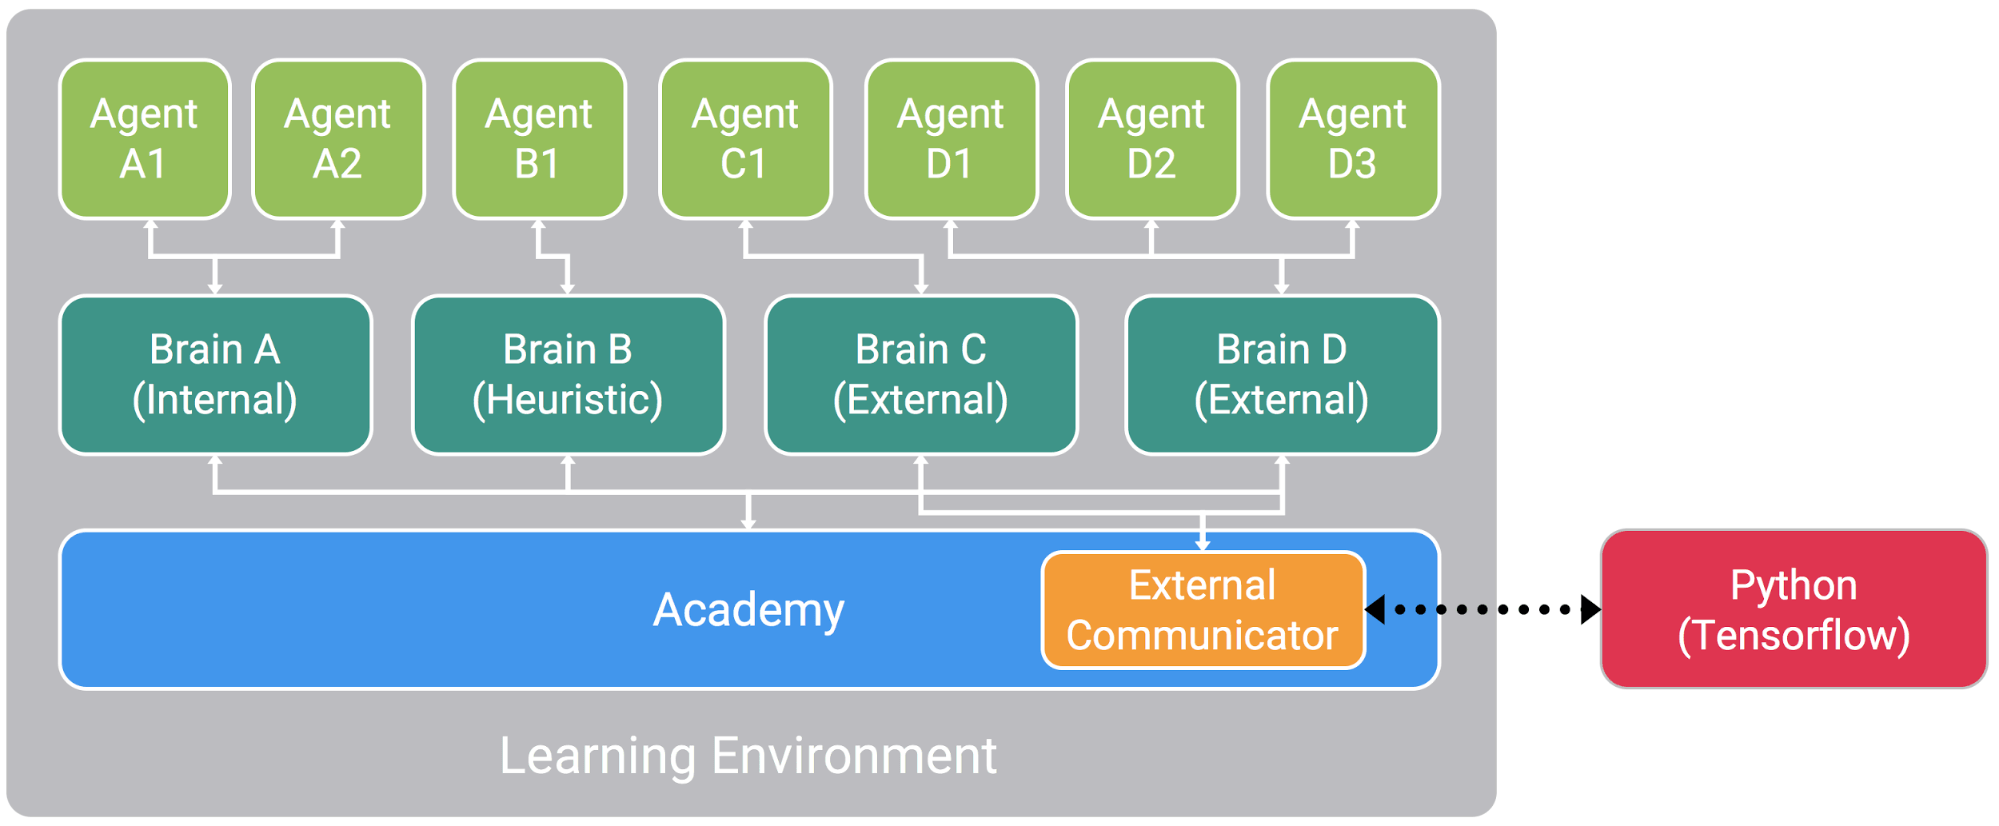
ML-Agentsでは画像のようにAgent,Brain,Academyで制御し、外部のPythonを利用して学習を行っていくようです。
Unity Hierarchyで空のゲームオブジェクトを3つ作り、Game,CartPoleBrain,CartPoleAcademyと名付けます。
そして、画像のように配置します。

ML-Agents>Template>ScriptsにTemplateAcademy,TemplateAgentsが入っているので、それらをCartPoleAcademy,CartPoleAgentsに変更、内部のクラス名も同じように変えて、HierarchyのCartPoleAcademy(オブジェクト)とCart(オブジェクト)にそれぞれ取り付けます。


ML-Agents>ScriptsにBrainがあるのでこれをCartPoleBrain(オブジェクト)に取り付けます。
Cart Pole Agents
CartPoleAgentsのスクリプトを以下のように書き換えます。
using System.Collections;
using System.Collections.Generic;
using UnityEngine;
using MLAgents;

public class CartPoleAgent : Agent
{
    public GameObject pole;
    Rigidbody poleRB;
    float angle_z;
    float cart_x;
    float anguVelo_z;

    public override void InitializeAgent()
    {
        base.InitializeAgent();
        poleRB = pole.GetComponent<Rigidbody>();
    }

    void FixedUpdate()
    {

    }

    public void StateTransition()
    {

        //ポールの角度が-30~30度の時、報酬+0.01、それ以上傾いたら報酬-1
        if (-30f < angle_z && angle_z < 30f)
        {
            AddReward(0.01f);
        }
        if ((-180f < angle_z && angle_z < -30f) || (30f < angle_z && angle_z < 180f))
        {
            AddReward(-1f);
            Done();
        }

        //カートの位置が-3~3の範囲を越えたら報酬-1
        if (cart_x < -3f || 3f < cart_x)
        {
            AddReward(-1f);
            Done();
        }
    }

    public override void CollectObservations()
    {
        AddVectorObs(cart_x);
        AddVectorObs(angle_z);
        AddVectorObs(anguVelo_z);
    }

    public void MoveAgent(float[] act)
    {
        //0-Left, 1-Right
        int action = Mathf.FloorToInt(act[0]);

        if (action == 0)
        {
            transform.Translate(-0.05f, 0, 0);
        }
        if (action == 1)
        {
            transform.Translate(0.05f, 0, 0);
        }
    }

    public override void AgentAction(float[] vectorAction, string textAction)
    {
        //行動
        MoveAgent(vectorAction);
        //カートの位置、ポールの角度と角速度
        cart_x = transform.localPosition.x;
        angle_z = pole.transform.localRotation.eulerAngles.z;
        //angle_zを-180~180度に変換
        if (180f < angle_z && angle_z < 360f)
        {
            angle_z = angle_z - 360f;
        }
        anguVelo_z = poleRB.angularVelocity.z;
        //状態の遷移
        StateTransition();
    }

    public override void AgentReset()
    {
        //エージェントの状態をリセット
        transform.localPosition = new Vector3(0f, 0f, 0f);
        pole.transform.localPosition = new Vector3(0f, 1f, 0f);
        pole.transform.localRotation = Quaternion.Euler(0f, 0f, 0f);
        poleRB.velocity = new Vector3(0f, 0f, 0f);
        //ポールにランダムな傾きを与える
        poleRB.angularVelocity = new Vector3(0f, 0f, Random.Range(-0.5f, 0.5f));

    }

    public override void AgentOnDone()
    {

    }
}
Brain, Agentを次のように設定します。


きちんと動いて、角度が一定以上になったらリセットされればOKです。
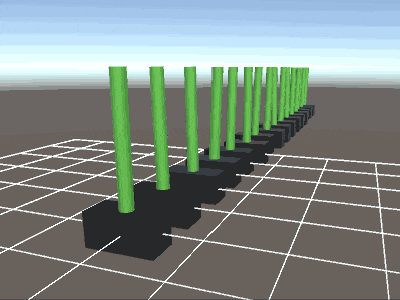
そしたらGame(オブジェクト)を複製して16個にしましょう。

これで学習準備が整いました。
ビルドして学習
1.CartPoleBrainのBrainTypeをExternalにする
2.画面上部のバーから Edit > Project Settings > Player
Resolution and Presentation > Run in Background がチェックされていることを確認
Resolution and Presentation > Display Resolution Dialog がDisabledににセットされていることを確認
3.File > Build Settingsから内容を確認してビルド。保存先は公式からダウンロードしたml-agents-master > pythonです。名前はCartPoleにしておきましょう。
pythonフォルダでAnacondaプロンプトを開き、次のように入力します。
python learn.py CartPole --train
trainer.configというファイルを開くとハイパーパラメータなどの設定ができます。

基本的にデフォルトのままで、max_stepsだけ20万回にしました。
学習が完了すると、python/models/ppo/ フォルダにCartPole.bytesというファイルが生成されています。
これをUnityのAssetsに持っていきます。
Edit > Project Settings > Player の Other Settings欄へ行き、
Scripting Runtime Version を Experimental(.NET4.6Equivalent)にする
Scripting Define Symbols に ENABLE_TENSORFLOW と入力する

また、Using TensorFlowSharp in Unity (Experimental)
こちらからTensorflowSharpのUnityPackageをダウンロードして、環境にインポートしましょう。
これは、Unity環境でTensorflowを使うためのプラグインです。

CartPoleBrain(オブジェクト)のBrain Type をInternalにする
先ほどのCartPole.bytesファイルをGraph Modelにセット。

これで実行してみましょう。
結果
20万回学習した結果、倒れることはなくなりました。