#完成予想図
今回は、コレクションビューを使って、画像とラベルが表示されるようにします。

#storyboard編
ViewControllerにパーツを置いていきましょう。
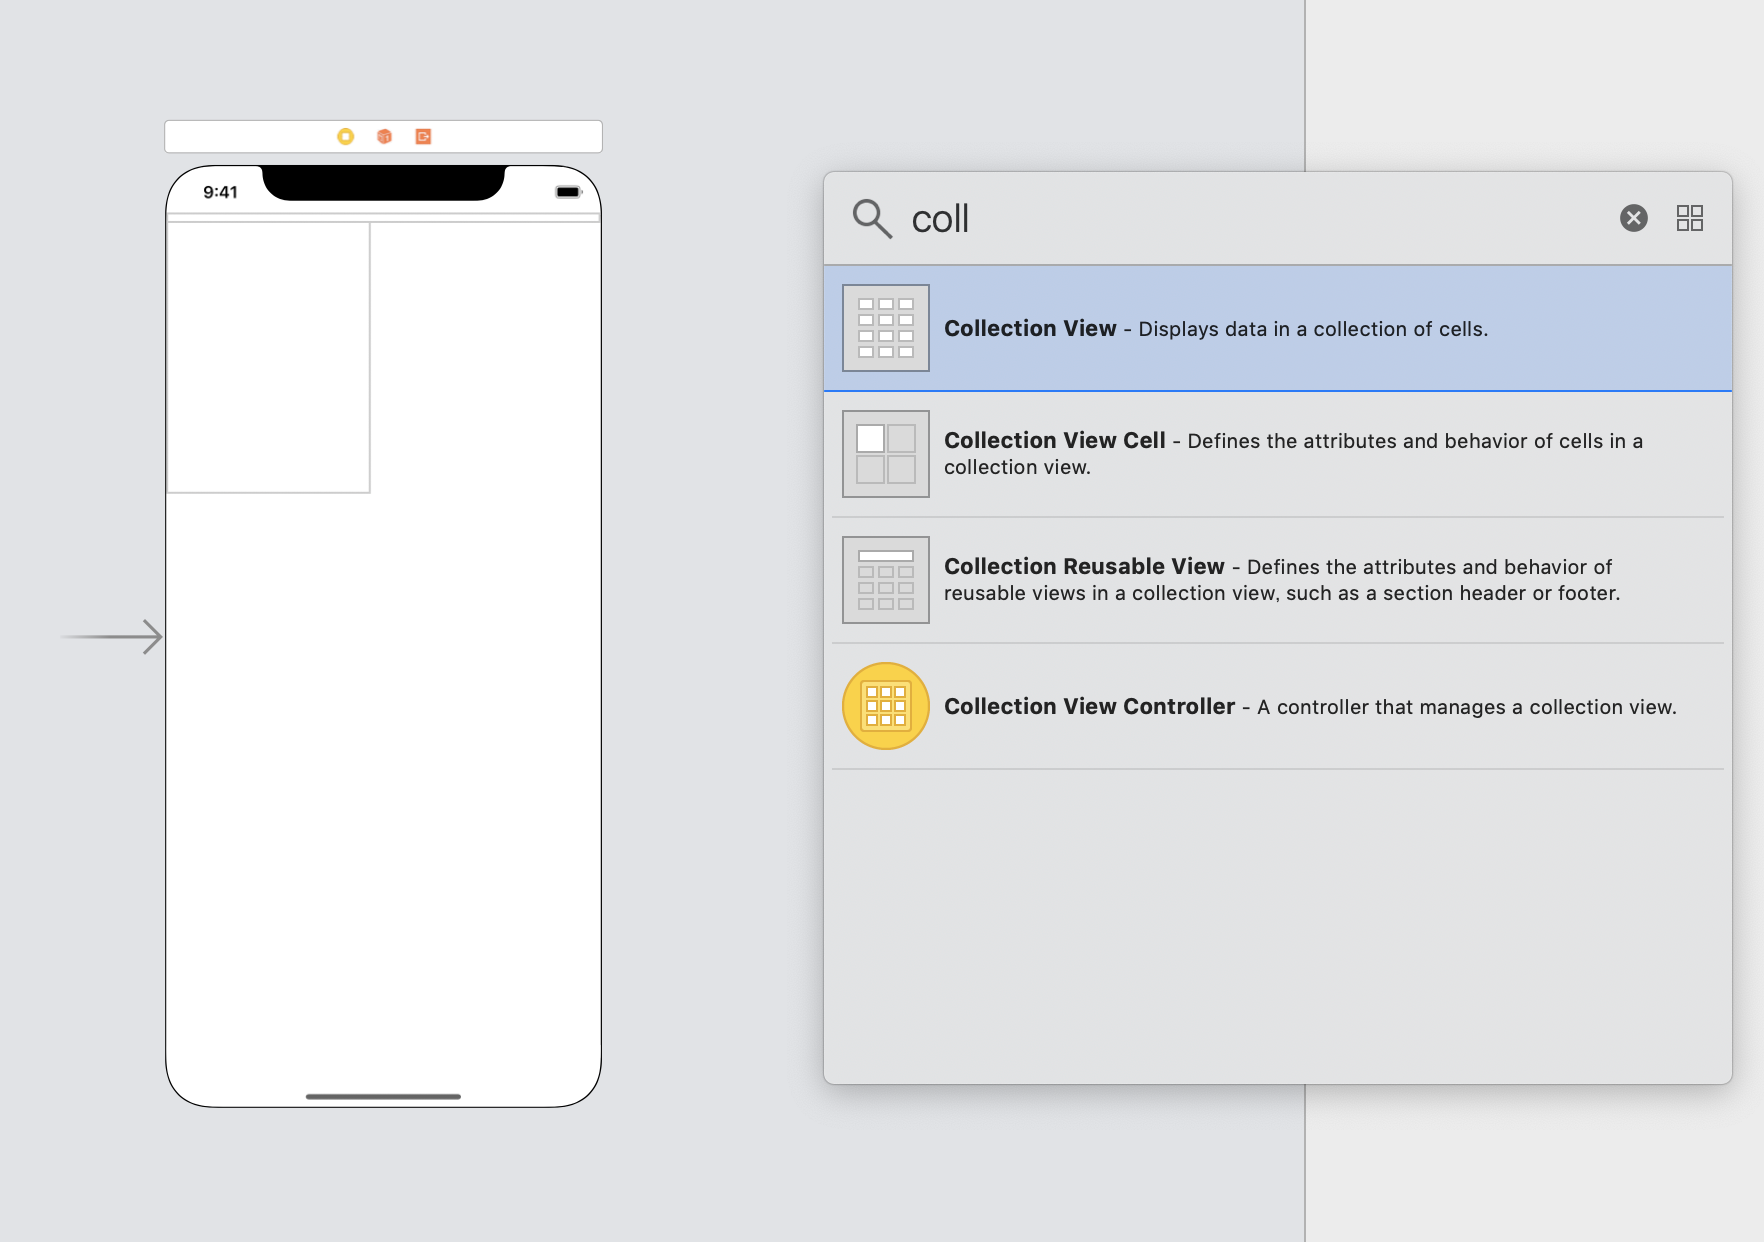
まずはCollectionViewをドラッグ&ドロップで、ViewController上に広げて配置します。
次に、CollectionViewの上に、Collection Reusable Viewを配置します。
(Collection Reusable Viewはセクションごとに分けたい人だけ配置しましょう)
セルの大きさや、ヘッダーの大きさの調整は、調整したいパーツをタップした後に、右側のユーティリティ領域の部分で数値を変えることができます。
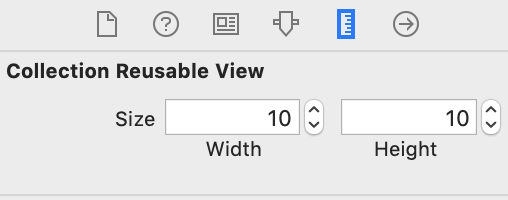
↑ヘッダーの大きさ
 ↑コレクションビューセルの大きさ
コレクションビューセルに名前をつけましょう。
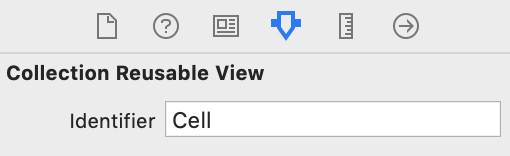
今回は”Cell”という名前をつけました。
#カスタムセル編
次に、カスタムセルを作ります。
まずは、ファイルを新規作成しましょう。
左側のナビゲーター領域で右クリックすると、以下のようになるのでNew Fileをクリックします。

次に出てくる画面では以下のように選択してNextへ。

Classはわかりやすい表示名をつけましょう。ここでは、CollectionViewCellとします。
Subclassでは、UICollectionViewCellを選択します。
最後にAlso create XIB fileにチェックを入れてNextを押しましょう。

ここまでで、新規ファイルが作成されました。
カスタムセルのCollectionViewCellに、クラスとセル名(先ほどつけたセル名と同じもの)を登録します。
セルをタップすると右側にこのような画面が表示されます。

CollectionViewCell(先ほど作成したファイル名)を選択。
storyboard上のコレクションビューセルにもクラスの登録を同様にしておいてください。
このカスタムセルに、storyboardでコレクションビューセルにつけた名前と同じ名前をつけましょう。

次に、新しく作成したカスタムセルにパーツを置きましょう。(xibファイル)

今回は、このようにUIImageViewとLabelを置きました。
#カスタムセルの変数宣言
次に、先ほど置いたパーツの変数宣言をしていきます。
新規作成したファイル、CollectionViewCell.swiftに変数宣言を書いていきます。
//変数宣言
    @IBOutlet var textLabel : UILabel!
    @IBOutlet var imageView : UIImageView!
変数宣言したら、忘れる前に関連付けをしておきましょう。
#ViewController編
次に、ViewControllerにコードを書いていきます。
まずは、コレクションビューのデリゲートメソッドとデータソースメソッドを書きましょう。
import UIKit
class ViewController: UIViewController, UICollectionViewDelegate, UICollectionViewDataSource{
今回は画像とラベルを宣言したので、コンパクトにまとめるため辞書型で書きます。
    var dog1 = [["name" : "あ",
                 "imageName" : "写真名"],
                ["name" : "い",
                 "imageName" : "写真名"],
                ["name" : "う",
                 "imageName" : "写真名"]]
    var dog2 = [["name" : "え",
                 "imageName" : "写真名"],
                ["name" : "お",
                 "imageName" : "写真名"]]
    var dogs = [["name" : "か",
                 "imageName" : "写真名"],
                ["name" : "き",
                 "imageName" : "写真名"],
                ["name" : "く",
                 "imageName" : "写真名"]]
次に、コレクションビューの変数宣言をします。
//変数宣言
@IBOutlet var collectionView: UICollectionView!
関連付けを忘れずにしておきましょう。
ViewDidLoad内に、セルの登録やファイル内処理のコードを書いていきましょう。
override func viewDidLoad() {
        super.viewDidLoad()
        //セルの登録
        let nib = UINib(nibName: "CollectionViewCell(xibファイル名の.xibを外したもの)", bundle: Bundle.main)
        collectionView.register(nib, forCellWithReuseIdentifier: "Cell(storyboardで登録した名前)")

        //ファイル内処理
        collectionView.delegate = self
        collectionView.dataSource = self
    }
次に、セクションの数を指定するコードを書きます。
//セクションの数
func numberOfSections(in collectionView: UICollectionView) -> Int {
        return 3
    }
セクションで分けない人は return 1 とします。ここでは、セクション数を3つに設定しました。
次にセルの総数を返します。
セクションを複数作った場合は、以下のようにセクションごとにセルの数を返すと良いです。
//セルの総数を返す
 func collectionView(_ collectionView: UICollectionView, numberOfItemsInSection section: Int) -> Int {

//セクションごとにセルの数を返す
        switch(section){
        case 0:
            return 3

        case 1:
            return 2

        case 2:
            return 3

        default:
            print("error")
            return 0
        }
    }
ここでは、上のセクションからセル3つ、続いて、2つ、3つと設定しました。
先ほど設定したセクション数と一致しない場合はエラーが出ます。注意しましょう。
続いて、セルの中身に値を設定します。
まずは、セルを宣言して、そのセルを複数生成するコードを書きます。
次に、セクションごとに分けて、セル内のtextLabelとimageViewに値を代入していきます。
//セルの値設定
 func collectionView(_ collectionView: UICollectionView, cellForItemAt indexPath: IndexPath) -> UICollectionViewCell {

        let cell = collectionView.dequeueReusableCell(withReuseIdentifier: "Cell(storyboardで登録したセル名)", for: indexPath) as! CollectionViewCell(新規作成したファイル名)

      //セクションごとにセルのプロパティを変える
        switch(indexPath.section){
        case 0:
            cell.textLabel.textColor = UIColor.red
            cell.textLabel?.text = dog1[indexPath.row]["name"]
            cell.imageView.image = UIImage(named: dog1[indexPath.row]["imageName"]!)

        case 1:
            cell.textLabel.textColor = UIColor.orange
            cell.textLabel?.text = dog2[indexPath.row]["name"]
            cell.imageView.image = UIImage(named: dog2[indexPath.row]["imageName"]!)

        case 2:
            cell.textLabel.textColor = UIColor.blue
            cell.textLabel?.text = dogs[indexPath.row]["name"]
            cell.imageView.image = UIImage(named: dogs[indexPath.row]["imageName"]!)

        default:
            print("section error")
            cell.textLabel.textColor = UIColor.red
        }


        return cell
    }
最後に、セクションに値を設定します。
まずは、ヘッダーを宣言して、そのヘッダーを複数生成するコードを書き返します。
 func collectionView(_ collectionView: UICollectionView, viewForSupplementaryElementOfKind kind: String, at indexPath: IndexPath) -> UICollectionReusableView {

        let headerView = collectionView.dequeueReusableSupplementaryView(ofKind: UICollectionView.elementKindSectionHeader, withReuseIdentifier: "Section", for: indexPath)

        //ヘッダーの色
        headerView.backgroundColor = UIColor.lightGray
        return headerView
    }
GitHubサンプルコード
https://github.com/EricaFujita/Erica