#今回の学習
2-1. HTML/CSSの概要
2-2. HTMLの基本
2-3. CSSの基本
2-4. ホームページの大枠を作ろう!
2-5. 自己紹介サイトを作ろう!
2-6. HTML/CSSをマスターしよう!
#GOAL
自己紹介サイトの大枠をここで完成させます。
今回は、HTMLやCSSの細かいところまで踏み込んでいきます。
#流れ
- sectionタグを使おう(HTML)
- 背景画像を設定してみよう(CSS)
- Margin, Paddingについて学ぼう(CSS)
- Flexboxについて学ぼう(CSS)
- 画像を入れてみよう(HTML)
#1. sectionタグを使おう(HTML)
セクションとは、関連する情報をまとめた部分のことです。
このページは以下のような3つのセクションから構成されています。
セクション1: Home: トップイメージ
セクション2: About me: 自分の情報
セクション3: Recent Activity: 最近したこと
これらを作るには、セクションタグというものを使います。
divもsectionも(実はfooterもheaderも)見た目は同じですが、(つまり、最悪全てdivで書いたり、headerで書いたりすることもできます)
しかし、コンピューターが解釈するときに困るので、タグは使い分けることが強く推奨されています。
それでは、index.htmlを以下のように書き換えましょう!
注意:headerのhrefの部分を".first-block" => "#first-block" に書き換えています。
これは各セクションのセレクタを classからidに変更しているためです。
・idセレクタ:id属性はHTMLの文章の中でid名を一度のみ使うことができます。
・classセレクタ:あるhtml要素に対してつける識別子です。
全体の中で1つしかない要素であること明示する場合はidを使いますが、登場頻度はあまり多くないため、
基本的にはclassを利用すると押さえておくと良いでしょう。
次の2-6の教材でまとめて学習するので、今はidとclassの違いをやんわり理解しましょう!
<!DOCTYPE html> <!-- この文章がHTML文章であることを伝える要素です。-->
<html lang="ja"><!--言語の指定-->
  <head><!--ページに表示されない情報(サイトの裏側の設定)-->
    <meta charset="utf-8">
    <title></title><!--ブラウザのタブのタイトルを指定-->
    <link rel="stylesheet" href="./stylesheets/index.css">
  </head>
  <body>
    <header class="header-nav">
      <nav><a href="#first-block">Home</a></nav>
      <nav><a href="#second-block">About me</a></nav>
      <nav><a href="#third-block">Recent Activity</a></nav>
    </header>

  <!--  コンテンツを一旦仮置きする  -->
    <section id="first-block">
    </section>
    <section id="second-block">
    </section>
    <section id="third-block">
    </section>
  <!--  コンテンツはここまで  -->

    <footer>
      <p>Copyright © ○○○○ All Rights Reserved.</p>
    </footer>
  </body>
</html>
#2. 背景画像を設定してみよう(CSS)
背景画像を設定するには、背景をつけたい要素に対して以下の記述を追加します。
backgroud-image: url(画像の場所を示すもの);
この場合、画像の場所を示すためには、以下のように画像のある部分を指定してあげる必要があります。
../images/画像の名前
(上の書き方は、「相対パス」と呼ばれるものです。今回は触れませんが、興味のある方は調べてみるといいでしょう)
今回は、sectionタグのidがfirst-blockのものに背景画像をつけるので
適切な記述をindex.cssの#first-blockに追記しましょう。
一旦以下の画像を利用しましょう。
下記の画像を右クリック"名前をつけて画像を保存"を選択。「first-back.jpg」と名付け、"images"フォルダに保存しましょう。
index.css全体としては以下のようになっていればOKです。
/*   First block   */
#first-block {
  background-image: url("../images/first-back.jpg");
  background-size: cover;
  width: 100%;
  height: 550px;

  display: flex;
  justify-content: center;
  align-items: center;
}

.title-container {
  text-align: center;
}

h1 {
  font-size: 80px;
  font-family: serif;
  color: #444;
}

h3 {
  font-size: 50px;
  font-family: serif;
  color: #444;
}
/*   First block End   */
/* First Block */と書かれた部分をメインに変更・追記しました。
また、 セクション1は以下のように変更しましょう。
  <!--   First block Start   -->
  <section id="first-block">
    <div class="title-container">
      <h1>山田 太郎</h1>
      <h3>~ Geeksalon Webコース1期生 ~</h3>
    </div>
  </section>
  <!--   First block End   -->
これによりセクション1は完成しました。
#3. Margin, Paddingについて学ぼう(CSS)
まず、セクション2を完成させましょう。
以下の記述をindex.html, index.cssのSecond Blockの部分に上書きしてください。
  <!--   Second block Start   -->
  <section id="second-block">
    <p class="info-title">
        About me
    </p>
    <div class="about-container">
      <p class="info-text">
        <b>サークル: ESS</b>
        <br>
        <span class="font-small">
        英語会に所属しています。
        <br>
        たくさんのイベントがあって面白いです。
        <br>
        特に好きなのは、外人を英語でガイドすることです。
        </span>
      </p>

      <p class="info-text">
        <b>早稲田大学政治経済学部3年</b>
        <br>
        <span class="font-small">
        将来は外資系コンサルタント関係の仕事につきたいです。
        <br>
        なので、日々経営や経済の勉強をしています。
        <br>
        最近読んだ本では、ドラッカーの「マネジメント」が面白かったです。
        </span>
      </p>

      <p class="info-text">
        <b>趣味: サッカー</b>
        <br>
        <span class="font-small">
        6歳の頃からサッカーをずっとやっていました。
        <br>
        ポジションは特にフォワードをしています。好きな選手はリオネルメッシです。
        <br>
        大学になってからサッカーをする機会が減ってしまったのでとても残念です。
        </span>
      </p>
    </div>
  </section>
  <!--   Second block End   -->
/*   Second block   */
#second-block {
  background-color: #f0f0f0;
  text-align: center;
  padding-top: 100px;
  padding-bottom: 100px;
}

.about-container {
  display: flex;
  justify-content: space-between;
  flex-direction: row;
  align-items: center;
}

.info-title {
  font-size: 60px;
  font-family: serif;
  margin-bottom: 20px;
  color: #444;
  text-align: center;
}

.info-text {
  font-size: 20px;
  margin-bottom: 20px;
  color: #444;

  width: 30%;
}

.font-small {
  font-size: 15px;
}
/*   Second block End   */
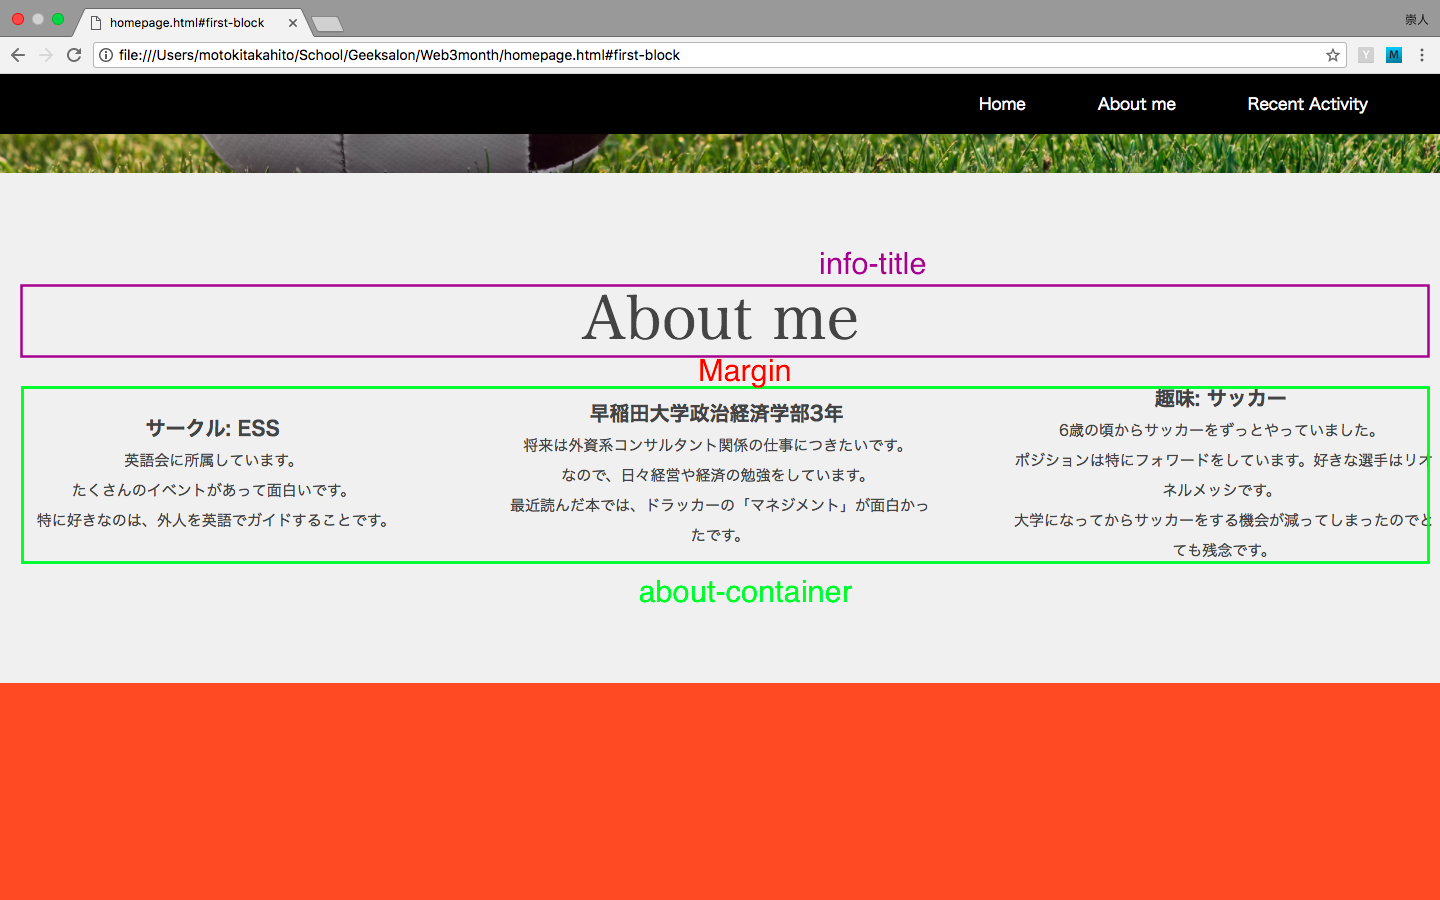
さて、以下の部分に注目してください。
上の画像をみると、About meの部分(info-title)と、その下の要素(about-container)の間が自動的に空いています。
これが、Marginと呼ばれるものです。
Marginと深く関連するものとして、Border, Paddingというものもあります。
それらの関係は以下のような図のようになっています。
Borderはdivなどの箱の境界線
PaddingはBorderの内側の余白
MarginはBorderより外側の余白
をさします。
例えば、
margin-top: 10px;
とCSSに書いたとすると、その箱の上側のborderから、10pxの間には、どんなものも入れなくなります。
つまり、余白ができるのです。
#4. Flexboxについて学ぼう(CSS)
Flexboxというのは、いくつかの要素を綺麗に配列するために用いるものです。
以下のサイトが綺麗にまとまっているので、以下のサイトを使って学習しましょう。
押さえてほしいポイントは以下の2つです。
☑️ Flexコンテナ(親要素)について
☑️ Flexアイテム(子要素)について
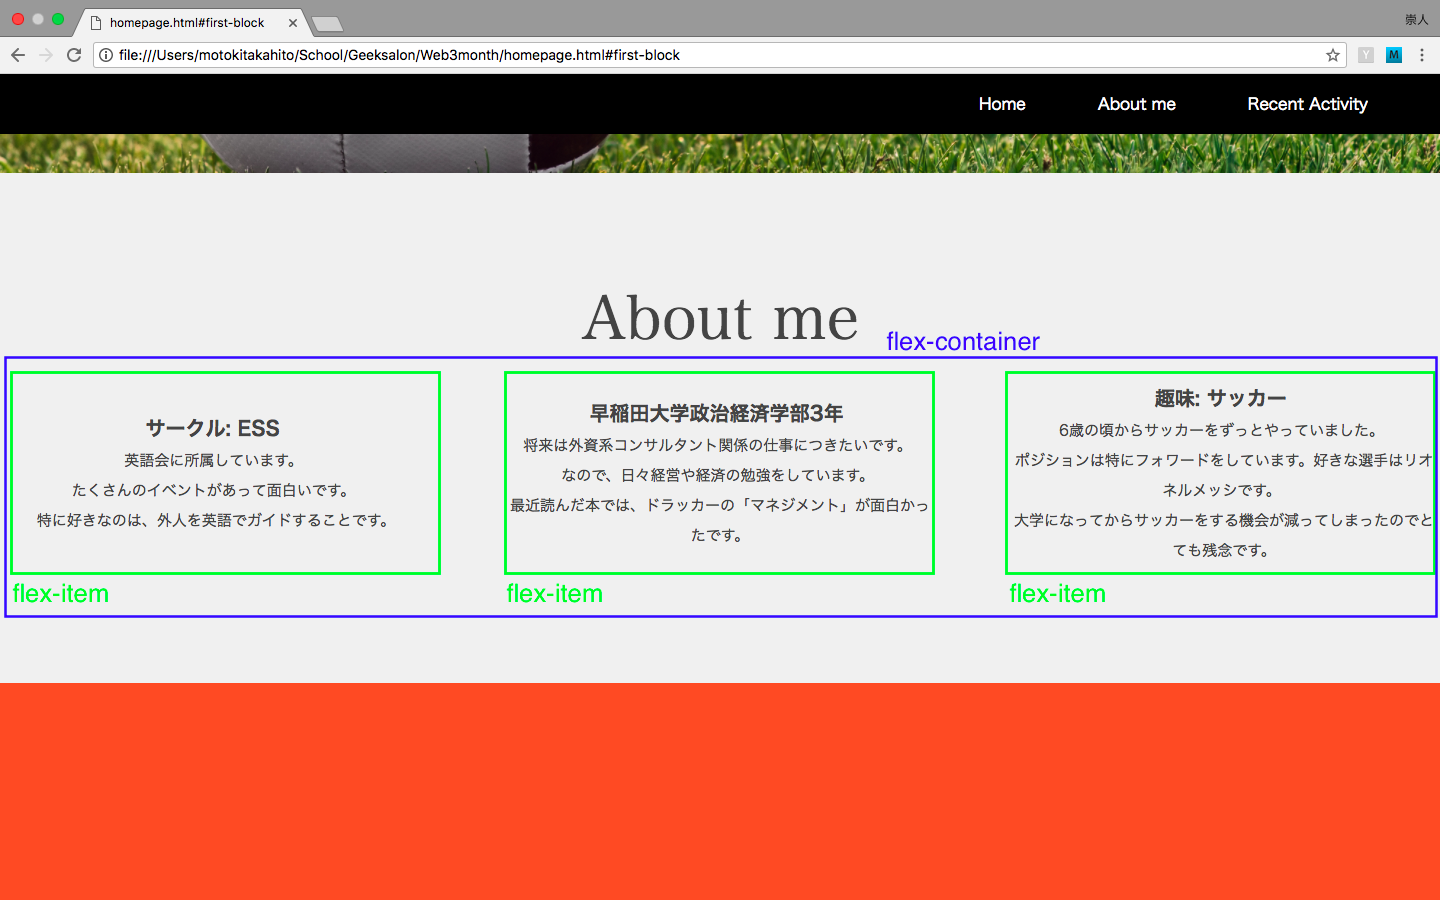
このページの場合、以下のようにFlexboxが使われています。
#5. 画像を入れてみよう(HTML)
まず、セクション3を完成させましょう。
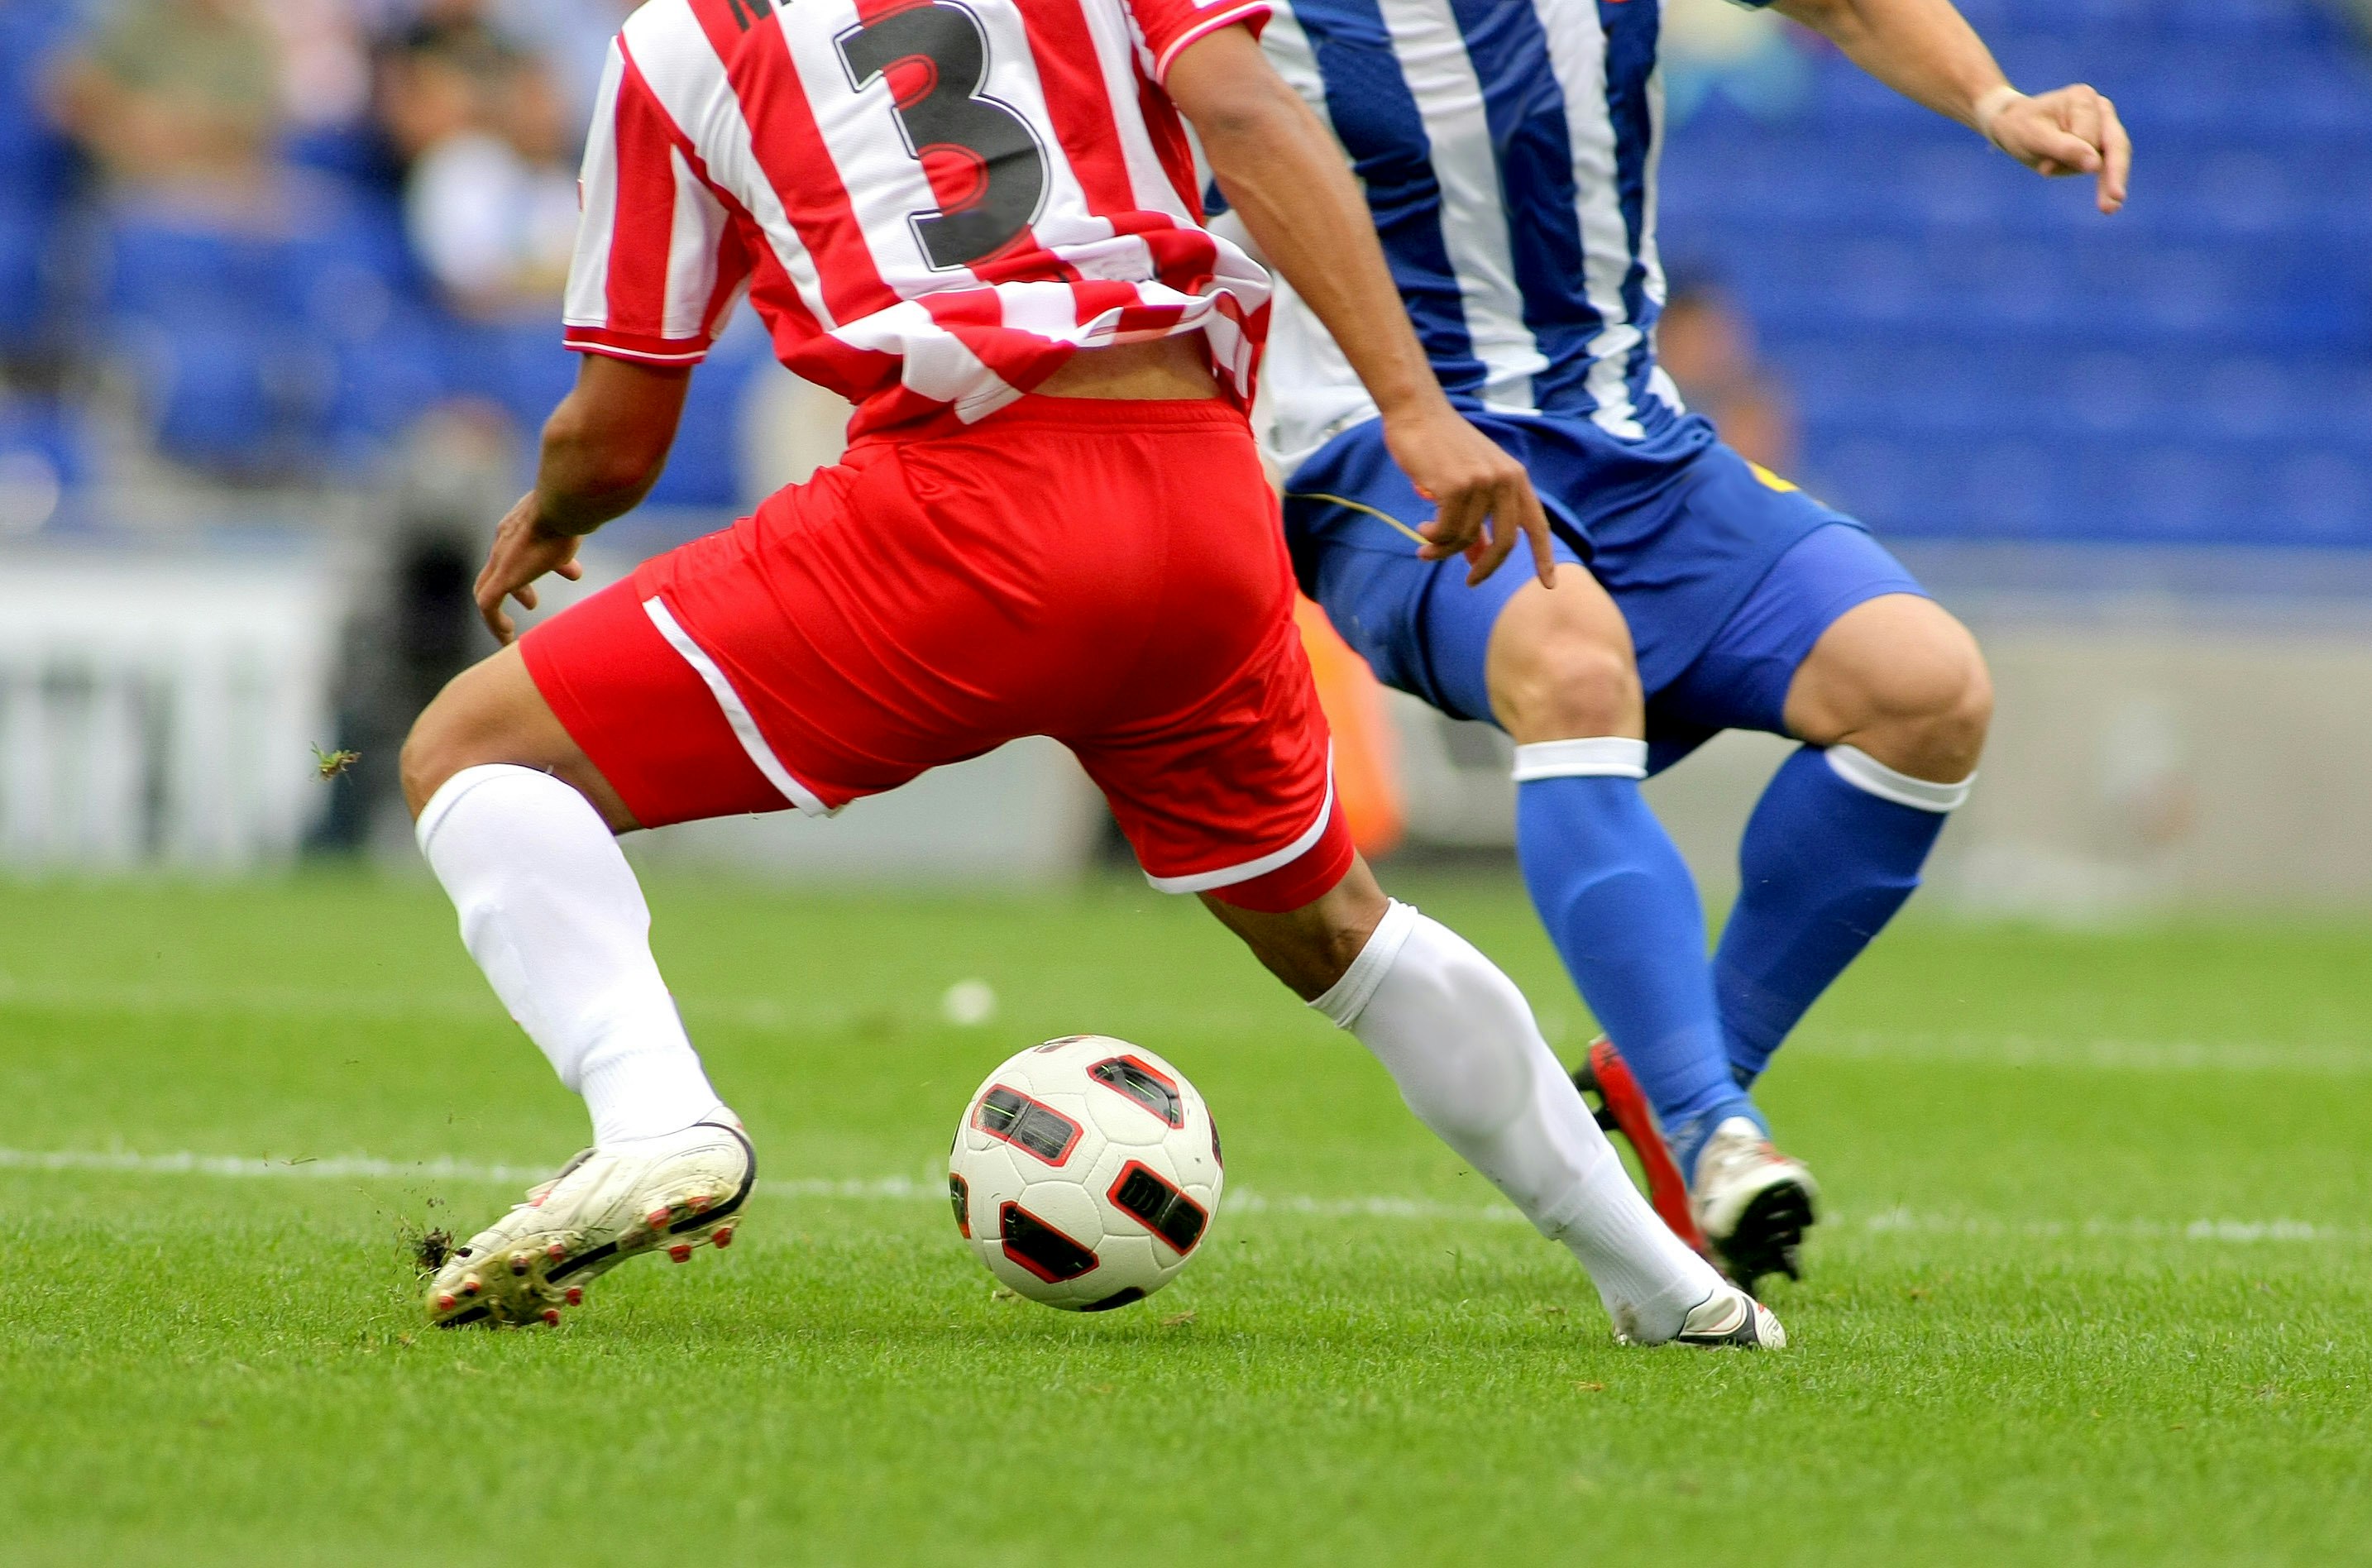
一旦以下の画像を利用しましょう。
下記の画像を右クリック"名前をつけて画像を保存"を選択。下記の様に名前を名付け、"images"フォルダに保存しましょう。
index.html, index.cssを以下のThird Blockの部分を以下のように変更してください。
  <!--   Third block Start   -->
  <section id="third-block">
    <p class="events-title">
      Recent Events
    </p>
    <div class="event-container">
      <div class="event">
        <image src="images/event1.jpg" class="event-image">
        <p class="event-name">
          <span>11/23<br>関東大会</span>
          <br>
          <br>
          今年の秋は関東大会に出場します。<br>
          全16大学が参加し、<br>
          全国大会出場に向けて試合をします。<br>
          サッカー同好会は昨年度優勝し、<br>
          全国大会に出場しました。
        </p>
      </div>
      <div class="event">
        <p class="event-name">
          <span>12/25<br>クリスマスパーティー</span>
          <br>
          <br>
          サッカー同好会は毎年<br>
          クリスマスの日にパーティーをします<br>
          毎年部員の半数以上が参加し<br>
          ビンゴをやったり、ゲームをしたりして<br>
          一晩中楽しみます。
        </p>
        <image src="images/event3.jpg" class="event-image">
      </div>
    </div>
  </section>
  <!--   Third block End   -->
/*   Third block Start   */
#third-block {
  background-color: #f05f40;
  text-align: center;
  padding-top: 100px;
  padding-bottom: 100px;
}

.event-container {
  display: flex;
  flex-direction: column;
  justify-content: center;

  width: 100%;
}

.events-title {
  font-size: 60px;
  font-family: serif;
  color: #444;
}

.event {
  display: flex;
  flex-direction: row;
  justify-content: space-around;

  margin-top: 30px;
  margin-bottom: 20px;
  width: 100%;
}

.event-name {
  font-size: 20px;
  padding: 10px;
  width: 40%;
}

span {
  font-size: 40px;
  font-family: serif;
}

.event-image {
  width: 40%;
  height: 330px;
}
/*   Third block End   */
これでセクション3は完成です。
最後に画像の表示について学ぼうと思います。
画像を入れる時は、Htmlファイル内でimageタグを使います。
背景画像を設定する時はCSS, 画像を入れる時はHTMLなので注意してください。
imageタグは以下のようにして使います。
<image src="./images/画像の名前" class="クラス名">
これで目的のホームページを作ることができました!
お疲れ様でした!
#記録フォームの送信
ここまでお疲れ様です!
最後にみなさんが本記事をいつ終えたか記録すること、また本記事をさらにいいものにするために以下のフォームに記入いただけると嬉しいです!
[ ]
]
(https://qiita.com/suzuxtuti5/private/67e92653884d59698319)[](https://qiita.com/GeekSalon/private/e2c32481976acdc3f6ca)


