前回はエミュレータを使って資産管理アプリケーションのコントラクトをテスト実行してみました。
動作も理解出来たので今度は Sandbox 環境にデプロイしてみましょう。
Sandbox 環境へのデプロイ
デプロイのコマンドは基本的には以前の記事と同じになります。
※この記事からご覧になった方はデプロイの前に上記の記事を参照のうえ以下作業をお願いします。
- Sandbox の利用申請
- 設定ファイル、秘密鍵、証明書ファイルのコピー
- 証明書の登録
以下ファイルが揃っていればデプロイの準備は完了です。
$ ls scalardl-client-sdk
client.properties {username}-key.pem {username}.pem
{username}は申請時のユーザ名になります。
これ以降は{username}部分は私の環境でのdenen-yoshidaとして記載していきます。
$ client/bin/register-contract -properties client.properties -contract-id denen-yoshida-AddType -contract-binary-name com.scalar.am.contract.AddTypeContract -contract-class-file ../getting-started-with-scalardl/build/com/scalar/am/contract/AddTypeContract.class -contract-properties '{"holderId": "Admin"}'
status: 200

$ client/bin/register-contract -properties client.properties -contract-id denen-yoshida-AddAsset -contract-binary-name com.scalar.am.contract.AddAssetContract -contract-class-file ../getting-started-with-scalardl/build/com/scalar/am/contract/AddAssetContract.class -contract-properties '{"holderId": "Admin"}'
status: 200

$ client/bin/register-contract -properties client.properties -contract-id denen-yoshida-ListType -contract-binary-name com.scalar.am.contract.ListTypeContract -contract-class-file ../getting-started-with-scalardl/build/com/scalar/am/contract/ListTypeContract.class -contract-properties '{"holderId": "Admin"}'
status: 200

$ client/bin/register-contract -properties client.properties -contract-id denen-yoshida-ListAsset -contract-binary-name com.scalar.am.contract.ListContract -contract-class-file ../getting-started-with-scalardl/build/com/scalar/am/contract/ListContract.class -contract-properties '{"holderId": "Admin"}'
status: 200

$ client/bin/register-contract -properties client.properties -contract-id denen-yoshida-StatusChange -contract-binary-name com.scalar.am.contract.StatusChangeContract -contract-class-file ../getting-started-with-scalardl/build/com/scalar/am/contract/StatusChangeContract.class -contract-properties '{"holderId": "Admin"}'
status: 200

$ client/bin/register-contract -properties client.properties -contract-id denen-yoshida-AssetHistory -contract-binary-name com.scalar.am.contract.AssetHistoryContract -contract-class-file ../getting-started-with-scalardl/build/com/scalar/am/contract/AssetHistoryContract.class -contract-properties '{"holderId": "Admin"}'
status: 200
以前から1つだけオプションが追加になりました。
- -contract-properties
- コントラクトに設定するプロパティをJSON形式で指定する。
これは前回エミュレータにデプロイする時に設定したプロパティを設定するオプションになります。
6つ無事デプロイできたので次は実行していきます。
コントラクトの実行
では実際にコントラクトを実行してみましょう。
こちらの実行方法も以前の記事を参考にしていきます。
まずは AddType からです。
$ client/bin/execute-contract -properties client.properties -contract-id denen-yoshida-AddType -contract-argument '{"name": "Tablet"}'
status: 200
{"result":"success","message":"type Tablet put completed."}

$ client/bin/execute-contract -properties client.properties -contract-id denen-yoshida-AddType -contract-argument '{"name": "SmartPhone"}'
status: 200
{"result":"success","message":"type SmartPhone put completed."}
無事タイプが登録できたようなので確認してみましょう。
$ client/bin/execute-contract -properties client.properties -contract-id denen-yoshida-ListType -contract-argument '{}'
status: 200
{"result":"success","message":"get list completed.","types":[{"type":"SmartPhone","age":1},{"type":"Tablet","age":0}]}
大丈夫そうですね。
続いて資産を登録してみましょう。
$ client/bin/execute-contract -properties client.properties -contract-id denen-yoshida-AddAsset -contract-argument '{"type": "Tablet", "asset": "iPad", "timestamp": 1563350961, "id": "1001"}'
status: 200
{"result":"success","message":"asset iPad put completed."}
こちらも登録されているか確認してみます。
$ client/bin/execute-contract -properties client.properties -contract-id denen-yoshida-ListAsset -contract-argument '{"type":"Tablet"}'
status: 200
{"result":"success","message":"get list completed.","Tablet":[{"id":"1001","name":"iPad","timestamp":1563357602,"status":"in-stock"}]}
大丈夫ですね。
エミュレータの時と実行するコマンドの形式が違うものの、処理される内容は違いが無いことが理解できたかと思います。
他のプログラムからの実行
コマンドラインで実行出来るということは他のプログラムからも実行可能ということですね。
今回はPHPから叩けるか試してみたいと思います。
システムの構成としては以下の通りです。
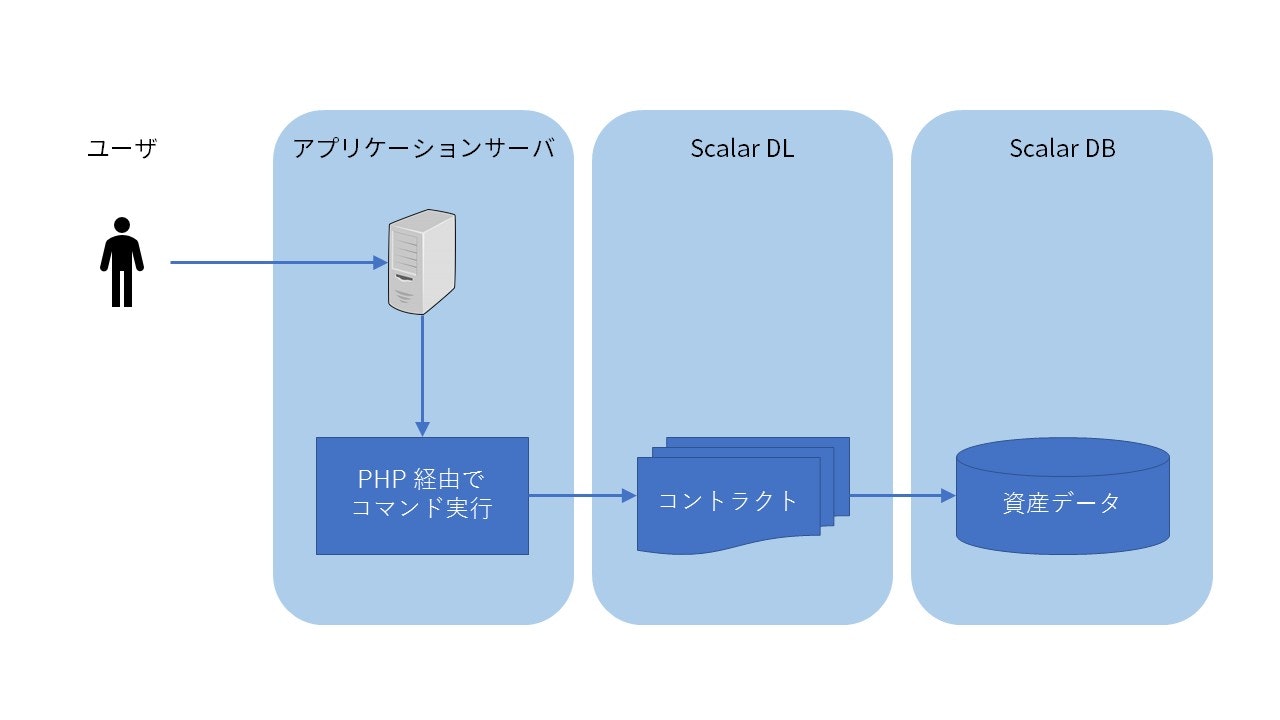
ユーザがアクセスする画面のソースは以下となります。
簡易的なものなので1ファイルにまとめました。
<?php
	$output = "";
	$cmd = "cd /Users/k.yoshida/git/scalardl-client-sdk/ && client/bin/execute-contract -properties client.properties ";
	if (isset($_REQUEST['action'])) {
		if ($_REQUEST['action'] == "ListType") {
			$param = "{}";
		} else if ($_REQUEST['action'] == "ListAsset") {
			$param = [
				"type" => $_REQUEST["type"]
			];
			$param = json_encode($param);
		} else if ($_REQUEST['action'] == "StatusChange") {
			$param = [
				"asset_id"  => $_REQUEST["asset_id"],
				"status"    => $_REQUEST["status"],
				"timestamp" => time()
			];
			$param = json_encode($param);
		}
		exec($cmd . "-contract-id denen-yoshida-" . $_REQUEST['action'] . " -contract-argument '" . $param . "'", $output);
		$output = print_r($output, true);
}

?><!DOCTYPE html>
<html>
	<head>
		<title>資産管理ツール</title>
		<meta charset="utf-8">
	</head>
	<body>
		<div style="padding: 10px; margin-bottom: 10px; border: 1px solid #333333; border-radius: 10px;">
    		<b>資産タイプの確認</b>
			<form method="POST" action="./">
				<input type="submit" value="実行" />
				<input type="hidden" name="action" value="ListType" />
			</form>
		</div>
		<div style="padding: 10px; margin-bottom: 10px; border: 1px solid #333333; border-radius: 10px;">
    		<b>資産の確認</b>
			<form method="POST" action="./">
				資産タイプ:<input type="text" name="type" value="" />
				<input type="submit" value="実行" />
				<input type="hidden" name="action" value="ListAsset" />
			</form>
		</div>
		<div style="padding: 10px; margin-bottom: 10px; border: 1px solid #333333; border-radius: 10px;">
    		<b>資産を借りる</b>
			<form method="POST" action="./">
				資産ID:<input type="text" name="asset_id" value="" />
				<input type="submit" value="実行" />
				<input type="hidden" name="action" value="StatusChange" />
				<input type="hidden" name="status" value="on-loan" />
			</form>
		</div>
		<div style="padding: 10px; margin-bottom: 10px; border: 1px solid #333333; border-radius: 10px;">
    		<b>資産を返す</b>
			<form method="POST" action="./">
				資産ID:<input type="text" name="asset_id" value="" />
				<input type="submit" value="実行" />
				<input type="hidden" name="action" value="StatusChange" />
				<input type="hidden" name="status" value="in-stock" />
			</form>
		</div>
		<div><pre><?php echo $output; ?></pre></div>
	</body>
</html>
画面にアクセスしてみます。
まずは現在の資産の情報を確認してみましょう。
資産タイプは Tablet を指定します。
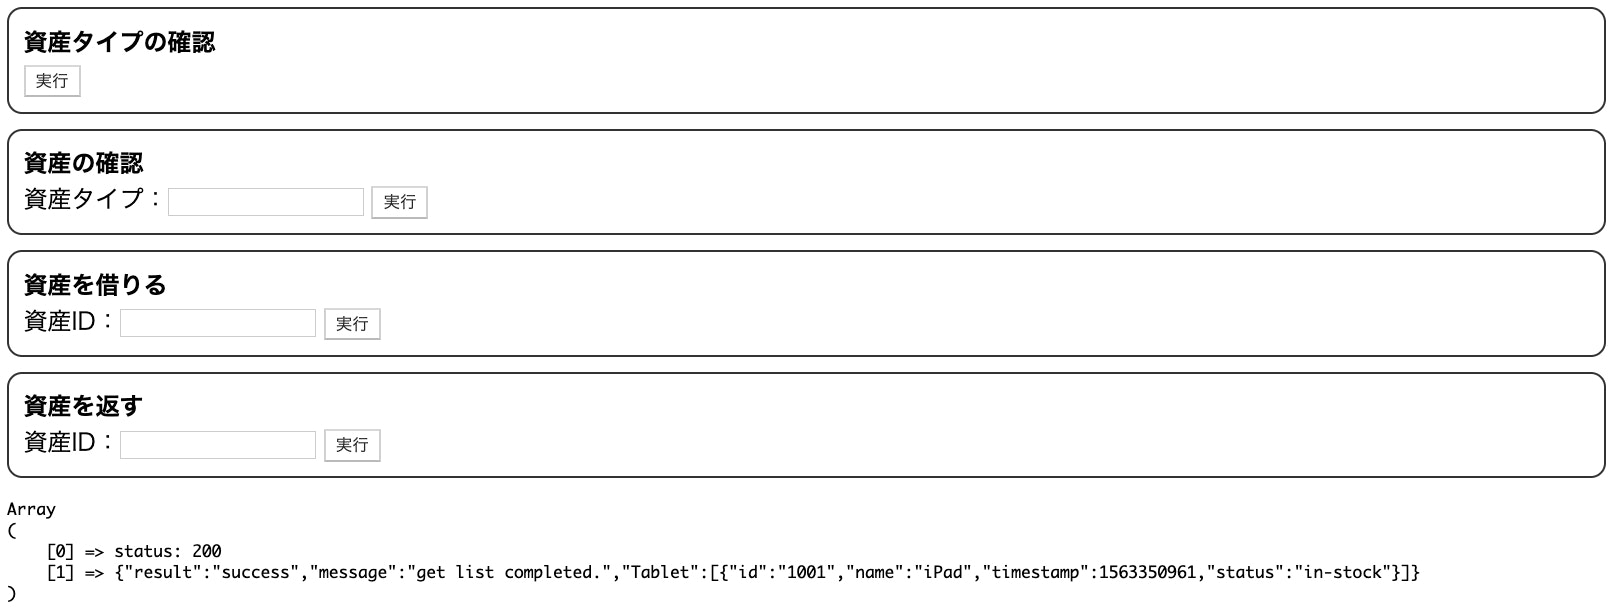
id:1001のiPadが確認できますね。
ではiPadを借りてみましょう。
資産IDにはiPadのID1001を指定します。
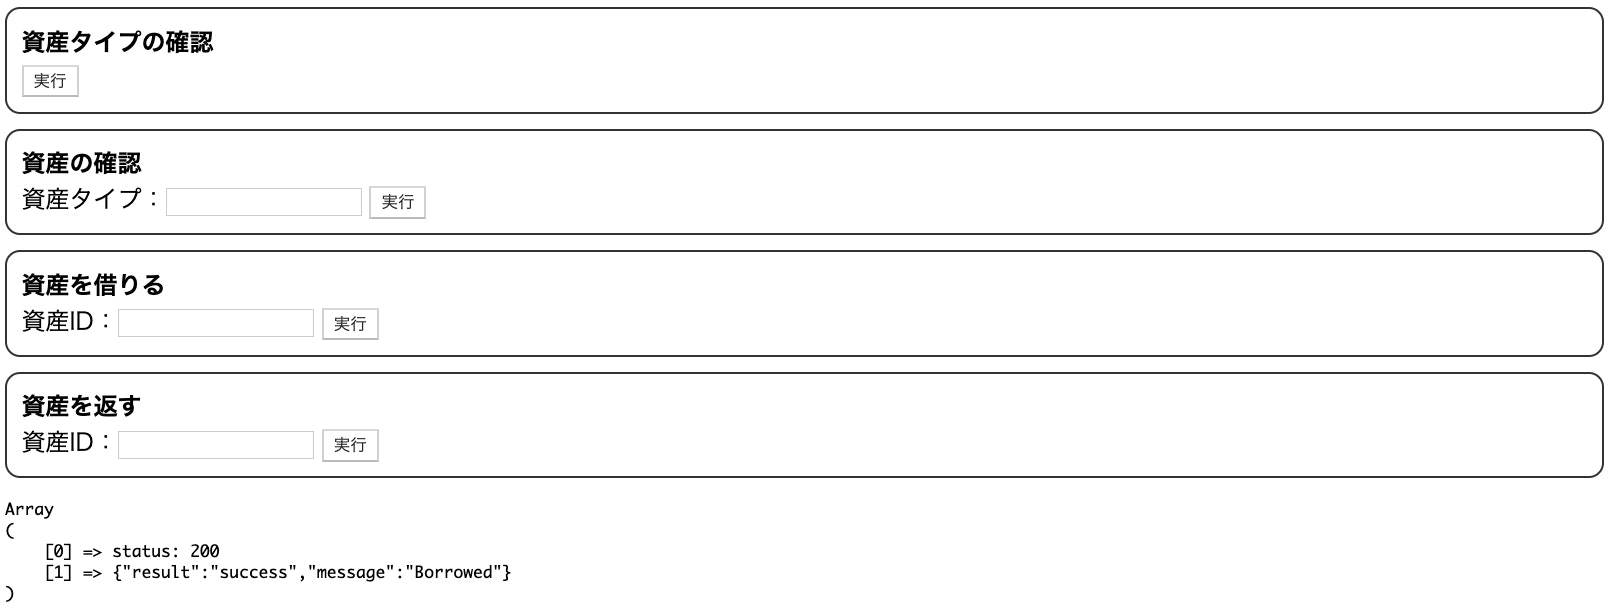
Borrowedというメッセージが返ってきています。
ステータスも確認してみましょう。
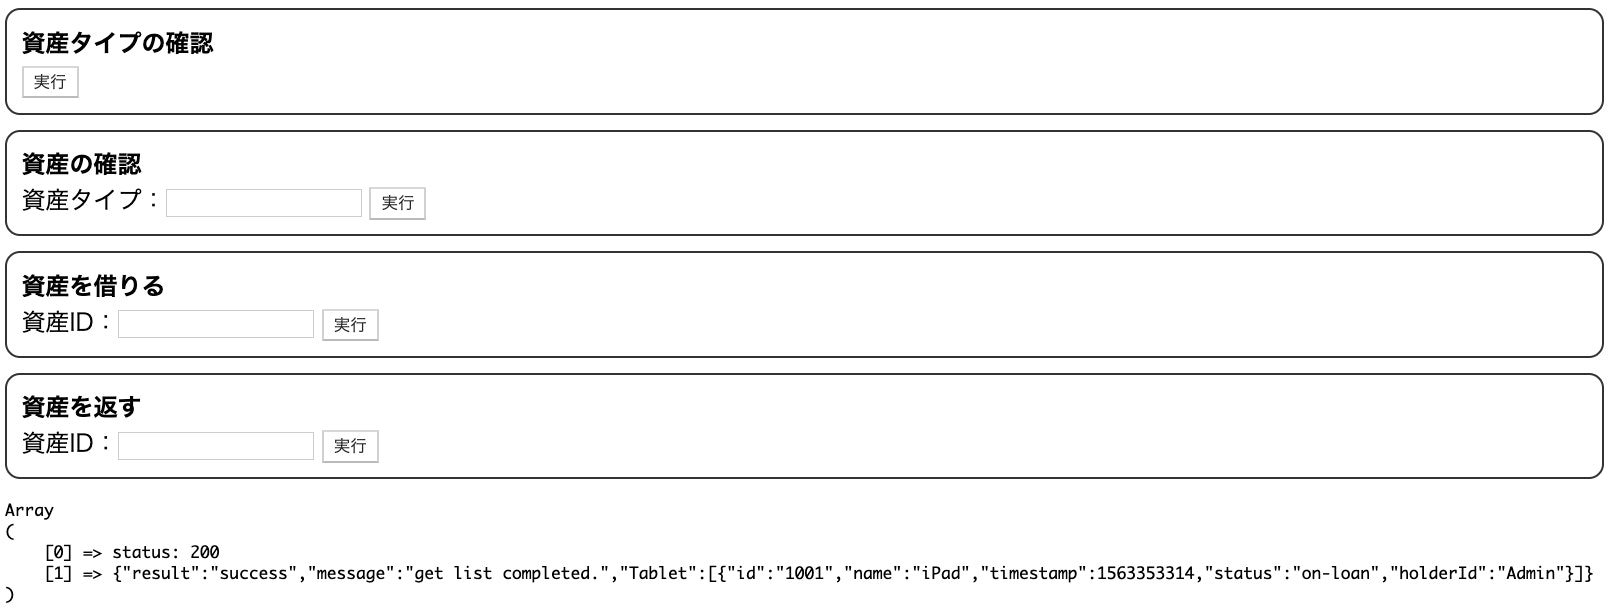
"status":"on-loan"になっていますね。
続いて返却してみます。
こちらも資産IDは1001を指定します。
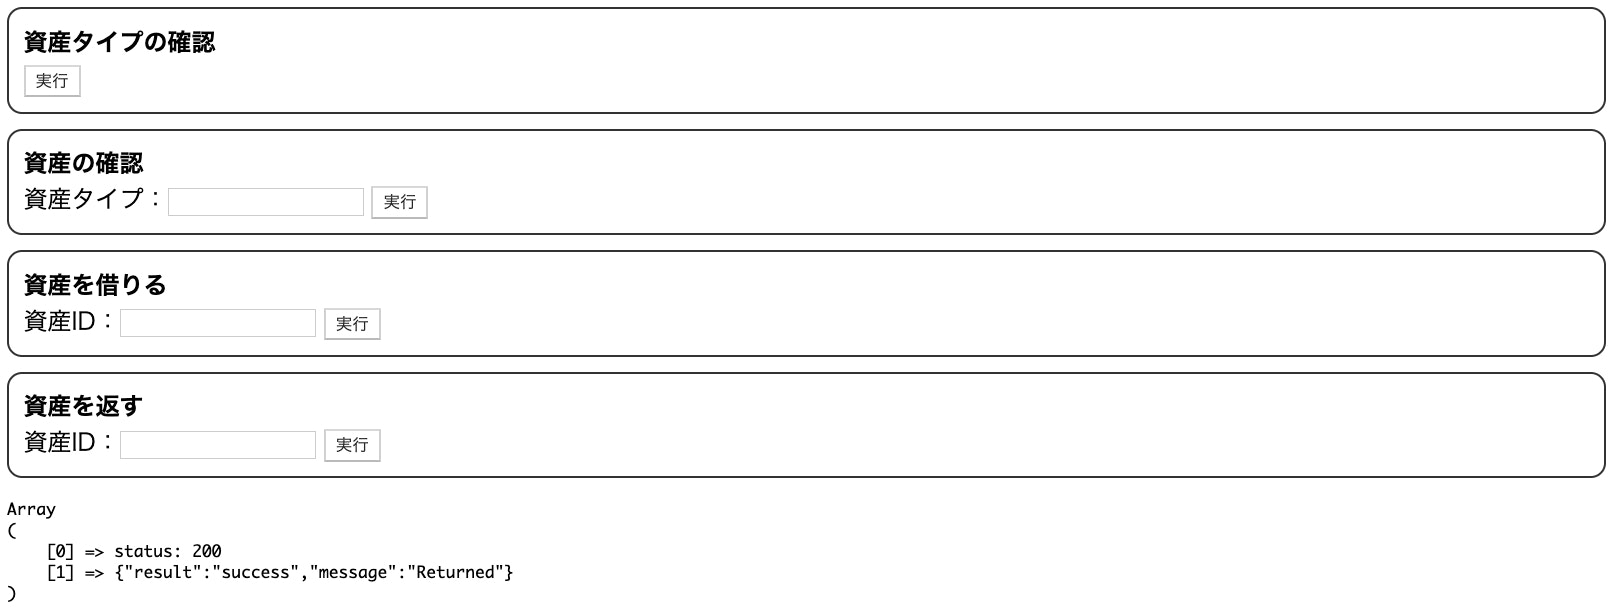
無事返却できました。
こういった形で、コマンドさえ呼び出せば他の言語・プログラムからの実行も可能というのがお分かりいただけましたでしょうか?
あとはコントラクトと表側のプログラムの組み合わせで様々なアプリケーションが構築可能となります。
まとめ
いかがだったでしょうか?
エミュレータで一度動かして感覚を掴めば Sandbox へのデプロイは簡単だったのではないでしょうか?
他のプログラムとの連携に関してもコマンドを実行するだけなのであまり難しくはないですよね?
次回はより実用的なアプリケーションを構築してみたいと思います。