SNSによくある通知機能。

これをポートフォリオに実装した話を書きます。
機能
- ユーザーに対して①フォロー、②記事にいいね、③記事にコメント、のどれかをすると通知が作成される。
- ユーザーは自分に宛てられた通知を一覧で見ることができる。
- まだ未確認の通知があるときには、それをユーザーに知らせる。

モデル概要
| id (int) | visiter_id (int) | visited_id (int) | micropost_id (int) | comment_id (int) | action (str) | checked(bln) |
|---|---|---|---|---|---|---|
| 1 | 1 | 2 | nil | nil | "follow" | false |
| 2 | 1 | 2 | 3 | nil | "like" | false |
| 3 | 1 | 2 | nil | 4 | "comment" | false |
visiter_id : 通知を送ったユーザーのid
visited_id : 通知を送られたユーザーのid
micropost_id : いいねされた投稿のid
comment_id : 投稿へのコメントのid
action : 通知の種類(フォロー、いいね、コメント)
check : 通知を送られたユーザーが通知を確認したかどうか default: false
モデル名は名前はNotificationとします。
$ rails g model Notification visiter_id:integer visited_id:integer
  micropost_id:integer comment_id:integer action:string checked:boolean
(色々index張ったりdefault設定をしてから)
$ rails db:migrate
モデル関連付け(User->Notifications)
自分が作った通知(active_notifications)と自分宛の通知(passive_notifications)の関連付けメソッドを実装します。
class User < ApplicationRecord
  ~
  has_many :active_notifications, class_name: "Notification", foreign_key: "visiter_id", dependent: :destroy
  has_many :passive_notifications, class_name: "Notification", foreign_key: "visited_id", dependent: :destroy
モデル関連付け(いいね通知)
いいね通知に関する関連付けを行います。いいねは記事に対する通知なのでMicropostモデルに書きます。
class Micropost < ApplicationRecord
  has_many :notifications,dependent: :destroy
class Notification < ApplicationRecord
  default_scope->{order(created_at: :desc)}
  belongs_to :micropost, optional: true
NotificationからMicropostへの関連付けについているオプションoptional: trueはmicropost_idにnilを許容するものです。railsではbelongs_toのつけられたカラムには自動的にallow_nil: falseが付与されます。フォロー通知ではmicropost_idは関与しないためnilとなるので、このオプションをつけないとフォロー通知が有効になりません。
こんな感じで同じようにフォロー通知(Userモデル)とコメント通知(Commentモデル)に対しても関連付けを記述します。ここでは省略します。
通知作成メソッド実装
いいねが押された時、つまりlikes#createが要求された時にいいね通知がnotificationsテーブルに登録される必要があります。ここではMicropostモデルでインスタンスメソッドを新しく作って、それをlikes#createに記述してこの動きを実装します。
class Micropost < ApplicationRecord
  ~
  def create_notification_by(current_user)
    notification=current_user.active_notifications.new(
      micropost_id:self.id,
      visited_id:self.contributer.id,
      action:"like"
    )
    notification.save if notification.valid?
  end
このcreate_notification_byメソッドを、likesコントローラーのcreateアクションに挿入します。
class LikesController < ApplicationController
  ~
  def create
    like=current_user.active_like.new(micropost_id:params[:micropost_id])
    like.save
    @micropost=Micropost.find(params[:micropost_id])
    @micropost.create_notification_by(current_user)
    respond_to do |format|
      format.html {redirect_to request.referrer}
      format.js
    end
  end
  ~
これによりいいねが押されると以下のような通知がnotificationsテーブルに登録されます。
| id (int) | visiter_id (int) | visited_id (int) | micropost_id (int) | comment_id (int) | action (str) | checked(bln) |
|---|---|---|---|---|---|---|
| 2 | current_userのid | いいねされた投稿の投稿者のid | いいねされた投稿のid | nil | "like" | false |
| こんな感じで同じようにフォロー(メソッドはUserモデルに作成)とコメント(メソッドはCommentモデルに作成)に対しても通知作成メソッドを実装していきます。ここでは省略します。 |
ルーティングとアクションの実装
通知の一覧表示を実装します。notificationsコントローラーを作成します。
$ rails g controller notifications
ルーティングとアクションを書きます。アクションはindexだけです。
Rails.application.routes.draw do
  ~
  resources :notifications, only: :index
end
class NotificationsController < ApplicationController
  def index
    @notifications=current_user.passive_notifications.page(params[:page]).per(10)
  end
end
自分宛の通知を全て@notificationsに代入します。
ビューの実装
複数形partialレンダーを使います。
<div>
  <h4 class="sub-title">通知</h4>
  <% if @notifications.exists? %>
    <div class="users-index">
      <%= render @notifications %>
      <%= paginate @notifications %>
    </div>
  <% else %>
    <p>通知はありません</p>
  <% end %>
</div>
<% visiter=notification.visiter %>
<% post=notification.micropost %>

<div class="user-view clearfix ">
  <%= link_to user_path(notification.visiter) do %>
    <%=  image_tag notification.visiter.image[:small].url, class:"user-thumb", style:"width: 60px;"%>
  <% end %>
  <%== notification_form(notification) %><span class="moderate-font"><%= " (#{time_ago_in_words(notification.created_at)}前)" %></span>
  <br>
  <% if !@comment.nil? %>
    <p class="moderate-font"><%= @comment %></p>
  <% end %>
</div>
view中にあるnotification_formメソッドをnotifications_helperに書きます。これは通知の内容によって表示内容を分岐させるものです。
def notification_form(notification)
  @comment=nil
  visiter=link_to notification.visiter.name, notification.visiter, style:"font-weight: bold;"
  your_post=link_to 'あなたの投稿', notification.micropost, style:"font-weight: bold;", remote: true
  case notification.action
    when "follow" then
      "#{visiter}があなたをフォローしました"
    when "like" then
      "#{visiter}が#{your_post}にいいね!しました"
    when "comment" then
      @comment=Comment.find_by(id:notification.comment_id)&.content
      "#{visiter}が#{your_post}にコメントしました"
  end
end
未確認の通知があることを知らせる
あと一息です。未確認の通知(checked:falseの通知)があったらそれを教えてあげるようにしましょう。
未確認の通知を示すunchecked_notificationsメソッドをnotifications_helperに書きます。
module NotificationsHelper
  def unchecked_notifications
    @notifications=current_user.passive_notifications.where(checked: false)
  end
  ~
notifications_pathが付いているリンクに何かしら未確認通知を示すマークを書きます。ここではfont-awesomeのfa-circleを使います。
<ul class="nav">
  ~
  <li class="notification"><%= menu_link_to '通知', notifications_path, class:"btn"  %>
  <% if unchecked_notifications.any? %>
    <i class="fa fa-circle notification-circle"></i>
  <% end %>
最後にindexを開いたらchecked:falseが全てchecked:trueになるようにnotifications#indexに追記しましょう。
class NotificationsController < ApplicationController
  def index
    @notifications=current_user.passive_notifications.page(params[:page]).per(10)
    @notifications.where(checked: false).each do |notification|
      notification.update_attributes(checked: true)
    end
  end
end
実際の画面
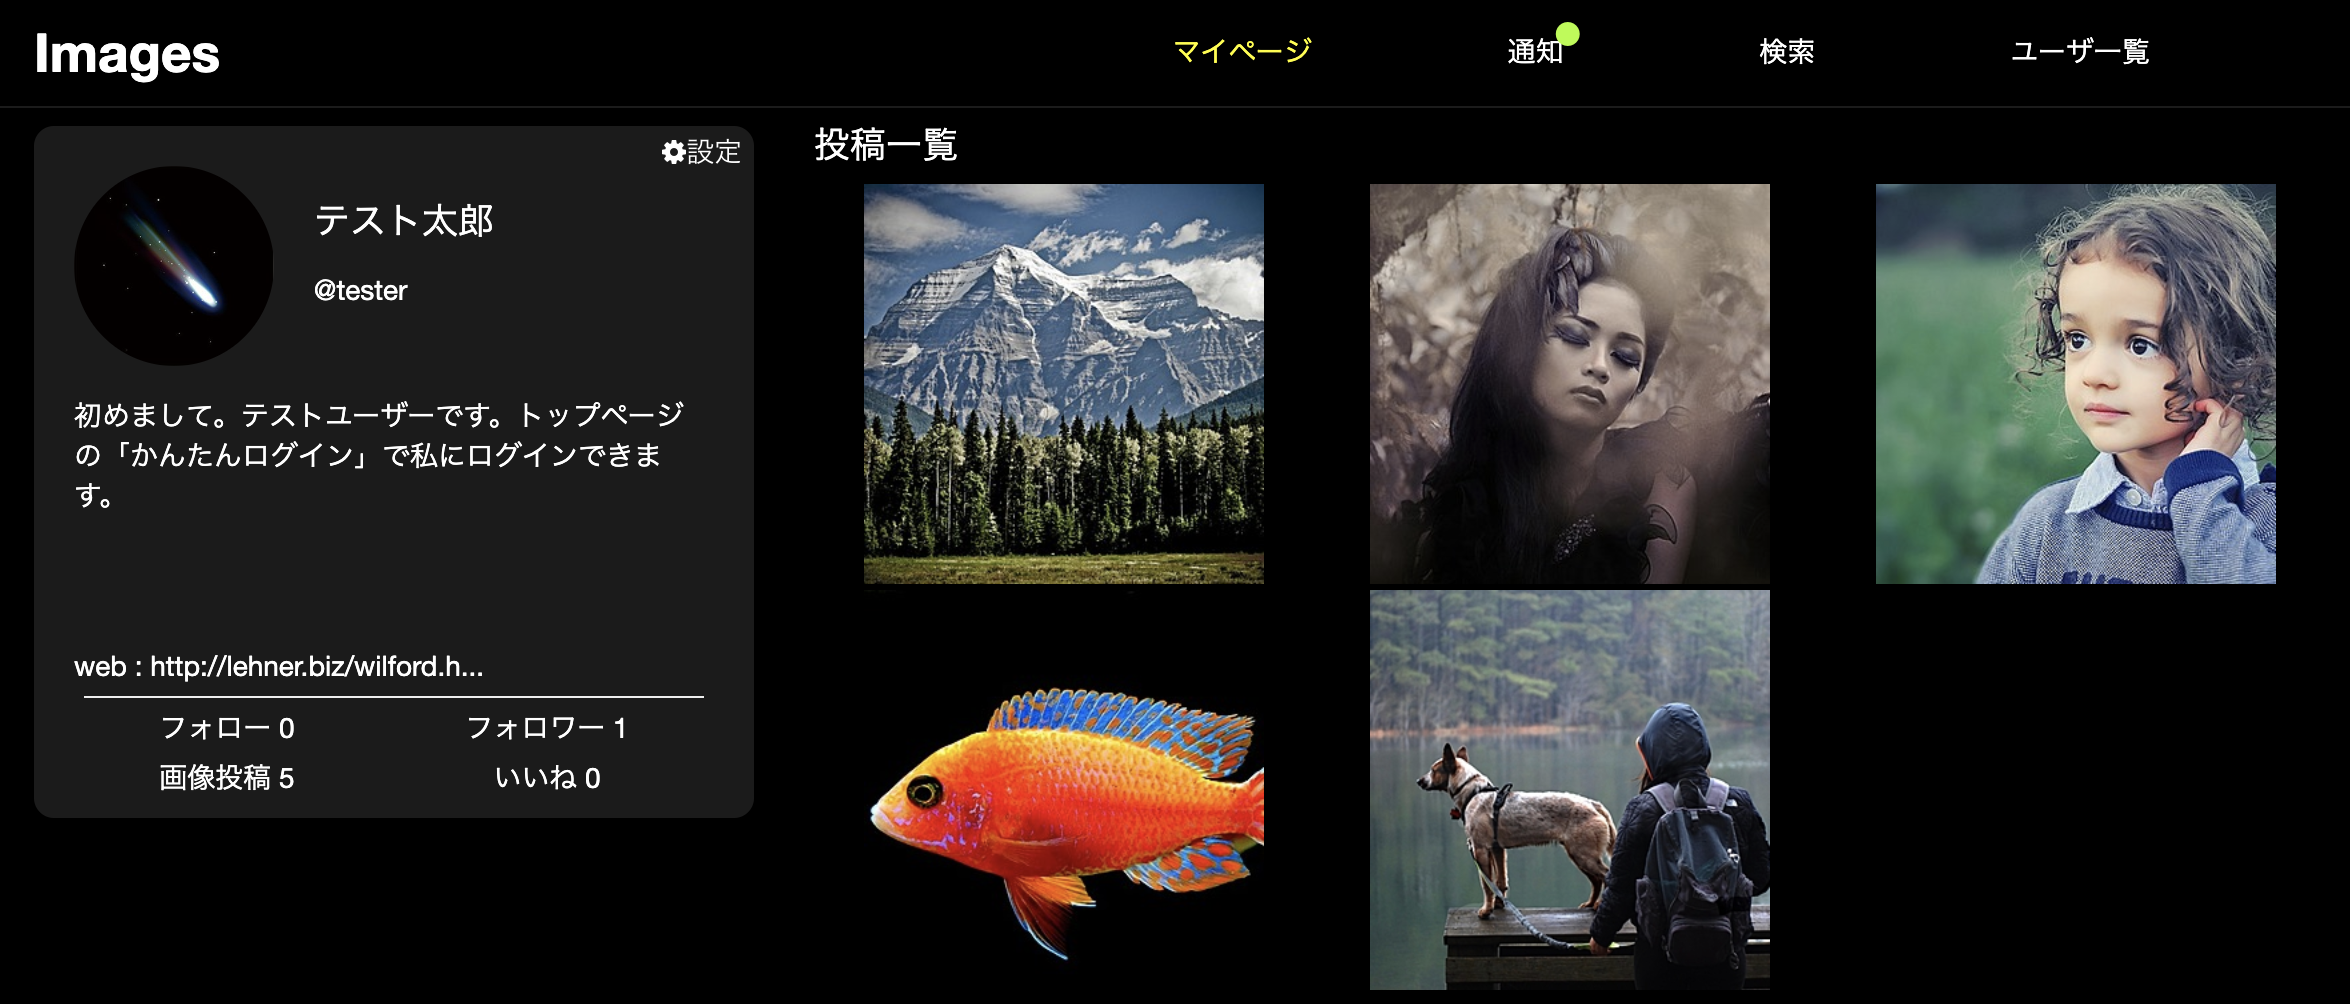
テスト花子さんからテスト太郎さんへフォローといいねとコメントを送ります。
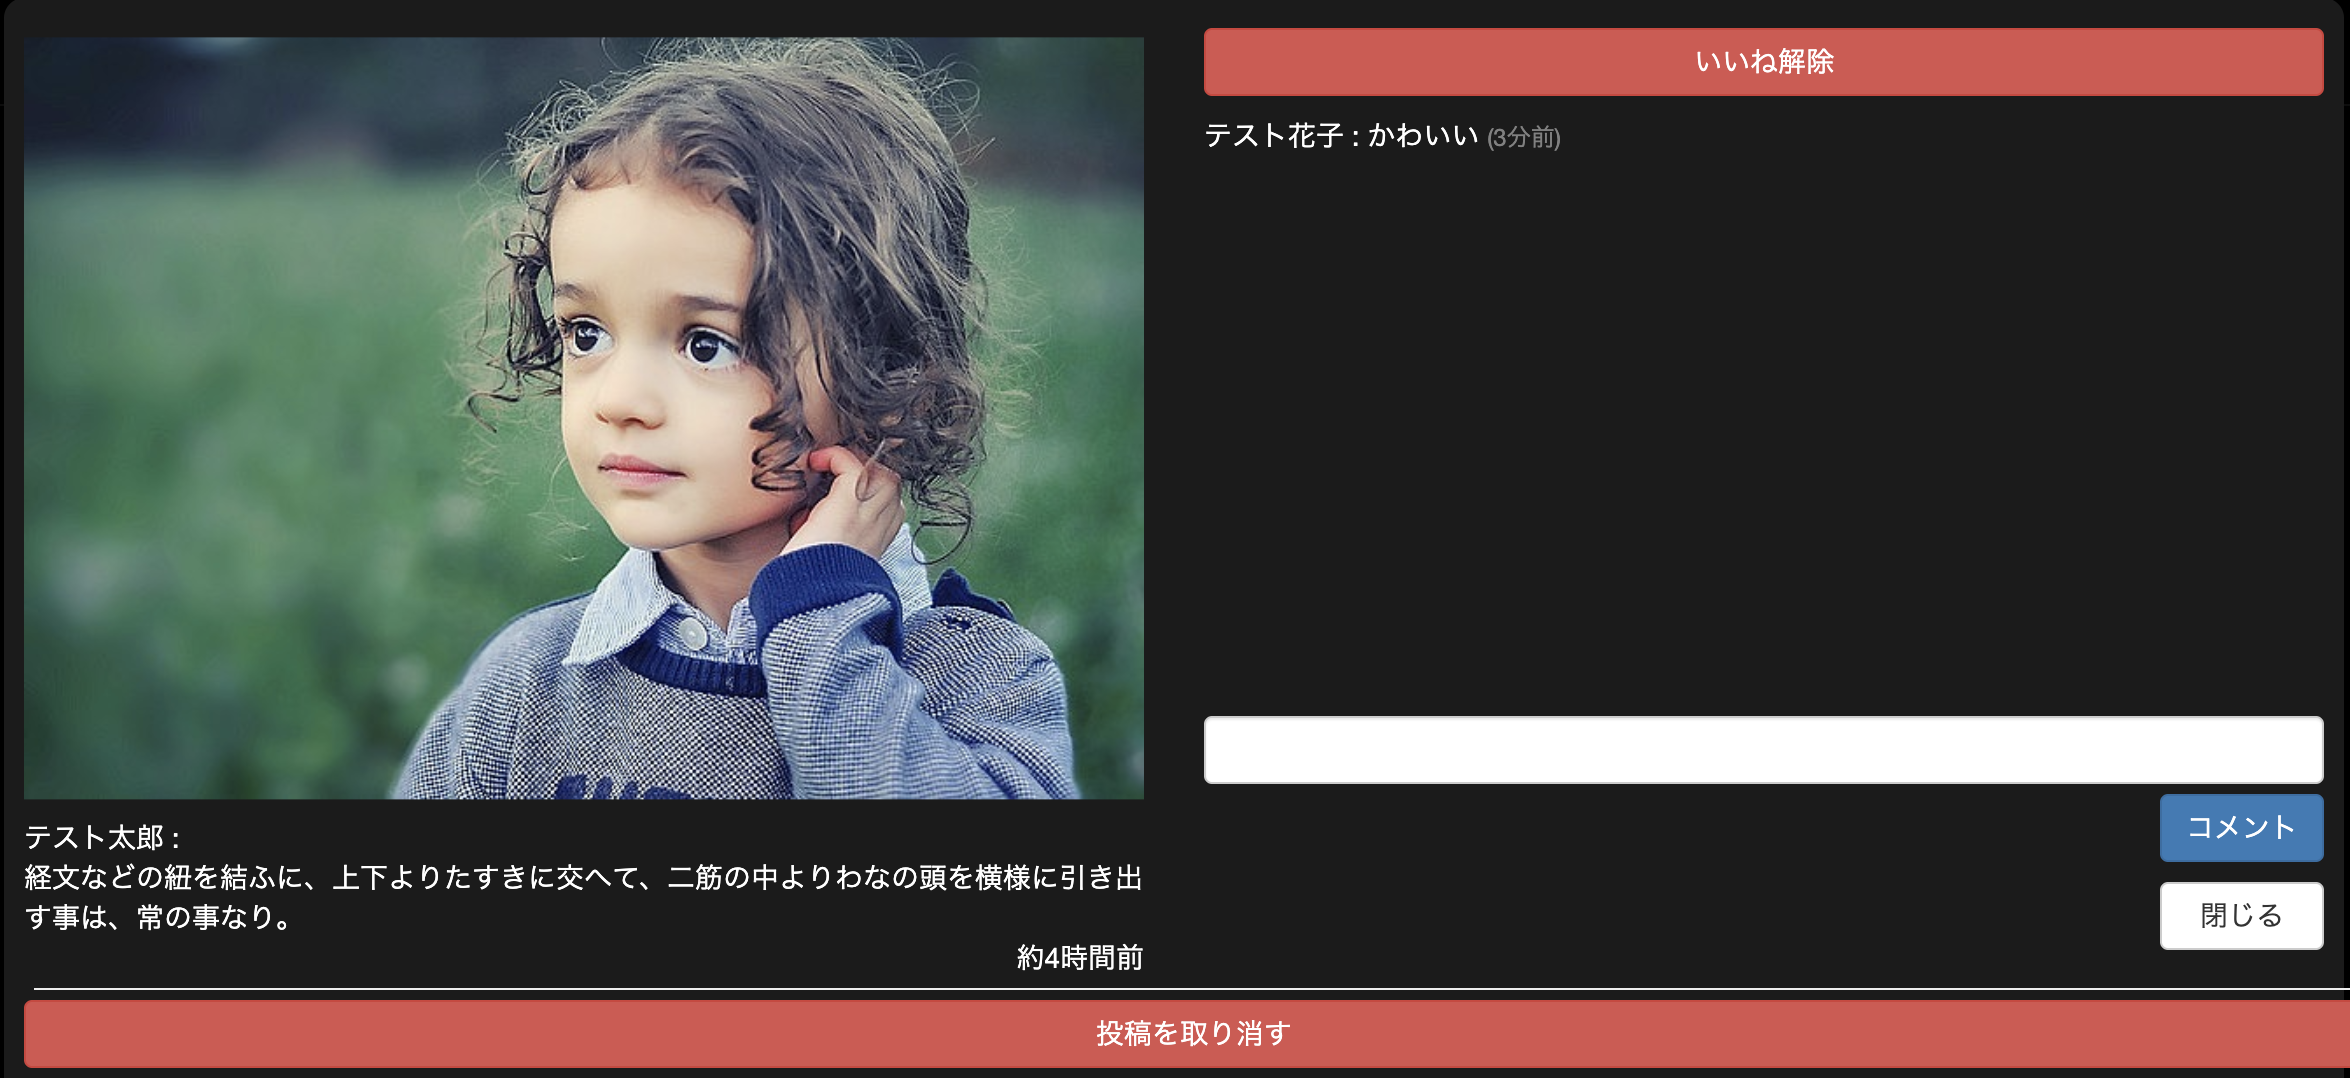
ログアウトしてテスト太郎さんのページに行きます。
通知のところに丸があり、未確認の通知があることを教えてくれています。通知をクリックします。
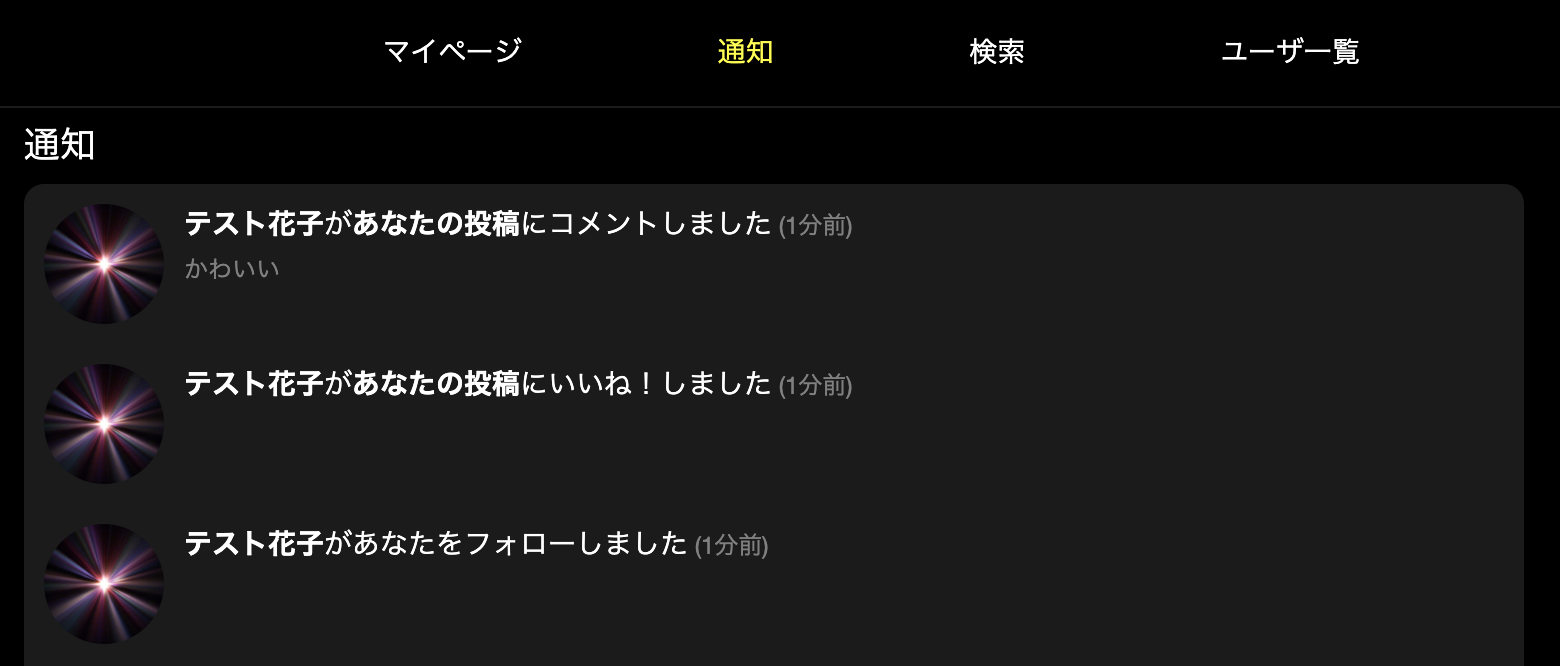
通知内容が正しく通知されています。また確認したことにより、未確認を示す丸が消えました。
おわりに
丸の中に通知の数を表示するなどアレンジしても面白いですね、おつかれさまでした!