前回に引き続きでUnityのWebGLビルド・Reactと連携を進めます。今回はUnityからReactをコールする部分について処理を構築します。
環境・バージョン
・開発PC: MacOS Catalina 10.15.7
・Unity: 2020.3.25f1
・React: 17.0.2
・react-unity-webgl:8.7.4
このプロジェクトではReactとUnityを連携するため、React用プロジェクトフォルダとUnity用プロジェクトフォルダを利用します。詳しくはGitHub リポジトリ をご確認ください。
Unity側の準備
まずUnity側でC#からの呼び出し部分を作成します。下記のような形でDllImportを使い、javascriptと連携するためのexternの関数を定義します。今回はSphereがMoveされたときに、その方向と現在座標を返すようなコールバックのような形で、javascript側を呼び出します。
using System.Collections;
using System.Collections.Generic;
using UnityEngine;
using System.Runtime.InteropServices;

public class BallController : MonoBehaviour
{
    [DllImport("__Internal")]
    private static extern void MoveCallback(string direction, int xpos, int ypos);

    public void ExecMoveCallback(string direction, int xpos, int ypos)
    {
#if UNITY_WEBGL == true && UNITY_EDITOR == false
        MoveCallback (direction, xpos, ypos);
#endif
    }

    // Start is called before the first frame update
    void Start()
    {

    }

    // Update is called once per frame
    void Update()
    {

    }

    public void MoveRight(int position)
    {
        this.gameObject.transform.position += new Vector3(position, 0, 0);
        ExecMoveCallback("right", (int)this.gameObject.transform.position.x, (int)this.gameObject.transform.position.y);
    }
    public void MoveLeft(int position)
    {
        this.gameObject.transform.position += new Vector3(-position, 0, 0);
        ExecMoveCallback("left", (int)this.gameObject.transform.position.x, (int)this.gameObject.transform.position.y);
    }
    public void MoveUp(int position)
    {
        this.gameObject.transform.position += new Vector3(0, position, 0);
        ExecMoveCallback("up", (int)this.gameObject.transform.position.x, (int)this.gameObject.transform.position.y);
    }
    public void MoveDown(int position)
    {
        this.gameObject.transform.position += new Vector3(0, -position, 0);
        ExecMoveCallback("down", (int)this.gameObject.transform.position.x, (int)this.gameObject.transform.position.y);
    }
}
次にjslibと呼ばれる仕組みを使ってUnity側の関数とjavascript側の関数をバインドします。Unityプロジェクト内におけるAssets/Plugins/WebGL/以下に.jslibという拡張子でファイルを作ります。jslibについては公式ドキュメントを参考にしてください。
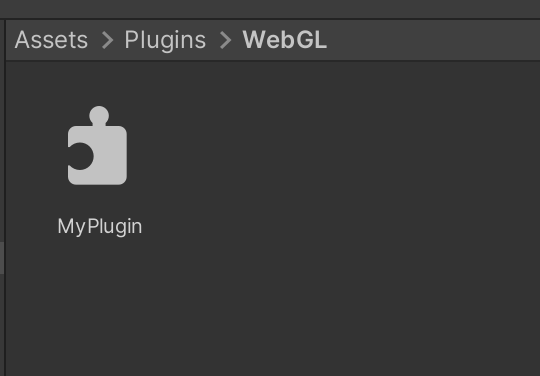
MyPlugin.jslib
mergeInto(LibraryManager.library, {
  MoveCallback: function (direction, xpos, ypos) {
    window.dispatchReactUnityEvent(
      "MoveCallback",
      Pointer_stringify(direction),
      xpos,
      ypos
    );
  },
});
React側の準備
React側では先ほどのjslibを使って関数をバインドします。unityContext.onを使うことでコールバックを設定することが可能となります。これによりReact側の関数をUnity側に連携することができ、Unity 側から呼び出すことが可能となります。
App.js
import React, { useState, useEffect } from "react";
import './App.css';

import Unity, { UnityContext } from "react-unity-webgl";

const unityContext = new UnityContext({
  loaderUrl: "UnityBuild/webgl_app.loader.js",
  dataUrl: "UnityBuild/webgl_app.data",
  frameworkUrl: "UnityBuild/webgl_app.framework.js",
  codeUrl: "UnityBuild/webgl_app.wasm",

});

function App() {
  const [direction, setDirection] = useState("");
  const [xpos, setXpos] = useState(0);
  const [ypos, setYpos] = useState(0);

  useEffect(function () {
    unityContext.on("MoveCallback", function (direction,xpos, ypos) {
      setDirection(direction);
      setXpos(xpos);
      setYpos(ypos);
    });
  }, []);

  function moveRight() {
    unityContext.send("Sphere", "MoveRight", 10);
  }
  function moveLeft() {
    unityContext.send("Sphere", "MoveLeft", 10);
  }

  return (
    <div>
      <button onClick={moveRight}>MoveRight</button>
      <button onClick={moveLeft}>MoveLeft</button>
      {<p>{`Moved! ${direction} x = ${xpos} y = ${ypos} `}</p>}
      <Unity unityContext={unityContext}
        style={{
          height: "100%",
          width: 400,
          border: "2px solid black",
          background: "grey",
        }}/>
    </div>
  );
}
export default App;
Reactの起動
ここまで更新したらReactのビルドし直し起動しましょう。
$ npm run build
$ npm start

これでUnityからReactの呼び出しも作成することができました。今後もUnityとReactを連携してさまざまなWebアプリ開発に挑戦していきたいと思います。