設定ゼロでウェブサイトを爆速デプロイする Serverless Component (website-optimized-cloudfront) を公開しました。
この Serverless Component は React, Vue をはじめとした JS フレームワーク にも対応しており、従来の serverless-component/website と比較するとキャッシュ最適化され、最速 10ms 以内 でコンテンツを表示できます。
I launched new Serverless Component !!
— G 🌥️ (@gee0awa) August 20, 2021
⚡️website-optimized-cloudfront ⚡️
📦 Deploy static website on serverless infrastructure with zero configuration.
✈️ Fastest content load time ~10ms
🔀 Surpport Client Side Routing#serverless #react #vue https://t.co/G7aIBNYqld
Web サイトをデプロイする
website-optimized-cloudfront コンポーネントを使用して Web サイトをデプロイしてみましょう。
※ Serverless Framework および AWS を利用します。Serverless Component の基本的な使用方法についてはこちらの記事を参照してください。
クイックスタート
簡単に始められるようにテンプレートを用意しています。
まずは、以下のように TypeScript 製の React アプリケーションをローカルに準備しましょう。
$ serverless create --template-url https://github.com/daisuke-awaji/website-optimized-cloudfront/tree/main/templates/react-starter-typescript
$ cd react-starter-typescript
yarn コマンドを使用して、依存モジュールをインストールします。
$ yarn
あとはデプロイするだけです。シンプルですね!
$ serverless deploy
Serverless ダッシュボード
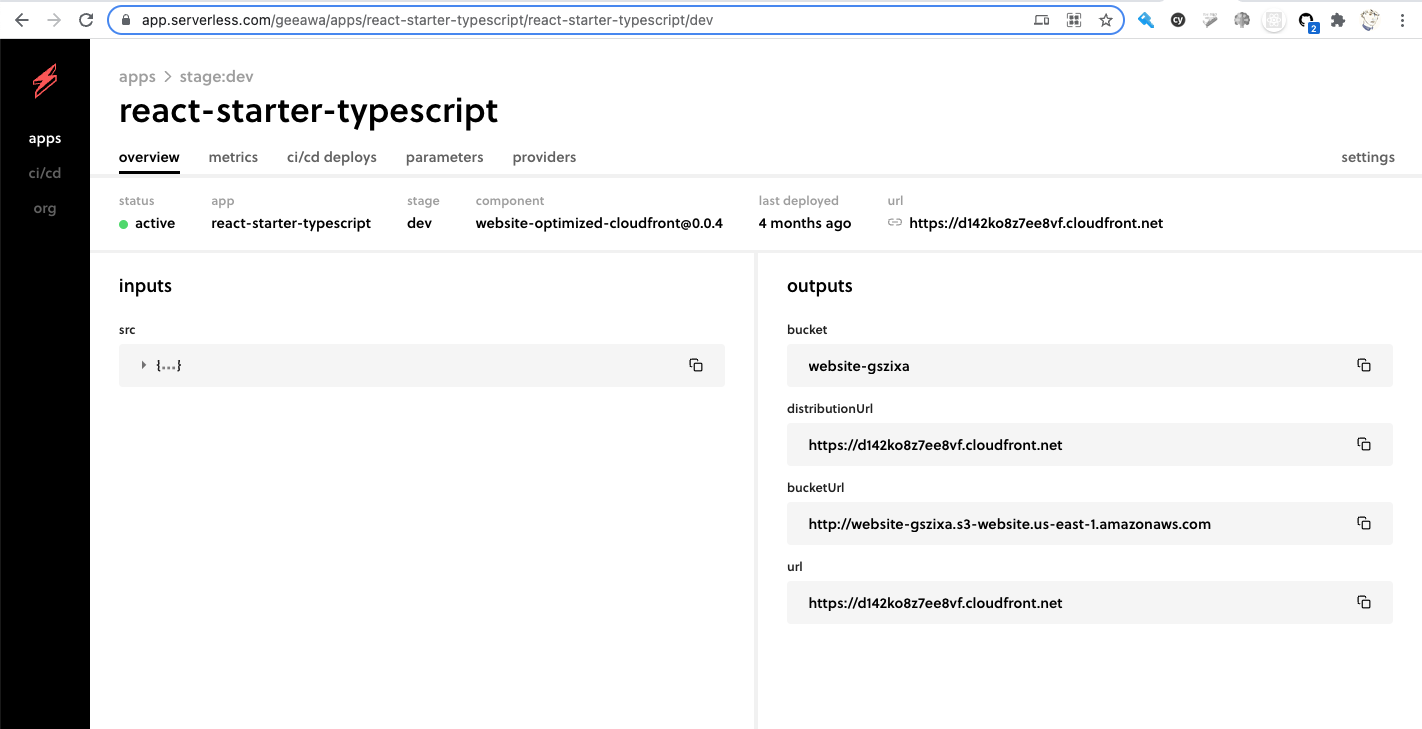
Serverless ダッシュボードを確認してみましょう。
以下の様に distributionUrl が示す URL に Web サイトがデプロイされています。
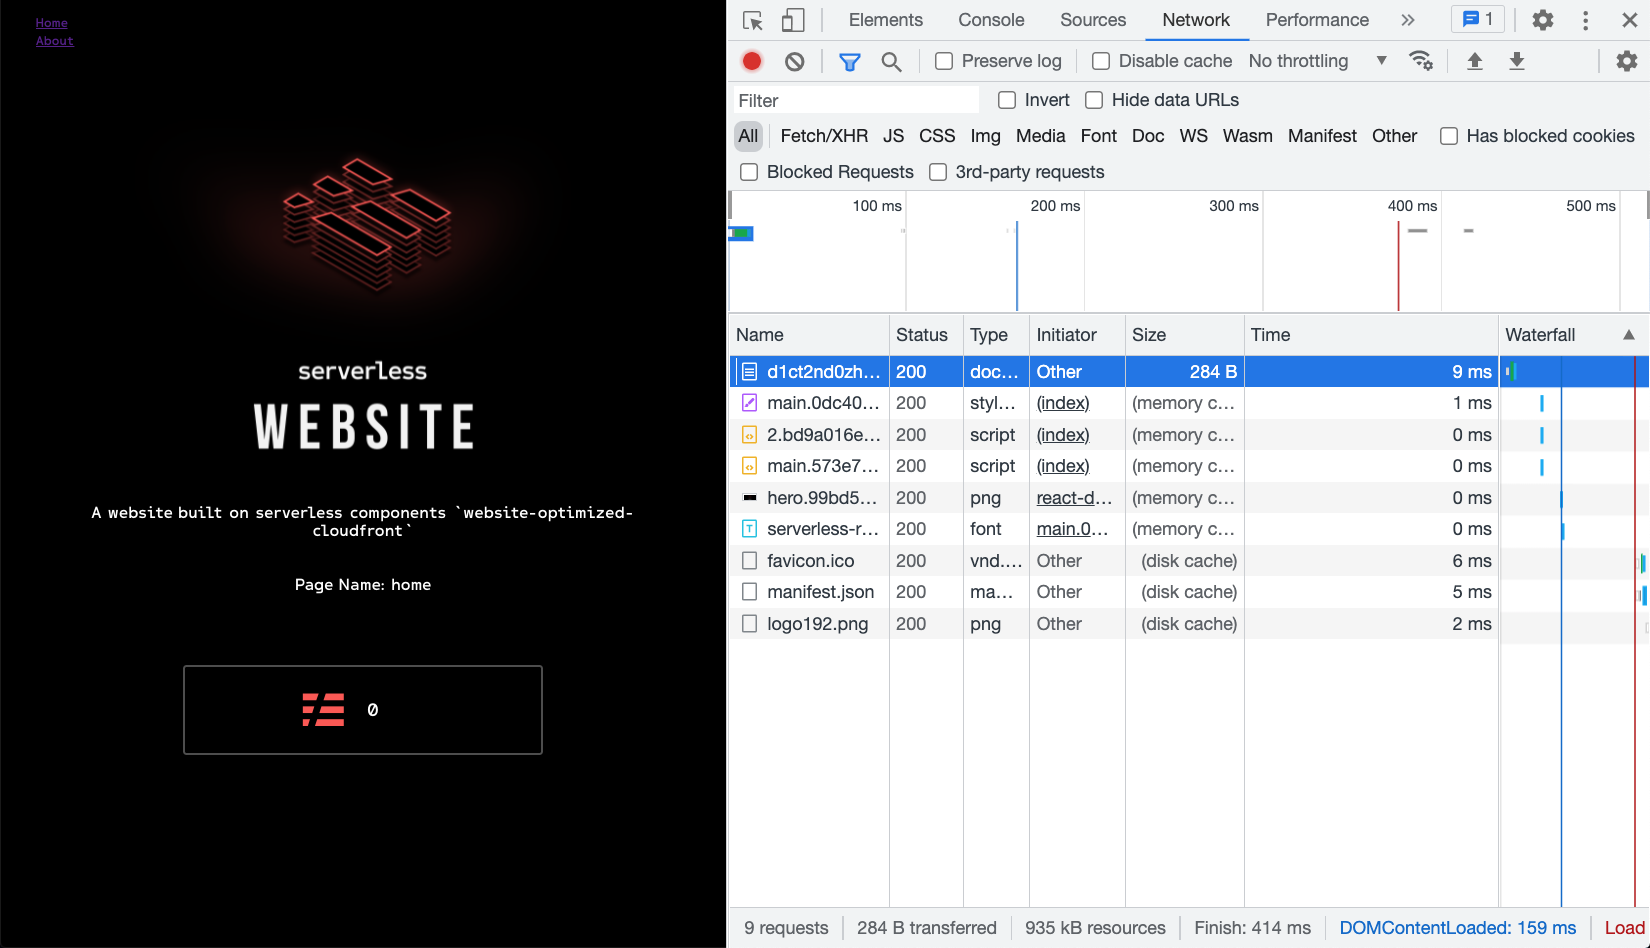
画面を開くとこのような Web サイトがデプロイされていることがわかります。
開発者コンソールのネットワークタブを確認してみてください。コンテンツがキャッシュ最適化されており、高速にWebページが表示できることが確認できます。
なお、サンプル Web サイトはこちら に公開しています。
後片付け
remove コマンドでリソースを削除しましょう。
$ serverless remove
自分のWebサイトをデプロイする
サンプルアプリケーションではなく、自分の Web サイトをデプロイする場合、serverless.yml に以下のように記入します。
component: website-optimized-cloudfront # (required) name of the component. In that case, it's website.
name: my-website # (required) name of your website component instance.
org: serverlessinc # (optional) serverless dashboard org. default is the first org you created during signup.
app: my-app # (optional) serverless dashboard app. default is the same as the name property.
stage: dev # (optional) serverless dashboard stage. default is dev.

inputs:
  src: ./src # (optional) path to the source folder. default is a hello world html file.
  domain: serverless.com # (optional) domain name. this could also be a subdomain.
  region: us-east-2 # (optional) aws region to deploy to. default is us-east-1.
  bucketName: my-bucket # (optional) aws bucket name. default is an auto generated name.
  indexDocument: index.html # (optional) index document for your website. default is index.html.
  errorDocument: index.html # (optional) error document for your website. default is index.html.
特に、デプロイの前にビルドする必要のある場合、ビルドスクリプトを hook に記述し、配信するディレクトリを dist に指定します。 webpack を利用してコンテンツをまとめたり、TypeScript 製のアプリケーションをコンパイルする際に利用できます。
inputs:
  src:
    src: ./src # the input source folder
    hook: npm run build # the hook you want to run
    dist: ./dist # the output dist folder
何が最適化されているのか
このコンポーネントは CloudFront と ブラウザ におけるキャッシュを実現しており、特に SPA 構成のアプリケーションに最適化されています。
サーバサイドキャッシュ(CloudFront)
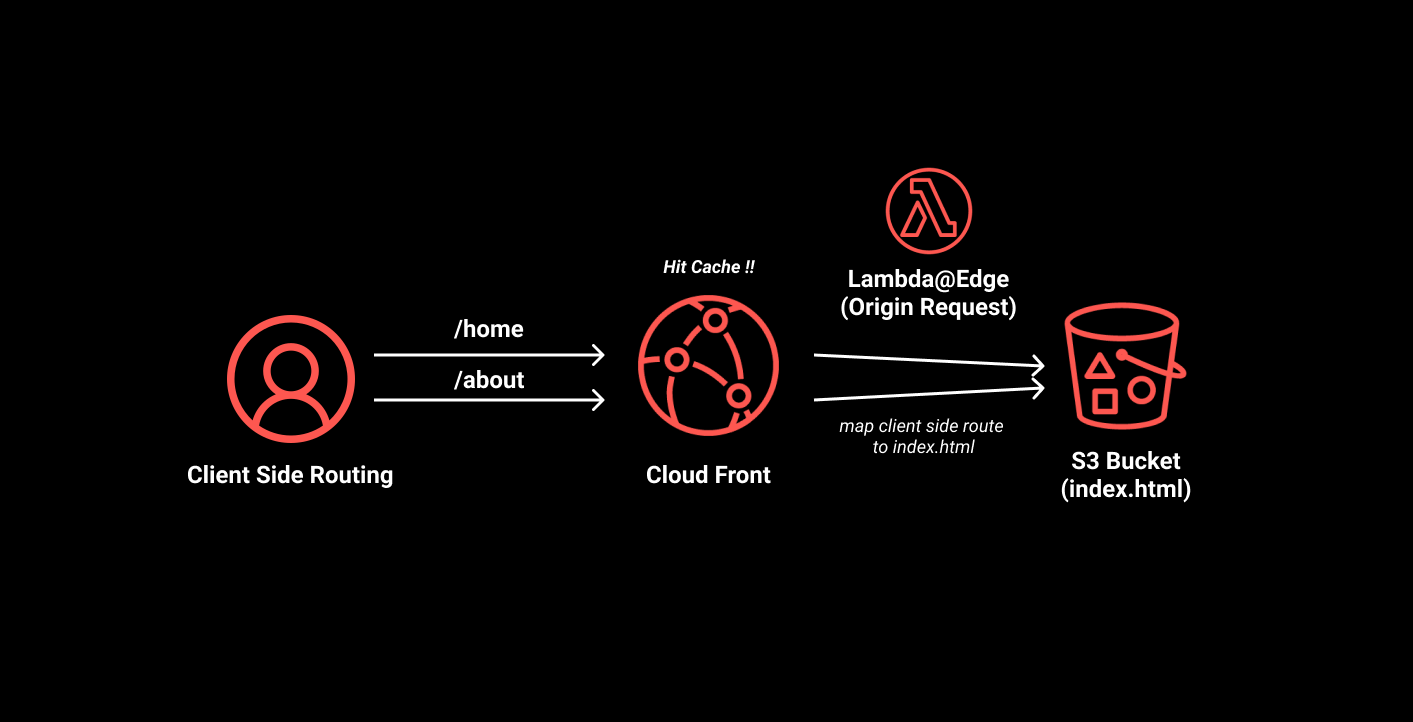
シンプルな SPA アプリケーションを CloudFront と S3 で配信する場合、S3 に index.html を配置して CloudFront にキャッシュします。しかしながら、react-router や vue-router をはじめとしたクライアントサイドルーティングを実装している場合、CloudFront はキャッシュヒットしない場合があります。
たとえば、以下 URL が https:://xxx.cloudfront.net へのリクエストの場合 CloudFront はキャッシュしたコンテンツを返却できますが、 https:://xxx.cloudfront.net/about へのリクエストの場合は CloudFront はキャッシュヒットしないため、S3のオリジンからコンテンツを取得してクライアントに返却します。
多くの Web サイトではいくつかのパスによってページを分ける実装(ルーティング)をしているでしょうから、この問題は致命的です。
そこで、website-optimized-cloudfront コンポーネントでは、リクエストされた情報と S3 のコンテンツを紐づけることで、CloudFront からキャッシュを返すことができるよう配慮しています。この処理は Edge ロケーションで実行されるため、非常に高速です。
ブラウザキャッシュ
CloudFrontにおけるキャッシュは1日間保持され、ブラウザでは html 以外の静的コンテンツをキャッシュします。
これにより、SPAアプリケーションを表示するためには軽量な最小限の index.html だけを CloudFront から取得すれば良いだけになります。もちろん、細かいチューニングは必要かもしれませんが、ほとんどの SPA 構成の Web サイトにおいてこの設定で十分でしょう。
| File | Browser | CloudFront |
|---|---|---|
| html | no-store | 1 day |
| css, js, json, ico, png etc. | 1 day | 1 day |
まとめ
Serverless Component を使用した Web サイトの構築方法について紹介しました。
website-optimized-cloudfront コンポーネントを使用することで、手元の Webサイトアプリケーションを即座にデプロイし、高速配信することができます。
Serverless Component は従来の Infrastructure as Code のアプローチとは異なり、ユースケースに特化したコンポーネントとして インフラを組み立てることができる強みがあります。うまく組み合わせて使用することで、デリバリを高速化できます。今後も Serverless のプロダクトには注目していきたいものですね。