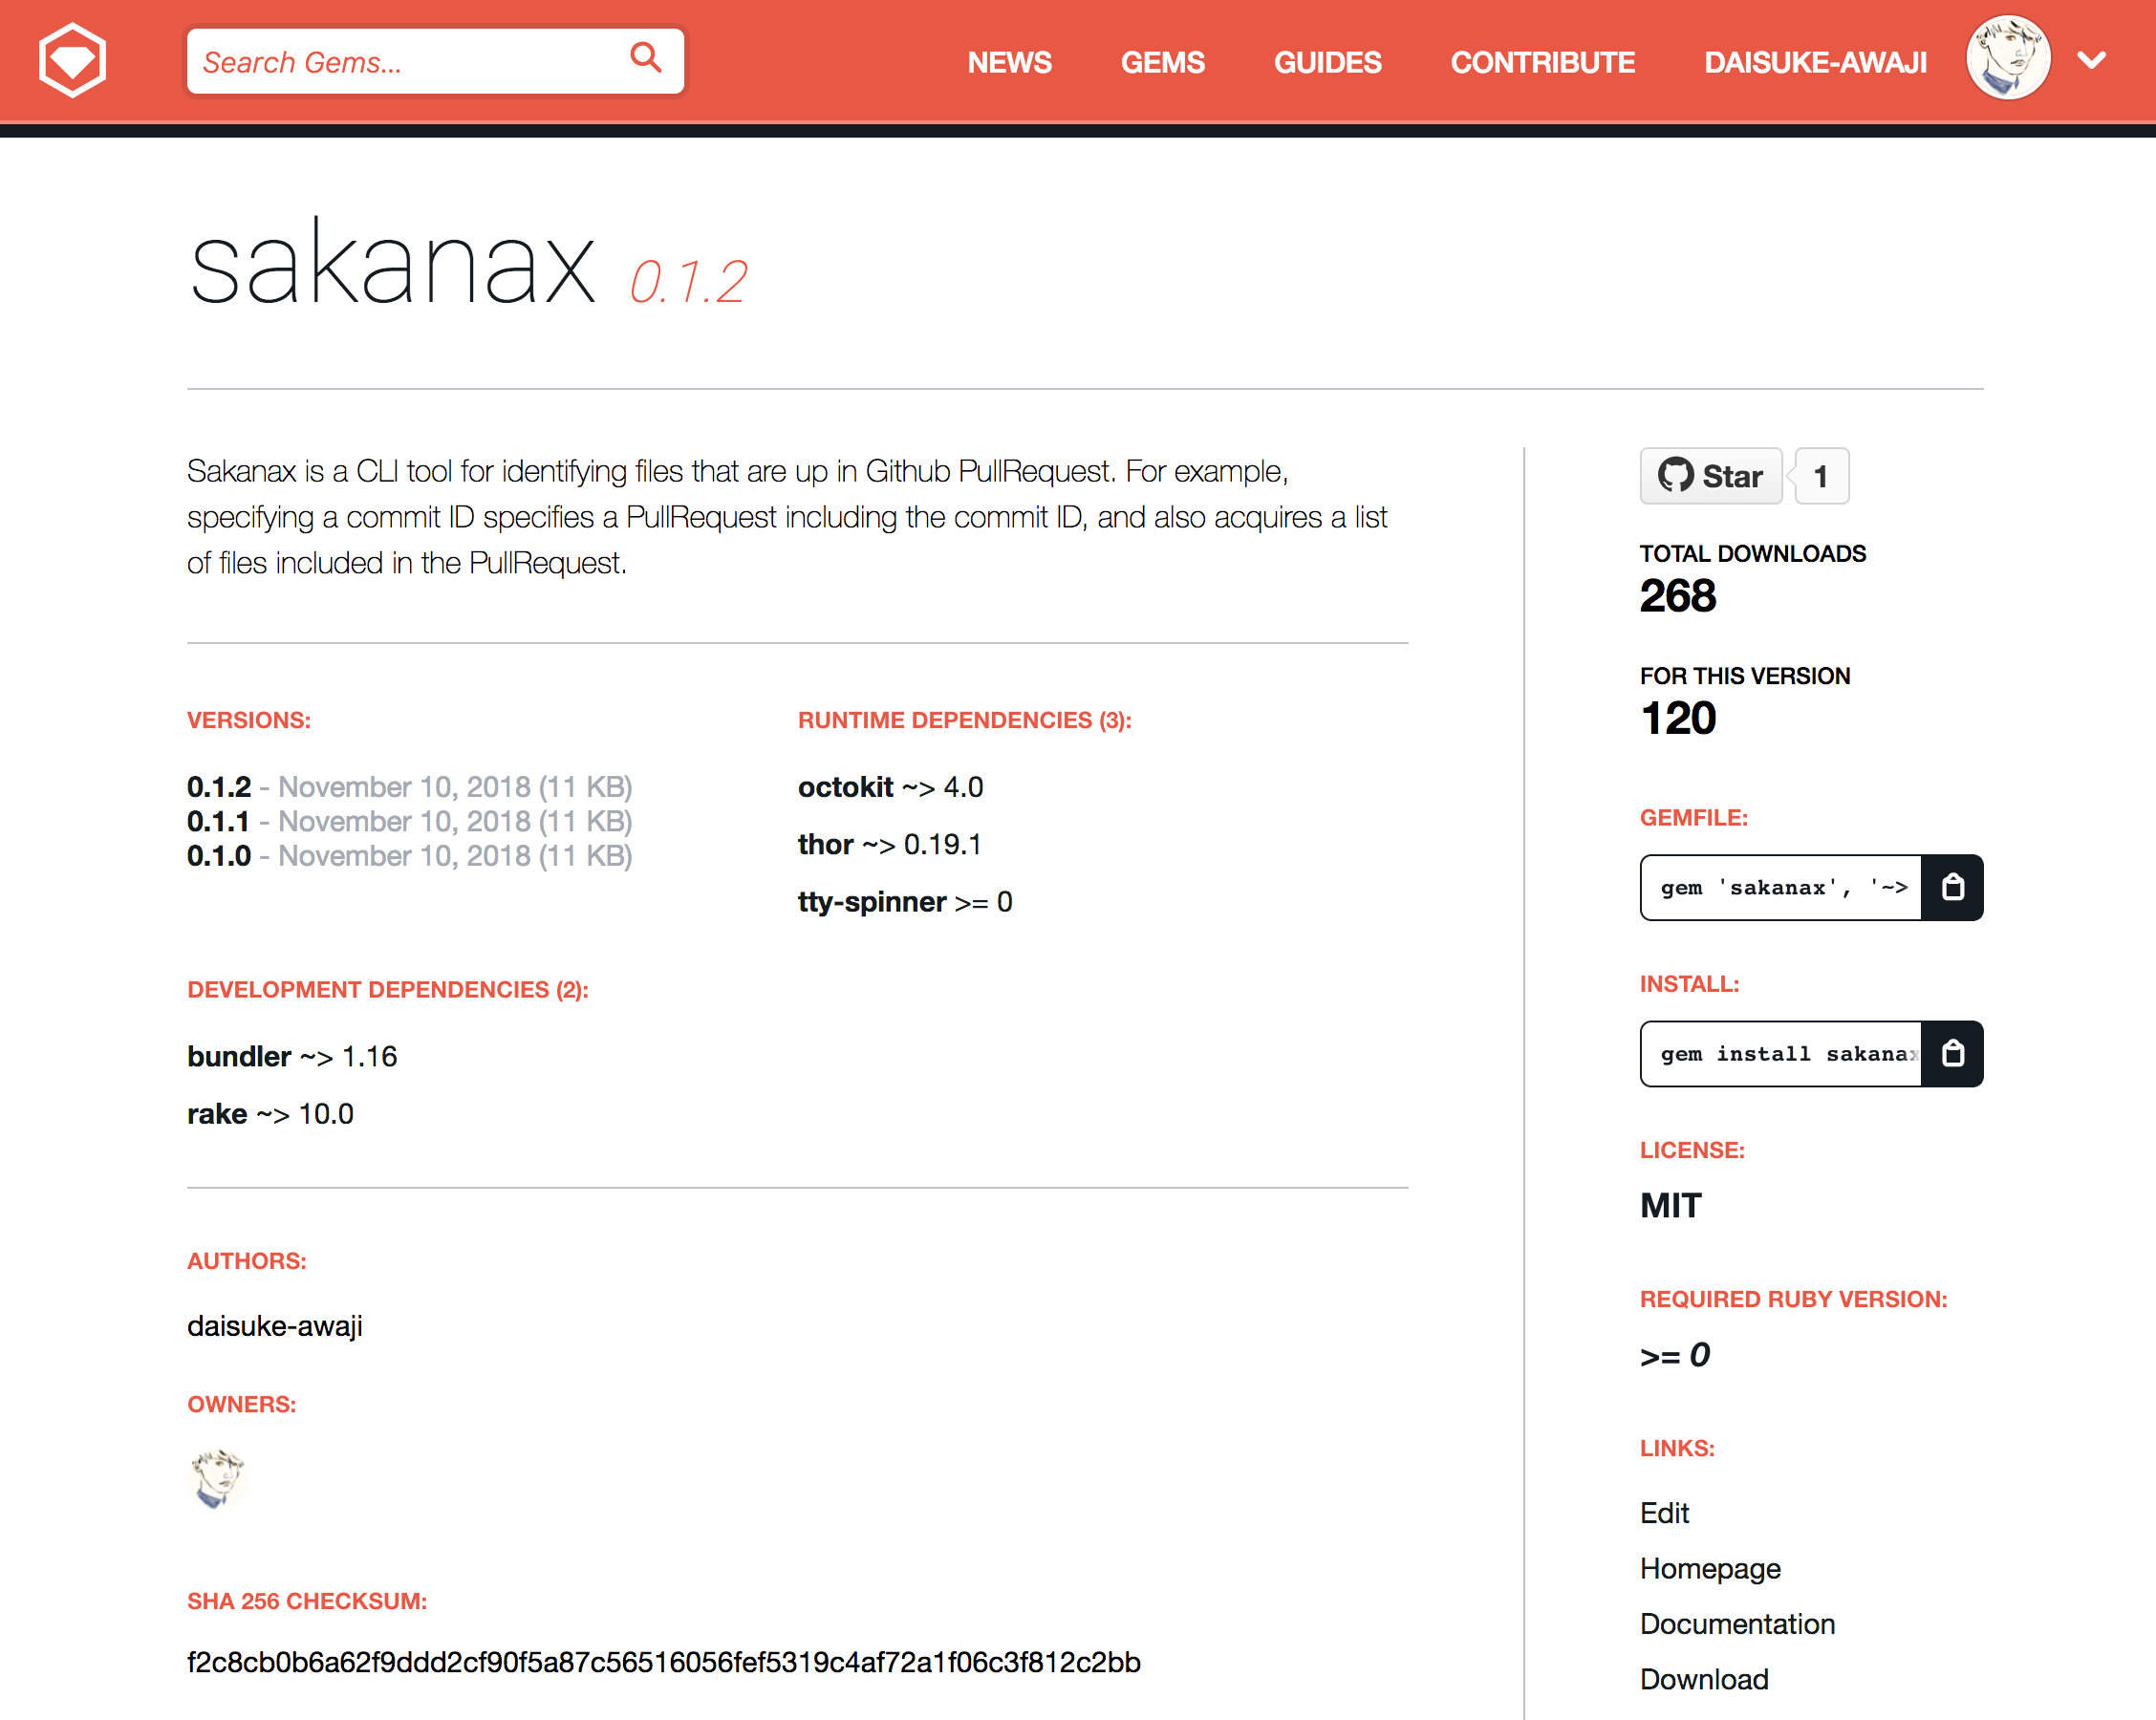
何を作ったのか
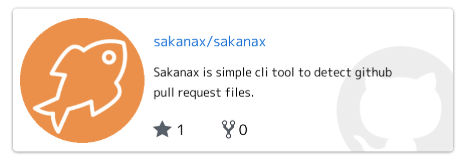
Sakanax: .sakanax.ymlに記述したファイルがPullRequest内に含まれているか判定するCLIツール
以下のように.sakanax.ymlに特定したいファイルを記入しておくと
detect_files:
  - cloudformation.yaml
コミットIDを指定することで検索することができます。
$ sakanax detect_file --sha aed28c5aa60398fda946878978168890b0x0007a
[INFO] detected [["cloudformation.yaml"]]
sakanaxは指定されたコミットIDを含むPullRequestを探し、そのPullRequestに含まれている(差分として表れている)ファイルの中から.sakanax.ymlに含まれているかどうかを判断します。
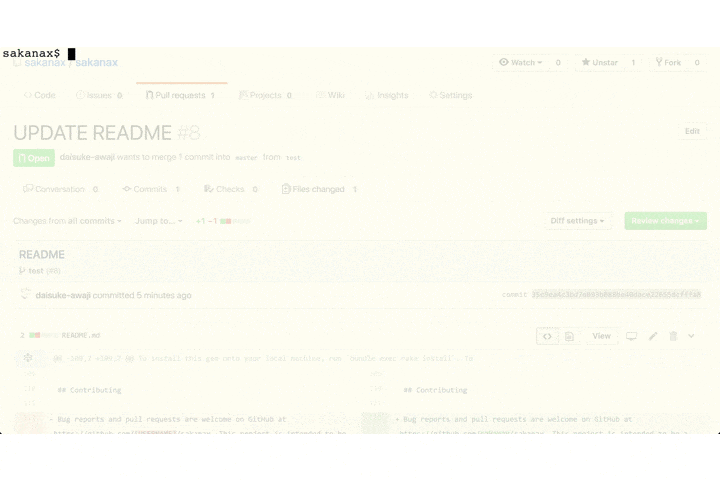
動作イメージ
なぜ作ろうと思ったか
Infrastructure as Codeとクラウドが当たり前になりすぎて、アプリケーションをGithubのリポジトリで管理する際にインフラとリポジトリを分けているからバージョンの差異が生まれてしまい、困ったといったケースはあるあるではないでしょうか?
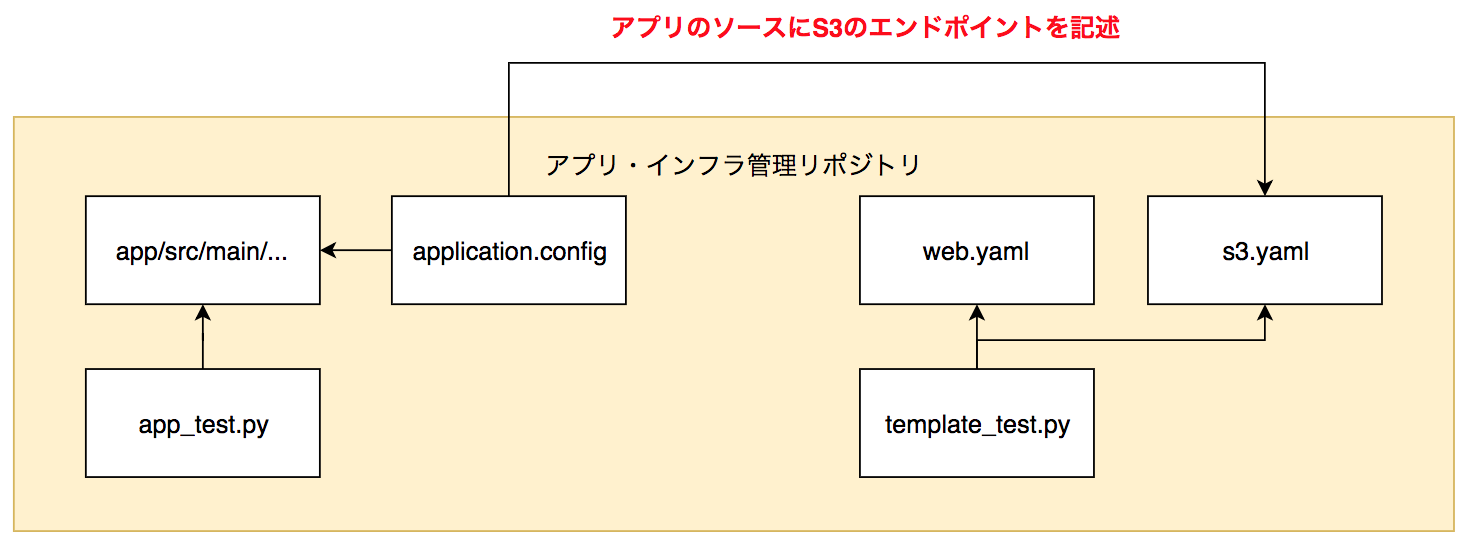
あるサービスを開発していて、そのリポジトリをアプリ管理リポジトリとインフラ管理リポジトリに分けていたとしましょう。
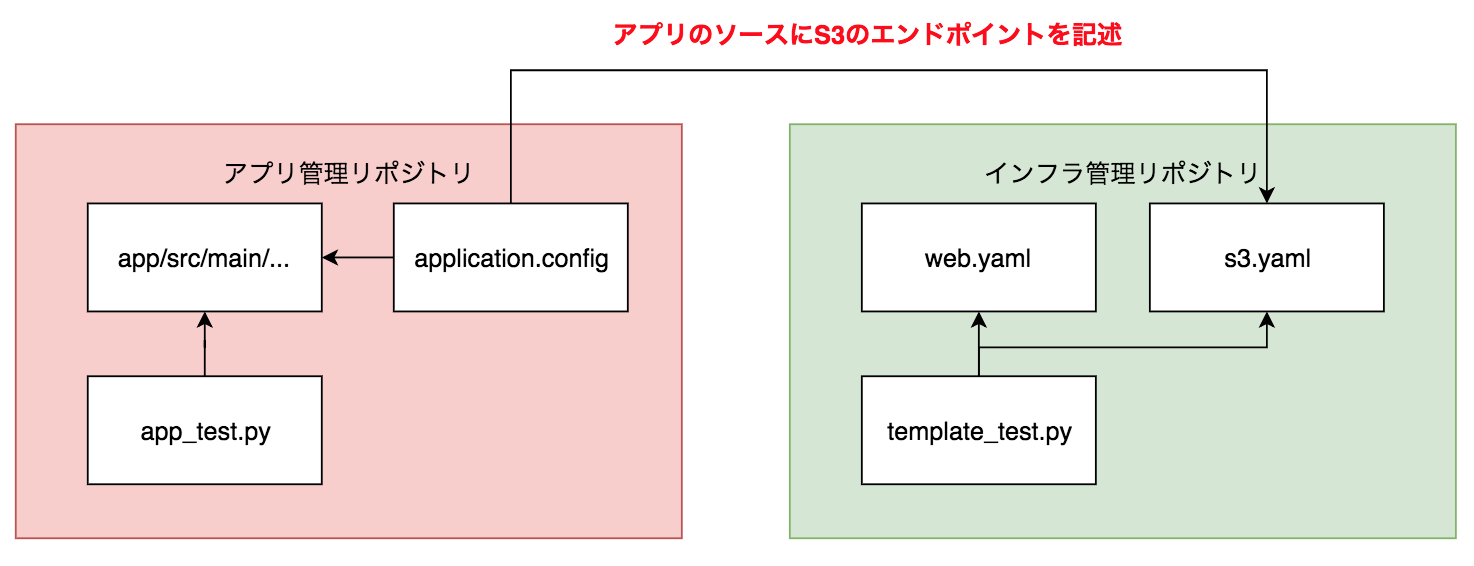
例えばこのサービスにS3にファイルをアップロードする機能があったとすると、アプリの設定ファイルにはS3のパスを指定しなければいけないことになります。もし仮にインフラのリポジトリでS3のパスを変更したとするとアプリに影響が及ぶためにリポジトリ間の依存を考慮してサービスを開発しなければなりません。
S3だけならまだしもクラウドサービスを使用しているとアプリとインフラをどちらも意識して開発しなければいけないシチュエーションばかりです。
そこで、リポジトリは1つにしてしまおうという方針を考えます。
するとどうでしょうか?これで全て解決でしょうか?
実はこのリポジトリ構成の場合、CIに影響が及びます。
コミット毎にビルド・テストを行うと思いますが、アプリのソースコードしか変更していないのにも関わらずインフラのテストも走ってしまう。あるいはインフラのコードを1行変えただけなのにアプリのテストも行われてしまうなんてことが起こります。
これではテストが非常に非効率ですよね。
それを回避しようとSakanaxを作成しました。
.infra.yml内に特定のテストを行いたいファイル(インフラ系のソースなど)を記入しておき、
detect_files:
  - web.yaml
  - s3.yaml
sakanaxコマンドで引数として指定します。detect_filesでファイルが検出されたらテストを行いましょう。
# !/bin/bash

RESULT=$(sakanax detect_files --sha <COMMIT ID> --config .infra.yml)

if [ "${RESULT}" == false ]; then
  echo "[INFO] Could not find the file contained in .infra.yml."
else
  echo "[INFO] Test the detected file"
  # インフラ系のテストを行う
fi
これでこの問題は解消できそうです。
何を使って開発したか?
今回Sakanaxを開発するにあたって使用したツール群(Gem)
| ツール名 | 説明 |
|---|---|
| Thor | RubyでCLIツールを簡単に作れるように してくれるツール |
| octokit | Github SDK for Ruby |
| tty-spinner | CLIツールでスピナーを使用できる |
Gemを開発してrubygems.orgにリリースするまで
Gemを作ってリリースするところまで簡単にご紹介です。
Gemプロジェクトの作成
$ bundle gem sakanax
以下のファイルがbundle gemで生成されます。
$ tree sakanax
sakanax
├── CODE_OF_CONDUCT.md
├── Gemfile
├── LICENSE.txt
├── README.md
├── Rakefile
├── bin
│   ├── console
│   └── setup
├── lib
│   ├── sakanax
│   │   └── version.rb
│   └── sakanax.rb
└── sakanax.gemspec
.gemspecの作成
bundle gemコマンドでGemプロジェクトを作成するとsakanax.gemspecのようなファイルができますので記入していきましょう。
lib = File.expand_path('lib', __dir__)
$LOAD_PATH.unshift(lib) unless $LOAD_PATH.include?(lib)
require 'sakanax/version'

Gem::Specification.new do |spec|
  spec.name          = 'sakanax' <-- Gem の名前
  spec.version       = Sakanax::VERSION <-- lib/sakanax/version.rb に記載
  spec.authors       = ['daisuke-awaji']
  spec.email         = ['gee.awa@gmail.com']

  ↓ 説明文とか(rubygems.orgに表示されます)
  spec.summary       = 'Sakanax is simple cli tool to detect github pull request files.'
  spec.description   = 'Sakanax is a CLI tool for identifying files that are up in Github PullRequest. For example, specifying a commit ID specifies a PullRequest including the commit ID, and also acquires a list of files included in the PullRequest.'
  spec.homepage      = 'https://github.com/sakanax/sakanax'
  spec.license       = 'MIT'

  ↓ この辺はコメントアウト
  # Prevent pushing this gem to RubyGems.org. To allow pushes either set the 'allowed_push_host'
  # to allow pushing to a single host or delete this section to allow pushing to any host.
  # if spec.respond_to?(:metadata)
  #   spec.metadata['allowed_push_host'] = "Set to 'http://mygemserver.com'"
  # else
  #   raise 'RubyGems 2.0 or newer is required to protect against ' \
  #     'public gem pushes.'
  # end

  # Specify which files should be added to the gem when it is released.
  # The `git ls-files -z` loads the files in the RubyGem that have been added into git.
  spec.files = Dir.chdir(File.expand_path(__dir__)) do
    `git ls-files -z`.split("\x0").reject { |f| f.match(%r{^(test|spec|features)/}) }
  end
  spec.bindir        = 'exe'
  spec.executables   = spec.files.grep(%r{^exe/}) { |f| File.basename(f) }
  spec.require_paths = ['lib']

  ↓ 開発するために必要なgemを記載
  spec.add_development_dependency 'bundler', '~> 1.16'
  spec.add_development_dependency 'rake', '~> 10.0'
  ↓ 開発しているGemが実行されるために必要なGemを記載
  spec.add_runtime_dependency 'octokit', '~> 4.0'
  spec.add_runtime_dependency 'thor', '~> 0.19.1'
  spec.add_runtime_dependency 'tty-spinner'
end
実際のプロダクトコードを開発
exe/sakanaxが最初に実行されます。ここからスタートです。
今回はCLIツールを作成するのでCLIクラスを実行させます。
# !/usr/bin/env ruby

require "sakanax"

Sakanax::CLI.start
本体はlib/配下に記載していきます。
Thorの実装方法はこちらの公式ドキュメントが非常に参考になります。
require 'sakanax'
require 'thor'
require 'octokit'
require 'tty-spinner'
require_relative 'github'

module Sakanax
  # CLI Class
  class CLI < Thor
    class_option :help, type: :boolean, aliases: '-h', desc: 'help message.'
    class_option 'config', type: :string, required: false

    def initialize(*args)
      super
      config = File.join(Dir.pwd, '.sakanax.yml') if config.nil?
      @github = Github.new(config)
      @sha = options['sha']
      spinner = TTY::Spinner.new(':spinner ', format: :dots_2)
      spinner.auto_spin
    end

    desc 'version', 'version'
    def version
      puts "sakanax #{Sakanax::VERSION}"
    end

    ...
rubygems.orgのアカウントの作成
プロジェクトが完成したら https://rubygems.org/sign_up でアカウントを作成します。
.gem/credentialsにAPIキーをセット
rubygems.orgからAPIキーを取得します。
https://rubygems.org/profile/edit の画面からAPIキーを取得して以下のように.gem/credentialsにセットします。
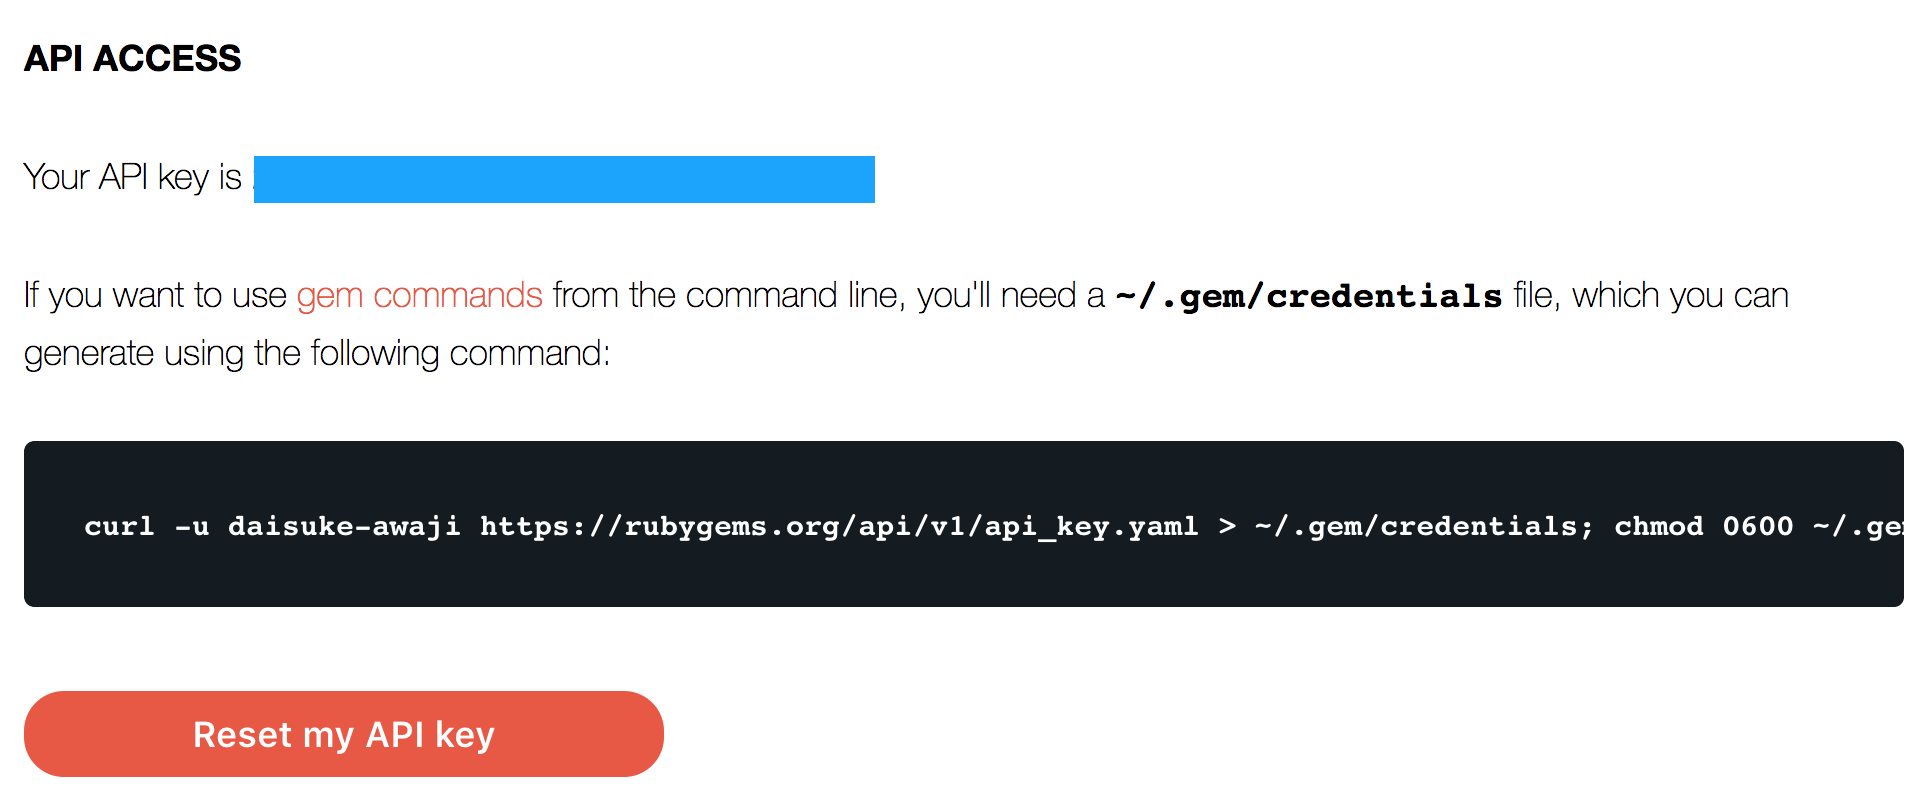
---
:rubygems_api_key: <APIキー>
rubygems.orgにGemをリリース
最後にリリースを行いましょう。継続的デリバリーを考えるならCIサービス(TravisやCircle)などを使用して
「Githubのmasterブランチにマージされたら以下のコマンドを実行する。」などのような運用をすればいいです。
$ bundle exec rake release
最終的に以下のようにリリースされればOKです。