はじめに
Azure Functions ( 実行環境 : Node , 使用言語 : TypeScript ) から、
Mongo DB ( Azure Cosmos DB ) を操作する方法について調査したのでまとめておきます。
検証環境
- 開発用PC ( OS : Windows 10 Pro )
- Node.js
v16.13.2- mongoose
6.1.9 - typescript
3.9.10 - @azure/functions
1.2.3
- mongoose
- Azure Functions Core Tools
v4.0.3971 - Postman ( テスト用 )
- cURL でも対応
- Visual Studio Code
手順
1. ローカル関数プロジェクトを作成する
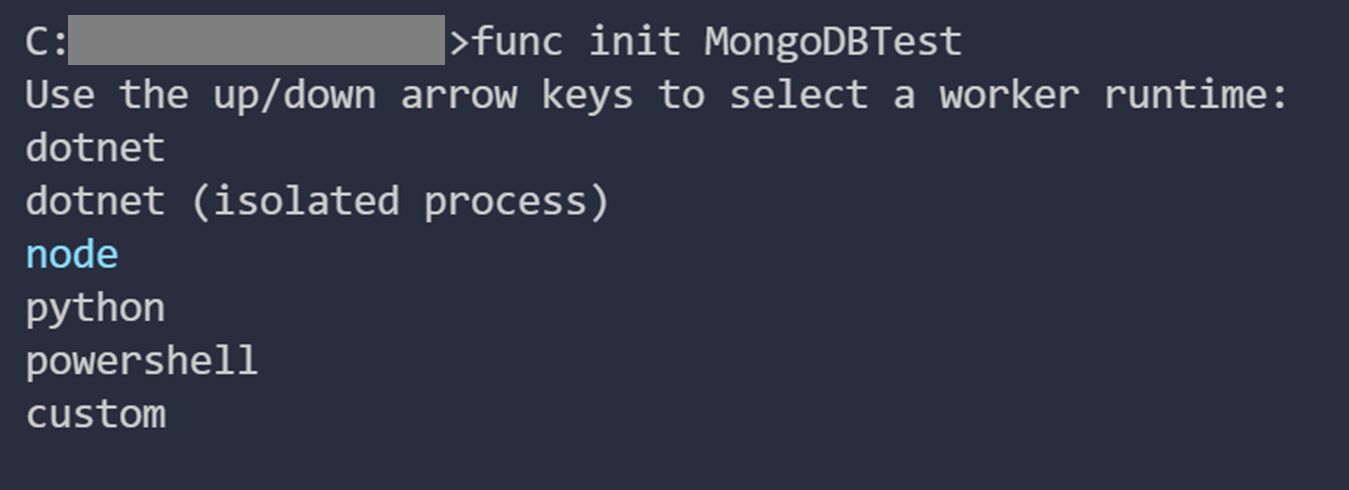
Azure Functions Core Tools を使用して、ローカルプロジェクトを生成する。
> func init MongoDBTest
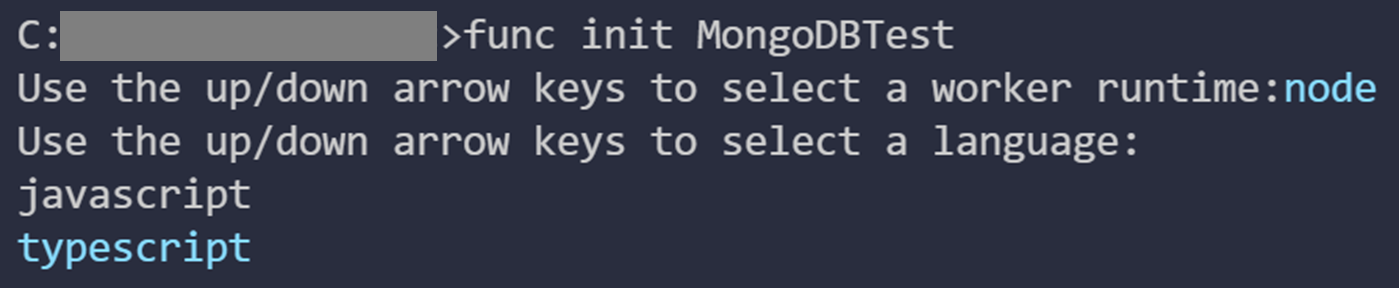
Use the up/down arrow keys to select a worker runtime: node
ランタイムは node を選択します。
Use the up/down arrow keys to select a language: typescript
使用言語は TypeScript を選択します。
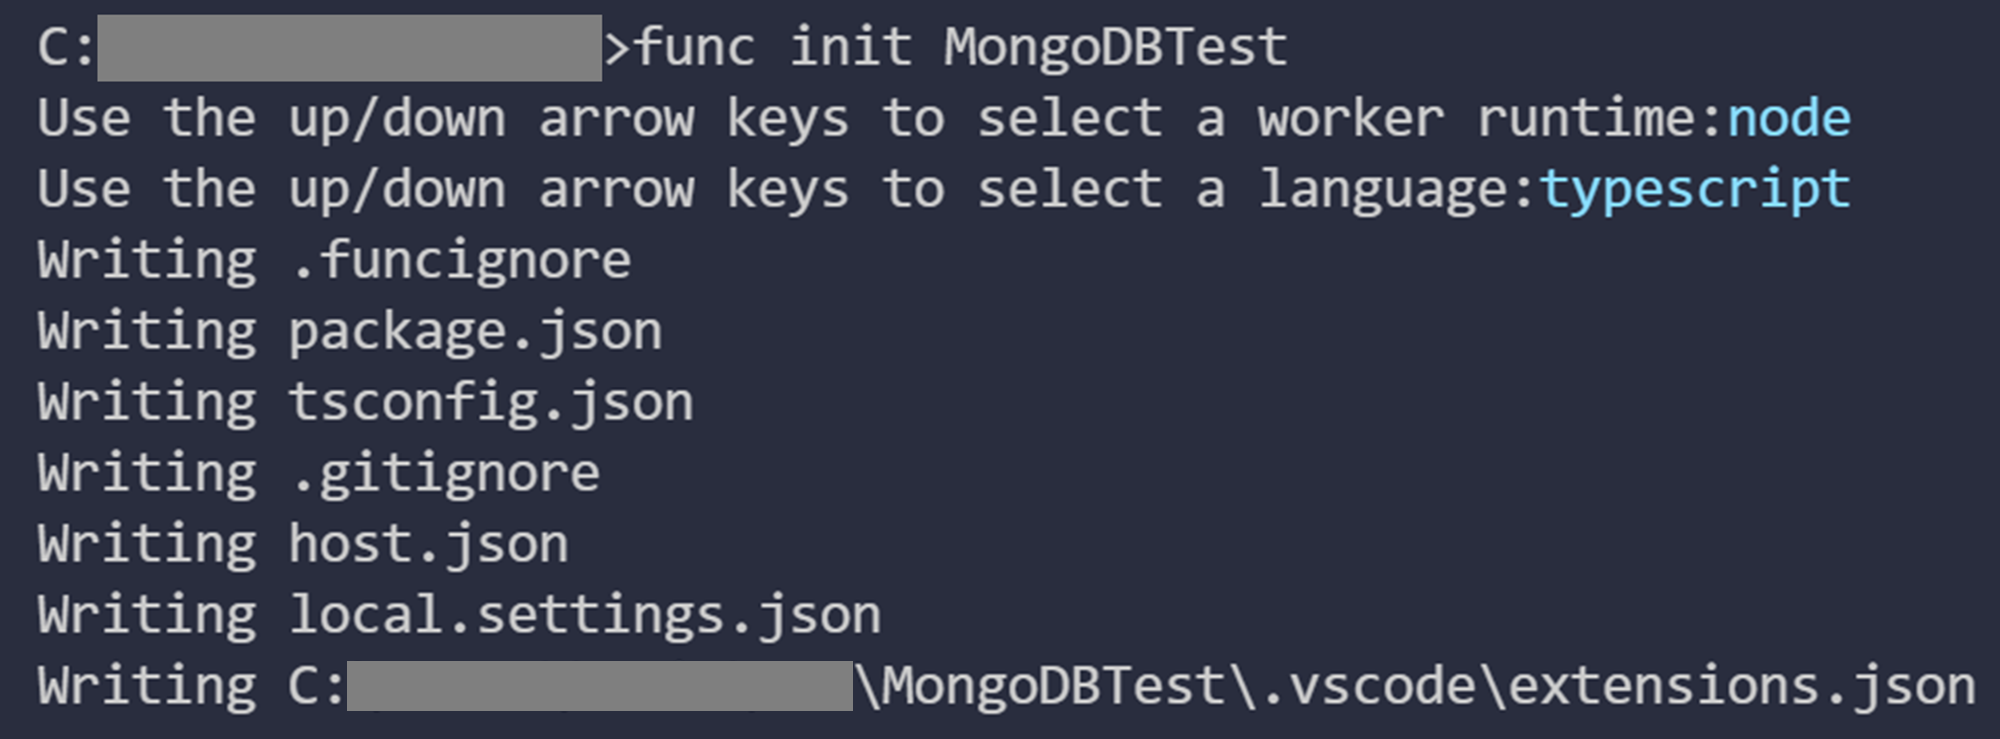
ランタイム (実行環境) と 使用言語 の選択が終了すると、
必要なファイルがローカル関数PJディレクトリ配下に生成されます。
2. ローカル関数を作成する
新規作成したプロジェクトのルートディレクトリへ移動して、
ローカル関数を作成するコマンドを実行します。
> cd ./MongoDBTest
> func new --template "Http Trigger" --name User
上記サンプルの場合、ルートディレクトリ配下に User ディレクトリが作成されます。
ローカル関数の functions.json, index.tx はこの User ディレクトリ配下に保存されます。
ローカル関数の作成手順はこれで終了です。
ルートディレクトリに戻り、以下コマンドを実行すると
ローカル関数を起動することができます。
> cd ..
> npm install
> npm start
3. Azure Cosmos DB を作成する
データを保存するための Azure Cosmos DB を作成します。
( Mongo DB on Azure Cosmos DB 作成方法は、公式ドキュメントをご覧ください。)
Cosmos DB のデプロイが完了したら、ナビゲーションメニューより
[設定] > [接続文字列] を選択します。
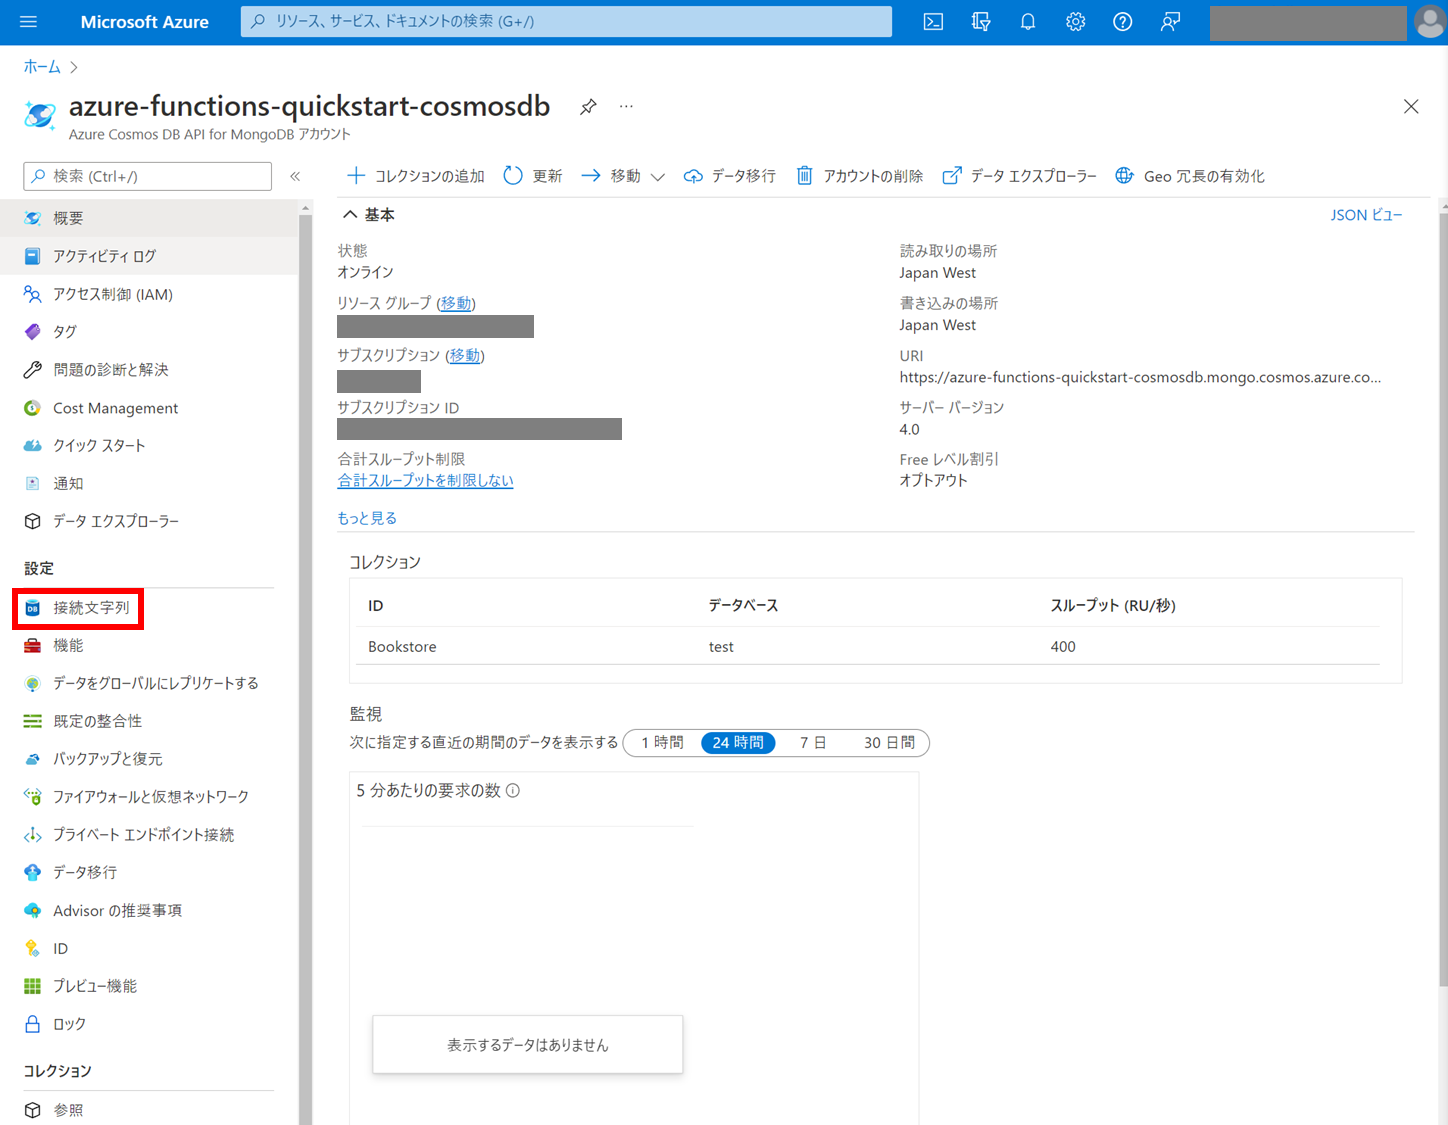
接続文字列が表示されるので、プライマリ接続文字列 をコピーします。
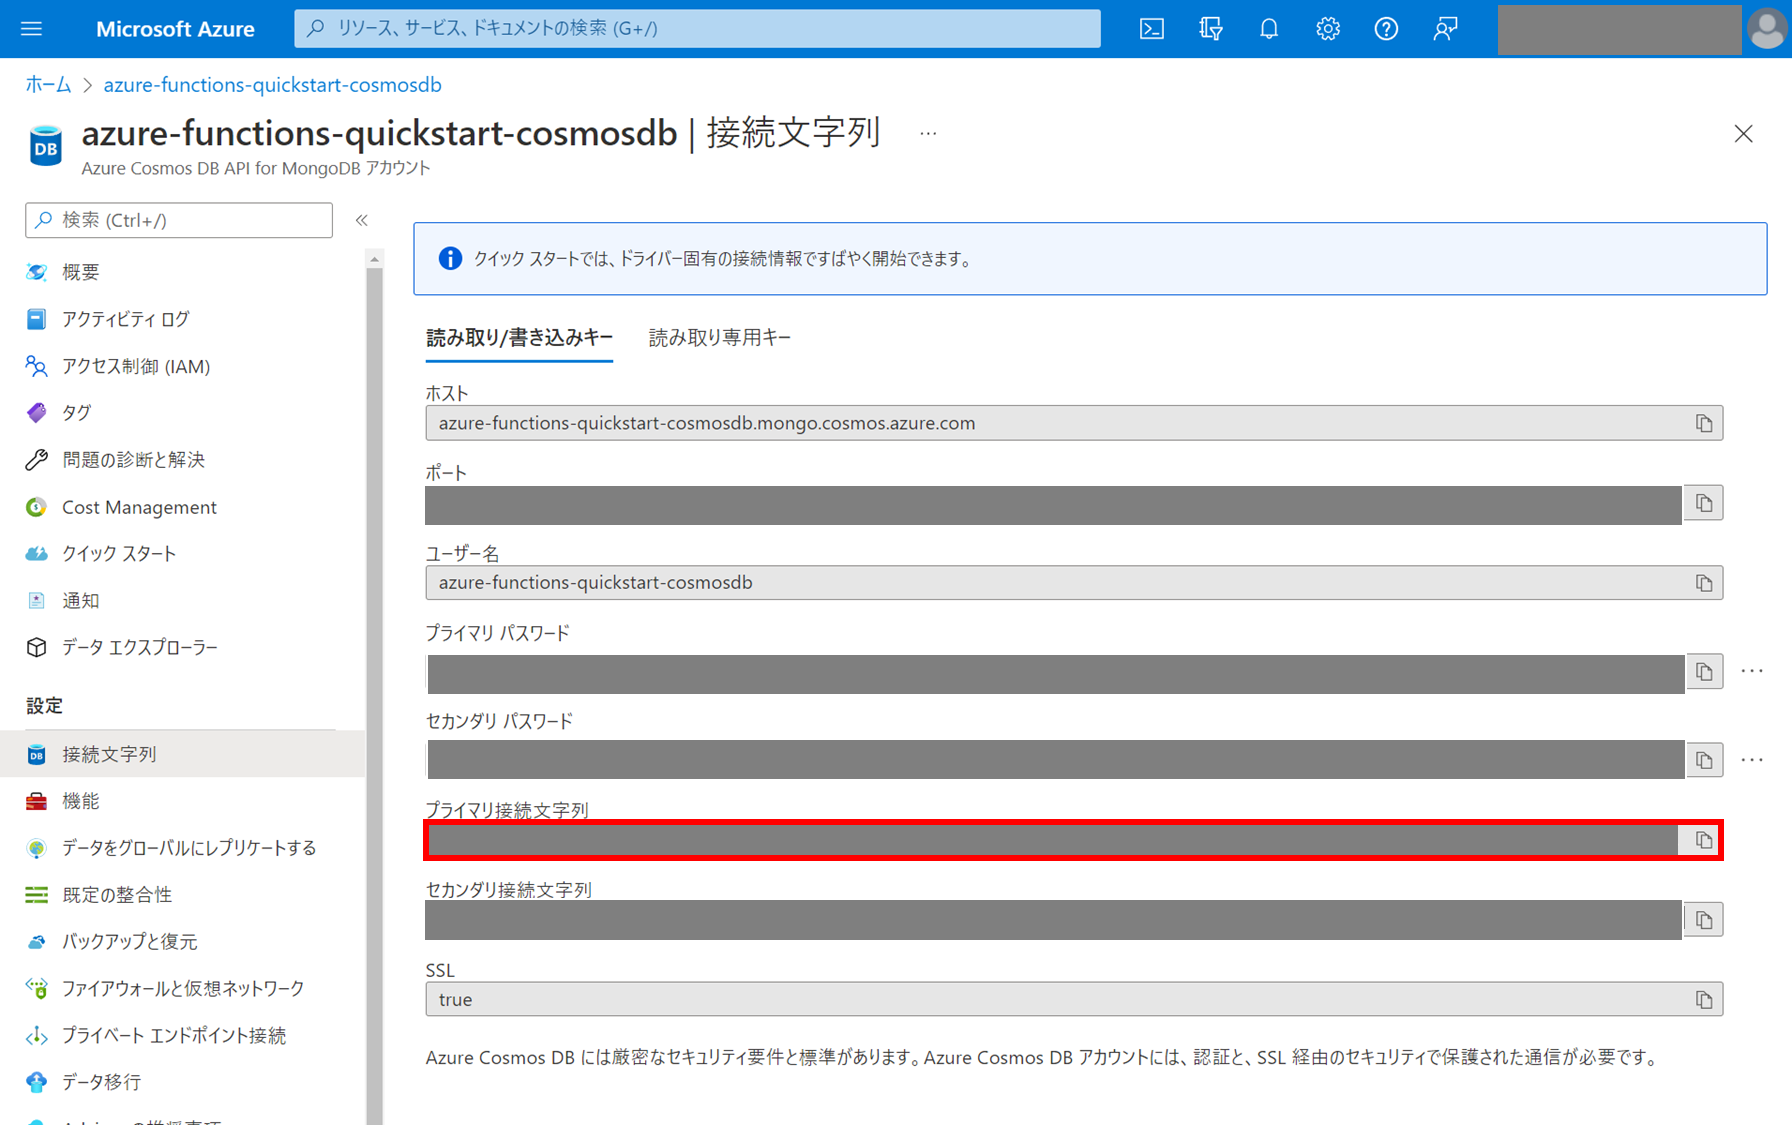
※ プライマリ接続文字列は、Node アプリケーションから
Cosmos DB ( Mongo DB ) へ接続する際に使用します。
4. ローカル関数から Cosmos DB にデータを保存する
ローカル関数から Mongo DB ( Cosmos DB ) へ接続するために、
mongoose をインストールします。
> npm install mongoose --save
ルートディレクトリの local.settings.json を開き、
Value オブジェクトに CosmosDBConnectionString を追加します。
{
  "Values": {
    "FUNCTIONS_WOKER_RUNTIME": "node",
    "CosmosDBConnectionString": "<--- Azure Cosmos DB 接続文字列 --->"
  }
}
- local.settings.json は ローカル関数を実行する際に読み込まれる設定になります。
Azure 上へデプロイする際には含めることができないので、Key Vault 等を使用して
接続文字列等の機密性の高い情報を取り扱うようにしてください。 - Azure Functions をローカルでコーディングしてテストする
Mongo DB 接続用の TypeScript ファイルを lib フォルダ配下に追加します。
( ※ lib フォルダが存在しない場合は、新規作成します。)
import { Schema, model, connect } from "mongoose";

let db = null;

const UserSchema = new Schema(
  { name: String },
  { timestamps: true }
);
const UserModel = model("User", UserSchema, "Users");

export const init = async () => {
  if(!db) {
    db = await connect(process.env["CosmosDbConnectionString"]);
  }
};
export const addItem = async (doc) => {
  const modelToInsert = new UserModel();
  modelToInsert["name"] = doc.name;

  return await modelToInsert.save();
};
export const findItemById = async (id) => {
  return await UserModel.findById(id);
};
export const findItems = async (query = {}) => {
  return await UserModel.find({});
};
export const deleteItemById = async (id) => {
  return await UserModel.findByIdAndDelete(id);
};
azure-cosmosdb-mongodb.ts で export した関数をインポートして、
ローカル関数から Mongo DB ( Cosmos DB ) への接続、データのストアを行います。
import { AzureFunction, Context, HttpRequest } from "@azure/functions";
import * as db from "../lib/azure-cosmosdb-mongodb";

const User: AzureFunction = async function (
  context: Context,
  req: HttpRequest
): Promise<void> {
  try {
    let response = null;

    // Mongo DB ( Cosmos DB ) への接続
    await db.init();

    // Request メソッドに応じて処理を振り分け
    switch (req.method) {
      case "GET":
        if (req?.query.id || (req?.body && req?.body?.id)) {
          response = {
            documentResponse: await db.findItemById(req?.body?.id),
          };
        } else {
          // リクエストパラメーターが存在しない場合は、コレクション一覧を取得する
          const dbQuery =
            req?.query?.dbQuery || (req?.body && req?.body?.dbQuery);
          response = {
            documentResponse: await db.findItems(dbQuery),
          };
        }
        break;
      case "POST":
        if (req?.body?.document) {
          const insertOneResponse = await db.addItem(req?.body?.document);
          response = {
            documentResponse: insertOneResponse,
          };
        } else {
          throw Error("No document found");
        }

        break;
      case "DELETE":
        if (req?.query?.id || (req?.body && req?.body?.id)) {
          response = {
            documentResponse: await db.deleteItemById(req?.body?.id),
          };
        } else {
          throw Error("No id found");
        }

        break;
      default:
        throw Error(`${req.method} not allowed`)
    }

    context.res = {
      body: response,
    };
  } catch (err) {
    context.log(`*** Error throw: ${JSON.stringify(err)}`);

    context.res = {
      status: 500,
      body: err,
    };
  }
};

export default User;
functions.json を開き、bindings オブジェクトの
methods 配列に "delete" を追加します。
{
  "bindings": [
    {
      "authLevel": "function",
      "type": "httpTrigger",
      "direction": "in",
      "name": "req",
      "methods": [
        "get",
        "post",
        "delete"
      ]
    },
    {
      "type": "http",
      "direction": "out",
      "name": "res"
    }
  ],
  "scriptFile": "../dist/User/index.js"
}
以上で、ローカル関数 ( Azure Functions ) から Mongo DB へ接続、
データを保存することが可能になります。
5. 実際にローカル関数を動かしてみる
ローカル関数 ( Azure Functions ) をローカルで起動します。
> npm start
起動後、以下出力があるので、URL をコピーします。
Functions:
  User: [GET, POST, DELETE] http://localhost:7071/api/User
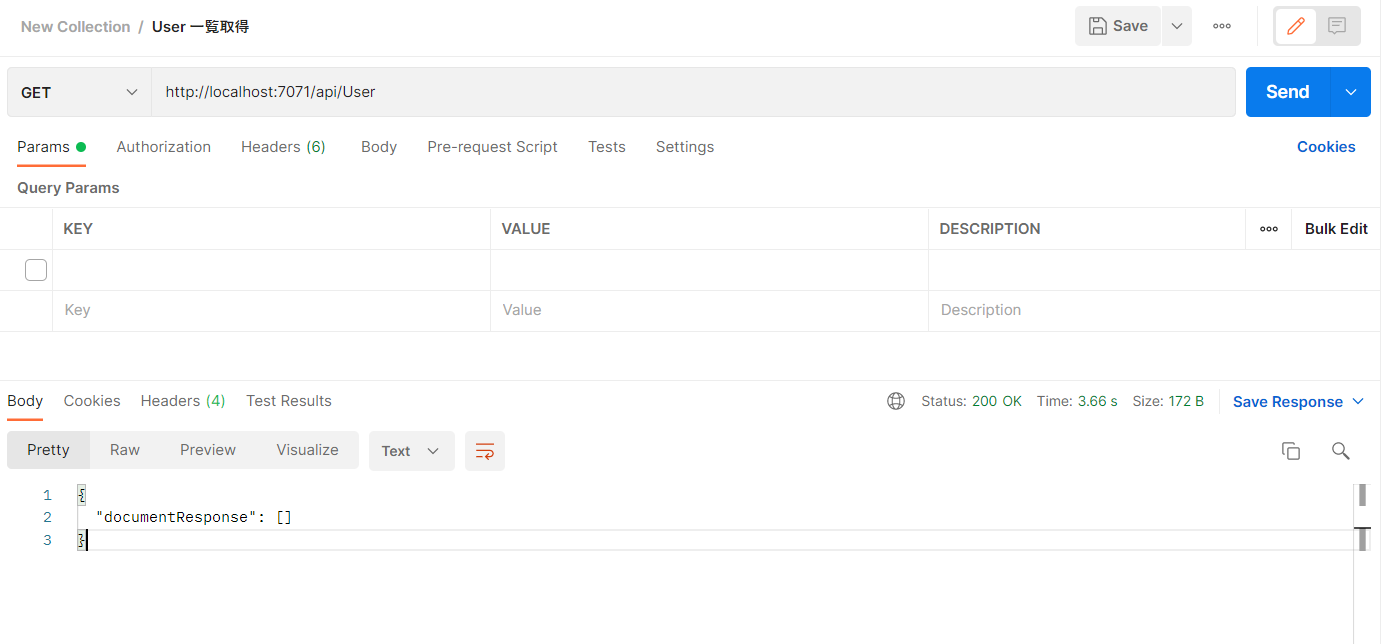
まず GET (リクエストパラメーターなし) でリクエストしてみます。
→ まだデータを登録していないので、空のオブジェクトが返ってきました。
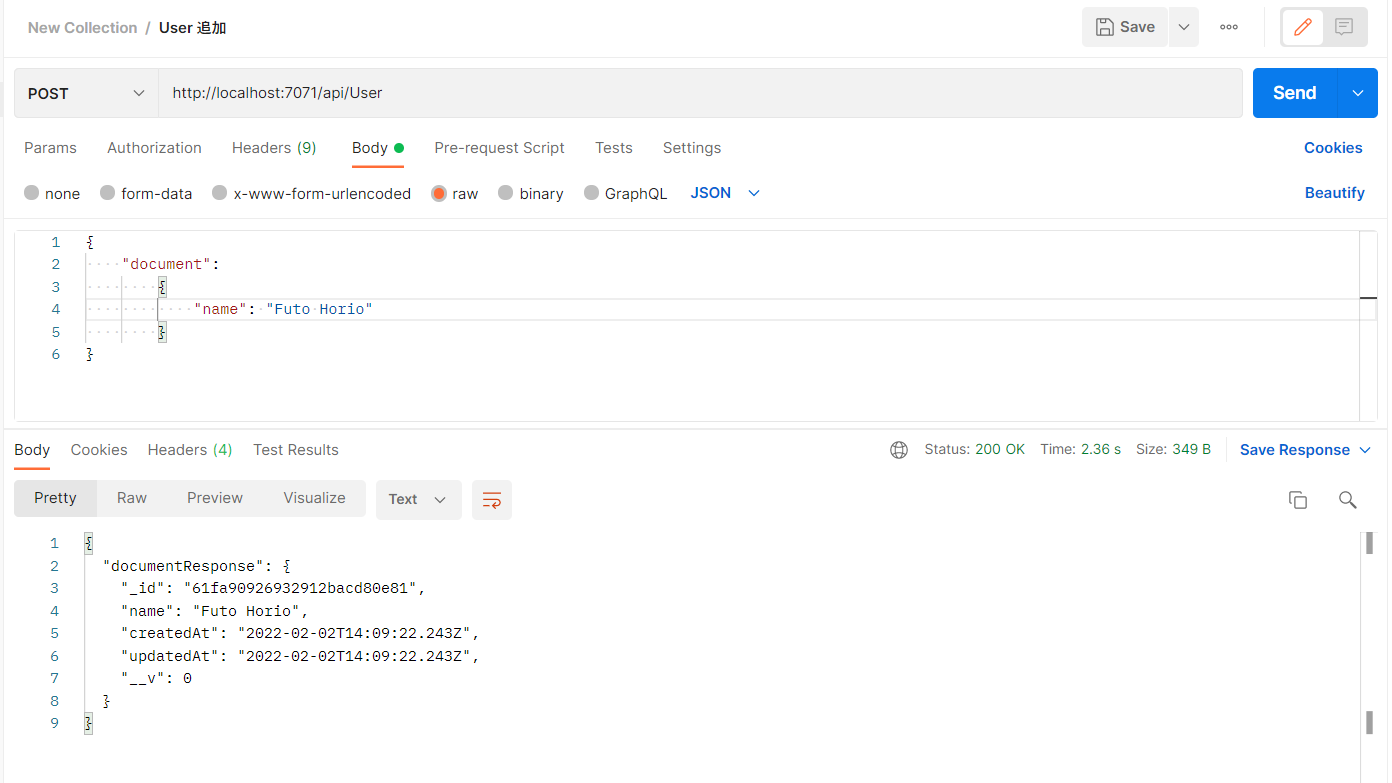
続いて、POST (リクエストボディ/ name : XXXXXXX) でリクエストしてみます。
→ データが正常登録されました。
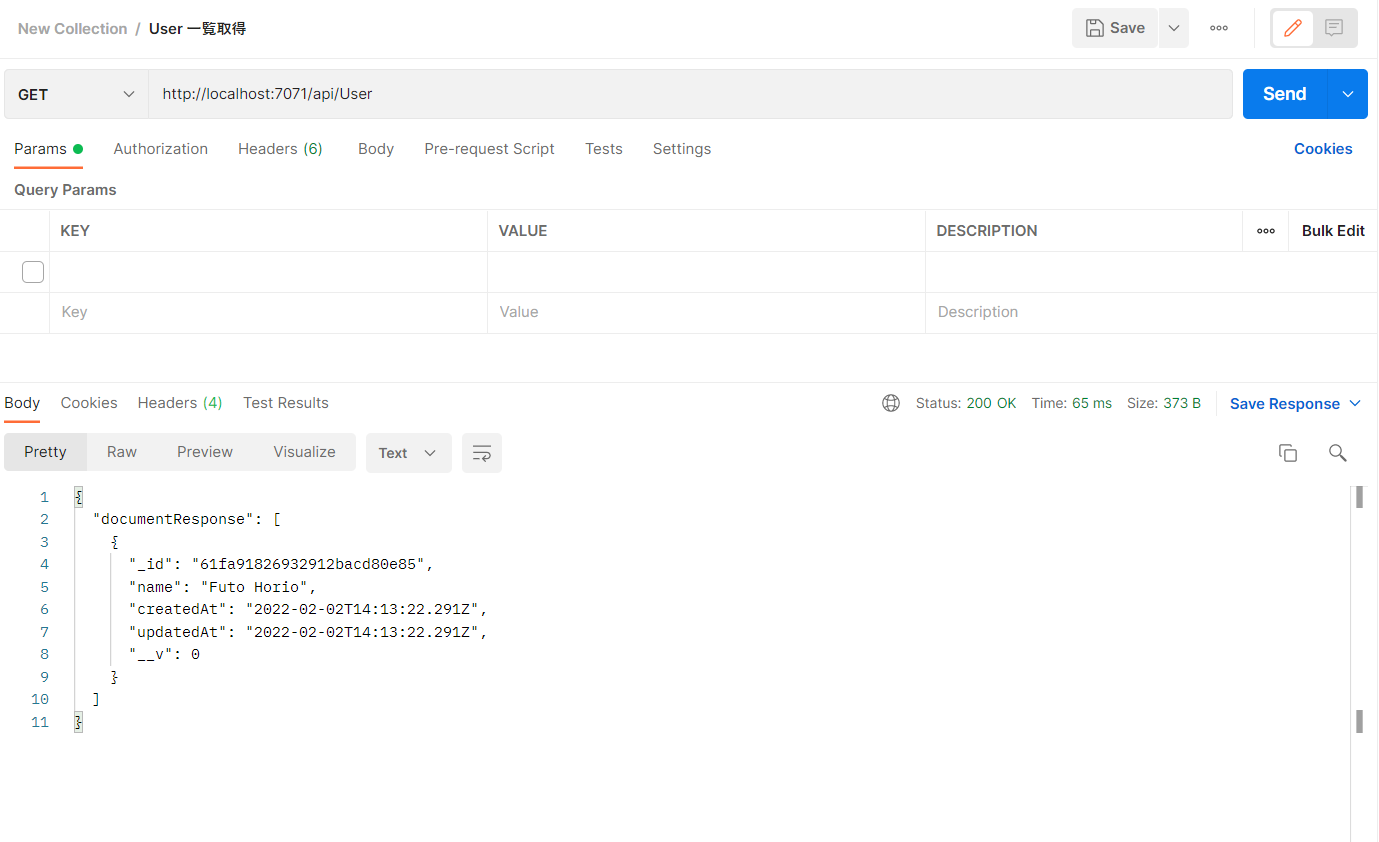
再度、GET (リクエストパラメーターなし) でリクエストしてみると...
→ User コレクション一覧を取得することができました。
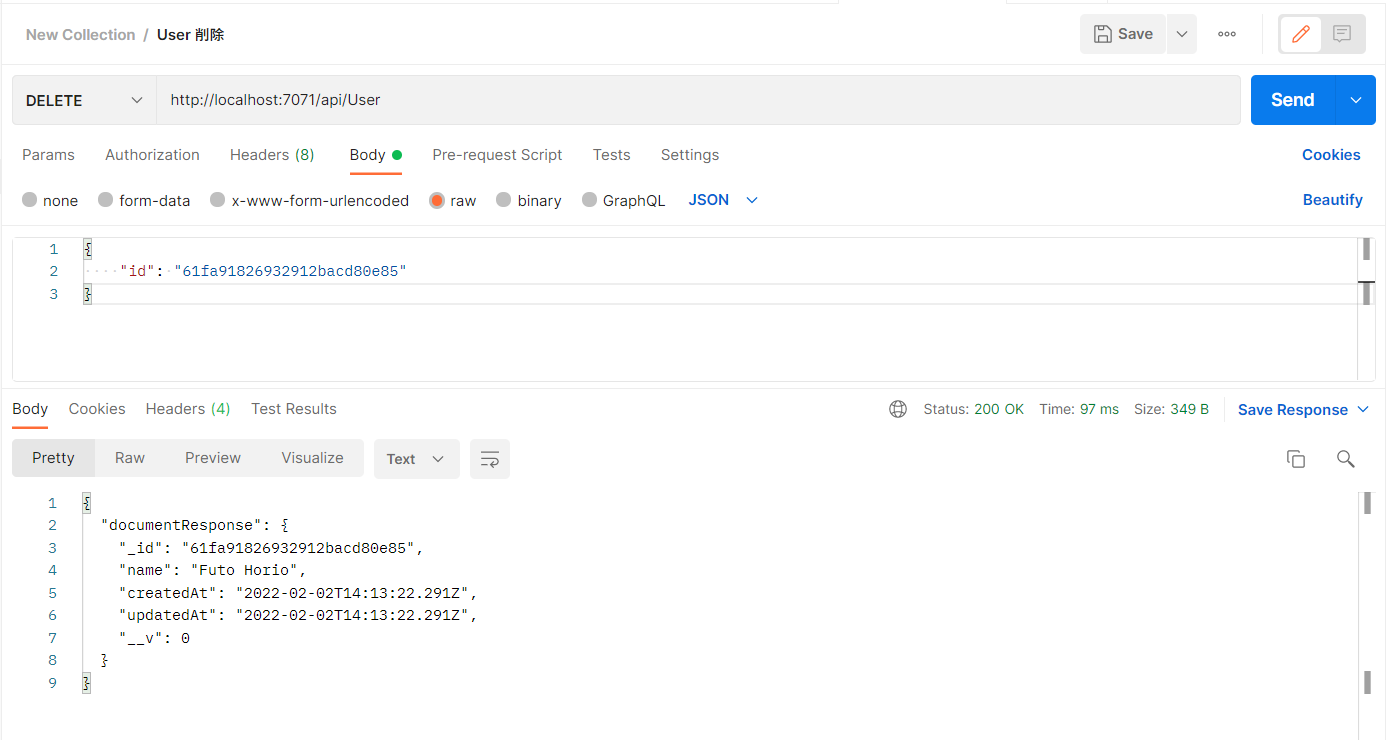
最後に Delete ( リクエストボディ / id : xxxxxxxxxxxxxxxxxxxxx ) を実行。
→ 対象のデータが削除できました。
以上、Azure Functions から Mongo DB を操作する方法でした。
終わりに
Azure Functions Core Tools を使うと、コマンド一発で Azure 上にもデプロイできるので凄い便利ですね。今は Azure CLI でリソースグループの作成、リソースのデプロイをやってるんですが、慣れてきたら ARM ( Azure Resource Manager ) テンプレートを使ってデプロイしてみたいなと思います。Azure は楽しい!