Azure Digital Twins の MS Learn 学習モジュールを試していたところ、デバイスシミュレーターから Azure IoT Hub へデータを送信する箇所があり、Azure Portal の IoT Hub リソースページで確認できるかと思っていたら出来なかった。Azure IoT Explorer (Preview) というツールが GitHub で公開されており、このツールを使えばテレメトリーデータの受信内容を確認できるらしいので、早速試してみたいと思います。
※ Azure IoT Explorer は 2023/4/14 現在、v0.15.8 プレビュー版として提供されています。
手順
- Azure IoT Explorer (GitHub) の リリースページ から .msi ファイルをダウンロード & インストールする
- Azure IoT Explorer (Preview) を起動する
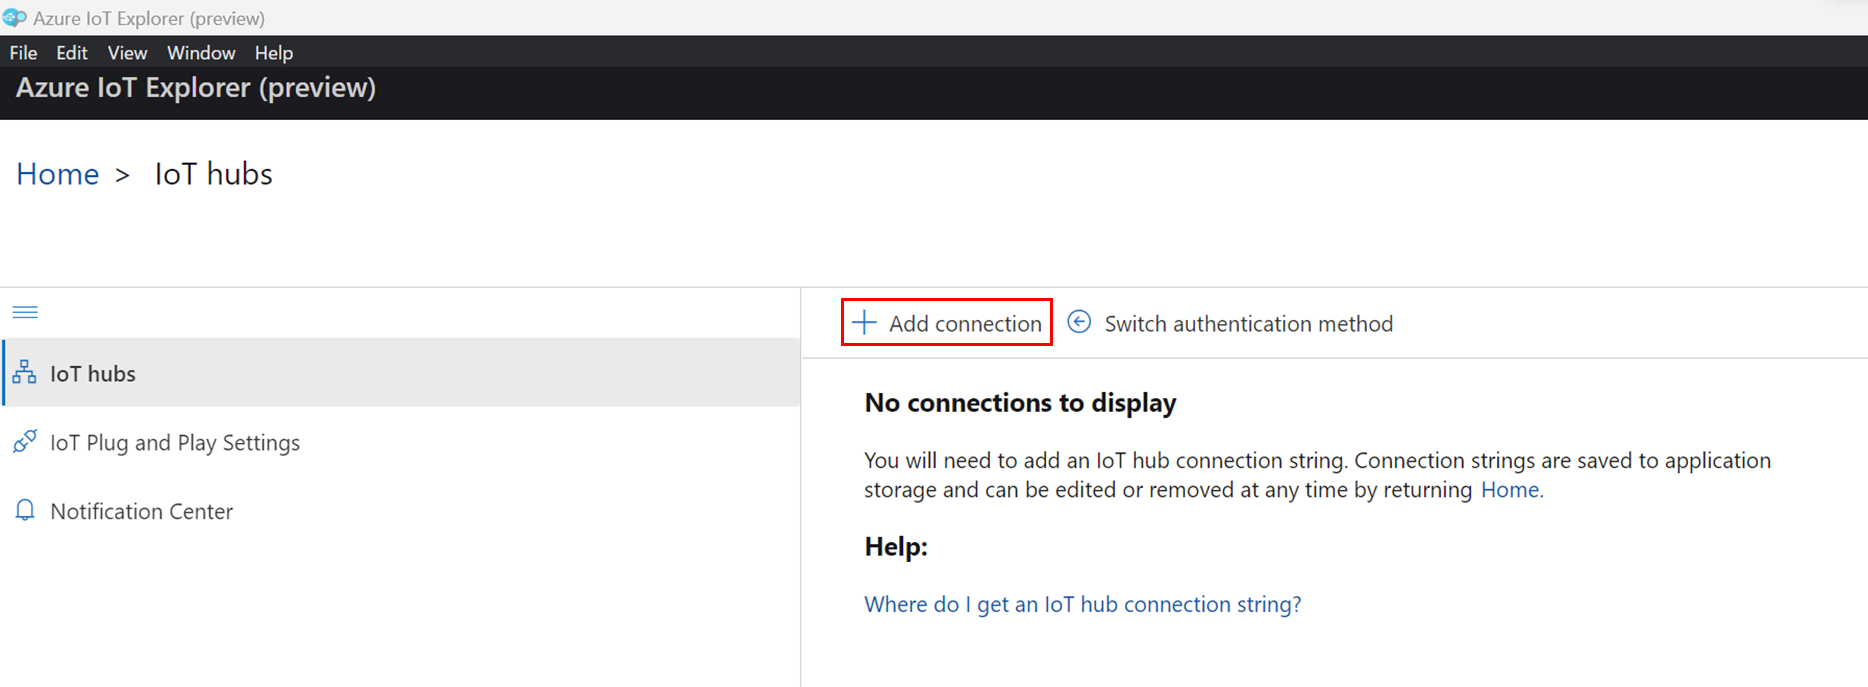
- Add Connection ボタンをクリックする
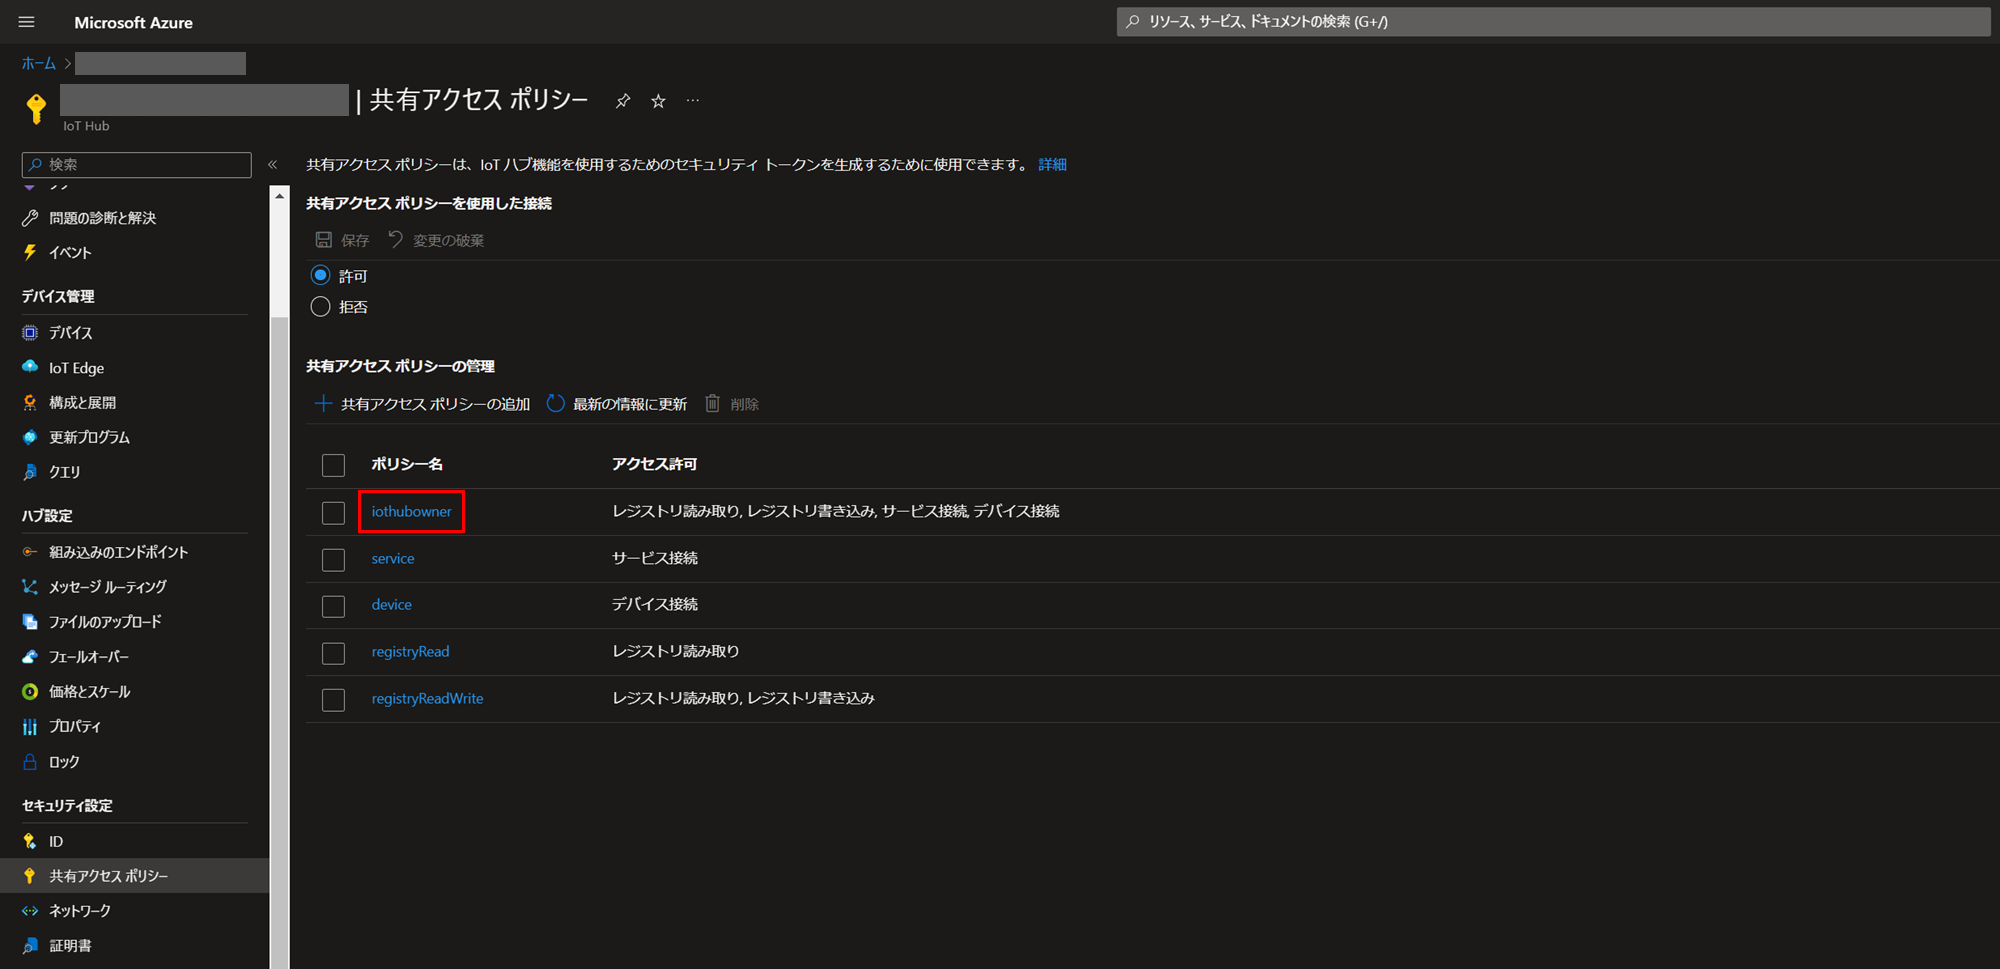
- Azure Portal で IoT Hub リソースページを開き [セキュリティ設定] > [共有アクセスポリシー] から iothubowner を選択する
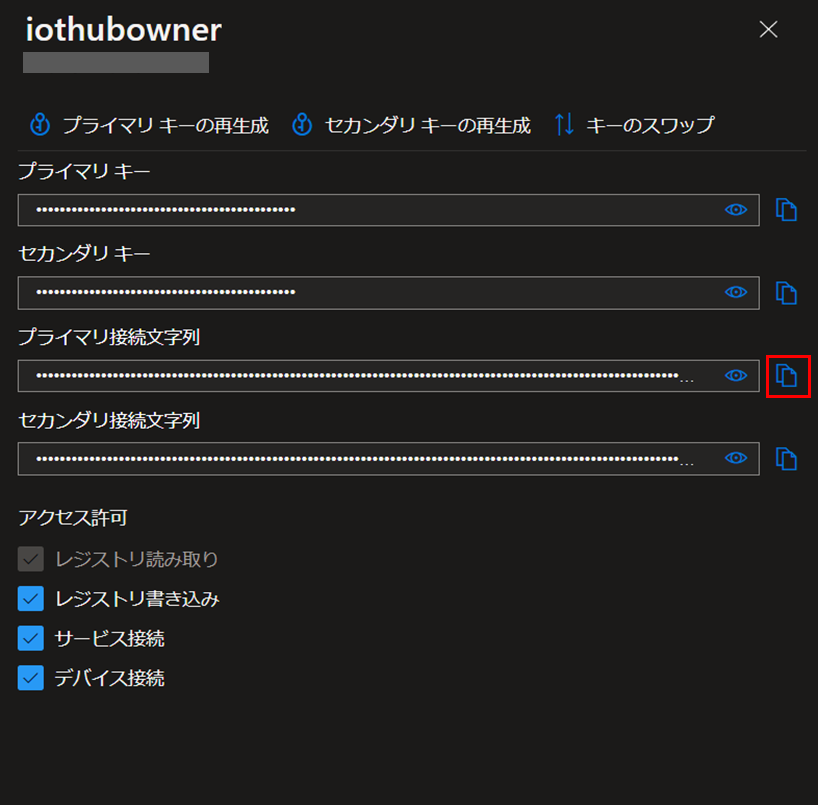
- プライマリ接続文字列をコピーします。
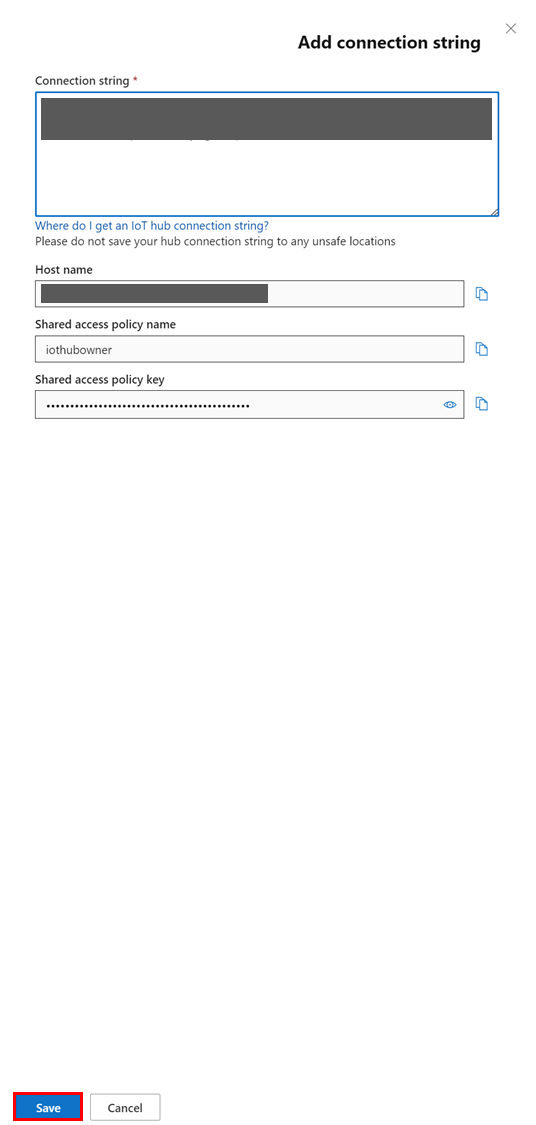
- Azure IoT Explorer に戻り、プライマリ接続文字列を貼り付けたあと、[SAVE] ボタンを押します。
- これまでの手順が正しく実施されていれば、IoT Hub のデバイス一覧が表示されます。
試しにデバイスページに遷移してみます。

- デバイスの認証情報等が表示されました。その他、デバイスツインやテレメトリーのタブもあるので、
今回の目的である [Telemetry] タブを選択します。

- テレメトリーデータの受信を行うために [Start] ボタンをクリックします。
(もちろん、Azure IoT Hub にデータを送信していないので、このままの状態だと何も表示されません。)

-
azure cloud shell を開き、シミュレーションデータを送信するコマンドを実行します。
az iot device simulate --device-id T105 --login <プライマリ接続文字列> -
Azure IoT Explorer で受信データを確認する。
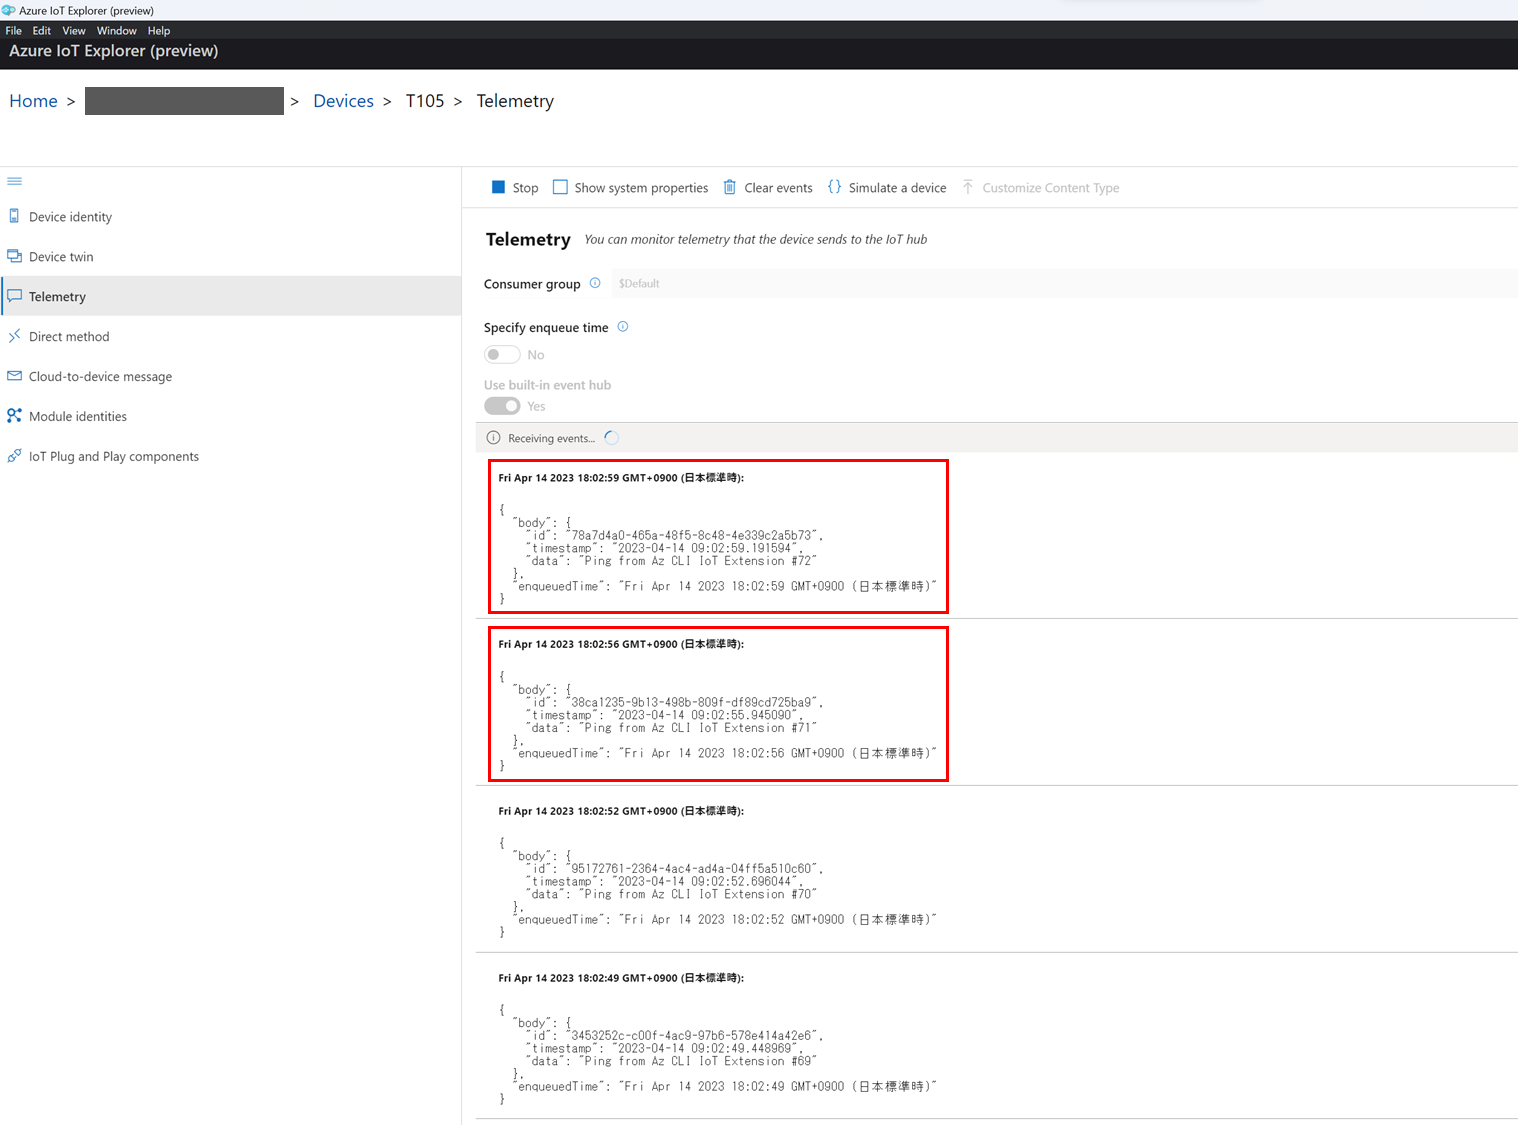
無事データが受信されていることを確認できました。